Lightroom Color Grading Process for Warm and Vibrant Landscape Photos
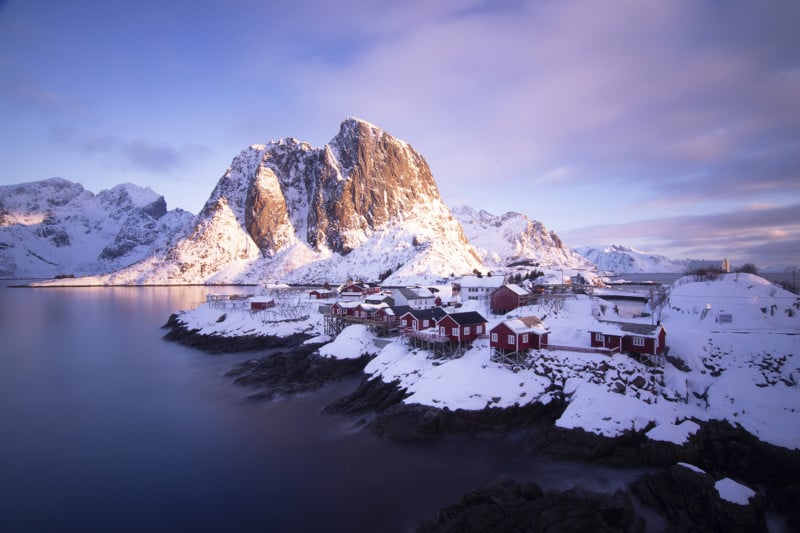
For this landscape photo, I wanted to get back the warm sunrise light, especially on the mountain face in the back. Also, I wanted to restore details, mostly from the darker parts in the foreground to have a nicely balanced exposure.
Obviously, the colors are a bit stronger, but that’s just how I like my photos. Also, 95% of the editing was done in Lightroom Classic, while I used Photoshop to clean up the image and do a little bit of dodging in the foreground.
Step 1: The Basic Adjustments
If I plan on making a picture very saturated, I’d like to start by changing the camera profile from Adobe Color to Adobe Landscape. This introduces some more saturation and also helps make the shadows a bit brighter. To further adjust the colors, I then work on the white balance. As I’m working with a sunrise shot here, I’m raising the temperature, giving the whole image a warmer look. Sometimes, there might be a strange-looking color cast going on. If this happens, it helps to reduce the tint to fix that.
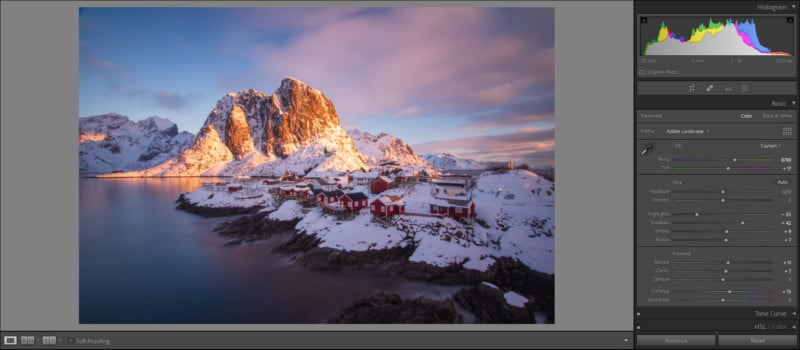
After the changes to the profile and the white balance, I usually work on the overall exposure. In this case, I dropped the highlights to reveal more details in the sky. At the same time, I increased the shadows to recover details from the dark areas and increased the whites to create a bit more brightness. Finally, I increased the blacks slightly. While this does reduce the contrast, it adds a kind of soft, dreamy look to the photo which I quite like.
To give this image a clear, sharp look, I introduce some texture and clarity, but very carefully as it can look storage very quickly. To finish this section, I increased the vibrance and saturation just a tiny bit.
Step 2: Adding Local Adjustments
With Lightroom’s new masking tools we can make very precise adjustments. In this case, I used the luminance range mask to target the darks of the foreground without affecting the brighter areas. On those darks, I dropped the white balance temperature and the tint to remove a strange color cast and make it look more natural.
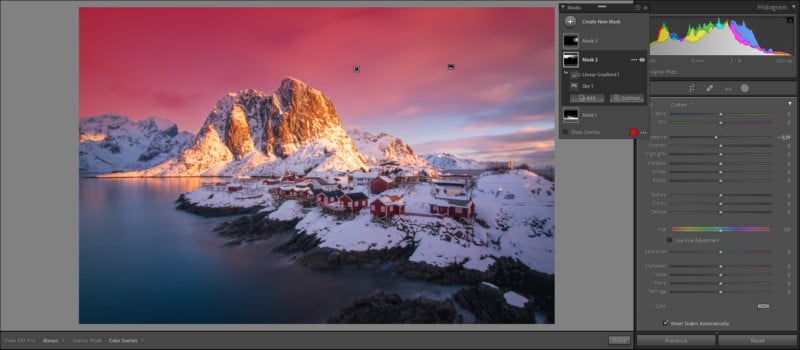
Next up, I added a sky selection mask and, using it, subtracted the righthand area using a linear gradient. I do this because I want to darken the left side of the sky by bringing down the exposure while not changing the brightness of the right side (as it’s supposed to be brighter).
To further work on that, I added a radial gradient overlapping the right side and inside of it, I carefully increased the whites.
Step 3: Playing with the Colors
Adjusting the colors is always my favorite part of the editing process. For this shot, I start in the Hue tab of the HSL Panel. As I don’t like the strong yellow tones of the mountain in the back, I decided to drop the yellow hue and in turn, give the mountain more of an orange tone. I also dropped the hue of the purples to reduce the purple color cast in the blue part of the sky. Then, I pushed the magenta hue to give the clouds more of an orange color.
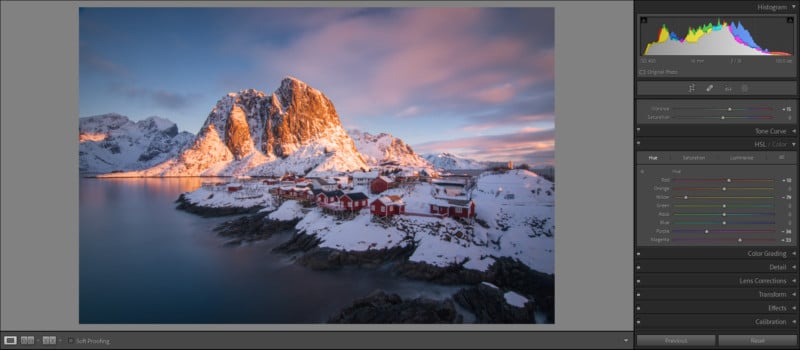
Once I adjusted the hue, I then dropped the blue saturation and the blue luminance. Dropping the luminance will make the blue parts of the sky darker, but also give the blues more saturation. To counter that, I dropped the saturation as well.
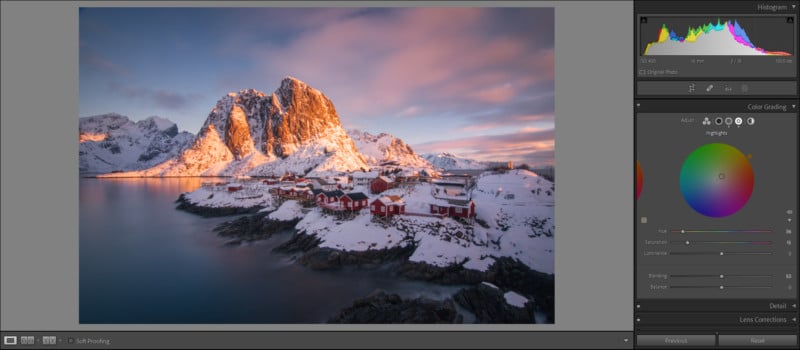
Then comes the split toning and here you can really enhance those sunset/sunrise colors! For this image, I decided to work on the highlights and the mid-tones as I was quite happy with how the shadows looked. For both highlights and mid-tones, I added a warm color tone in the orange-yellow range. For the highlights, I also added more saturation, and for the mid-tones, a bit less.
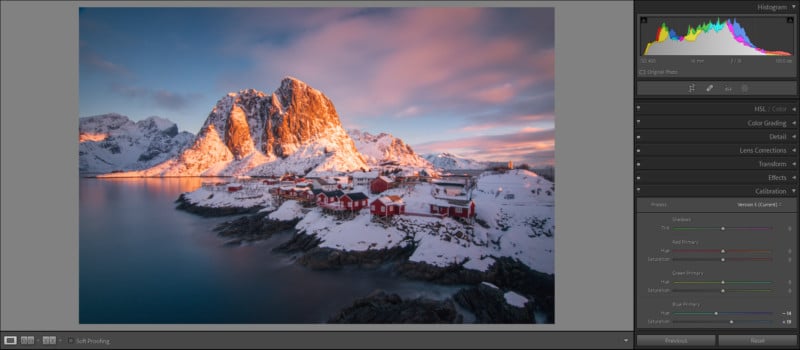
Finally, in the Calibration panel of Lightroom, I usually (at least for sunrises and sunsets) drop the blue primary hue slightly and play around with the saturation.
Below is the original photo one more time followed by my finished edit.

About the author: Christian Möhrle is a professional landscape photographer who has been capturing photos since 2010. Besides photography, he works as a media and motion designer for a living. For more, you can see additional videos on his YouTube Channel as well as his Instagram.