How to Use Curves Effectively in Capture One 22
The Tone Curve in Capture One 22 is by far my favorite tool to edit images, but it’s usually one of the most difficult commands to get to grips with. It can definitely be one of your most valuable assets if you want to improve your editing skills.
What the Curves Tool Is
The Curves tool is a huge topic, so I will not discuss all its color features, and I’d rather prefer to stay focused just on how to manipulate brightness and contrast, giving you a sort of formula to target the adjustments based on the image content in order to maximize the contrast without introducing weird flat area with no details.
The Curves tool is really about contrast. Contrast defines the relationship between the tones in your photo, and it’s really the difference between bright and dark you have in any area of your picture.
A high-contrast image will generally have strong shadows and highlights, with a lot of saturation, whereas, low contrast photos will look flatter.
The Curves Tool in Capture One 22
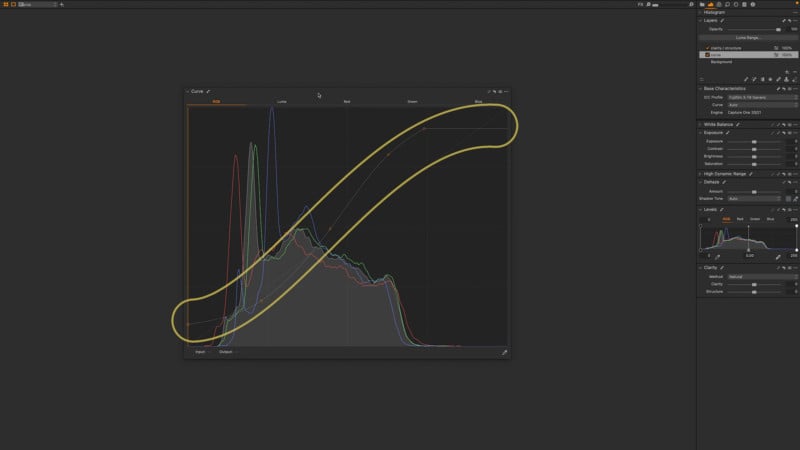
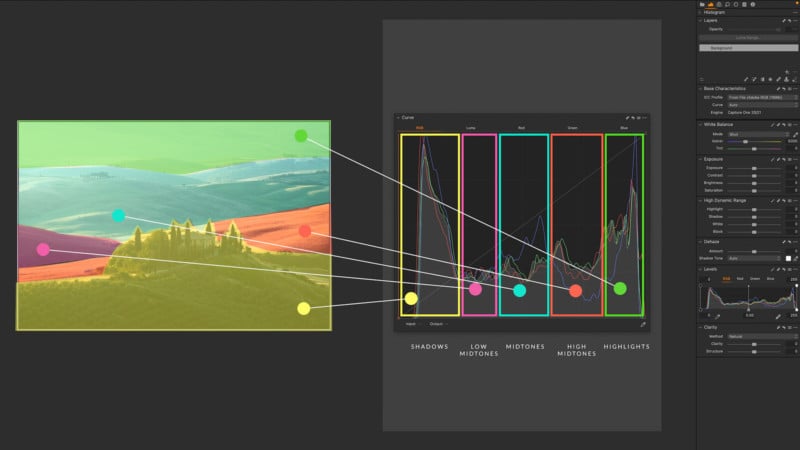
Capture One provides two different types of curves, and it’s one of the main aspects that differentiates Capture One from other software. It has the RGB curve, which changes the contrast of the image affecting also the color saturation, and the Luma curve that only changes the density of the image while keeping the hue and saturation of the colors untouched.
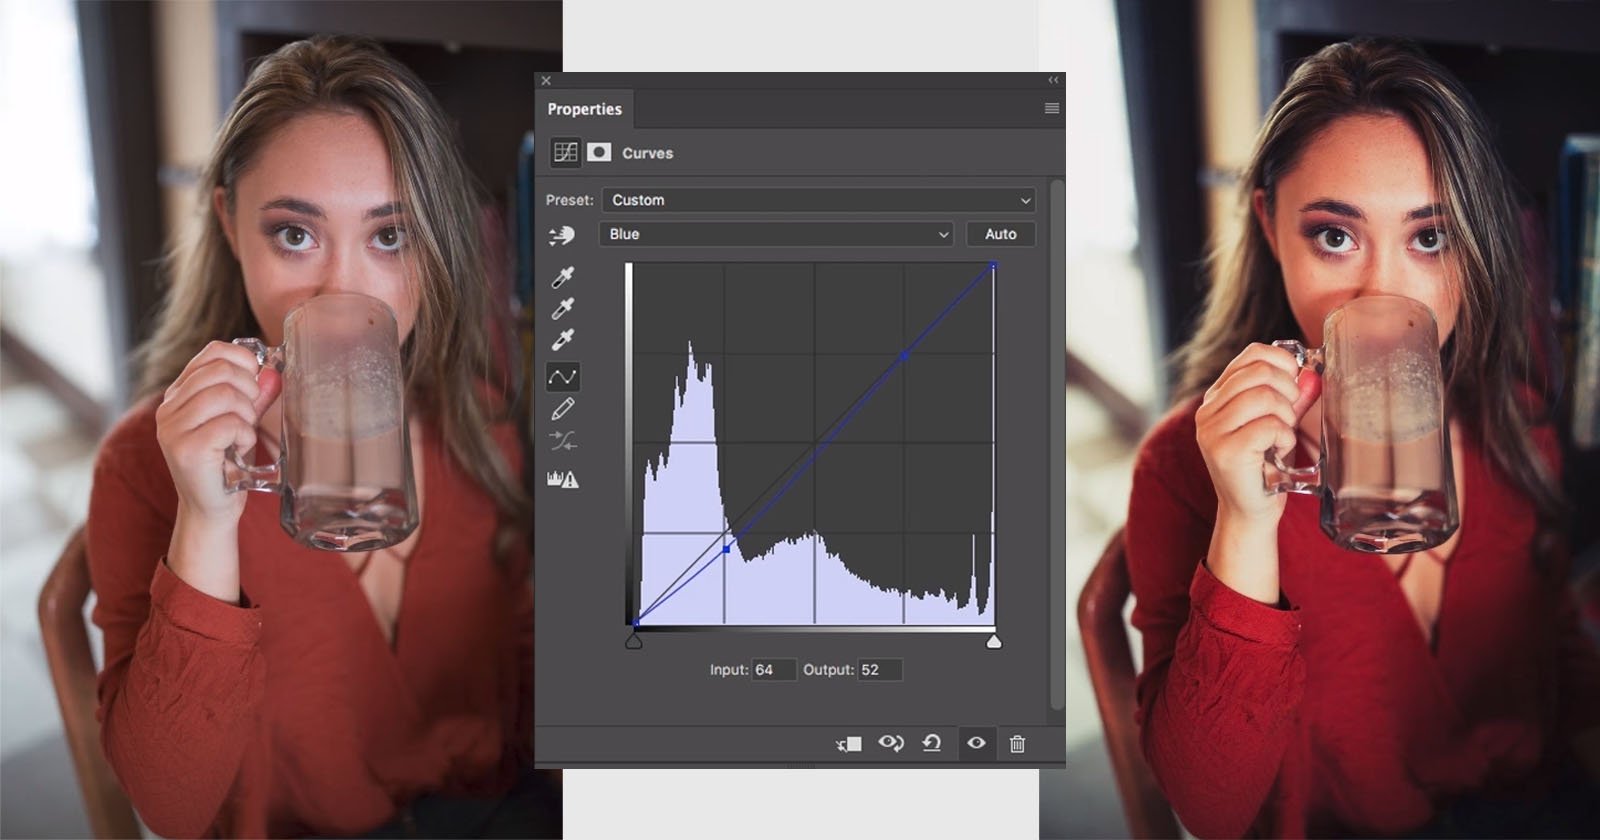
Aside from the Luma curve, everything you’re going to see in the video is applicable to any other software that has the regular RGB Curve tool. For example, take a look at this colorful image:
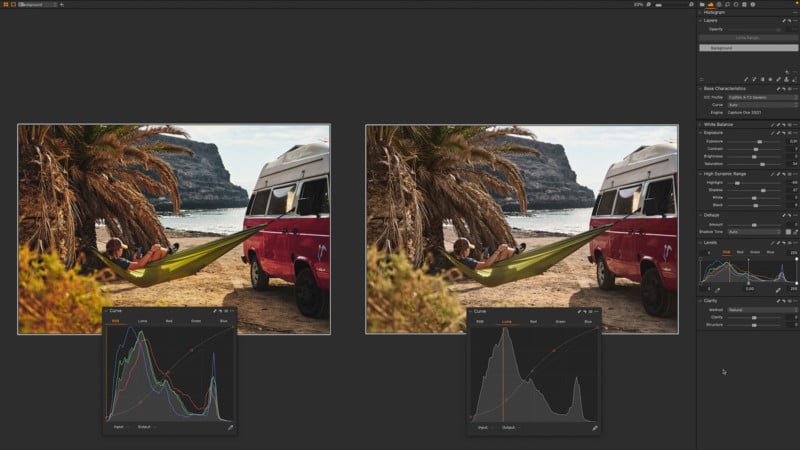
I applied the same adjustments. On the left, we have got the edited version using the RGB curve, and on the right using the Luma curve. And, as you can see, in the Luma version, the skin tones are very pleasant and well-controlled. Whereas, on the RGB version the skin is oversaturated with strong reds and is way over the top.
The most common example that people often do to add contrast is a simple so-called S-curve.
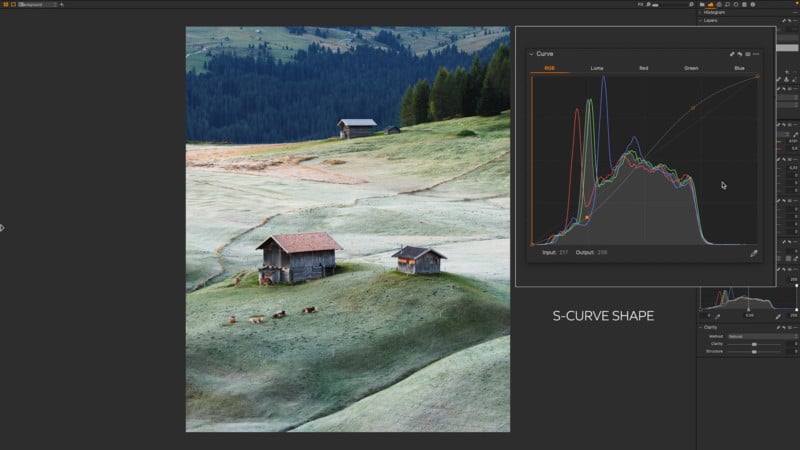
They will add a couple of anchor points, one on the shadows and another on the highlights. Often lifting the highlights a little bit, while dipping the shadows ever so slightly, creating a gentle S-shape. It’s a nice approach, and it definitely works, but most of the time it’s too generic and that adjustment doesn’t differ too much from the result achievable just dragging the regular Contrast slider.
We can definitely go more in-depth than this and get a much more targeted adjustment.
Using the Curves Tool in Capture One 22 on a Low-Contrast Photo
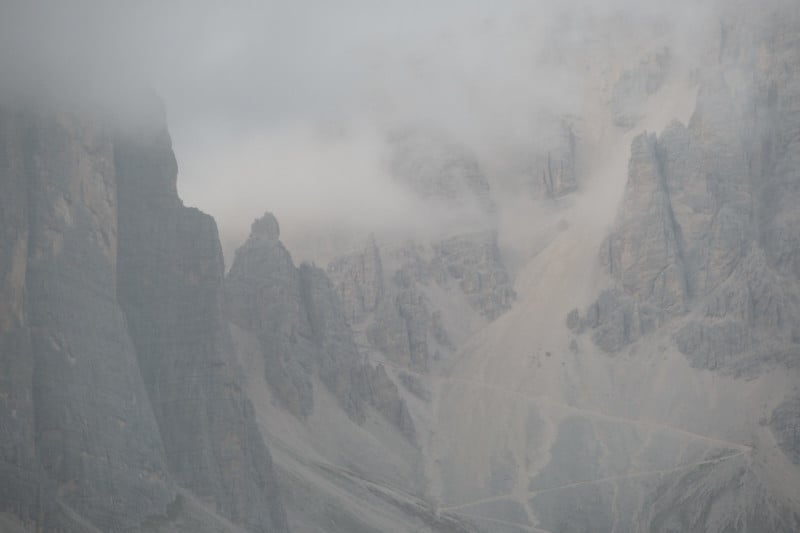
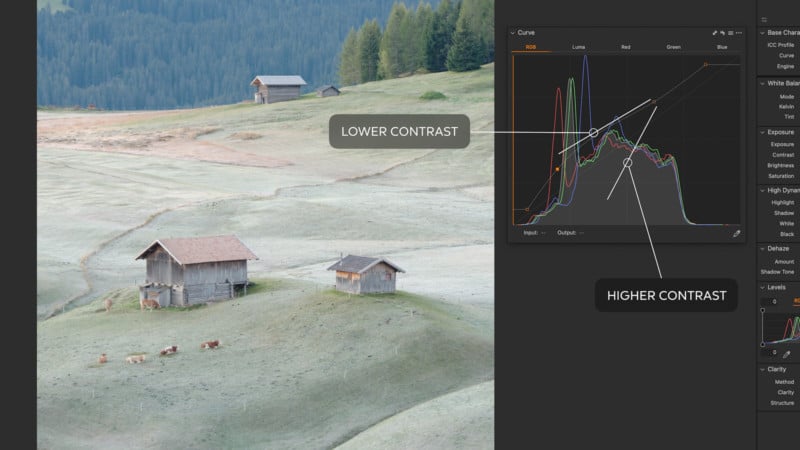
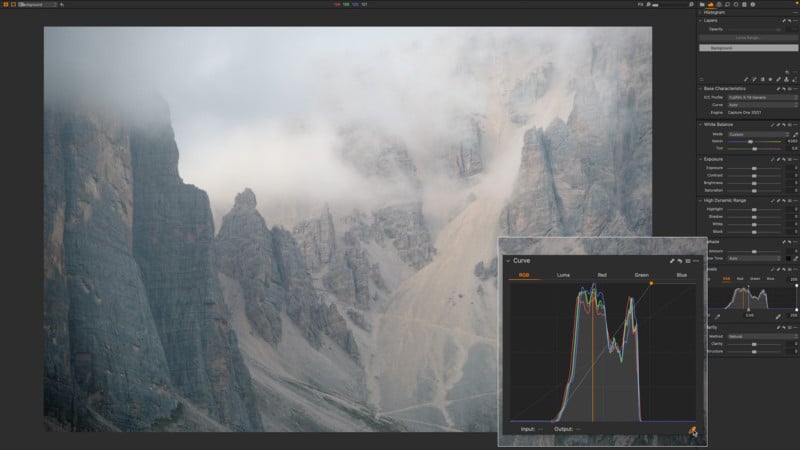
Here we have got a low-contrast image and our goal is to increase the contrast using curves. But instead of using the basic S-shape, I want to show you how I like to tackle these kinds of images creating a more intricated curve targeted to the image content.
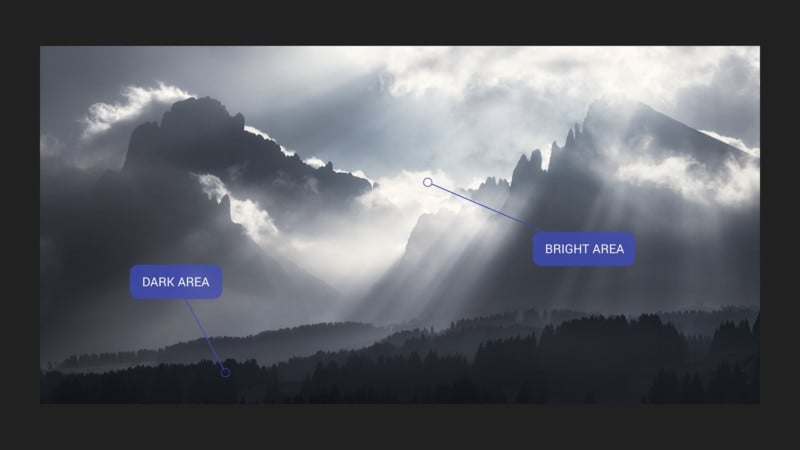
First things first: we want to analyze the levels of brightness in the image, and just moving the mouse over the image, the curve panel provides a vertical orange line that indicates the brightness level of the area we’re moving over.
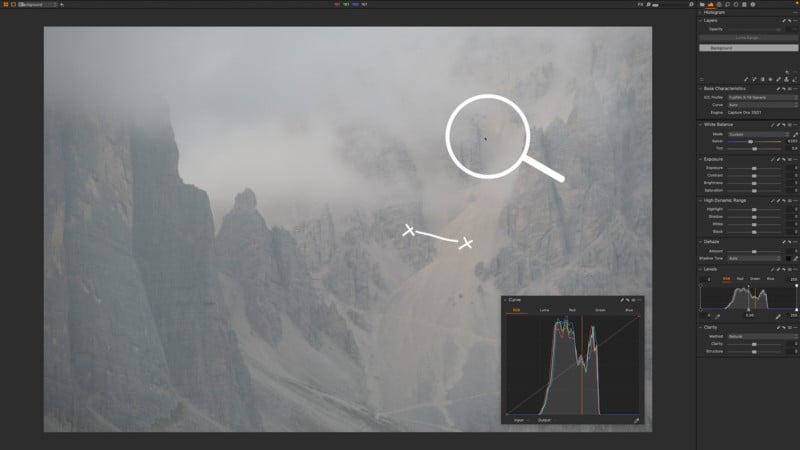
What we want to do is to identify the areas we want to improve in terms of contrast. In this case, we want to increase the contrast between the rocks and the smooth levels in the scree slope.
If we draw a basic s-curve, just raising up this generic part of the highlights and decreasing the shadows, the result is nicer but it’s not enough for my liking, and the adjustment is not targeted to the image content. This is a great example of why a simple s-curve is not always the best solution. One size doesn’t fit all. We can definitely achieve a better result.
Now we’re going to set the black and white points dragging the two respective dots, and we can already see a nice contrast improvement, and also an increase in colors saturation.
Then we’re going to add a few anchor points based on the tonal value of a specific zone in the image.
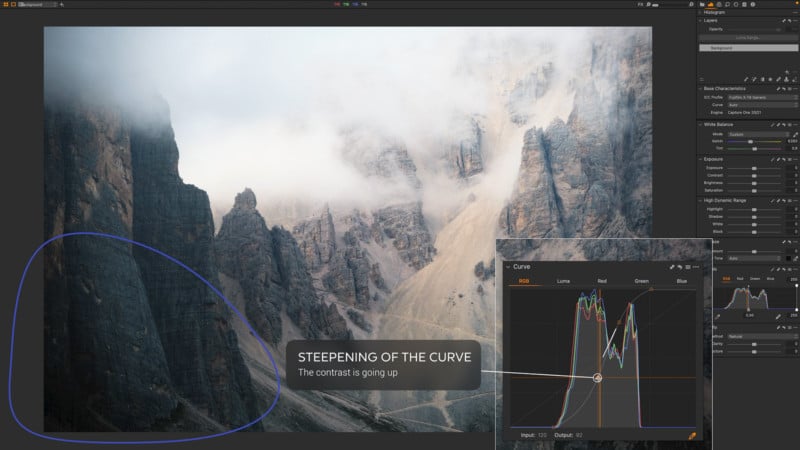
We’re going to add an anchor point on the scree slope and another one on the rock. Our goal is to increase the distance in terms of brightness value between the two elements. Just increasing the brightness dragging up the upper dots dot, we can immediately see an increment of the contrast.
Bringing down the lower anchor point assigned to the rock, we can add even more contrast. But now we’re losing detail on the shadows area.

You might think to add an extra point right between the two anchor points and slightly increase the brightness, but doing so we’re flattening the curve, so that’s mean we’re losing details.
Whenever you have a horizontal flat line, that’s means you are flattening details. Some areas of the image start having the same tonal value, and the photo starts to look blotchy. It’s very important to avoid flat horizontal lines in your curves, at least, when you’re not creating it on purpose (for example to create the film/faded look).
Now, how can we solve the problem? Here is the trick. To mitigate the issue of the flat curve and losing details, we need to add an extra anchor point right after this one, just when the mouse changes its pointer icon. And now what we want to do is to straighten up the curve.

In this way, we can keep the localized contrast adjustment without crushing the shadows too much.
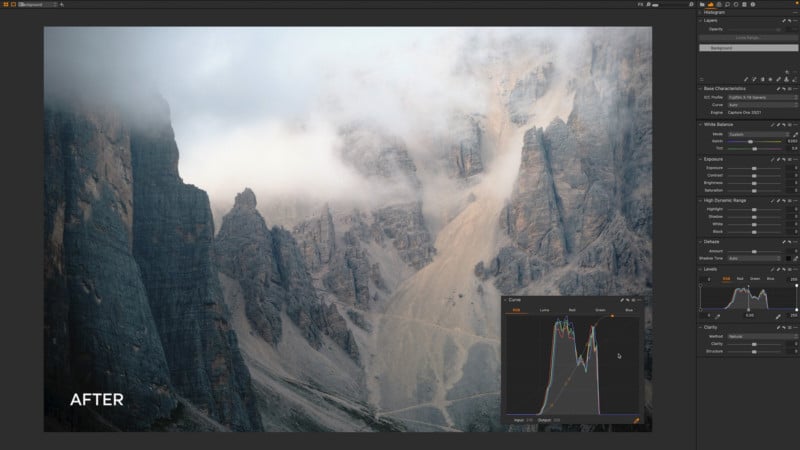
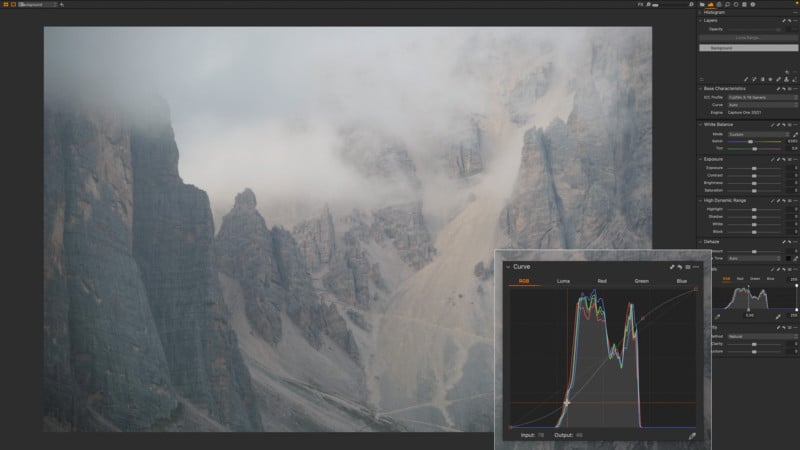
We still have enough room to improve the contrast even more in this rock wall adding another anchor point here on the lower part of the curve. If you like, we can add one last dot at the top of the curve to add even more punchiness to the clouds.
Here is the final result using a targeted curve based on the image content and not just applying a couple of random anchor points for the shadows and the highlights:
Keep in mind that these kinds of adjustments are only possible if the two areas you’re trying to adjust have a different brightness level.
Curves is an amazing tool you have to master. You can do so much stuff using it, and this video and article only scratched the surface. This is just the tip of the iceberg.
About the author: Andrea Livieri is a Venice-based professional photographer, educator, musician, and spirited adventurer. He started exploring the photography medium by capturing images of fellow musicians, their families, and other friends and acquaintances in the music industry. As he continued honing his craft, he merged his love for photography and exploring the outdoors, enabling him to amass lots of photographic work of delightful scenery, rugged mountainscapes, and exhilarating terrain. He also leads photography courses, workshops, and tours to teach other photographers his methods and help them to bring out their own vision. For more from Livieri, you can follow him on his website and Instagram and subscribe to his YouTube Channel.