Dramatic Portrait Lighting Made Simple
Street portraiture provides the opportunity to capture so much of the urban textures and patterns that give a city its look. The brick walls provide great leading lines as well as murals and large wall art that set a dramatic tone to any image.
Gear Used
- Canon EOS R5
- Canon RF 70-200mm f/2.8L IS USM
- Profoto A10 On/Off Camera Flash
- Manfrotto Nanostand
- Magmod MagShoe
- White Umbrella
The Initial Composition
The type of composition I’m looking for is simple. I left the scene quite dark since I’m aiming for a moody look. Let’s start building our dramatic portrait lighting setup.
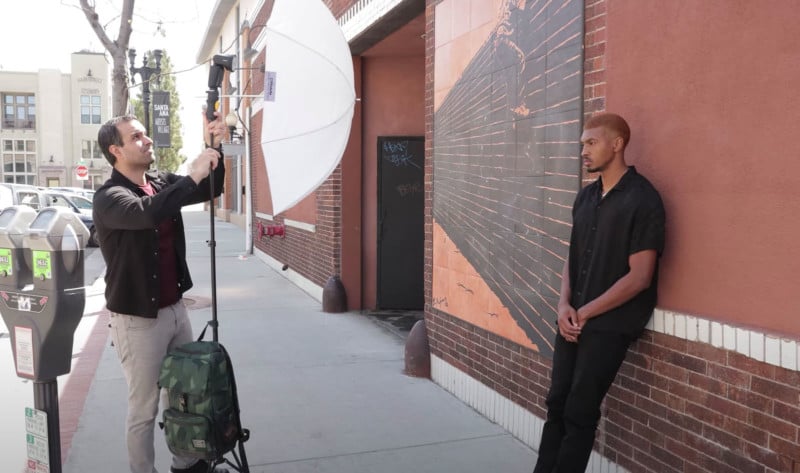
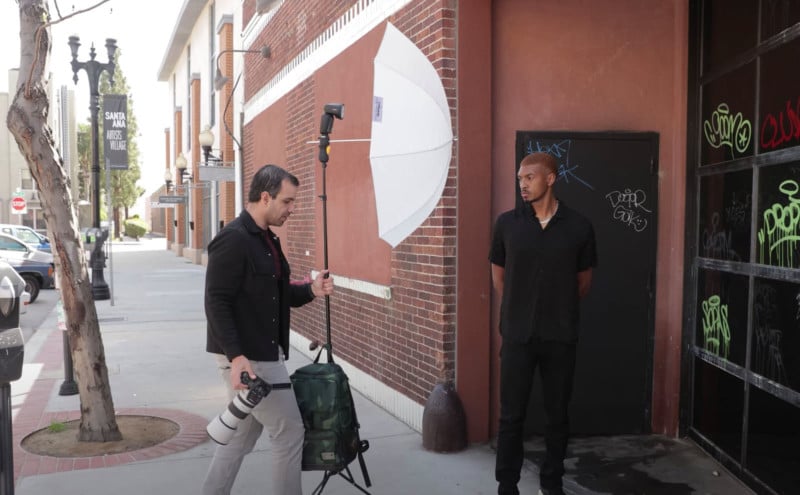
We’re in the mid-day shade so I only needed the Profoto A10 with a basic shoot-thru umbrella. Be aware when using lightweight stands with modifiers as any wind can knock it down. As a precaution, weigh it down with a backpack or sandbag to prevent any accidents.
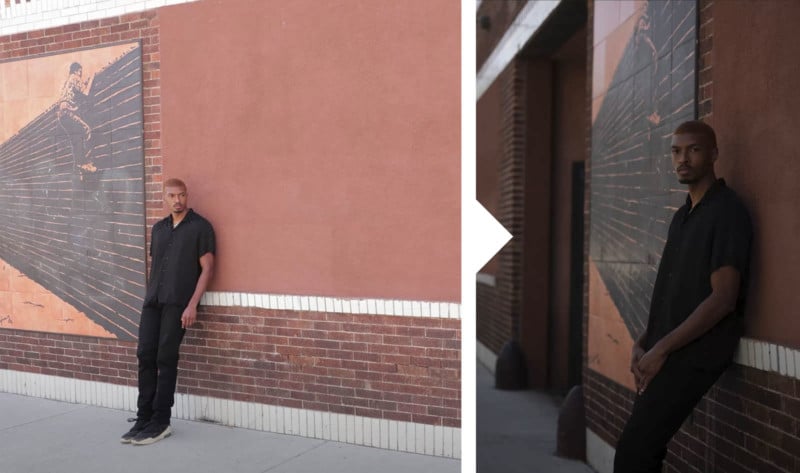
I set the A10 to full power with High-Speed Sync in order to have a fast shutter speed and shallow depth of field. Notice the shadow behind Brandon produced by the direct light. Let’s try to remove this shadow.
Cleaning Up the Composition
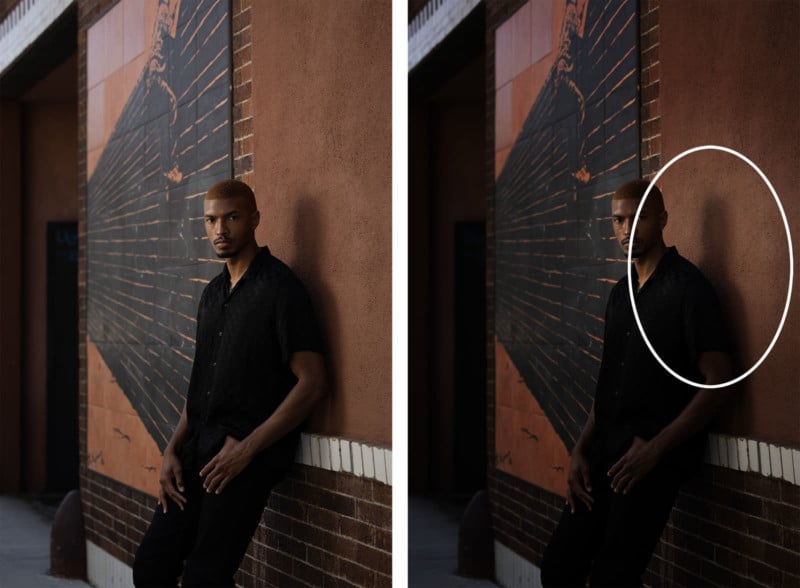
My trick to avoid that shadow is to place Brandon in a recess in the wall as we have here. I placed the light as close to Brandon as I could without getting the light in the frame. Doing so produces not only a softer light but a brighter light as well.
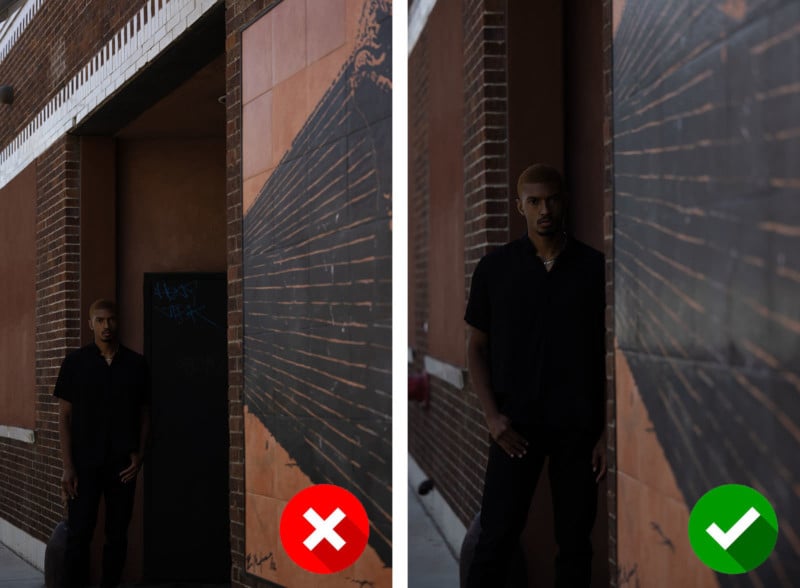
I stood close to the wall as I took the photo in order to hide the doorway in the wall. Compare that image with one I took further away. From here, we’ll be following the standard C.A.M.P. framework.
Setting the Ambient Light
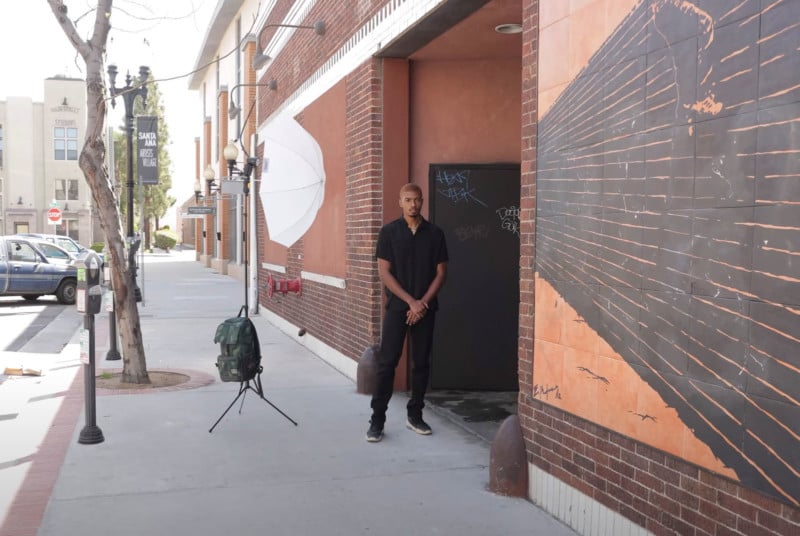
After moving Brandon more into the recess to capture the detail on the wall, I landed on my final ambient light settings: 1/500sec, f/2.8, ISO 50. I set the settings dark to capture that dramatic tone. Compare it to a brighter exposure which negates the need for external flash altogether.
Modifying/Adding Light
I made sure the light was slightly in front of Brandon and turned his head toward the light. In order to get more power from the light, I brought the light even closer.
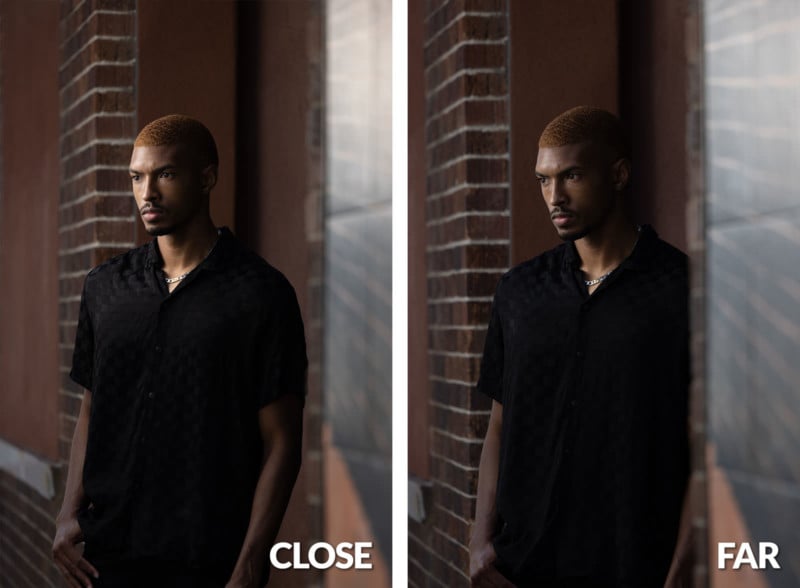
Notice the difference in light quality and brightness when it’s closer vs. further away.
Photographing the Final Images
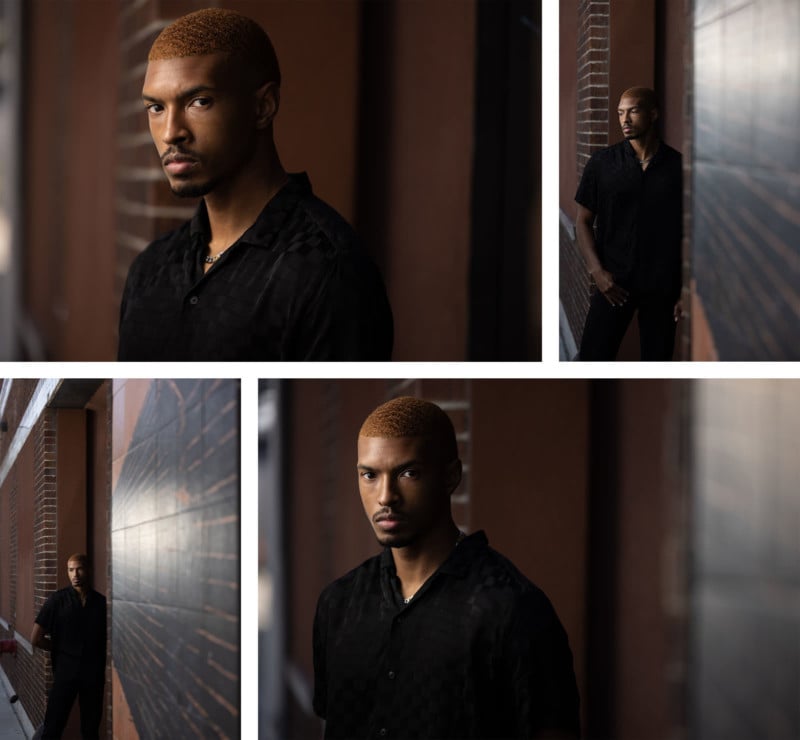
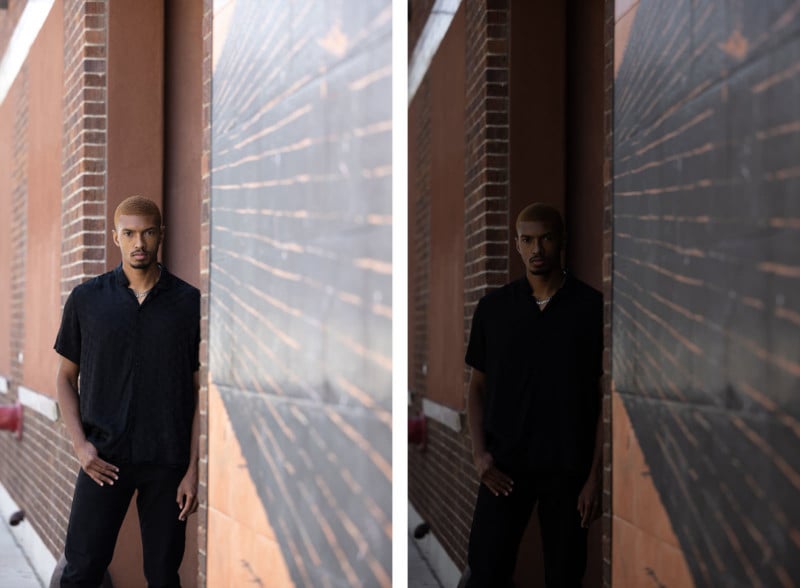
Now it’s time to shoot away! Move your model around to get different light shapes on his/her face. I wanted to get more light on Brandon’s far cheek so I moved him back. Then, I captured this series of images.

These final images were edited using Visual Flow’s Modern Preset Pack.
Conclusion
I hope you all enjoyed this article/video. Capturing a great image can be simple with this dramatic portrait lighting setup. With a great model and knowing what to look for in your location, you too can capture stunning portraits.
P.S. For a complete course on flash photography, check out SLR Lounge‘s Lighting Series from the Premium Channel. Also, be sure to check out Visual Flow for lighting-based Lightroom presets like we used here.