How NOT to Light Your Portrait Photos
Light can be one of the most challenging topics when it comes to learning photography. It takes a lot of trial and error to understand light, as there are very few resources available that teach light beyond setups.
In this article, I will break down some mistakes that photographers make when working with light, and in particular studio light or strobes.
Before we get into the specific mistakes, I need to address the bigger problem behind all the smaller errors outlined in this article. The mistakes you’re about to read are only a small portion of a larger problem: a lack of understanding of light. That comes only through being actively engaged with learning the physics of light.
I know what you may think: photography is an art, not a science. Why would anyone bother learning science if they chose to do art? Although photography is a creative industry, the knowledge of light opens up possibilities for you to showcase your artistic ability. Understanding the physics of light is simply a step towards being truly free to photograph and bring your visions to life. I, therefore, encourage everyone to spend time to really understand and hone light, not just know “portrait light setups”.
A painterly approach to lighting is quite appropriate — a photographer paints their image: light by light. Lighting setups are a lazy way to do lighting, and what is more, they are counterproductive in helping you understand light.
Placement
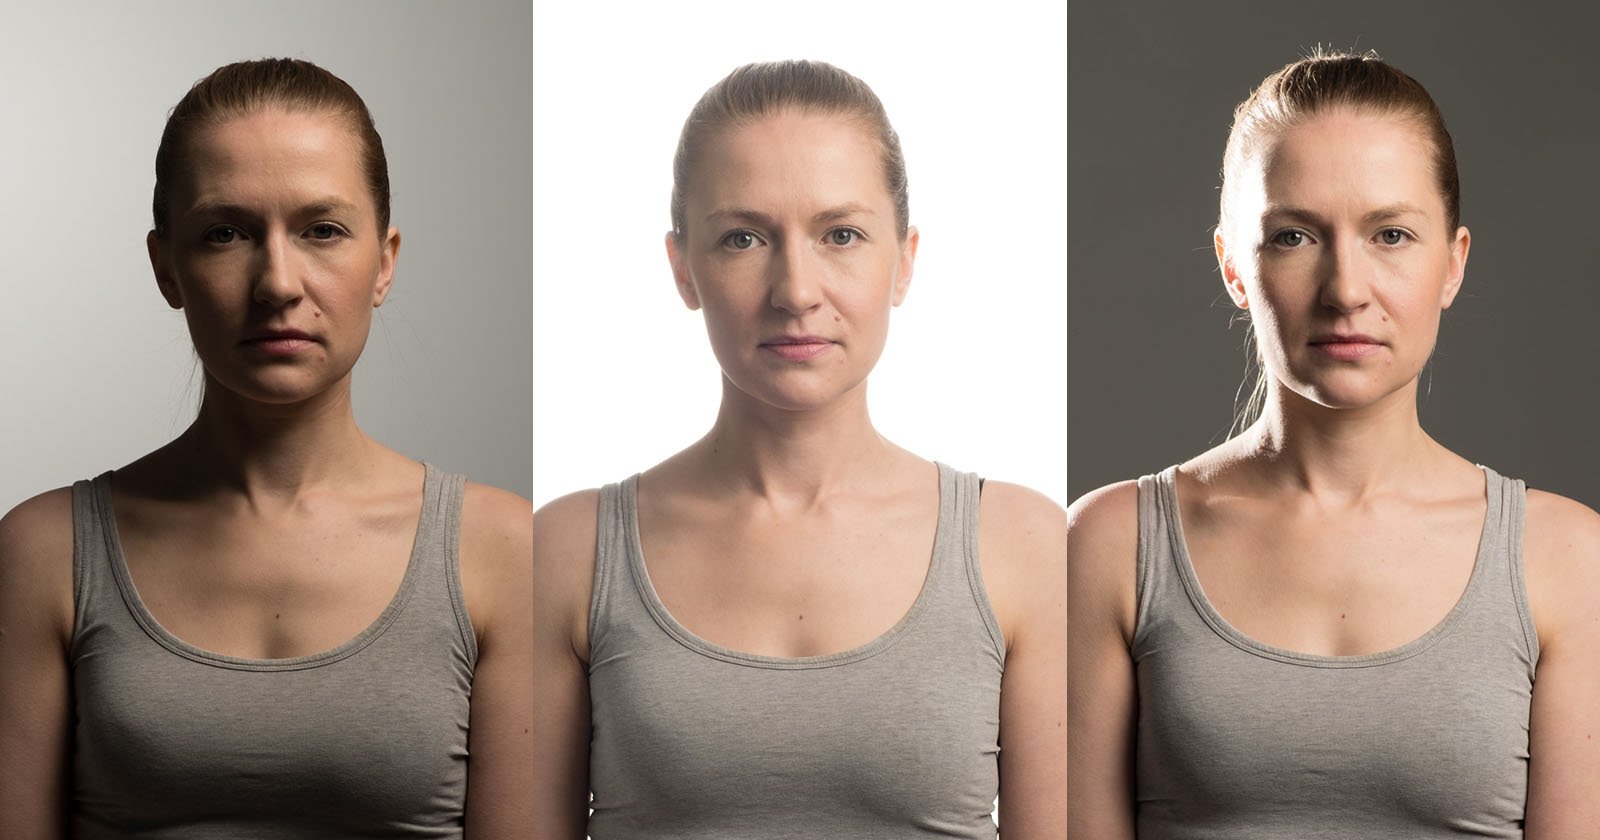
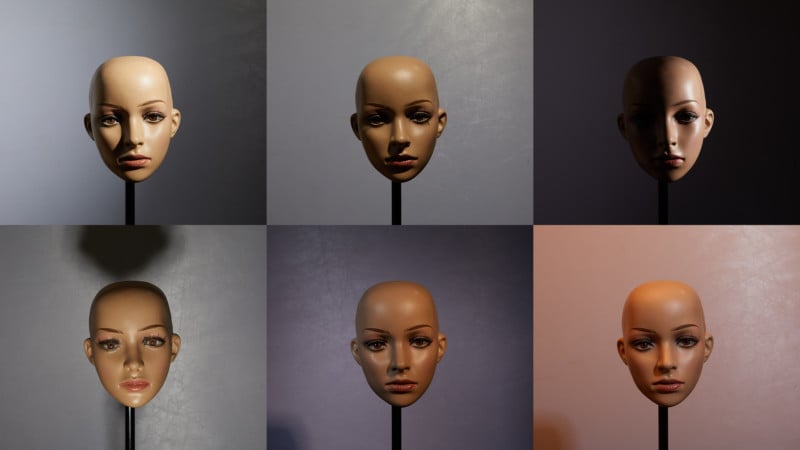
One of the first things you need to do with a light source is figuring out where to put it. This will determine your final outcome. The position of the light can either add drama, flatten, or elevate the face. This is the first step where some photographers go wrong. An ill-placed light can be detrimental to the final success of the photograph. Let’s break down some errors in placement, and how to determine them.
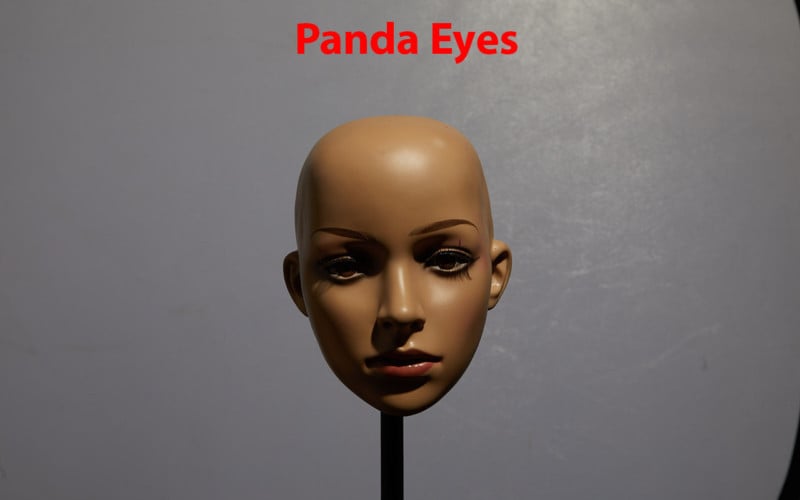
Panda Eyes
Most lights are placed above the subject’s head. This gives it a very natural look. But a light that’s placed too high, can actually be very damaging to the picture. When the light is high, it will create unnecessarily deep shadows in the subject face, and thus make the so-called panda eyes. The easiest way to see that is to pay close attention to the eyecups: if they’re too dark, ask the subject to put their chin up, or move the light down.
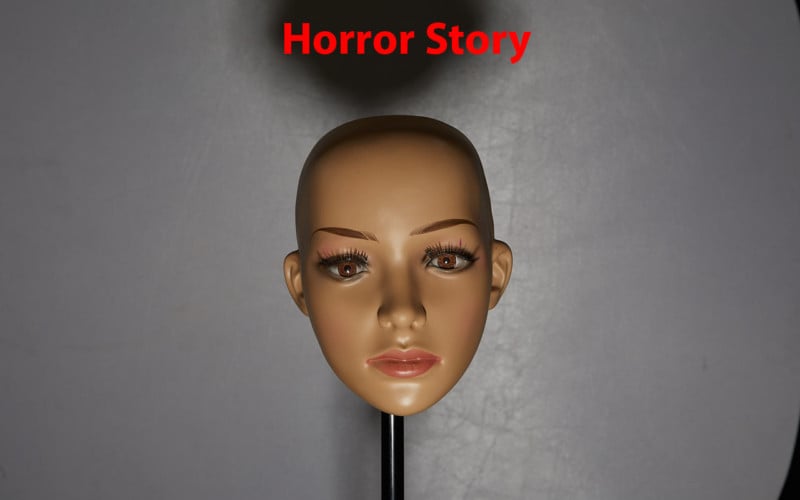
Horror Story
Lighting from below the face is very unflattering. Although there are times where that is done for special effect, it is very hard to retouch. A bottom light looks very unusual if not unpleasant to the eye because we are trained to like light coming from the top, such as the sun. It is very rare to see bottom-lit situations in nature, so a light that’s too low will look unpleasant.
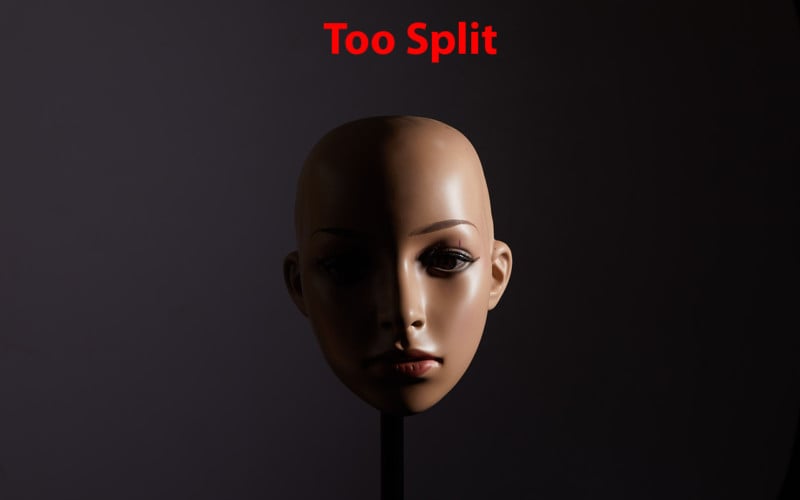
Splitting the Face in Half
Split lighting is a powerful tool that you can use to create drama in your work. However, it also means leaving a harsh shadow on one side of the face which can be rather unflattering, if not unnatural. As a general rule of thumb, filling in with a large light source coming from the same direction as the camera is best to lift deep shadows up.
An important concept to understand when split-lighting is lighting ratios. A lighting ratio is basically the factor difference between the key and fill light. For an effective split light, the ratio has to be small in order to preserve detail in shadows.
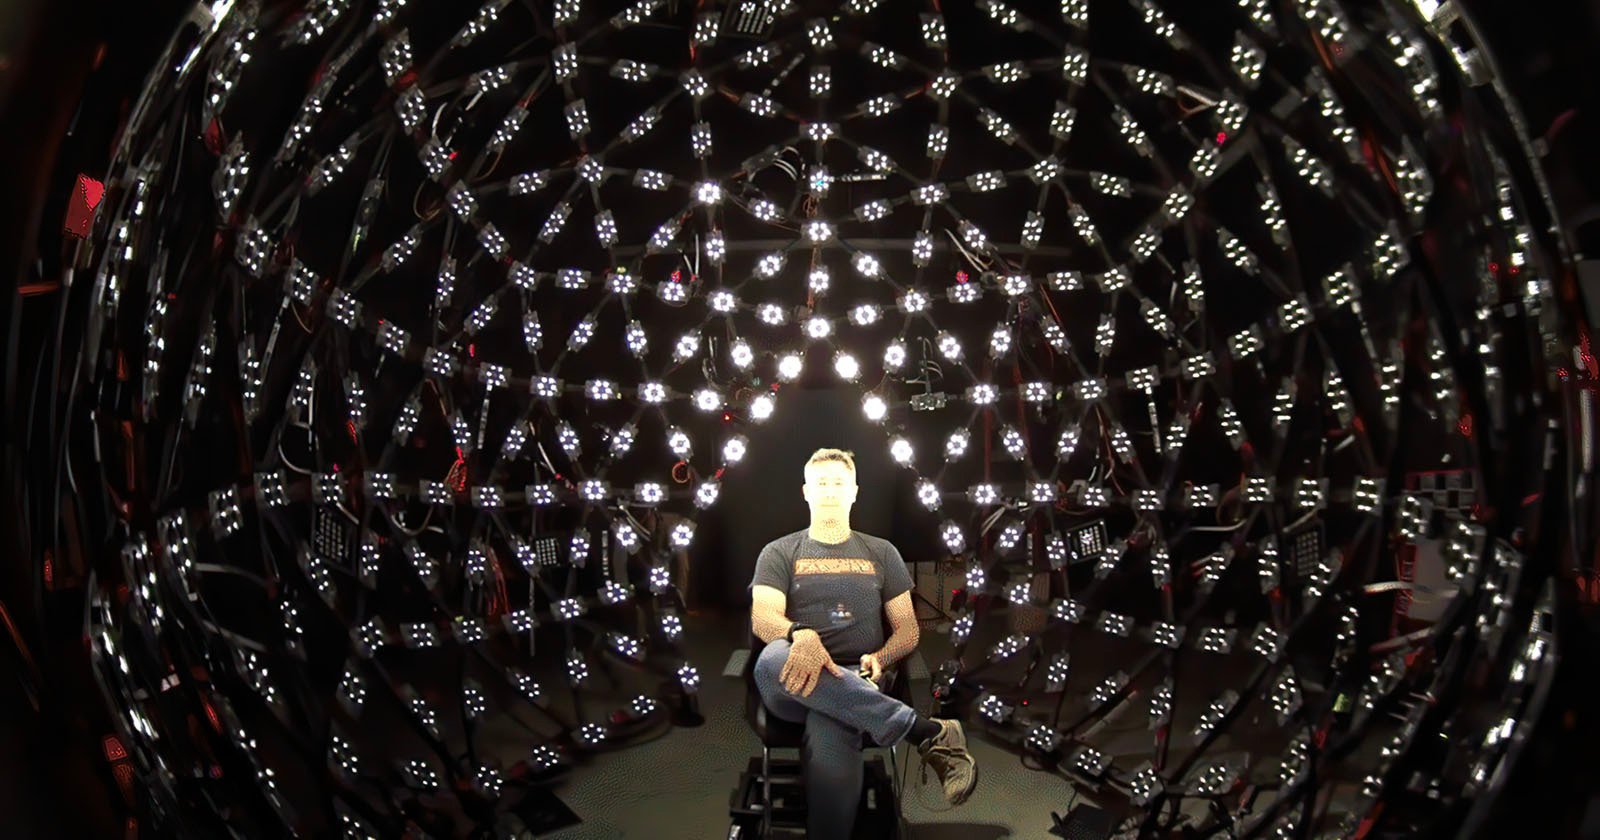
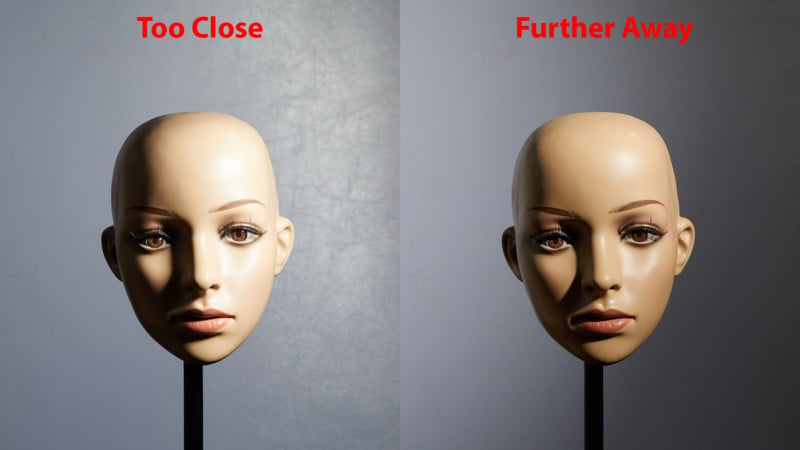
Too Close
Light falloff follows the dreaded inverse square rule. While you don’t need to understand the nitty-gritty maths behind it, knowing the concept is a great starting point in shaping light. If the light is placed too close to the subject, it will produce a bright highlight, as well as very deep shadows. This stark difference in exposure across the face could account for unflattering results. In order to reduce that effect, you can move the light further away. That would create a more even light across the face which will ultimately result in flattering results.
Read more: Understanding the Inverse-Square Law of Light
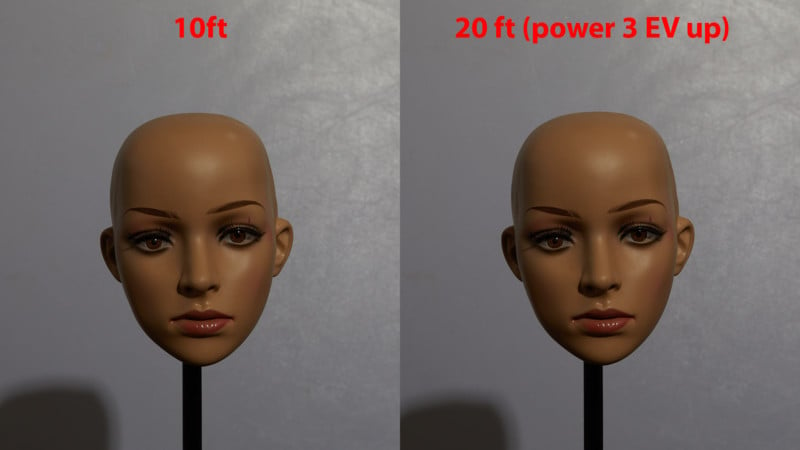
Too Far Away
Coming back to the inverse square rule, light falloff is not as dramatic on large distances. Many photographers fear that they will get uneven illumination and put their light too far away. This reduces your power and causes unwanted reflections from surrounding surfaces. Often, to create a defined shape moving the light closer is necessary, as light falls off more dramatically at short distances. Coming back to the previous point, you still don’t want to have the light too close. A good starting point would be to have the light 6 feet (2 meters) away from the subject.
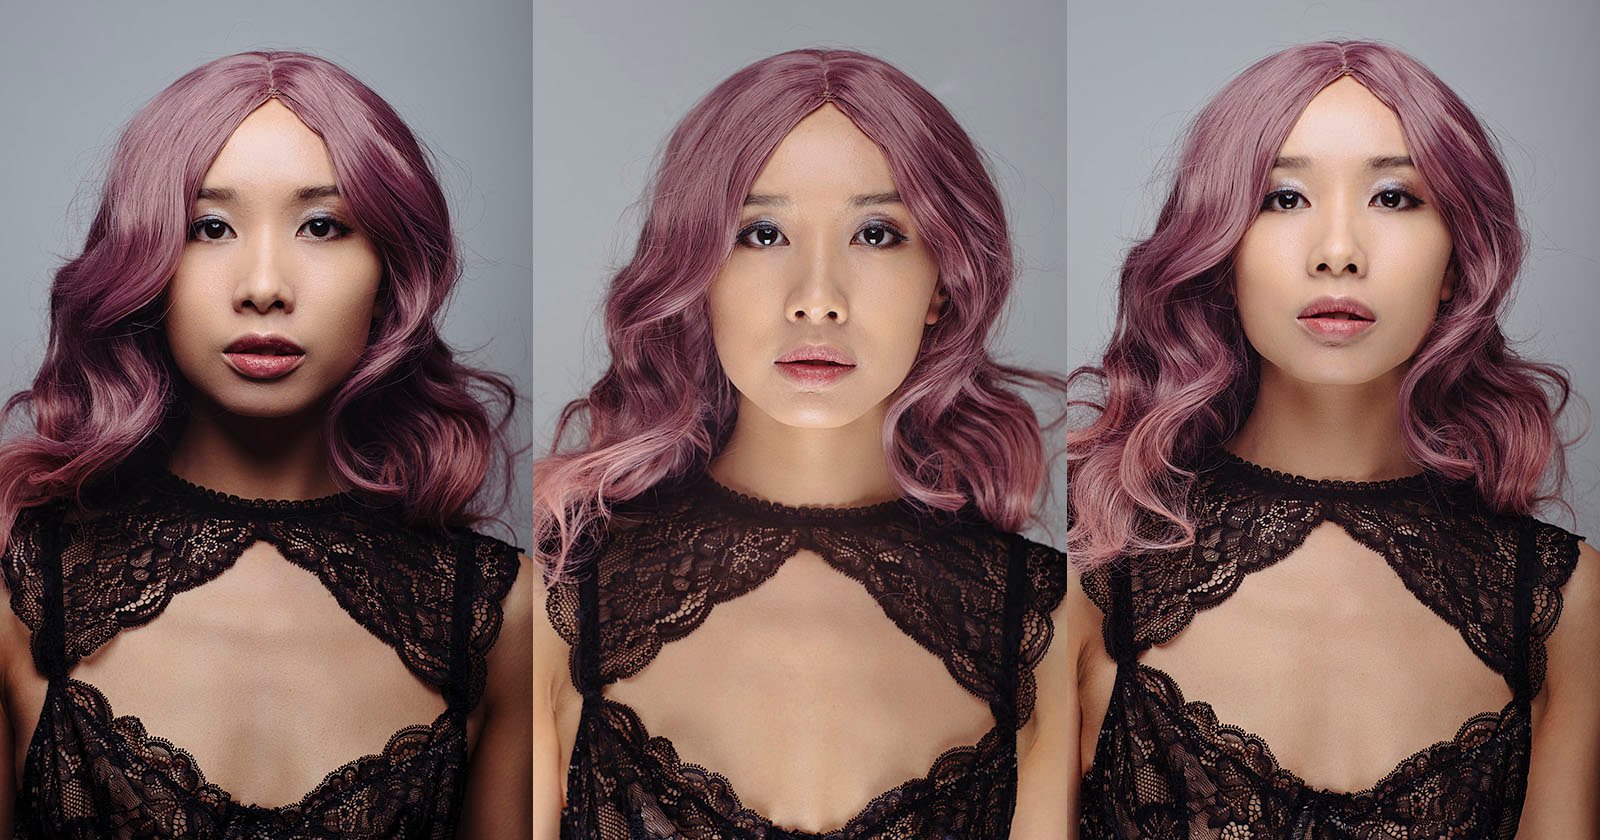
Light Temperature
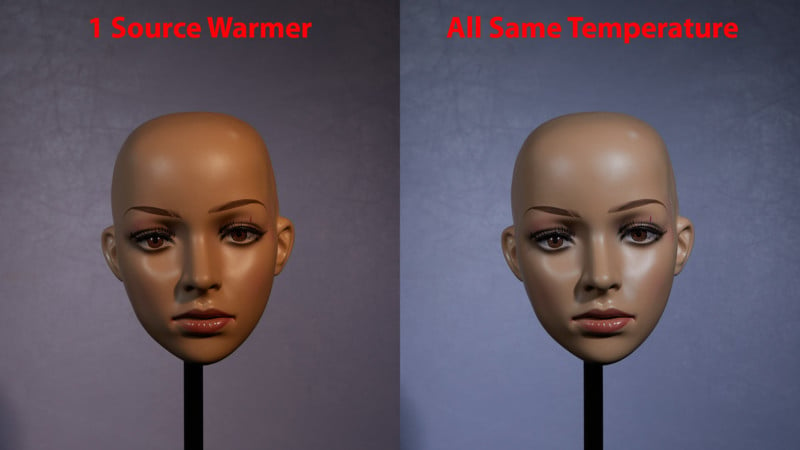
Temperature Inconsistencies Across Modifiers
One of the qualities of light worth noting is its temperature. Combining a cold and hot light, where the difference between the two is very minute can discomfort the viewer. That applies to using old modifiers, which tend to yellow out with time. If a light source is giving a slightly warmer tone than the rest, it should be replaced.
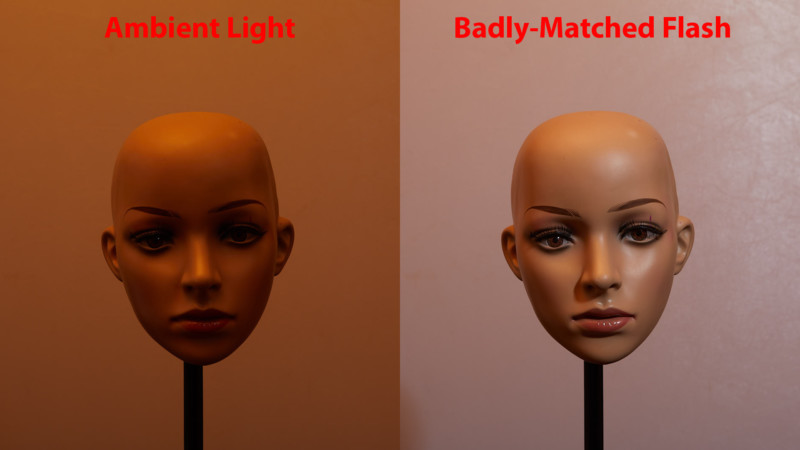
Forgetting the Ambient Light
This also goes to combining flash with ambient light. Thinking back to my event days, I used a daylight-balanced flash (5100K). However, the ambient light was often a lot warmer — around 3200K. This resulted in the images feeling very strange, as although the surroundings are yellow, the faces appear white. This throws the viewer off and looks unprofessional.
The first step to balancing flash with ambient light is figuring out the temperature of the two and matching them. A great help are CTO and CTB gels. CTO will warm the light up, and CTB will cool it down.
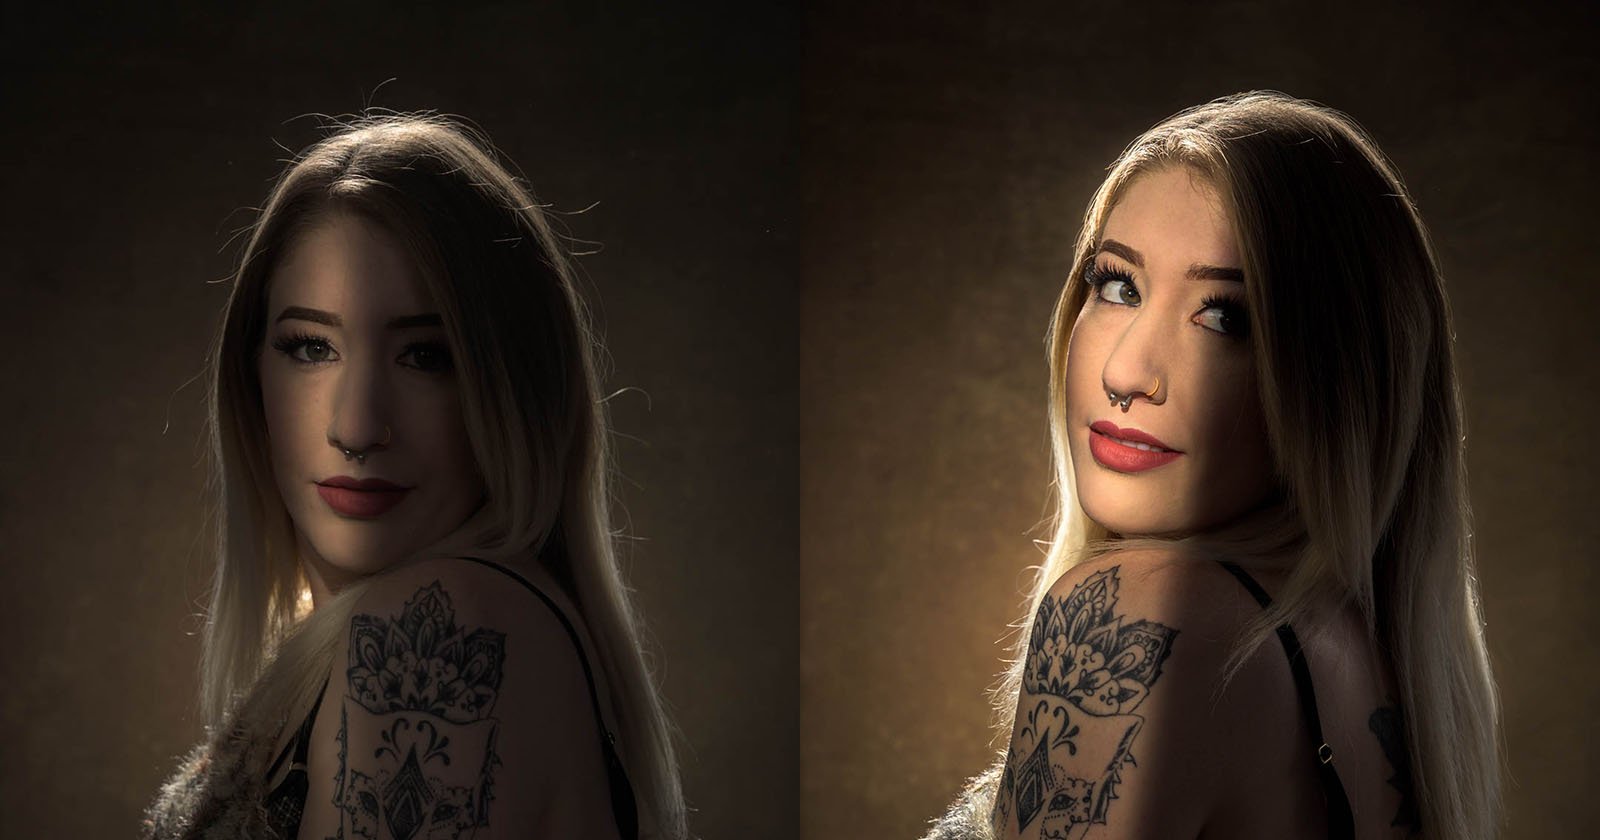
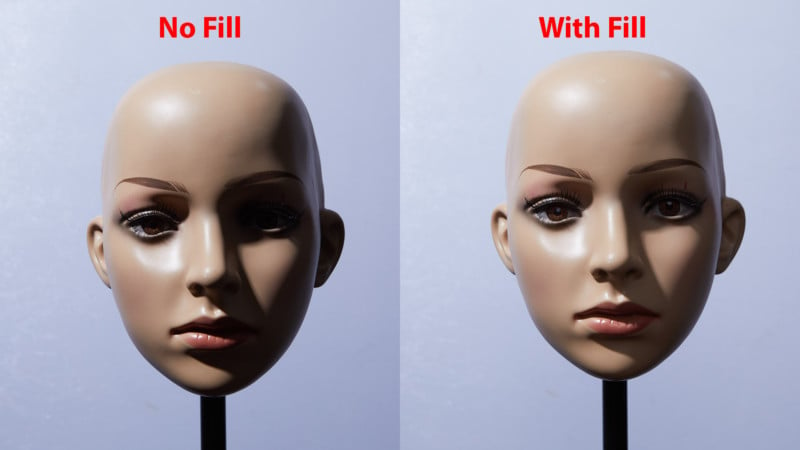
Dark Detailless Shadows
Shadows are 50% of all photos, highlights make up for the other 50%. They work together to produce the image we see with our eyes. Although highlights tend to be very bright and shadows dark, it’s critical to not overdo and make an imbalanced light. As a general rule, using a large fill source from the direction of the camera never hurts. Personally, I like to set up a 65” Umbrella Deep White Xl with a 1.5 stop diffuser. That produces smooth fill light.
The Wrong Light Quality
There are more than 200 different light modifiers you can use. They are all united with 4 different qualities: hardness, diffusion, falloff, temperature. The quality of light will have a direct impact on what you’re trying to achieve.
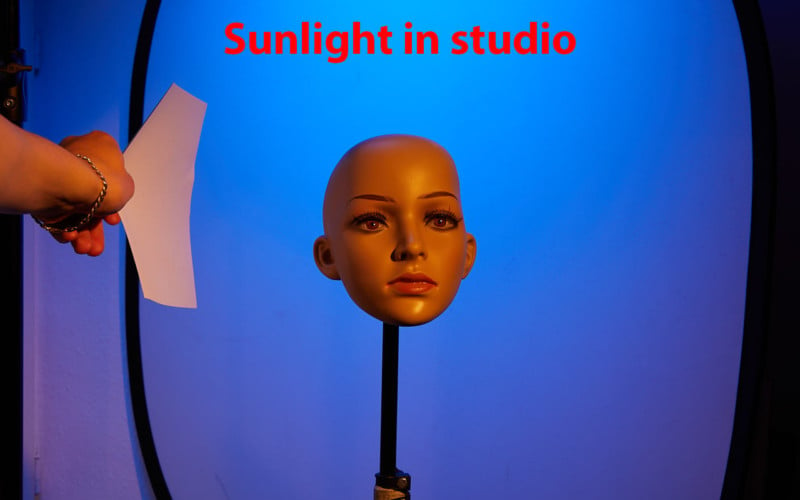
If you want midday California sun, then you will need a hard, not diffused light with even fall off and warm temperature. If you need to replicate a typical London rainy day look, a soft, diffused, and cold light source will be more appropriate. The same applies to mimicking lights coming from other sources such as TV screens or table lamps.
A mistake many photographers make is failing to understand how the light would look if it was coming from the source they’re trying to replicate. In the image below, flash was used to replicate the ambient chandelier light: a half CTO gel with a hard concentrated light source was used.
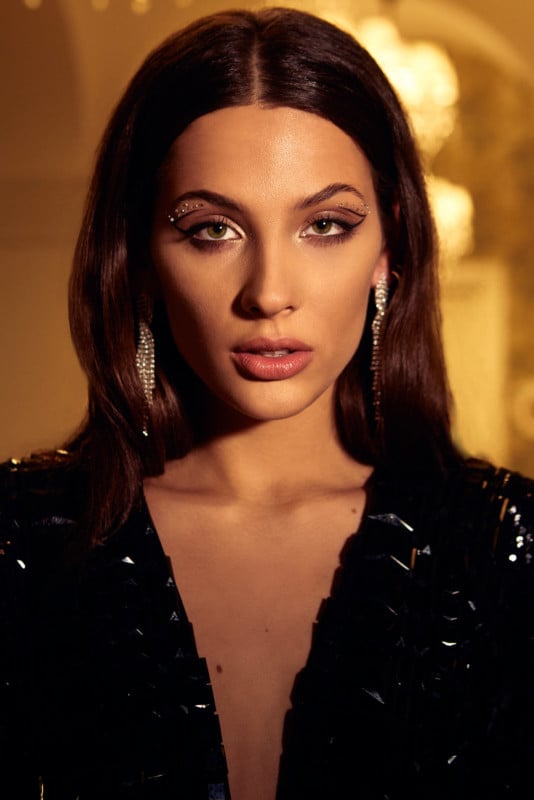
Model @mynameisaliz @attractivemodels
Styling: @lillafarkas_stylist Dress @tanczosdesigner
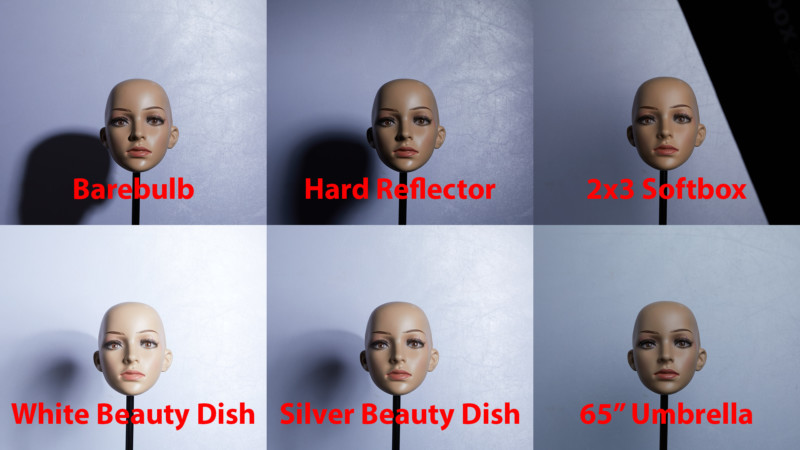
Poor Modifier Choice
As I mentioned, there is a vast choice of modifiers available on the market. The properties that are important in a modifier are size, direction, and material. Many photographers make the mistake of choosing the wrong modifier for the look they need. For example, a small softbox will never produce even soft light with little contrast.
On the contrary, you will have a hard time making dramatic light with a 65” umbrella. An indirect modifier will make light more even, whereas a direct one will have a hotspot in the middle. That hotspot can be used to elevate a face from the background, but it could also mean uneven illumination on a group of faces.
Closing Thoughts
The things listed here are only some of the many mistakes you can make when working with light. Truth be told, I’ve made all mistakes that I listed in this article. In fact, I’m sure that all photographers, at one point or another, make these mistakes. The important thing is to recognize them and work further to improve. Understanding that the light setup idea is complete nonsense is also a step in the right direction. Bob Ross didn’t use one “brush setup” for trees — he used the most appropriate brush setup for trees.
About the author: Illya Ovchar is a commercial and editorial fashion photographer based in Budapest. The opinions expressed in this article are solely those of the author. You can find more of Ovchar’s work on his website and Instagram.