How I Built My Custom Vehicle ‘Obelix’ for Outdoor Photo Expeditions
As a landscape and travel photographer, I consider my camera gear the most important tool of my trade. I have been traveling for photography for so many years and have conducted several workshops in that span. This involved traveling to remote areas off the beaten track chasing the perfect shots.
I started doing my research on what my actual needs are when I travel by myself and when I conduct my landscape photography workshops in the United Arab Emirates and Gulf Cooperation Council (GCC) countries. I also considered what I require to ensure I provide workshop participants what I advertise: a unique experience combining adventure, photography, and overlanding while ensuring the best quality service, flexibility, and safety.
Working on my dream car was a fun project that had its own challenges. I had to find the right gear, the best workshop, and mechanics, and the biggest challenge of them all was that I had to stay within my budget! (As with any such projects, I went over my budget and my wife wasn’t very happy with me…)
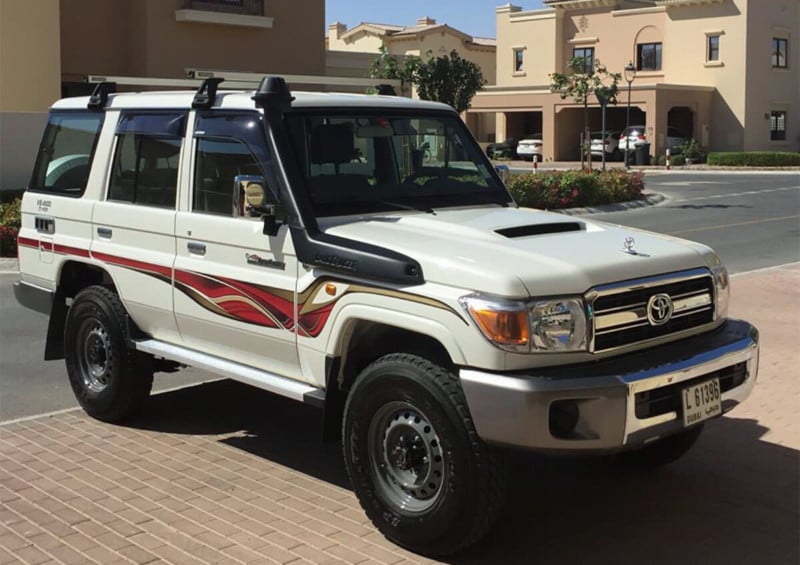
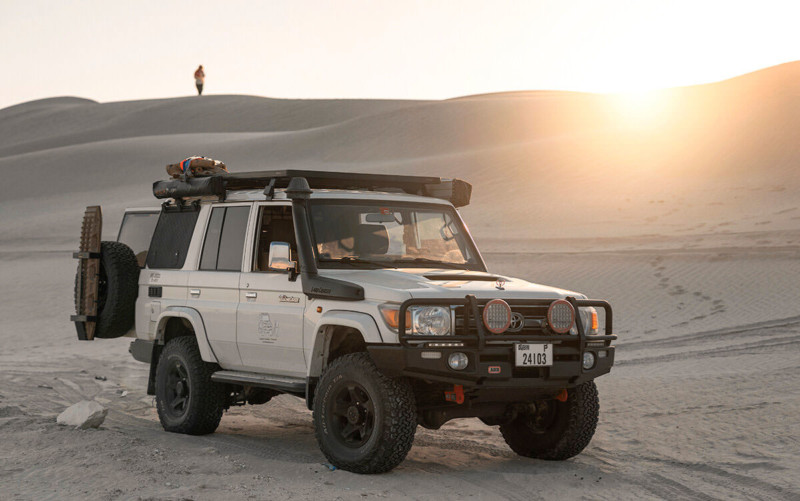
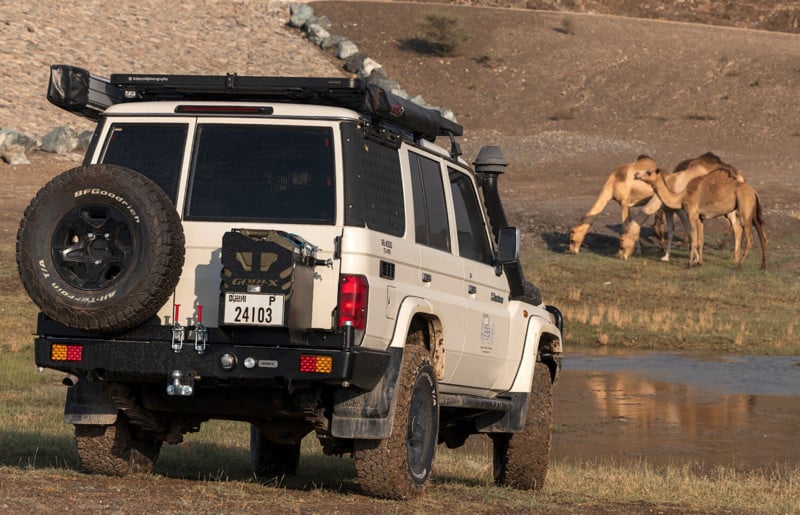
The main factors that I considered while searching for the right vehicle are reliability, space, capacity, and freedom to do modifications. There are many cars on the market that meet these requirements, and that didn’t make the decision easy. In the end, I chose the Toyota Land Cruiser 76 series 4.5 V8.

Why did I decide to go old school? It is simple, because of its long solid history in the 4×4 vehicles. It is a machine mainly made for farms, NGOs, and is usually driven in the rugged terrains of Africa, South America, and Australia. In addition to this, it has leaf springs and a powerful V8 engine.
Living in Dubai, one does not run short in options. I was lucky to have found a second-hand Toyota 76 series 4.5 V8 being sold by an Australian ex-pat also living in Dubai. He’s a big fan of Toyota and I will never forget the sad expression on his face when I got in the car, which he named Obelix, and drove off.
Before signing Obelix over to me, he had requested me to keep the name of the vehicle the same. I promised that I won’t change the name and so, Obelix found a new home unaware of the modifications and adventures awaiting him.
The Modifications
I finally got a car, however, I had no previous experience in modifications for off-roading and overlanding purposes. I spent hours doing research online, watching YouTube videos, and following big names in the industry such as Andrew St Pierre White or Ronny Dahl. Through all of this, I learned a lot but still didn’t understand everything.
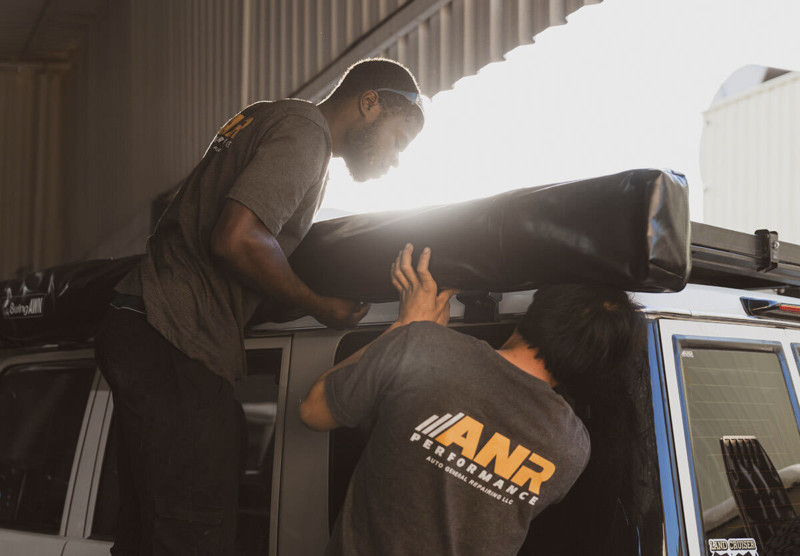
The local market in Dubai is focused on dune bashing and extreme desert sports but I required something that is optimized for overlanding too. It was tricky to find the right workshop that can implement my ideas and vision. A friend introduced me to a local workshop in Dubai “ANR Performance.” The owners behind the business are real overlanders with years of experience and above all, love Toyota’s 70 series.
During our first meeting, they asked me: “What is the purpose of building this rig? Do you need it for dune bashing or long overland trips?” This was the moment I knew that Obelix is in good hands.
We started the journey by creating a full list of accessories we need to fit in the vehicle and then prioritized the essentials. With a multitude of choices available on hand, it was clear that it will take me a while to reach my ultimate set up.
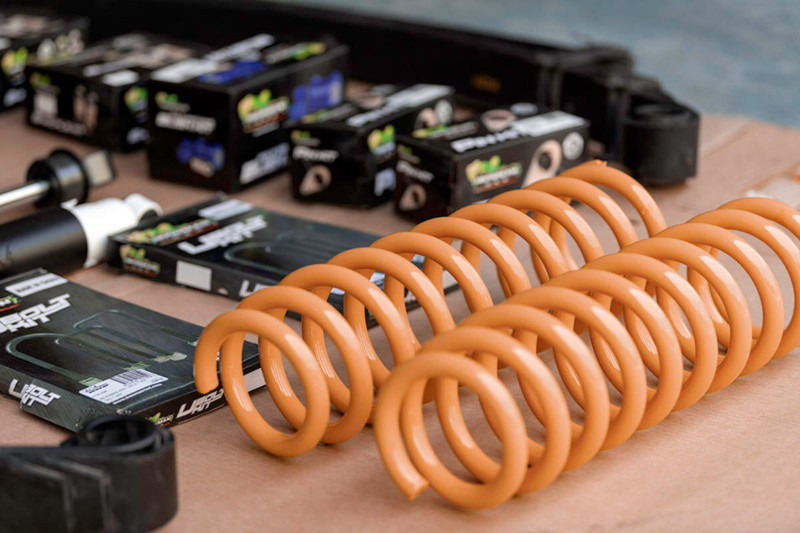
Suspension Kits
The LC 76 is known as a real truck with leaf springs and a ride that’s far from being smooth. The problem was that I decided to drive Obelix as my daily car. The first thing the ANR team and I decided on was to improve the ride on both normal and gravel roads.
I added new leaf springs and Foam cell shocks from IronMan to support the additional weight of cargo and improve the handling and ride. This enabled improved load capacity of up to 400kg and lifted the vehicle by 2 inches.
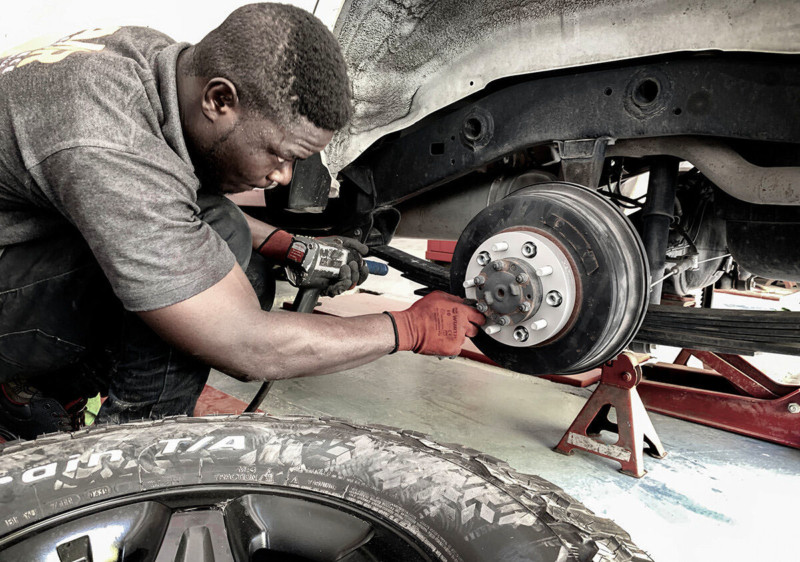
In the Toyota 70 series, the rear wheel track is narrower than the front by 100mm, and spacers helped to fix this issue.
Tires and Wheels
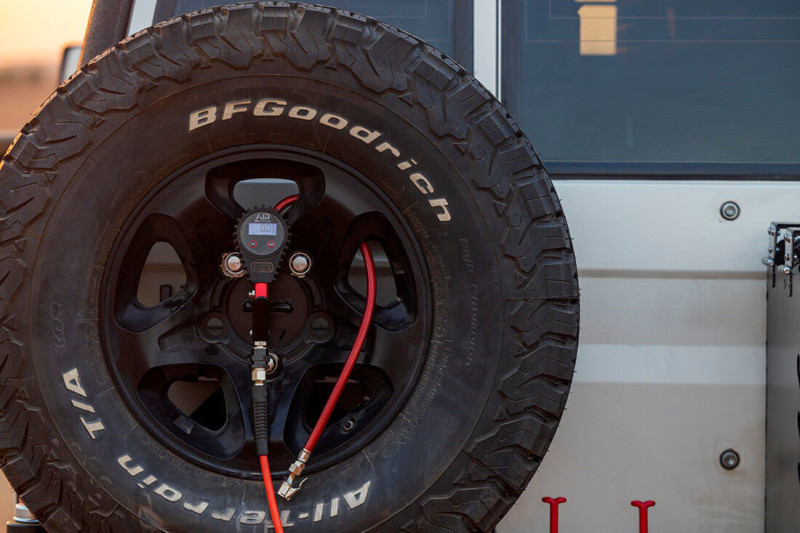
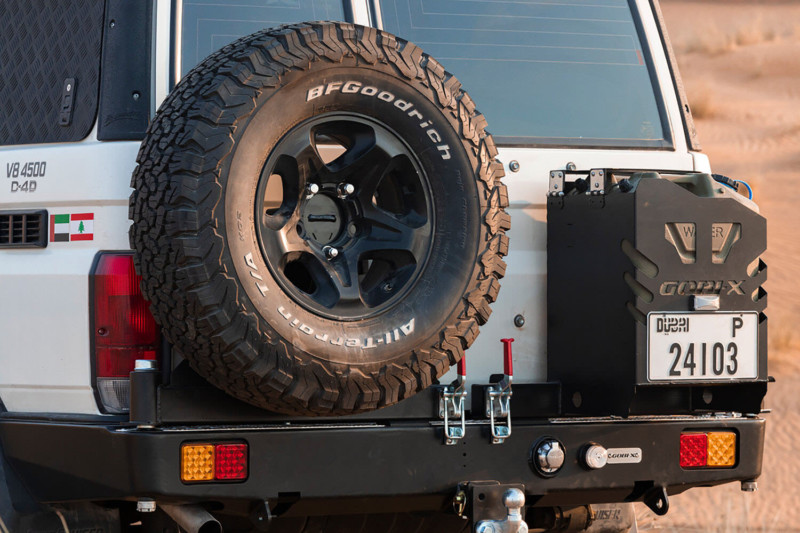
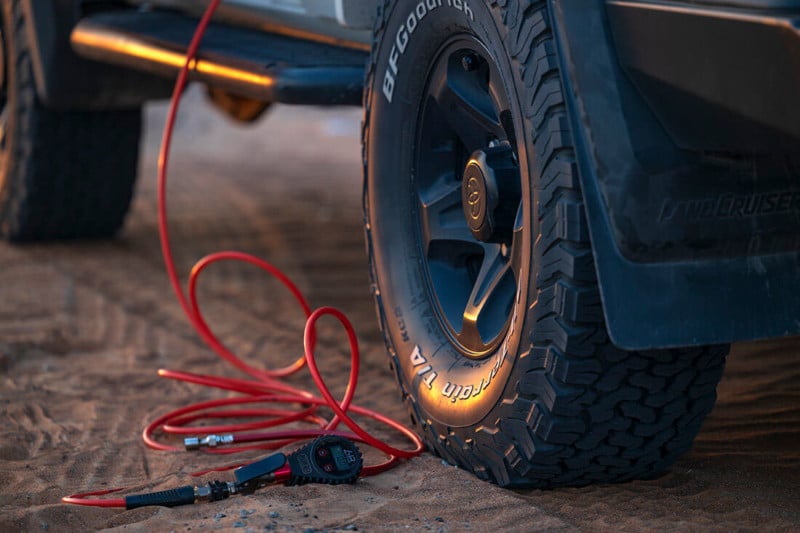
I have opted to go with the BF Goodrich KO2 285/75/16 tires. BFG tires are tried and tested in the harshest of trains and highly recommended by many overlanders.
With wider tires, I had to change my wheels. Obelix came with the “prehistoric” Toyota skinny wheels, which will not be suitable for the wider footprint BFGs and therefore, I have changed them to the modern Toyota light-alloy wheels.
Safety and Vehicle Protection
Safety can’t be compromised; therefor a number of products were considered specifically from the leading Australian brands in this field.
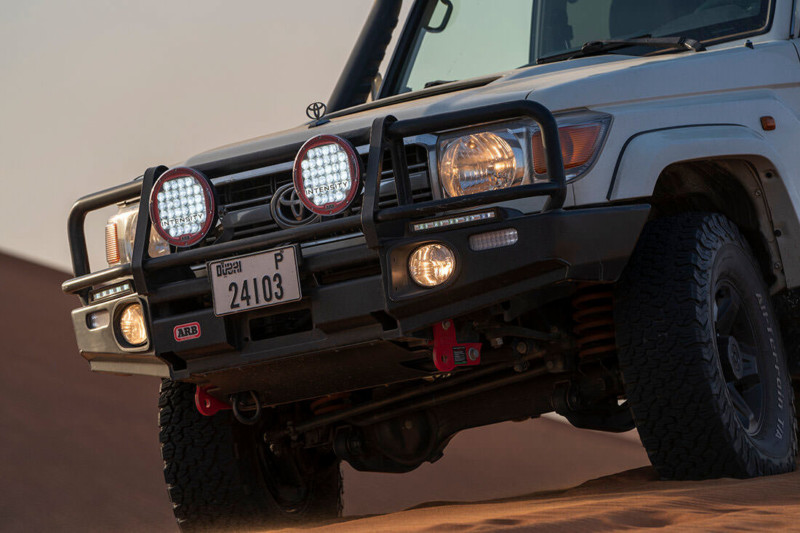
For frontal protection, we fitted the ARB Delux bull bar. This is a metal bull bar to protect the front of the vehicle with winch compatibility.
The underbody of the 4WD is one of the areas most susceptible to damage when traveling off-road. We added a skid plate from ARB to protect the underbody and engine.
IronMan recovery points were fixed in the front for safe vehicle recovery.
To create a more aggressive look and add side protection (and to make it easier for my wife to climb into the car with high heels) I also added side steps from TJM.
ANR Performance has also fabricated a customized cargo barrier placed between the rear cargo and the vehicle occupants protecting them from unsecured loads thrown forward in the event of sudden braking and accidents.
Recovery boards, in my case Maxtrax, are so essential in this region as I do most of my driving on soft sands. These were fitted on the rear spare wheel.
Obelix has also received a nice undercoat rust protection in order to survive the harsh environment.
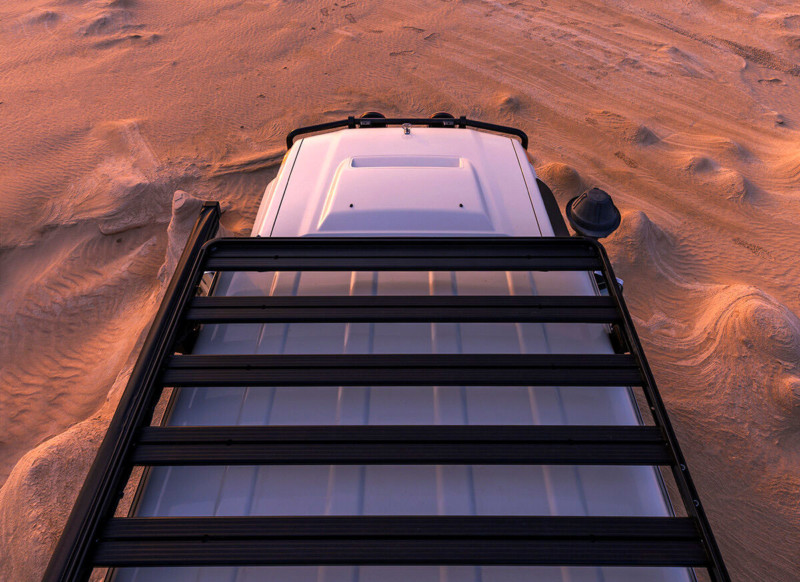
In order to further isolate heavy objects from occupying the internal space of the vehicle, I went with Frontrunner roof rack specifically designed for the LC76 and we equipped Obelix with a Gobi X rear bumper.

Engine Bay
Frankly speaking, I didn’t touch the engine. The Toyota Landcruiser’s 70 series V8 engines can do hundreds of thousands of miles if you take care of the engine and service it regularly. The previous owner only added a catch can in order to help reduce the amount of oil vapors getting into the intake of the engine. In the future, I will also add a secondary filter to protect the engine from dirty diesel.
I decided to keep the factory snorkel. At the moment I’m not planning to cross any deep rivers, but in the future, I will upgrade to a safari snorkel to improve the performance and look.

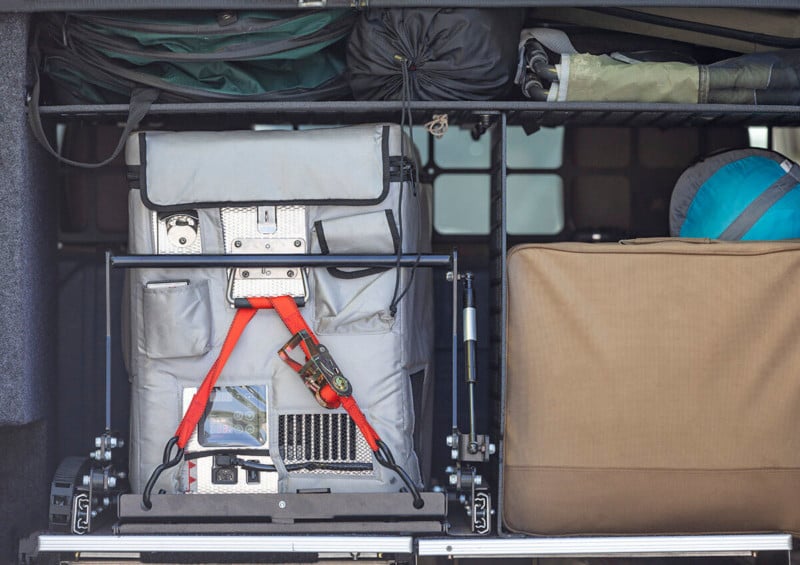
Storage System
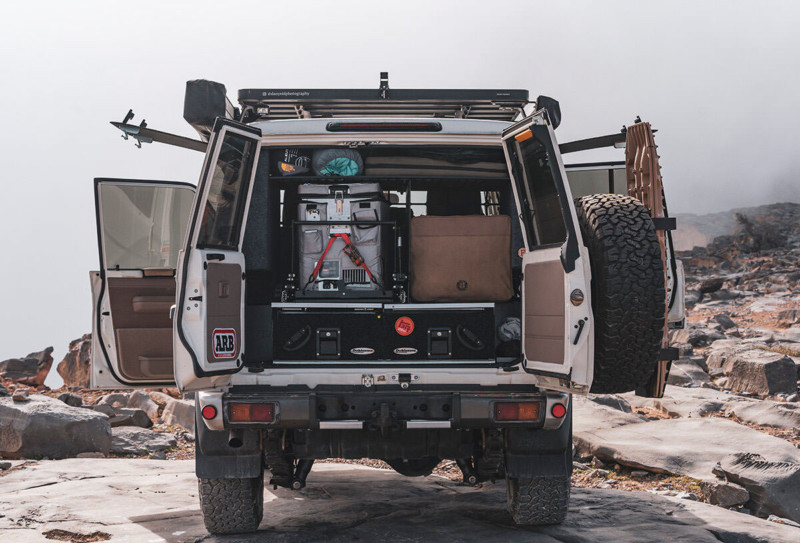
While traveling overland, it is important to optimize the storage space available to you. It is best to pack all the supplies that you might need during your trip as you don’t know where you might find yourself. Rear drawers are a convenient and practical way to increase the storage space in the back of the vehicle.
My main drawer system is from Dobinsons, which consists of two lockable drawers; with a capacity to support 150kg load each.
I have also added a shelf in the rear cargo area carrying my chairs, tables, and misc. items.
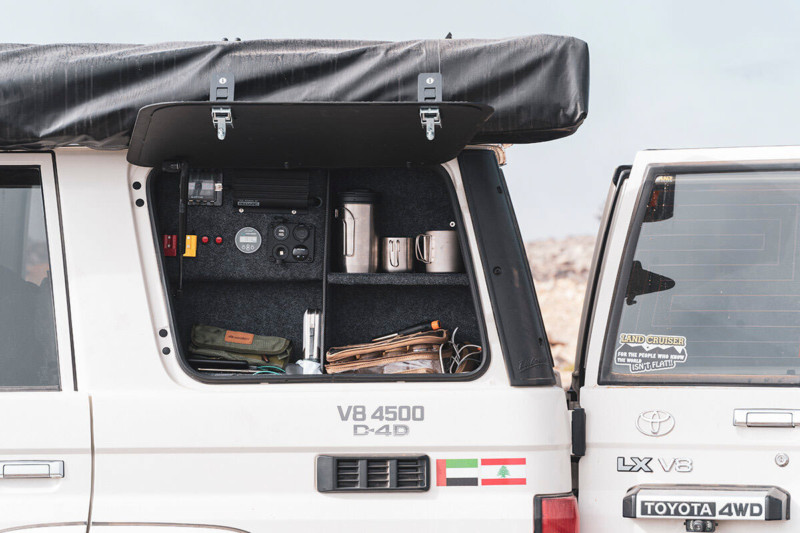
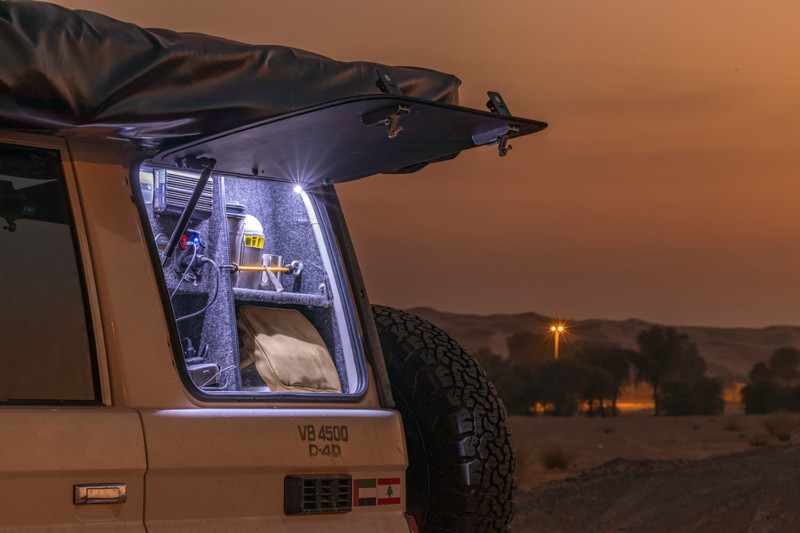
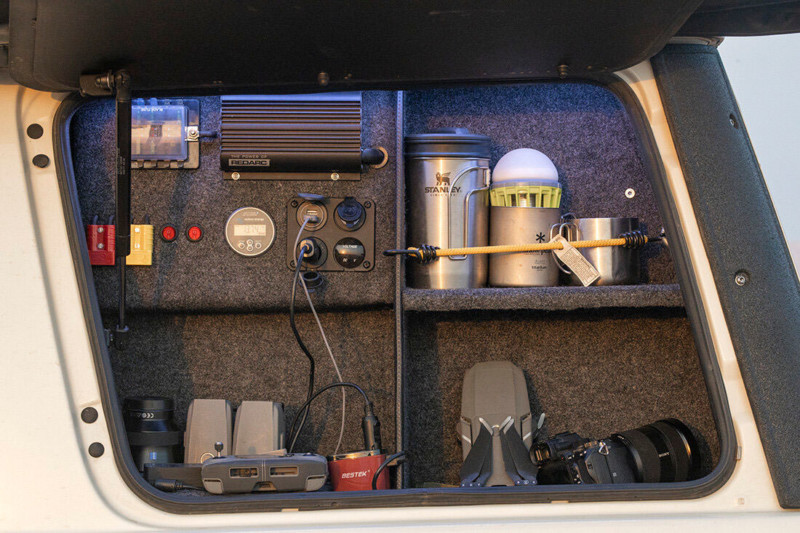
Due to the small size of the vehicle, I need to optimize the space available to me. Something that I found very useful, was to replace the rear window with gullwings to allow easy access to the cargo bay via the side of the vehicle in a secure way. For this, we built aluminum boxes on both sides.
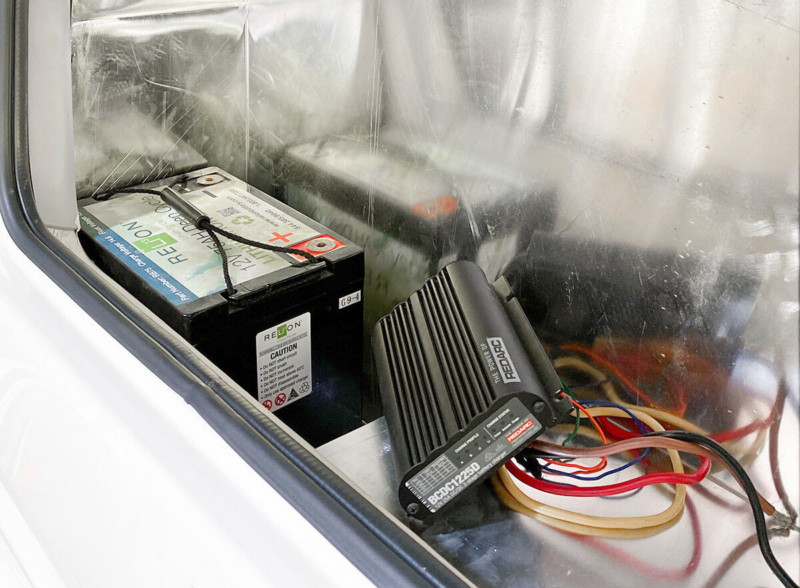
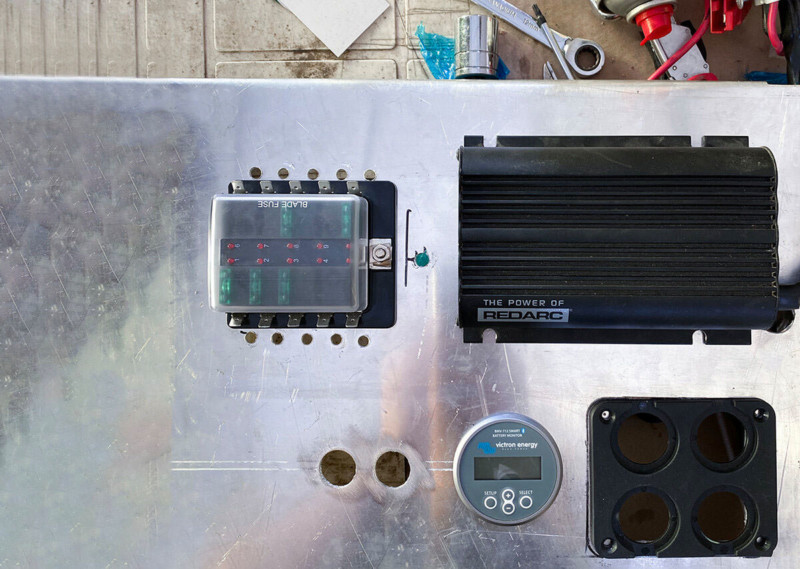
The left side is dedicated to all my recovery gear and tools while the right side is dedicated to the electrical parts. The right box required a special customized design. We decided to fit the auxiliary lithium battery, Redarc BCDC, Victron monitor, fuses, Anderson plugs, and USB connections in this box.
Compressor
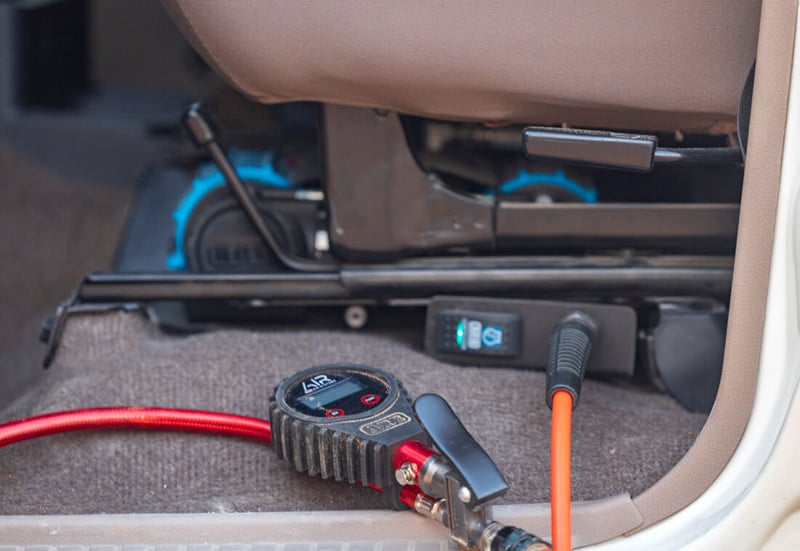
Deflation and inflation of tires are key to have effective tractions on various terrains. I chose the ARB 12V On-board twin high-performance air compressor and mounted it under the driver’s seat along with the entire recovery kit from ARB.
Fridge System
Safe storage of food and drinks is key for any long-term trip. I decided on two fridges: the first is a console 12v fridge from Dometic located next to the driver seat. This fridge is mainly to keep water and soft drinks cold and within easy reach while driving.
The second fridge is a 42 liters fridge from Snomaster located at the back of the vehicle. This fridge is used to store fresh food such as meat, fish, poultry, vegetables, cheese, etc. This fridge is supported by a slide and drop stand to make it easily accessible.
Electricity
This was one of the most complicated and important parts of the build. Since I run photography workshops and travel to remote areas, I require a reliable electricity source to charge my gear, keep the fridges cold and light the camp at night.
The vehicle is, of course, equipped with the main battery in the engine bay but this battery is only for cranking the engine. The ANR team had to split the electricity system here by having an auxiliary battery only for charging my gear and the fridge without draining my main battery.
Our first choice was a lithium battery of 75AH. This is a smart battery that charges quickly with more than 4000 charging cycles.
I have installed the Redarc BCDC25, which manages the charging mechanism of my lithium battery. It enables charging via the vehicle alternator as well as through solar panels, whichever it finds available.
Now I can camp however long I want with self-sufficient energy to charge my gear and keep my fridge running.
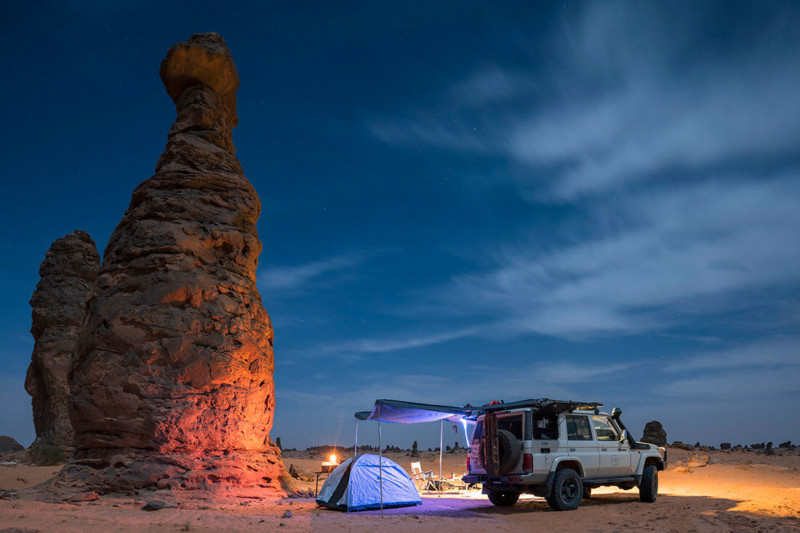
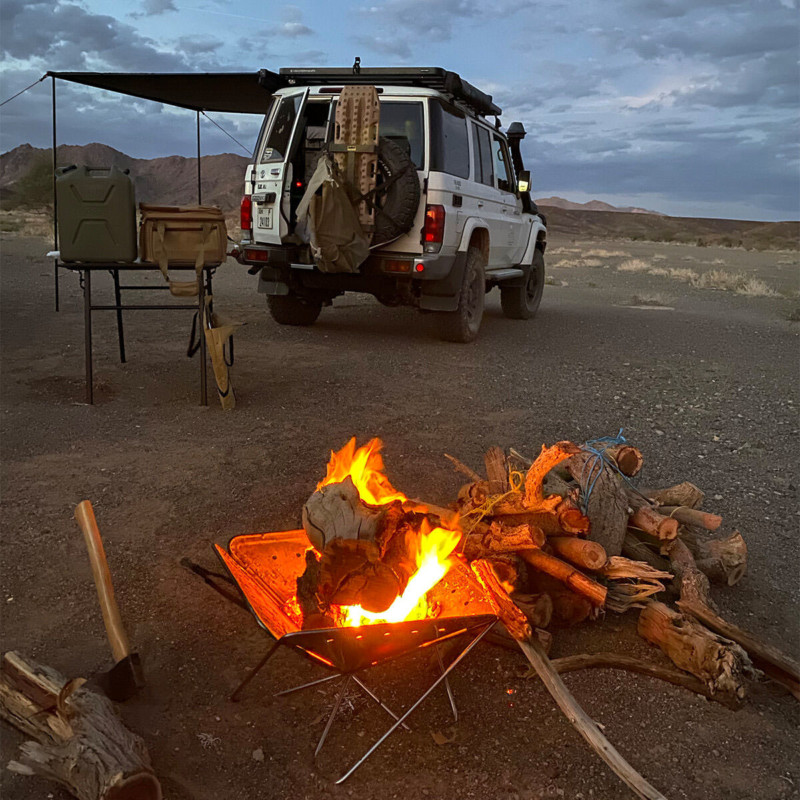
Shade and Water
We decided to equip Obelix with an internal 50-liter water tank for washing purposes along with 2 main food graded jerrycans for drinking water at the back of the vehicle.
Personal hygiene still remained a concern and even if you are in a remote area, who wants to shower out in the open? To address this, I installed a foldable shower and change room sourced from the Australian market.
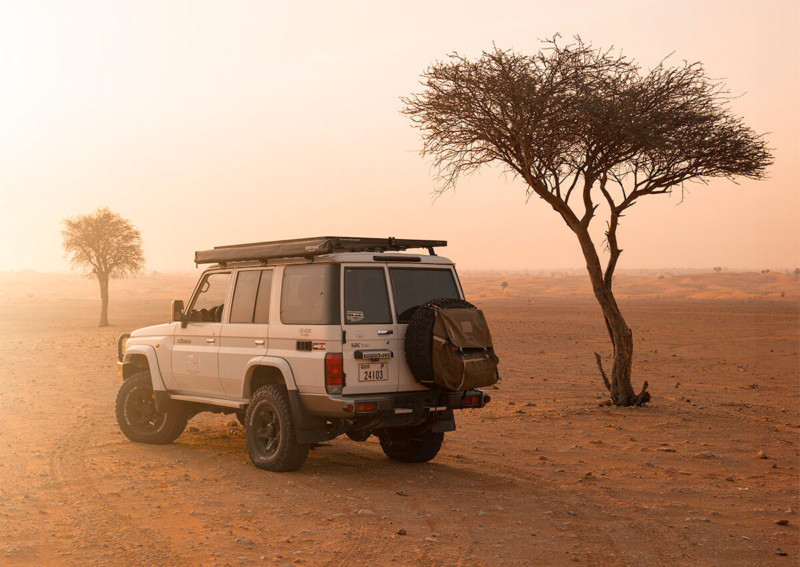
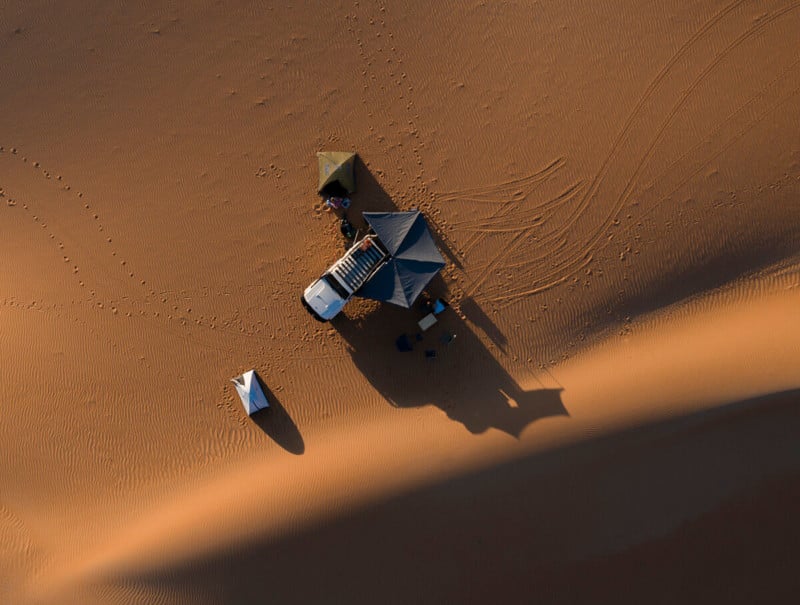
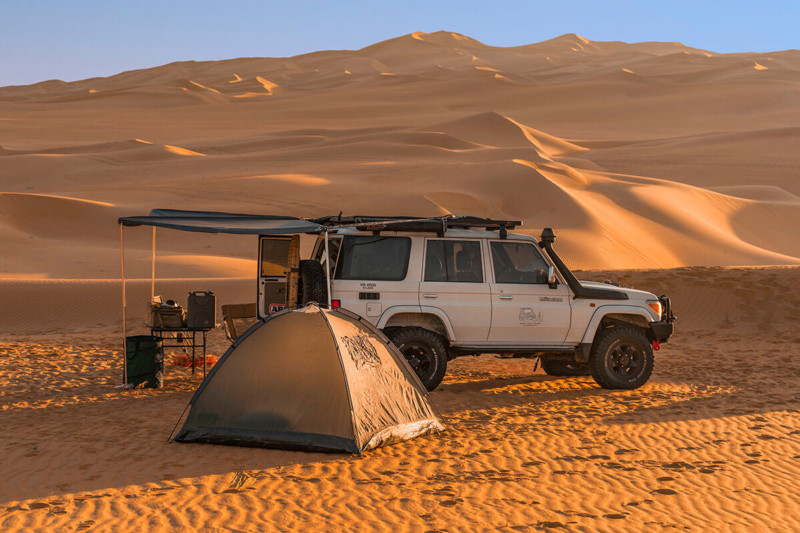
Living in the Gulf region and often touring in the desert, it is very important to have shade during the sunny hot days. One of the best investments I made was installing a 270-degree awning from Howling Moon. This awning is a perfect choice for those who want a quick and easy setup with a massive 270-degree coverage. It is easy to set up and offers instant protection from the sun and inclement weather.
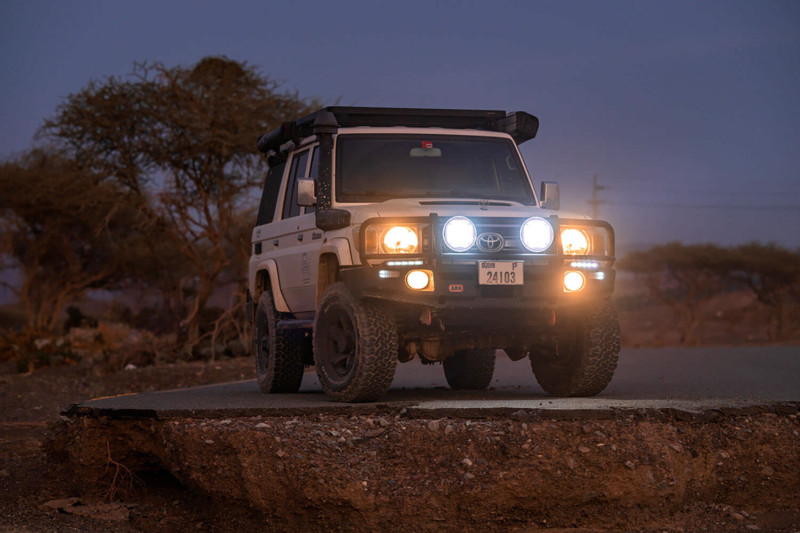
Driving Lights
A front bull bar is a great addition to any truck as it allows you to mount accessories on it. We fitted 2 main fog lights by ARB in front of the vehicle for driving safety along with left and right beam laser lights to light the side of the road.
I’m not a big fan of driving at night. I prefer driving during the day and arriving early at my location so that I can set up the camp and focus on my photography. However, strong lights are important in case there is an emergency at night and I have to drive somewhere in the dark. Therefore, we installed 2 ARB Intensity V2 LED beam lights with 20,000 lumens each on the front bumper.
The vehicle is also equipped with different LED lights for camping purposes as well as a reverse lights and camera to able to see while I’m reversing at nights in the bush.
Camping Gear
Having the best photography equipment in terms of quality is very important, and the same applies when it comes to camping gear. Since I’m touring and running workshops throughout the year, investing in high-quality products as well as their portability and lightweight is essential for myself and my workshop participants.
As a landscape photographer timing is very important. Arriving early to the campsite and having the flexibility to set the camp in a short period of time with the minimum effort is a priority. I invested in top brands and quality furniture such as tables, camping chairs, BBQ set, tents, kitchen tools, stoves, plates, and food gadgets.
I’m not worried about the cost, as it is a long-term investment. And above all, I would like my workshop participants to leave with a great experience during this trip that combines camping and photography.
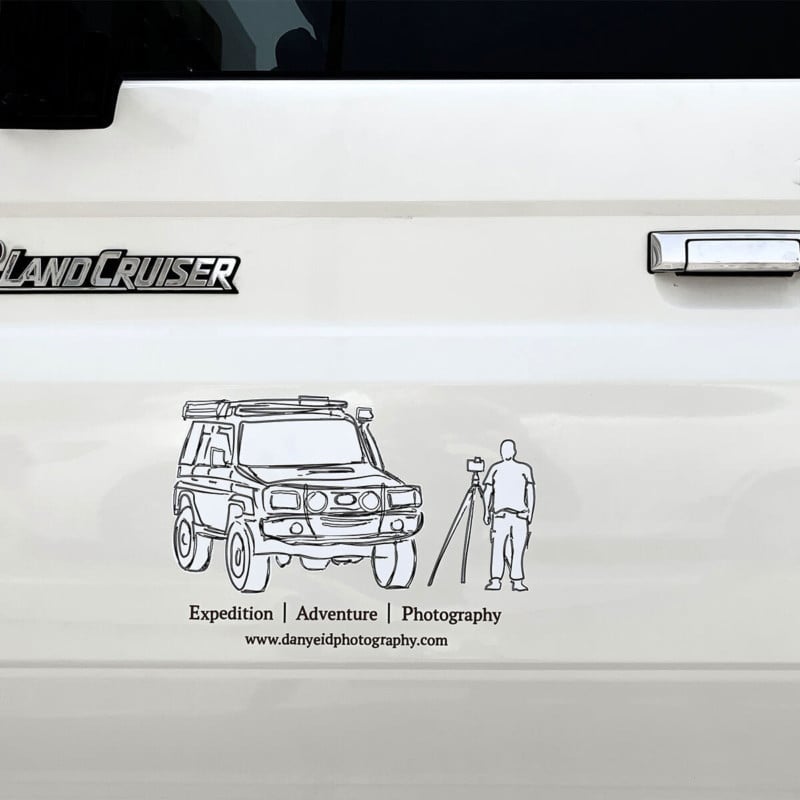
Branding
The final touch was my own branding. A simple logo with outlines related to overland and photography. I’m also planning to wrap the vehicle with different colors in the future.
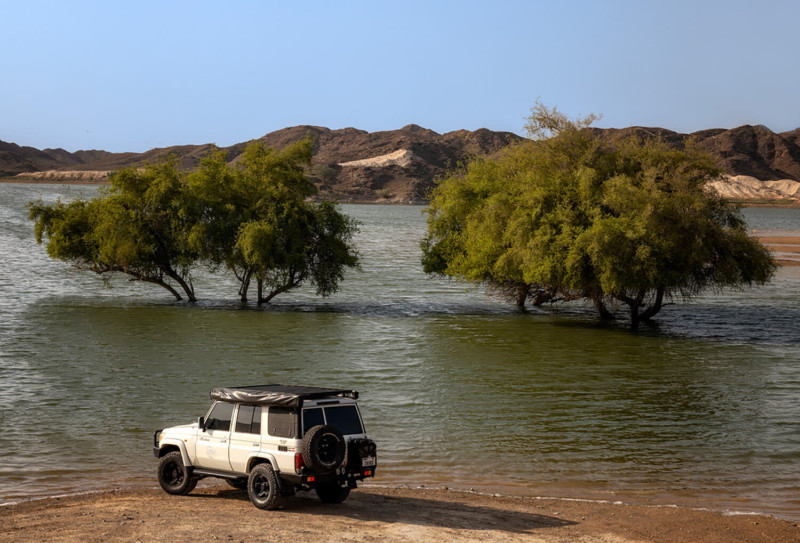
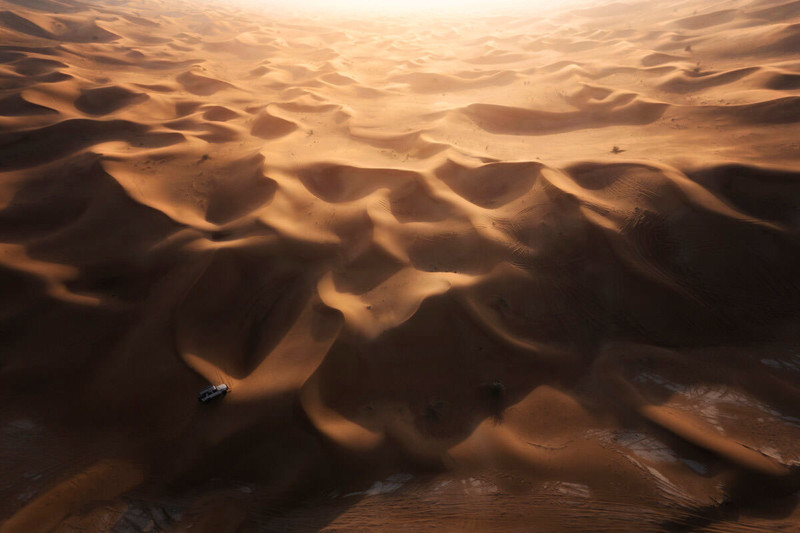

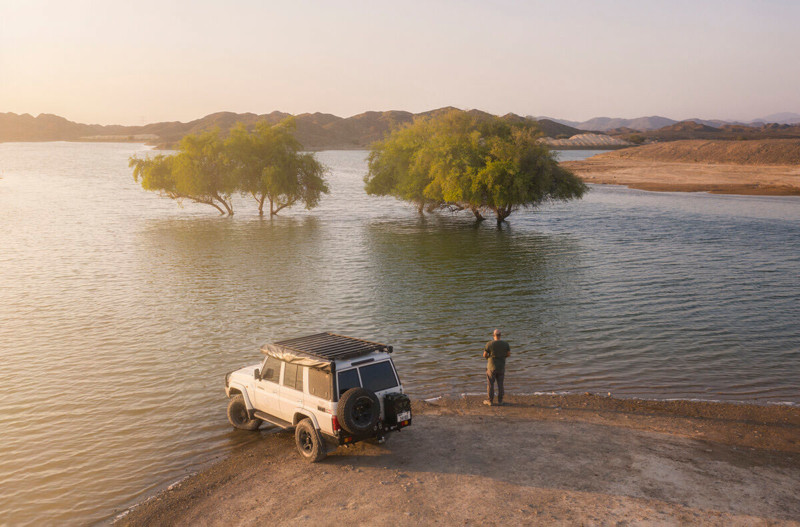
This was an expensive project and as I mentioned before, I did go over my budget. Was it worth it? Definitely! I have already traveled between Oman, the UAE, and Saudi Arabia in Obelix, and I’ve enjoyed every second of it.