Using a Drone to Create Stop-Motion Animations in the Sky
Before we jump into this blog post if you haven’t already read how I do drone light paintings horizontally in the sky be sure to check this out here. If you have done that already (or don’t wanna read something else) get ready to have your socks knocked off because we are flipping them into vertical space and animating our light paintings all with stop motion.
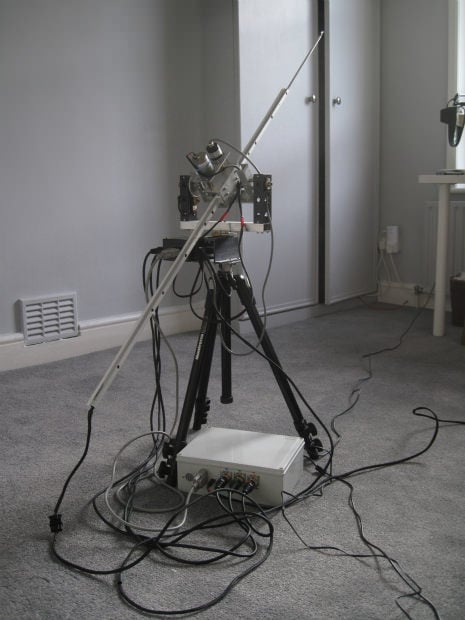
To create this effect we use a similar process as I did in the link I mentioned above, but with a couple twists.
First off, thanks to Oliv Yeh and Krzysztof Dziądziak for making the original math to help make this possible. Secondly, huge thanks to Jonathan Bogaert and Jacco Veldscholten for writing code to make this whole process easier. I’m going to give a little backstory and then the process (but if you don’t care skip the next couple paragraphs to get to the pictures).
Krzysztof Dziądziak had come up with some math to convert horizontal light paintings into vertical ones using excel math. This basically consisted of taking the first latitude with your way points making it the same across all points. Then some extra math with how many meters in 1 degree of the Earth and altitude to make sure it was displayed correctly vertically in the air, but the process of doing that in an excel spreadsheet could be a bit confusing.
It’s also very important that when using these calculations that your overlay is facing north to south otherwise the math doesn’t work. For clarification, this means that the top of your overlay should be north and the bottom should be south. Once you’ve mapped out your drone light painting using the original tutorial linked above then you can use this program that Jonathan and Jacco created to translate it into a vertical light painting.
It’s all done online and you just need to use a CSV file which you can download from Litchi after you uploaded the original KML file you created. Let’s get to the animations.
My first animation needed to be simple as it was made before I had the excel spreadsheets or anything that made this whole process easier. So I decided on a quick game of Tetris.
I found a YouTube video that played through Tetris and mimicked the movements, screen capturing them so I could make layers in Photoshop and have a timeline of which frame came first. I chose Tetris because it’s in a grid and I could calculate how many meters in altitude the piece would need to move vertically for each frame.
The next part is hard to explain. I placed the overlay in Google Earth for that specific frame, and after measuring the length on the ground applied that vertically into the air as altitude for each shape. This was made from a total of 23 frames at ISO 200, f/6.3, around 60 seconds for each frame, and three drone batteries used.
This was the second animation that I created using drones and stop motion. It was a total of 10 frames at ISO 100, f/10, around 172 seconds for each picture, and two drone batteries used. It took around 11 hours from start to finish for the whole process.
The concept of using a horse was inspired by a marketing company that reached out to ask if I could do a drone light painting of a horse above the L.A. skyline. I didn’t end up getting the bid for the company they were representing, but it made me want to take their request to the next level.
I’m no animator myself, so instead I used some of the oldest chronophotography as my baseline—a film known as “The Horse in Motion”—to make this drone light painting. The story in a nutshell is that a man named Leland Stanford wanted to see if a galloping horse ever left the ground completely. Turns out there is such a moment! If you want to learn more about the history of Muybridge taking these photographs, you can read about it here.
For my third animation, I wanted to try and push the idea of writing in the sky. I had seen DariusTwin do this with his stop motion writing animations and didn’t know how time intensive it would really be.
For the first attempt I just wanted to see what was possible, so simple letters were more than enough for me. It turns out was the perfect first experiment. I shot at ISO 200, f/10, a variable exposure time of 14 seconds to 210 seconds, and used a total of five drone batteries.
The variable exposure is easy to explain: for every frame after the first I had to re-write out each letter piece that was previously done, which makes my exposure times longer and longer. After using five drone batteries, my remote for the drone started complaining that it was on low battery, so if you want to attempt something like this make sure that everything is charged and you have spares.

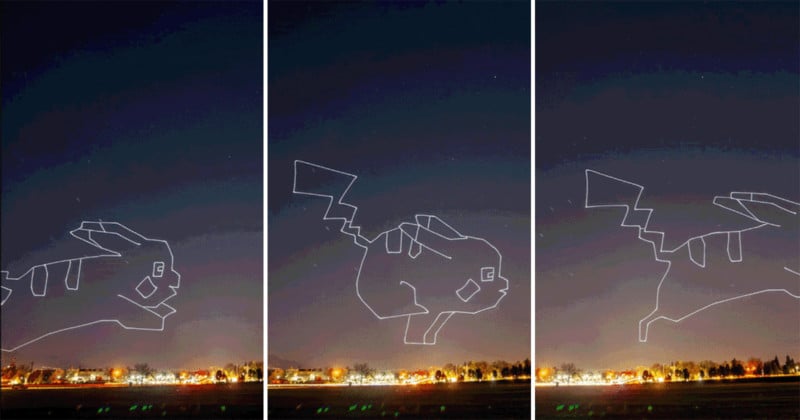
My last and most current 2D animation is a running Pikachu! This one was leaps and bounds harder than the horse. I wanted to see what it would be like to have a looping animation that wasn’t just a static image in the sky, and this was the result. I used an animation provided by LordLibidan to create this. These 11 frames were shot at ISO 100, f/10, around 209 seconds for each image, and used a total of 4 drone batteries.
The challenge in making something move across the sky smoothly is knowing how many pixels I need to move each frame of the animation. Thankfully, I was able to ask my friend Heather who does animations her opinion on this and she stated it would be around 8 pixels moved to the right for each frame.
To give you an idea of how this looks in Google Earth, here is a picture:
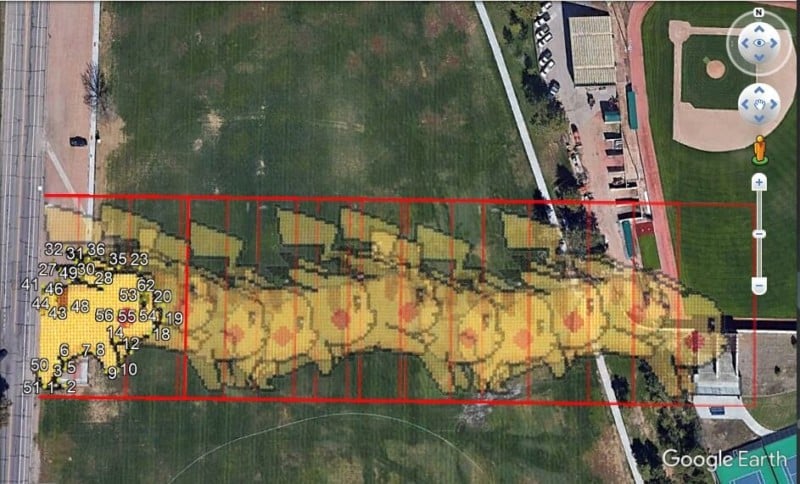
To make sure this would work, I did a test run of my framing of the beginning, middle and end frames to try and weed out any errors when it came to shooting this and making sure I didn’t crash the drone into anything. Turns out my testing wasn’t enough, however, as I originally had 12 frames planned out, but on the 12th frame my drone got stuck in a tree 20 feet up and I had to throw a couple of C batteries at it to get it to fall down.
Thank goodness I’ve been learning how to repair them myself.
I believe we are still just at the beginning of what can be done with drone light painting and it can be pushed even further. I’m so excited to see where it goes and so grateful to have a community around me that is willing to explore this new frontier.