How I Photograph the Milky Way with Medium Format Film
My name is Jason De Freitas (@jase.film on Instagram), and I’m an analog photographer based in Australia. In this article, I’ll share how I shoot the Milky Way from my backyard on medium format film.
The Challenge
The main challenge with analog astrophotography is reciprocity failure. Film doesn’t maintain a linear response for exposures longer than a couple of seconds — double the exposure time no longer doubles the exposure result on the film.
A Milky Way photo with a DSLR would normally be in the range of 20 to 30 seconds at an ISO of 1600 to 3200 if using an aperture of f/2.8. Due to reciprocity failure, this results in exposures of around 1 hour with film.
A lot of people ask me why I don’t use faster speed film stocks but due to the different reciprocity characteristics of film, higher speeds generally require even longer exposure times. My favorites that I have tried for extreme long exposures are Acros, Provia, Ektachrome, and Ektar.
Shooting the Milky Way on 35mm is a good place to start because you have much faster lenses available — at an aperture of f/1.4, you’re getting an exposure duration of around 15 minutes on Provia 100 (with some pushing).
My Setup
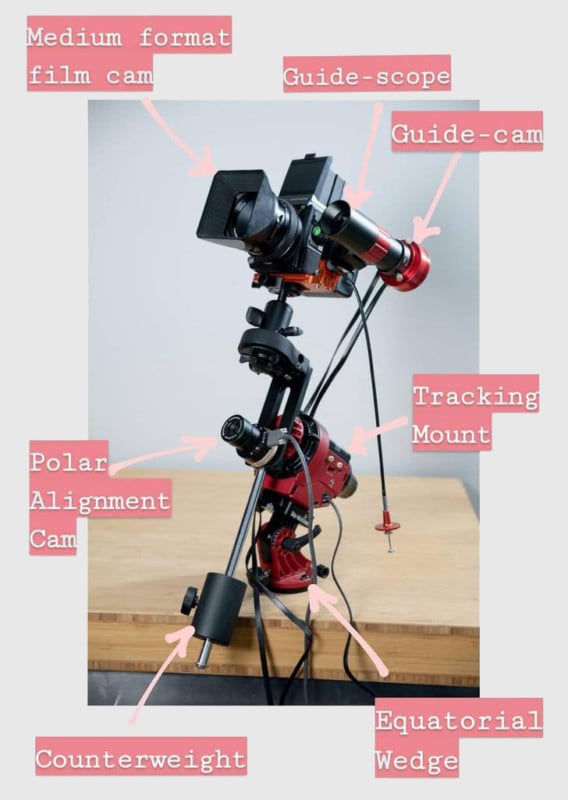
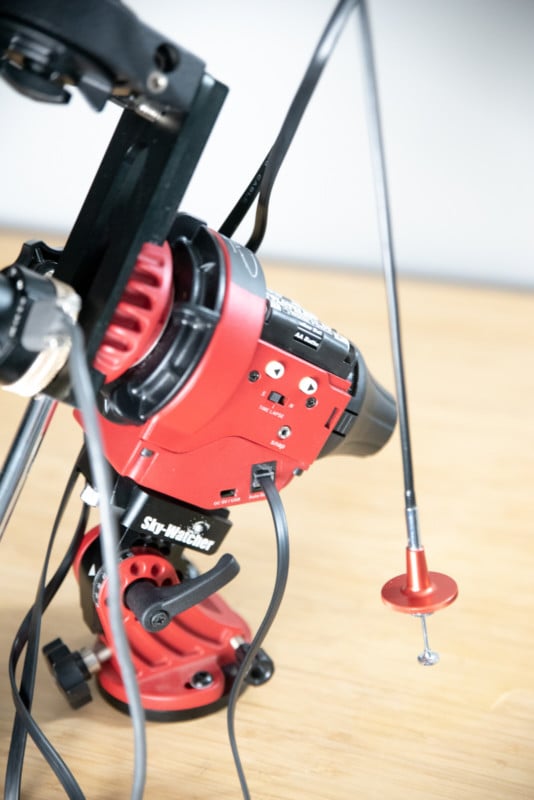
With a wide lens and a digital camera, all you need is a tripod to take these photos. With film and these very long exposures, the Earth’s rotation is a big problem — you’ll end up with star trails (which is a fun type of photo to take). The solution to this problem is a star tracker, a mount that precisely rotates your camera at the same rate as the Earth (known as sidereal rate). I use the Sky-Watcher Star Adventurer Pro.
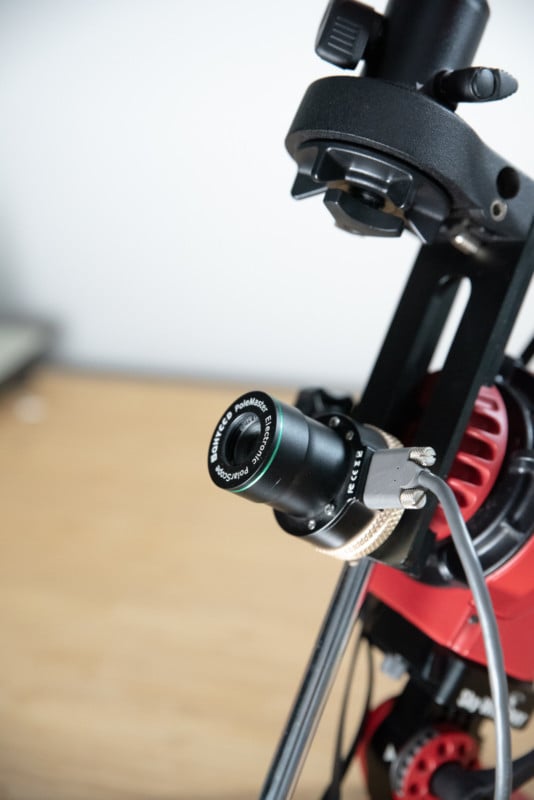
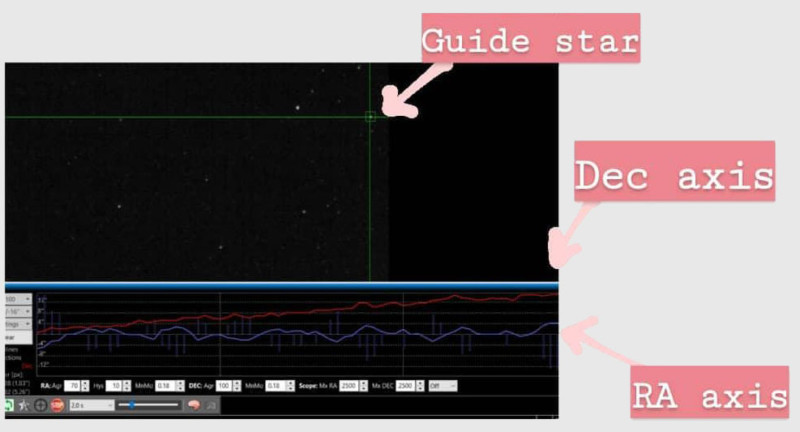
The first step to getting accurate tracking is polar alignment — the axis of the tracker needs be precisely aligned with the Earth’s axis of rotation by pointing it precisely at the North Celestial Pole or South Celestial Pole. The more accurately you can align the tracker, the longer you can expose before seeing star trails. I use a piece of equipment called a QHYCCD PoleMaster to help me get this very accurate. It’s a little camera with dedicated software to monitor stars near the pole and tell you how to adjust your mount to align it.
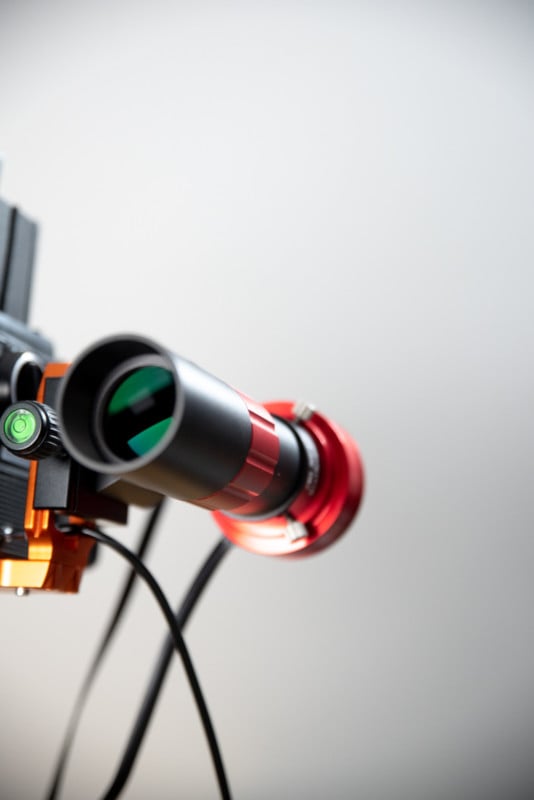
When shooting on medium format cameras, the fastest lenses are typically f/2.8 or f/3.5, so you’ll be tracking exposures of greater than an hour. This is beyond the normal scope of a tracker like the Star Adventurer but there’s a way to increase its performance even more. It’s a feature called guiding, which is yet another camera with a scope (this time aligned with your imaging camera). It looks at the stars near your imaging target and monitors the error in your tracking, it then sends pulses to the tracker to correct these errors. I use a ZWO 30mm/f4 guide scope with an ASI120MC-S camera and PHD2 guiding software.
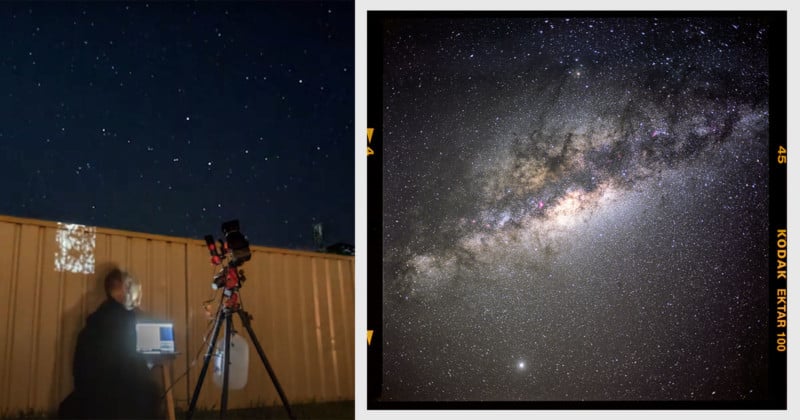
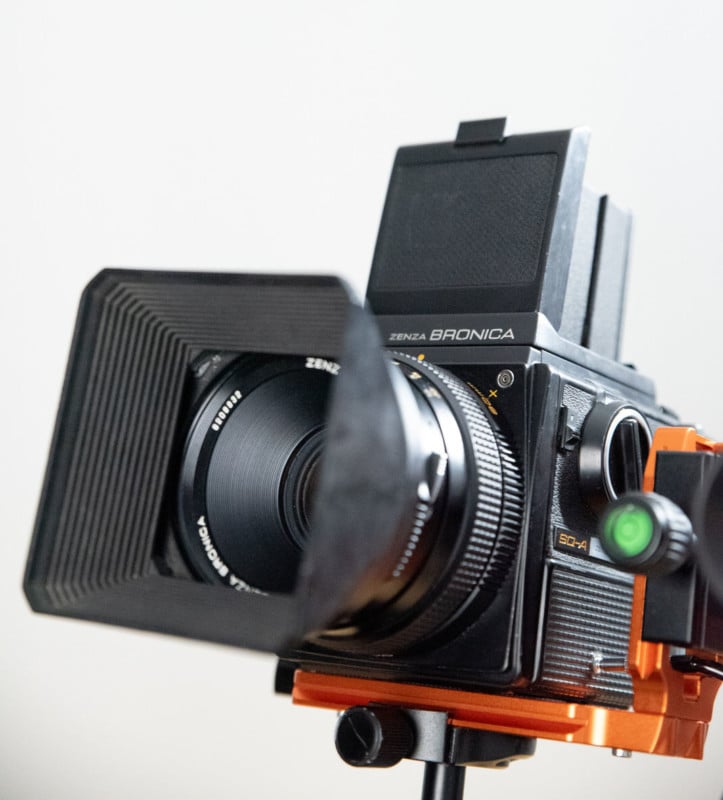
My camera is a Bronica SQ-A with a Zenzanon 80mm f/2.8 lens.
Here are two timelapse videos of my rig in action (the first one is in my backyard):
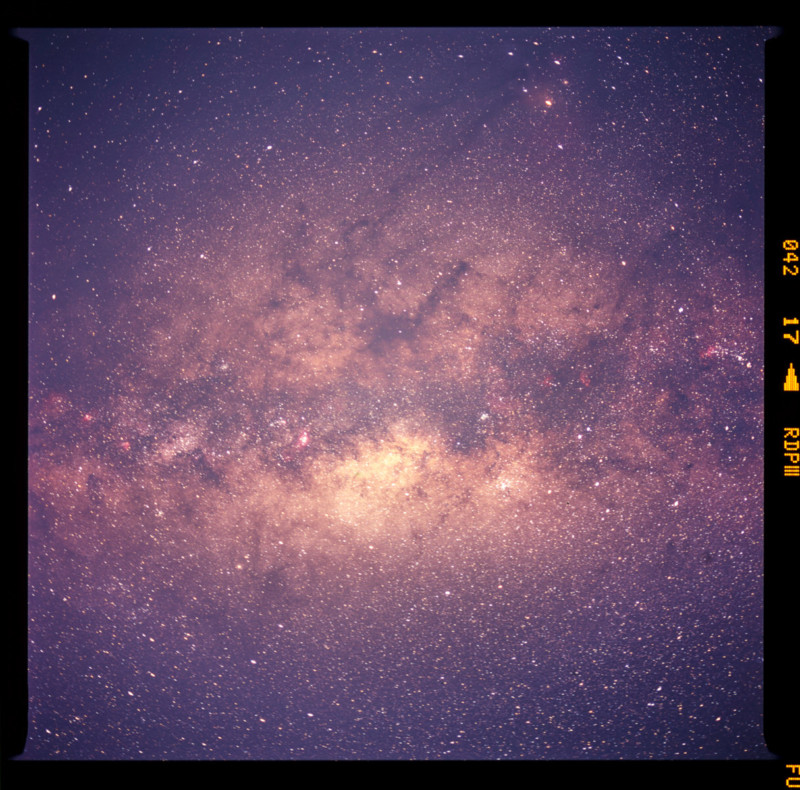
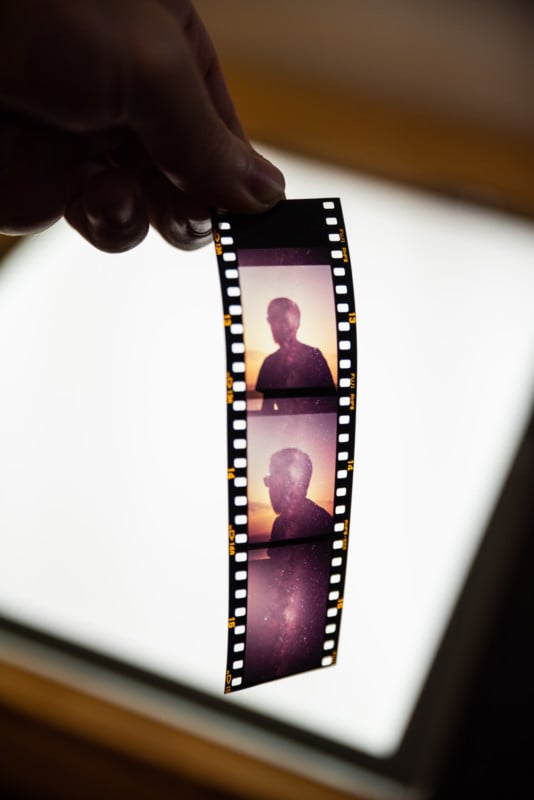
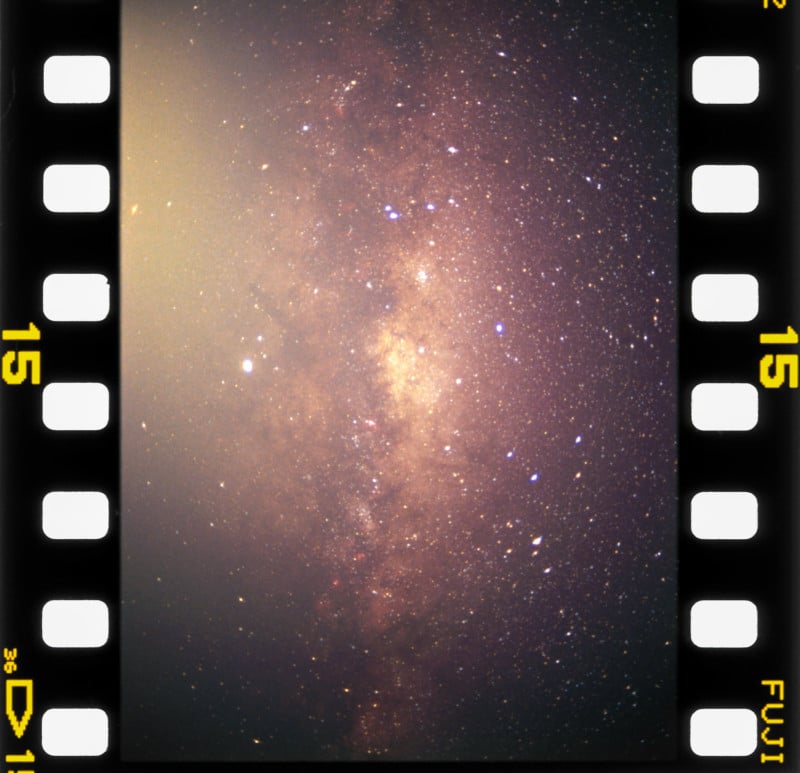
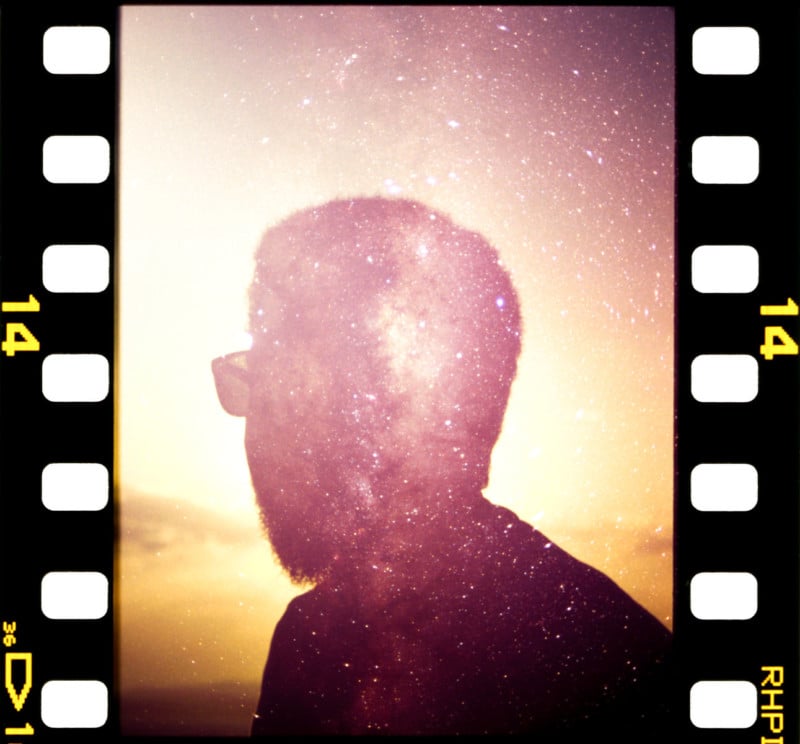
The Results
Here’s a video of the above slide seen through an enlarger:
I can’t do darkroom prints with slides but I can with negatives (like the Ektar shot below), so this was mainly to use it as a projector.
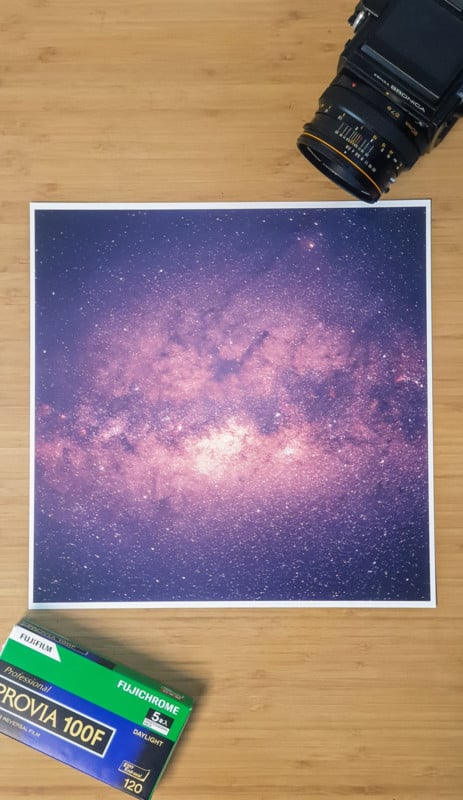
Here’s an inkjet print I made of the photo:
Here’s a photo shot on Ektar 100:

I also shot some exposures on expired 35mm Provia 400f using a Nikon FM2 35mm SLR and a Nikkor 35mm f/1.4.
You can find more of my work on Instagram and buy prints of my photos on my website.
About the author: Jason De Freitas is an experimental analog photographer based in Australia. The opinions expressed in this article are solely those of the author. You can find more of De Freitas’ work on his website and Instagram.