Reaching the Megapixel Limit (for 35mm Camera Scanning)
Since I first started camera scanning, I’ve always advocated using the highest resolution camera you can get ahold of. (My first camera scans were with the 1.3-megapixel Nikon E2n, so it’s been a long road.) That advice is changing.
Table of Contents
Diffraction-Limited Resolution
The main problem is not camera design or lens design — it’s physics. As light passes by the blades of your aperture, it bends. But it does not bend equally for all wavelengths of light, so you get a scattering of light.

When you shoot at a large aperture, a smaller percentage of light rays are passing closely to the aperture blade, so the scattering is limited and things look sharp. As you close your aperture down, a higher percentage of the light rays scatter on top of each other.
When the individual pixel sensors are large, this may not create a decrease in apparent sharpness. But as the pixel wells get smaller (so you can get higher resolution), the effect becomes very pronounced. Sharpness falls off rapidly at some point. Higher pixel density requires the use of wider apertures in order to take advantage of the full camera resolution.
Here are three photos made with the same camera and lens:
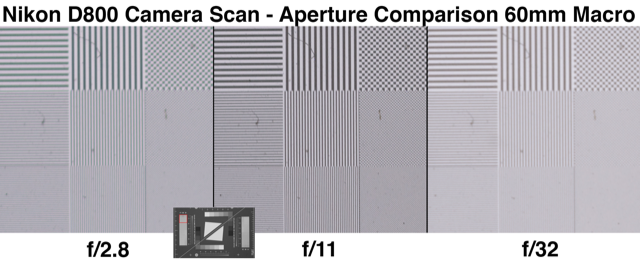
At the widest aperture, (left image) the soft focus is caused by the chromatic aberrations and focus imperfections on the outer edge of the lens elements. As you stop down, you get to the sweet spot of the lens and the sharpest image (center image). And as you continue to close down, you run into the limits of diffraction (right photo), even though the lens itself is likely to have the fewest imperfections in this part of the glass.
Not Just for Copy Work
Of course, the diffraction limits are not just an issue for copy work. This same effect shows up in your regular photography as well. That lens that looked good at f/16 with a 14-megapixel camera will show significant softness with a 45-megapixel camera. (Run a full set of test frames at all apertures, and you’ll see what I mean.)
Here’s the Trade-Off
When you use a very high resolution camera, you are going to be limited to using wider apertures, in order to avoid diffraction problems. Unfortunately, this may lead to a depth of field problem for scanning film that is not perfectly flat or for cameras that are not properly aligned with the film. So the marginal resolution increase you get with more megapixels may be entirely lost to a lack of critical focus across the entire frame.
Your Lens is Probably Not Made for This Task
Diffraction limits are a theoretical problem. But there are some real-world issues at work here too — ones that are more likely to show up with the high megapixel cameras and high magnification.
Modern professional macro lenses are generally very good, but they are typically not optimized for 1:1 reproduction. Usually, manufacturers try to balance performance between general use and macro use. And except for the Coastal Optics ($5,000), DSLR lenses are not apochromatic, so there’s an inherent prismatic effect at all apertures.
Can’t We Fix This Somehow?
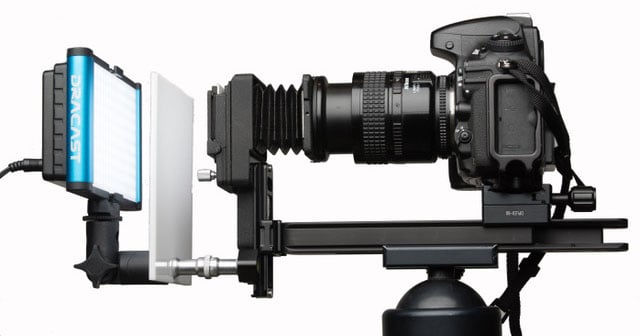
Sure, there are a bunch of technical approaches to fix the problem. You could try glass mounting the film, but that comes with a lot of other workflow problems — newton rings, dust, reflections, and slower workflow to name just a few.
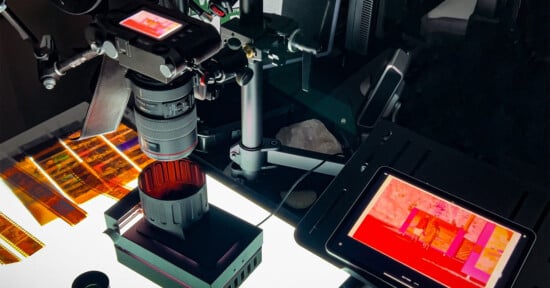
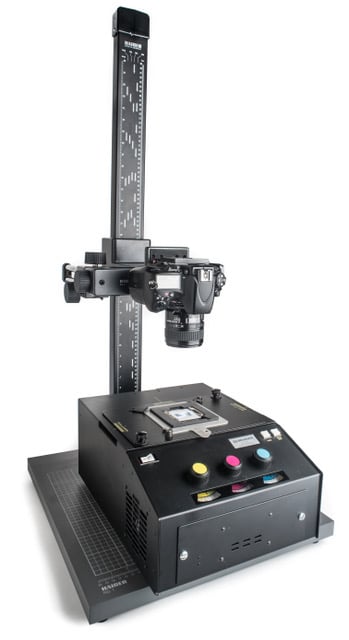
You could use very precise hardware to calibrate the alignment of the camera with the film, in order to make sure they are exactly parallel. There are several systems that have this precision built in. Digital Transitions makes some very high-end copy stands with Phase One backs, special apochromatic macro lenses, and lots of really nice film holders. They are also cost as much as a BMW (and not a crappy BMW, a nice new one).
Fortunately, There is Good News
So here’s the good news. Most 35mm film does not really benefit from scans over 30-40 megapixels. There’s just not that much image information in the film. You might get a better scan of film grain, but that’s unlikely to show up in any normal usage, even on very big prints.
The FADGI guidelines are considered to be the go-to best practices for museum scanning, and they recommend 4000 PPI for 35mm, which translates to a little more than 20 megapixels. I like higher resolution, but not so high I bump into the focus problems described above.
Again, I strongly suggest making some test prints, ideally at very large sizes. Or throw the images up on an 8K TV if you have access to one. This is a better test of actual viewing experience than zooming in with Lightroom or Photoshop.

The Bottom Line
For 35mm, you can use that 24-45 megapixel camera and make fabulous camera scans which are suitable for any use that most people will ever have. You get more margin of error in your hardware, alignment and setup. The cameras cost less, and they can use widely available lenses.
When scanning medium and large format film, you can put that 50+ megapixel camera to good use. Because you are not focused at such a close range, you’re not pushing your lens so close to the limits. And the greater camera-to-subject distance allows you to use a larger aperture while still avoiding alignment and flatness problems.
In any case, as you put a camera scanning rig together, I strongly suggest doing critical focus evaluations at multiple apertures, and pay lots of attention to the center and all 4 corners of your scan. If it’s too hard to get uniform sharpness with very high megapixels, try using a lower megapixel camera and check the results.
About the author: Peter Krogh is a photographer, writer, and software designer. The opinions expressed in this article are solely those of the author. Krogh is the author of six books, including The DAM Book 3.0 and Digitizing Your Photos with Your Camera and Lightroom. He is the new Chief Product Officer at Tandem Vault. More info at www.theDAMbook.com.