How to Shoot People-Free Photos of Crowded Places
It’s more and more difficult these days to photograph places without crowds or cars. One of the strategies that can help achieve that is to wake up early and be there at sunrise, but in very popular places, there will be other photographers with the same idea as you. So, how can we take a picture of a scene without this crowd?
You also can remove wires or garbage from a particular scene, but it is also possible to remove them using Photoshop. But some scenes can be very difficult to work with because there are too many things going on.
With things like people and cars, an important thing to note is that sometimes they can stay in the same spot for a very long time, or they can move very fast, and there is no moment in a scene to avoid having someone constantly in our picture.
Enter a very handy tool in Photoshop. It’s the Blend Mode of Smart Objects, and two blend modes that help you work with such scenes are Mean and Median.
I’ve found Mean to work better when you have water in your scene. It makes water to look more smooth.
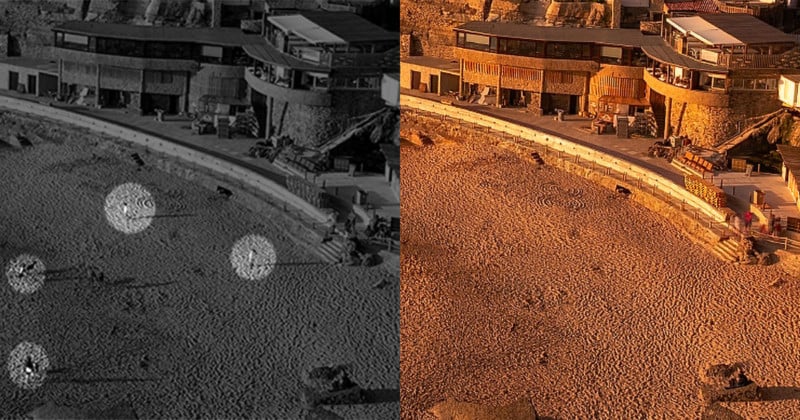
This picture is from Portugal, Azenhas do Mar — I combined about 200 frames to create it:
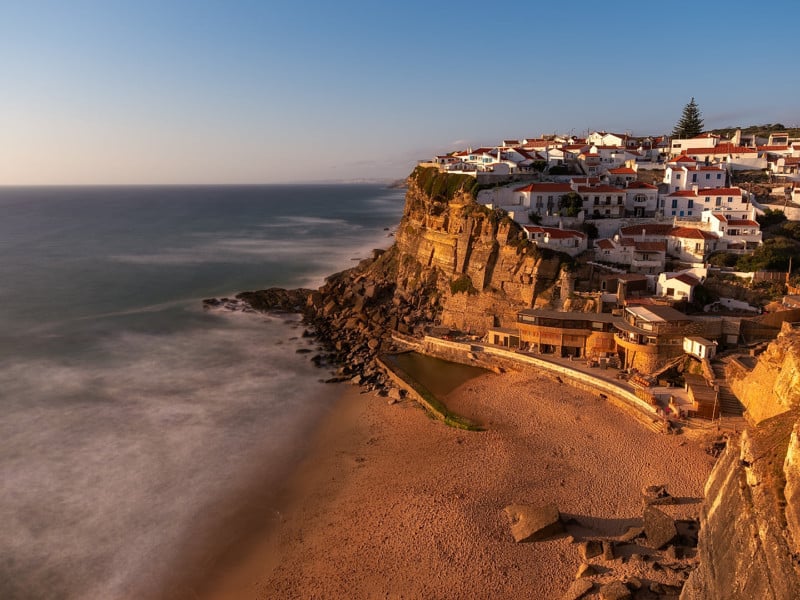
This beautiful light is available only at sunset, so I had to take this picture when there were many people on the beach and on the stairs.
I understand that some would like to see these pictures with peoples, but I wanted to have a picture of only that village without people. Also, I do have other pictures from these places with people, so I do like to include people in scenes as well.
Here is one crop from one of the raw file:

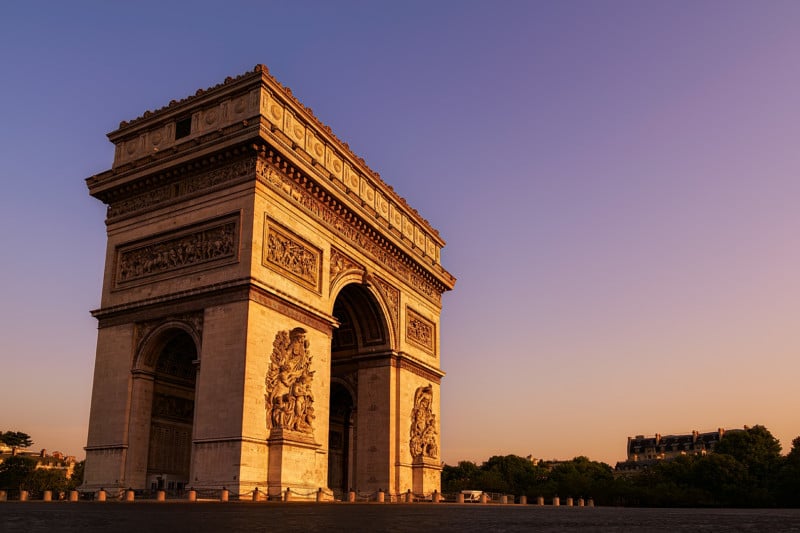
Here is another picture of the Arc de Triomphe in Paris, also at sunset — it’s also about 200 frames combined:
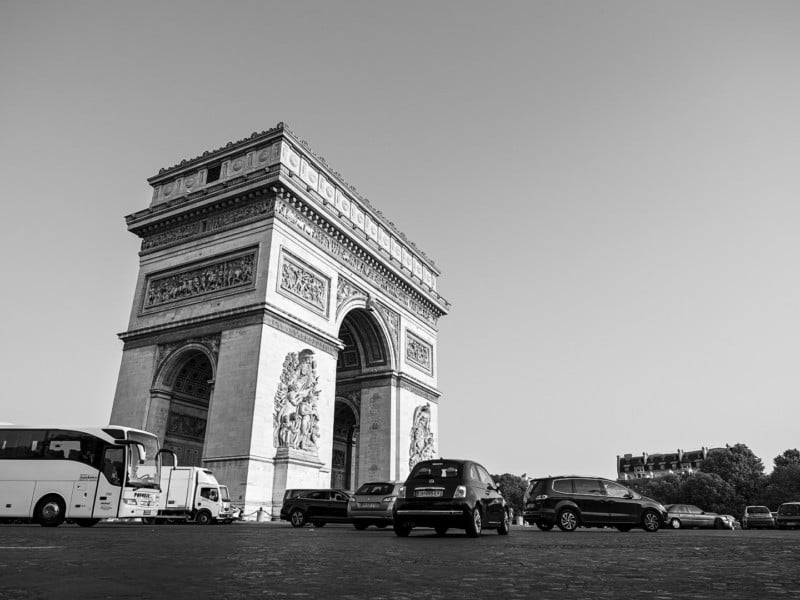
Here how it looks in just one frame I used showing lots of cars and people around:
Here’s how you can do this technique yourself:
You have to take multiple pictures of the same scene with a tripod (or even without). A tripod will help you to combine pictures faster since Photoshop will not need to align pictures for you.
Try to take as many shots as you can (but not so many that light is completely different in your scene across the frames).
Make sure that for every single spot in your scene, you have at least one photo without someone or something covering it.
It can be 30 frames. It can be 1,000. It all depends on the busyness of your scene.
Next, you need to make simple adjustments to your raw files. If you have few files, you can open them directly in Photoshop, but if you have a large number of files (something like 100 or more) I would recommend saving them as tiff files and then working with those.
In Photoshop, under the File menu, go to Scripts, then Load Files Into Stack.
If you have opened your files from Camera Raw, click on Add Open Files. If you have tiffs, then hit Browse.
Make sure you checked both boxes like in this screenshot:

Even if you used a tripod, it is still better to have Photoshop align your pictures, as there is always a risk that in the time you were shooting your tripod moved slightly.
After Photoshop does its magic of aligning, go to the Layer menu, select Smart Objects, then hit Stack Mode. Chose Median or Mean. You have to make your choice based on what works best with your work. As I wrote before, in my experience, Mean works better with pictures that have water in a scene. It makes water more silky, more smooth.
That’s pretty much it. But you should know that Photoshop may not always delete all people or subjects you want to remove, so you may have to fine-tune it at the end.
This method can be used if you do not have ND filters (which can help you achieve a similar thing by shooting a long exposure photo), and it actually gives you an advantage over using an ND filter. Here’s why: if you photograph the sky with trees or something else that is moving, with ND filter those objects will be blurred because of wind, but when you have let’s say 300 separate pictures, you can bring back your sharp trees and keep your sky exactly as you want it.