Adobe Brings More AI-Powered Tools to Photoshop on iPad

Adobe has announced its Spring update for both Adobe Photoshop on the iPad and its other freehand image app, Adobe Fresco. By taking advantage of the iPad’s new M1 Silicon chip, as well as the precision of the Apple Pencil, Adobe has brought several new desktop-grade features to the Photoshop for iPad app including Content Aware Fill, Remove Background, and Select Subject Portrait Mode, which can remove background with just a simple click.
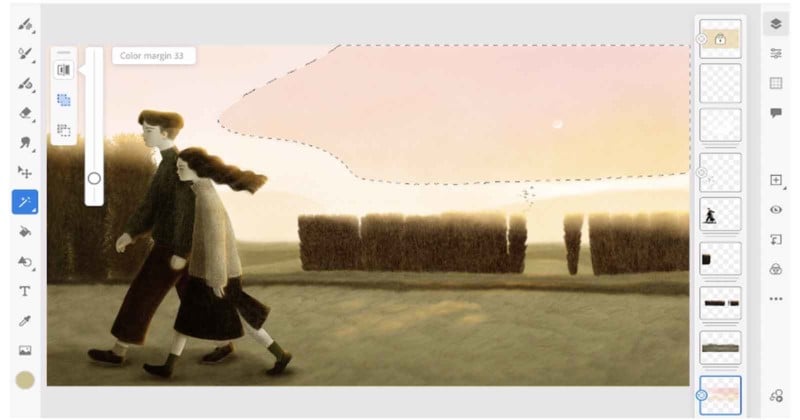
Content Aware Fill, which has become a very popular feature in Adobe Premiere and Photoshop on the desktop, is able to remove parts of an image and replace them with whatever it finds around it. Users merely use the select tool to surround whatever part of the area they want to replace, then, by selecting Content Aware Fill, Photoshop uses Adobe Sensei’s machine learning algorithm to analyze the scene, remove the unwanted content, and fill in the space with a natural background that blends in.
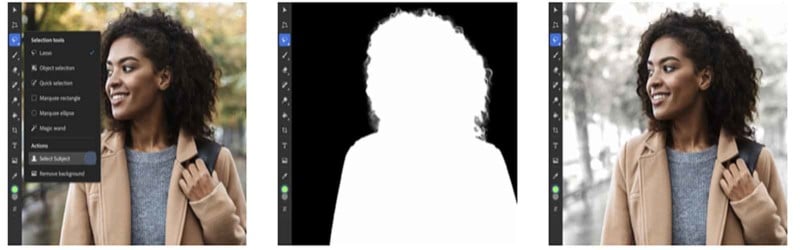
Select Subject Portrait could be the easiest of the new features. Using Adobe Sensei, the app will then analyze the scene and isolate the subject from the surrounding background. The app is optimized to select people and their hair to make it easier to make non-destructive changes without losing any details of the subject.
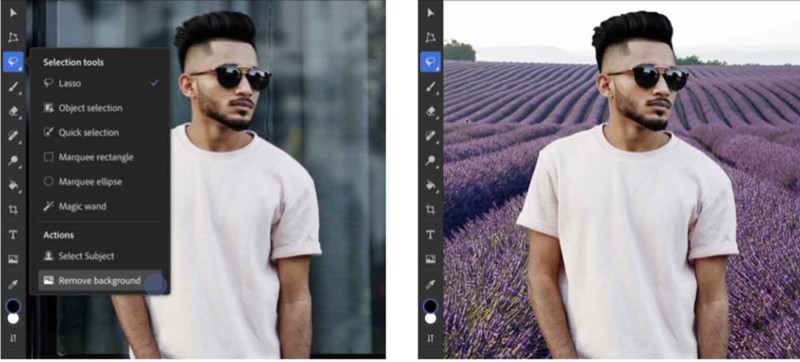
The Remove Background feature is rather self-explanatory. With it, Photoshop creates a layered mask and hides the background so that the subject is available separately from the background.
Other new features coming to Photoshop for iPad include access to the more than 20,000 Adobe Fonts from directly within the type tool, the ability to load custom fonts, rename a document while editing it, sync the document to the cloud on-demand, and view pins and annotations left by others on documents users have shared from the commenting panel.
Adobe has also included three new tone features for quickly enhancing or balancing out the tone of a scene. Auto Tone, Auto Contrast, and Auto Color are all popular Photoshop commands for one-tap solutions to correct tonal issues or color imbalances, taking extra steps out of adjusting photos and continuing on with the tasks at hand.

In Fresco, three new features have been added: Reference Layers, Liquify, and a Magic Wand. With Liquify, artists can distort any area with the same tools found in Photoshop to push, pull, twirl, pucker, or bloat an area.
With reference layers, Adobe Fresco can now keep line layers separate from fill layers, a blessing for animators who seek to refine the outline of a drawing without affecting any color work that has already been done.
Much like in Photoshop, the Magic Wand provides the flexibility to quickly select a colored area without having to manually trace outlines. Users can just select a general area, and then use the slider to further isolate a selection until the desired amount is selected.
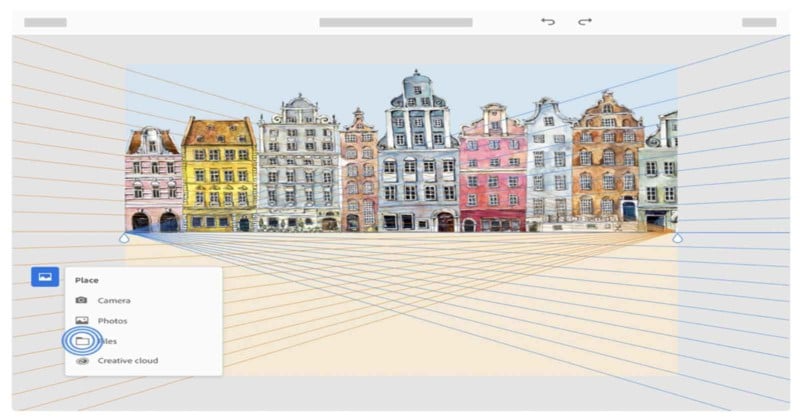
There is also a “remember brushes” feature which keeps track of the history of brushes used, no matter how long it’s been since. Additionally, perspective grid capture uses Adobe Sensei to analyze a drawing or image to work out the perspective and then lays out a grid. Not to be forgotten are Manga brushes that allow users to create that iconic Japanese comic style. Lastly, Adobe has added new accessibility features that enable users to more easily navigate Fresco’s keyboard and locate content on the canvas with new labels and panel displays.