Stacked Macro Photos of Exotic Plants Using the Nikon D850
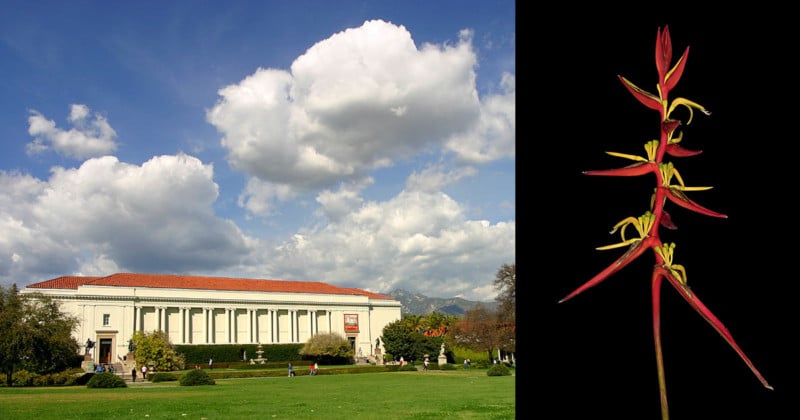
I recently tested the Nikon D850 with some of the world’s rare and exotic plants at the world-famous Huntington Library, Art Collections and Botanical Gardens outside Los Angeles.
The process is similar to an MRI, where the imaging equipment moves across an object creating slices which are then composited to give a full image.
My journey toward developing my botanical art and this perspective began in the depths of the Amazon, where I was shooting landscapes but found myself captivated by the tiniest of living things on the rainforest floor. Tiny leaf cutter ants and small lizards which changed colors to camouflage themselves were overlooked by our group, and the tiniest of flowers were being stepped upon.
I trained my camera on these tiny living things, but I did not have the right equipment to capture these small flowers. On my way back to Los Angeles, I decided I would try to elevate botanical wonders to pop star status so viewers could see the provocative side of nature.
Early macro photography equipment, namely lenses, could only capture a small depth of field, which is not what I wanted. I wanted to create imagery that rivaled art, where the entire image is in focus. I wanted to give viewers a bees-eye view of nature.
So, I started experimenting with focus shift photography, at first using a robotic focusing rail called the Stackshot which had just come on the market. These devices control the camera and take a series of photographs as they move in closer to the subject, each image capturing a different area in focus.
Software arrived on the market which could produce similar results by controlling the camera’s lens, taking a series of photographs at different focal points. The resulting images can then be layered together using specialized focus stacking software. Both processes work well and helped me achieve the results I envisioned.
But now, Nikon has developed a new way to make this process accessible to the world of photography. The Nikon D850 makes it easy for any photographer to achieve these results natively in the camera. Nikon’s new Focus Shift Shooting technology is easy to use and does not require special hardware or software — nor being tethered to a computer — which makes it easy for photographers out in the field.
Nikon USA consigned a D850 camera to me to test the new technology and provide images and honest feedback. When I received the camera, I got the idea to test the camera at one of the world’s leading botanical gardens, The Huntington Library, Art Collections and Botanical Gardens, just outside Los Angeles.
The Huntington is set on more than 200 acres and is known for its rare books, manuscript, and art, stretching from the 11th century to the present. But the gardens and plants are the main attraction for me. The Huntington is a visual treat for photographers with a massive collection of rare and exotic plants from around the world.
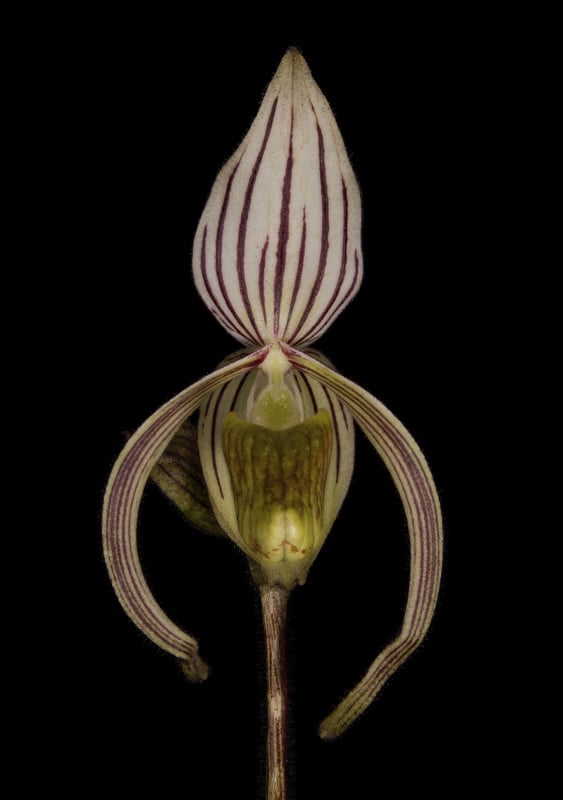
The team at The Huntington, led by director Jim Folsom, was incredibly gracious and accommodating, providing me with a private room and access to their valuable collection of orchids, ancient bonsai and vast gardens from which they allowed me to select specimens.
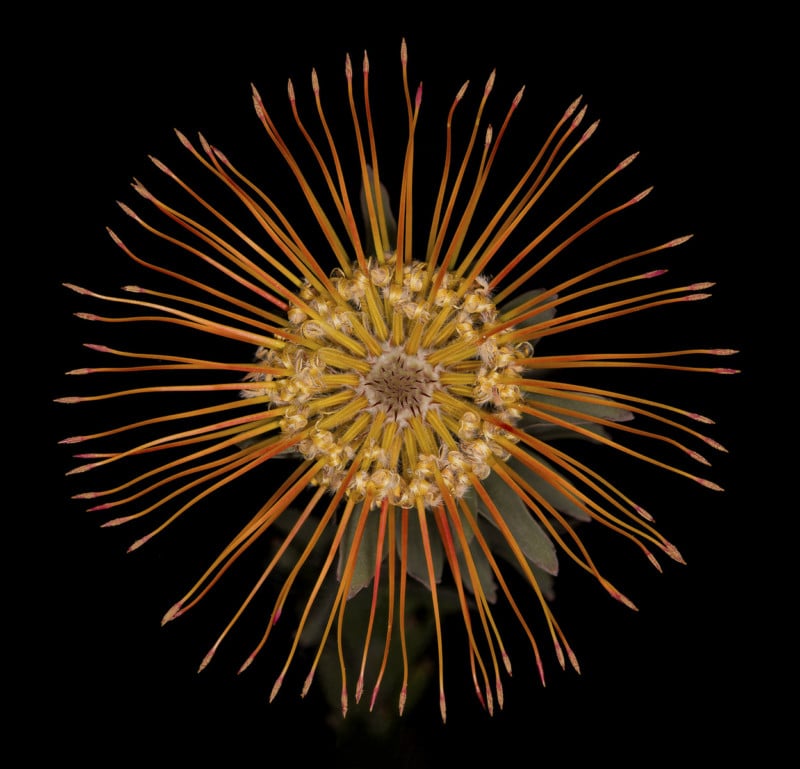
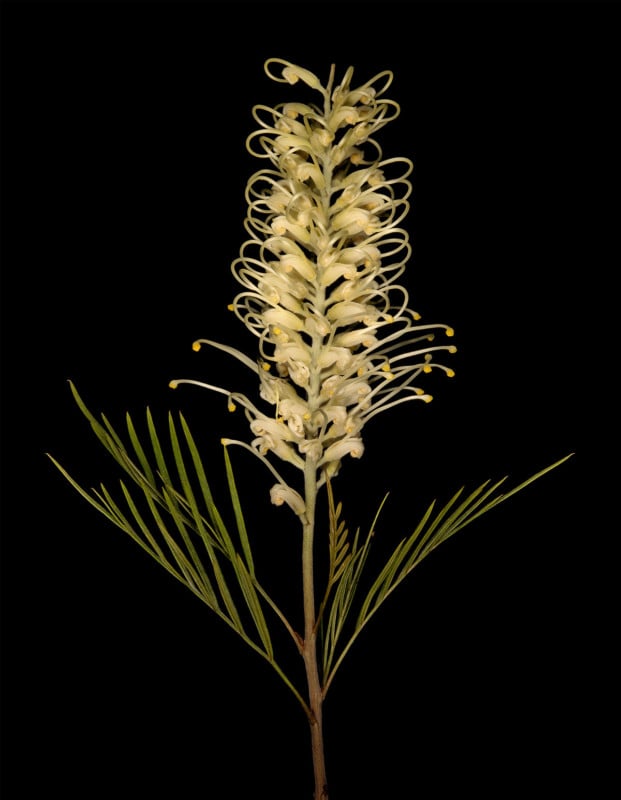
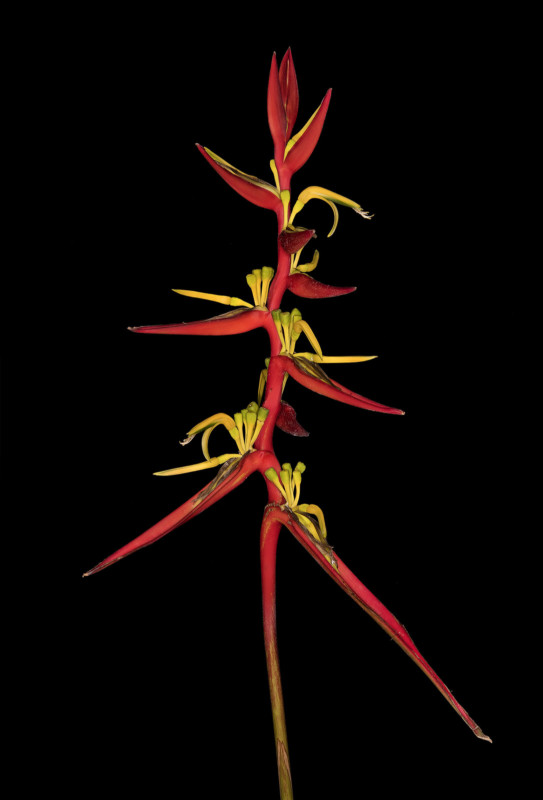
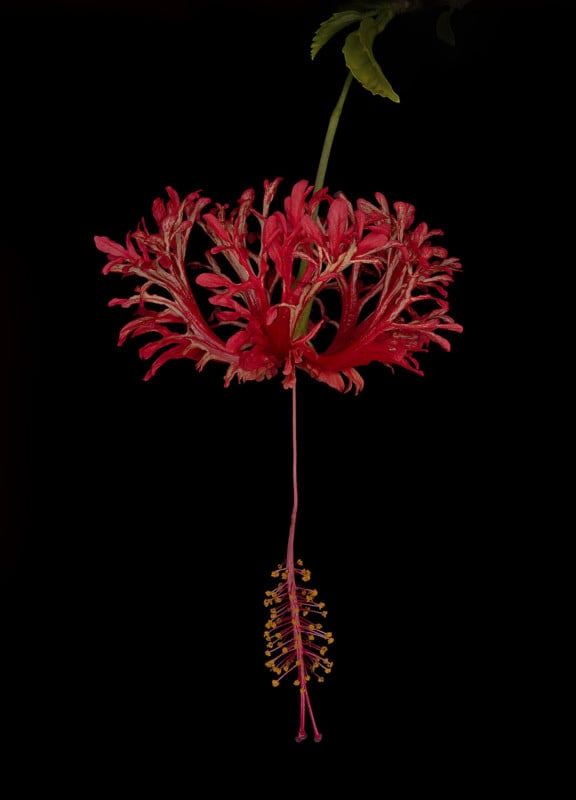
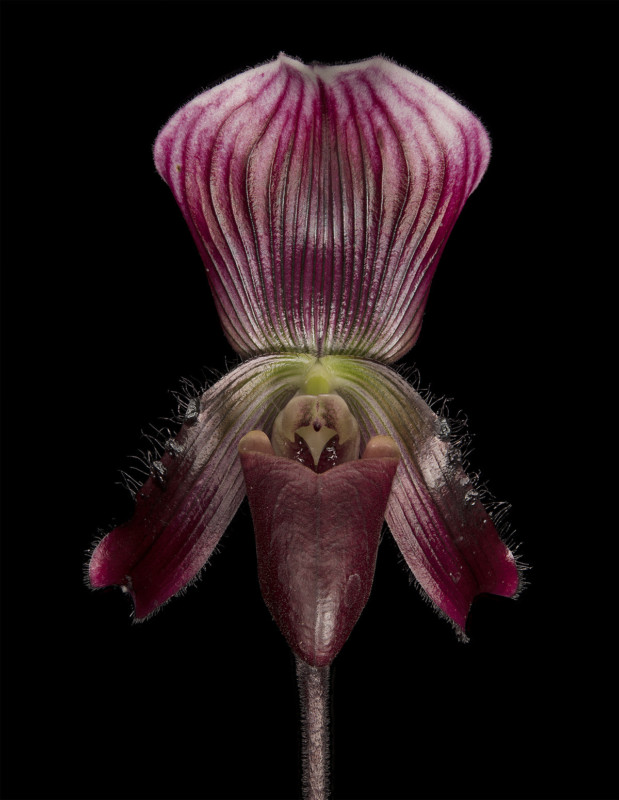
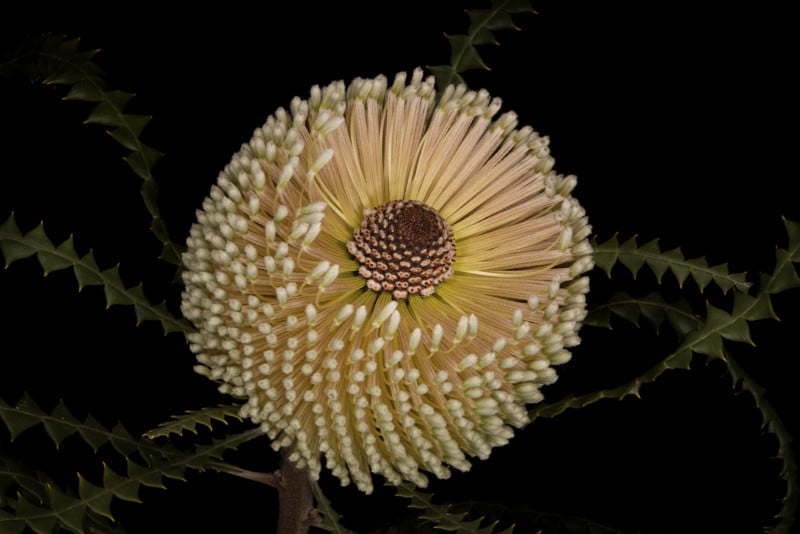
I particularly wanted to see how the D850 would capture and display details; that was more important than the artistic side of the work. And with a short time window, I did not expect to leave with images I would add to my portfolio. But when I left, I realized I had been able to do both: Show the detail the D850’s focus shift technology can achieve and capture images of nature which move me — and may move others.
The Setup
I created a portable studio onsite at The Huntington. The centerpiece, of course, is the Nikon D850. I modified the camera with a Nikon DK-17M Magnifying Eyepiece which makes it easy for me to see details through the viewfinder. I also use the LCD screen preview and zoom in to ensure sharp focus. I sometimes use the Hoodman H32MB HoodLoupe Glare Free Viewing Loupe Optical Viewfinder for D-SLR 3.2″ LCD Displays to magnify the display.
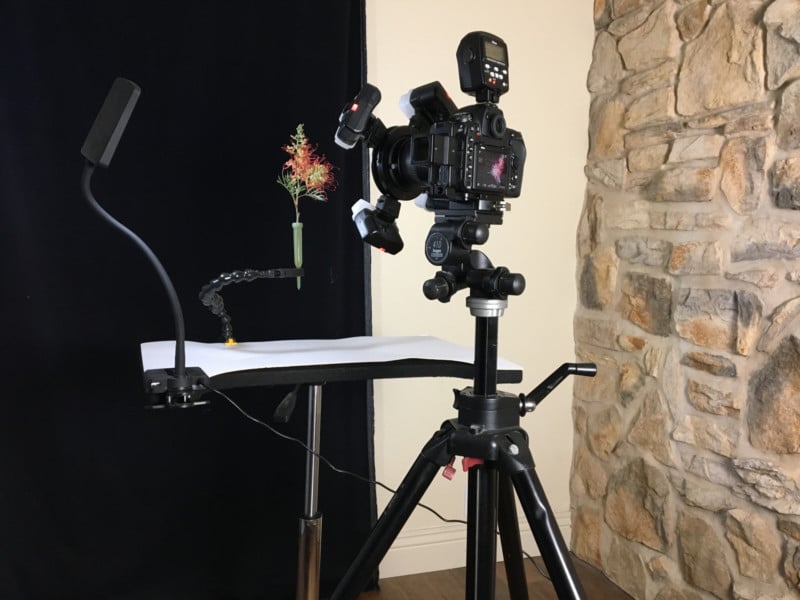
For lighting, I use the Nikon R1 Wireless Close-Up Speedlight System with four or five SB-R200s attached. I diffuse the light with Sto-Fen OM-SBR200SET Omni-Bounce diffusers. To scatter the light even more, I cut up small pieces of thin packing foam and place them inside the diffusers.
The camera is placed on an old Manfrotto 3251 tripod. Unlike the light carbon fiber Gitzo I use in the field, I like this Manfrotto tripod for studio work because it is heavy and doesn’t move even slightly when I am shooting a stack — and I can’t knock it down in my clumsiness. I also use a Really Right Stuff L-Set bracket for Nikon D850 attached to the camera and a Really Right Stuff plate on the tripod head.
I use a posing table with flat feet (no rolling casters) and place the subjects on the table in a vase. I use Wimberley PP-200 plant clamps to keep the plants steady and to position with precision. I use floral water tubes for single stem cut flowers to keep them hydrated; they can easily be inserted into the Wimberley plant clamps. I use an LED table lamp as a modeling light. I clip the light to a cheap tripod near the posing table to help me focus, and then I shut the light off before shooting.
I set my background several feet back from the posing table. If I am shooting against a white seamless paper or green screen background, I illuminate the backdrop with two Elinchrom Portalite strobes. I do not diffuse or modify the light because it will be diffused by the backdrop and I do not want to waste energy.
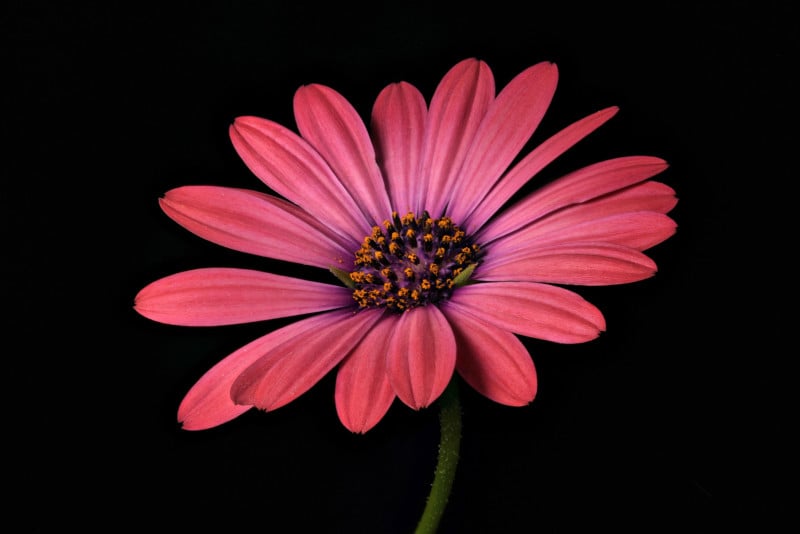
Because flowers tend to have translucent areas, I often reduce the background lighting so the flower does not appear faded or washed out. That means I typically have to remove the background for white backgrounds in post-production using Adobe Photoshop. When I shoot against black, I use a piece of velvet fabric with no illumination.
Mounting the Camera
I place my Nikon D850 on my tripod and I am ready to begin. I check the camera’s battery level to ensure the battery is fully charged. I set the Nikon D850 to Manual Mode with the shutter at 1/60 and aperture at F8 with an ISO of 64 and take a test photo. I disable lens vibration reduction (VR) since I will be shooting on a tripod.
Posing the Subject and Focusing
I pose and frame my subject. If exposure looks correct and the framing looks interesting, I focus on the area of the subject nearest to lens. The camera and lens are set to automatic focus, but I manually turn the lens counterclockwise and then slowly turn clockwise until the first areas of the image come into focus.
I will then turn the lens slightly counterclockwise again, effectively focusing in front of the image. I do this because, in many cases, there may be some small element, maybe a flower stamen, that I could have missed. Once everything has been adjusted to my satisfaction, I close the camera’s viewfinder eyepiece shutter to prevent light entering via the viewfinder and interfering with the exposure.

Understanding Focus Shift
Now, comes the easy part — using the Nikon D850’s built-in Focus Shift Shooting menu. Focus shift shooting requires you to set the number of shots you take and the step width between each shot. You want to make sure you take enough shots to cover the distance between the front and back of the subject. You also want to make sure you have enough overlap between each shot so you have complete focal coverage.
To make it easy, Nikon published a few tables online, which I downloaded. Since I am using a standard AF-S Micro NIKKOR 60 mm f/2.8G ED at aperture f/8, I can easily calculate the number of shots I need to take. I decided to set the focus step size at 3 because of the size of my subjects, which are relatively small.
Setting up the Focus Shift Menu and Begin Shooting
When you open up the Focus Shift menu, you will see several options to set:
- Start: This is the last thing you do to initiate shooting after you have set up the parameters in the menu.
- No. of shots: You can choose up to 300 shots. A safe bet for my work and camera settings is closer to 50, but for small subjects, it might take 100
- Focus step width: This is where you choose the amount the focus distance changes with each shot. The options available range from 1 to 10 with lower values for smaller steps, higher values for larger steps. I chose 3.
- Interval until next shot: This is time between shots, in seconds. I selected 00 to take photos at approximately 5 fps, which works with release modes S, CL, CH, and MUP. You can choose 3 fps for release modes Q and QC. If you are using flash and strobes, consider how long it takes for your lighting to refresh.
- Exposure smoothing: If On is selected, the camera will adjust the exposure for each new shot to match the immediately preceding shot. I leave this on.
- Silent photography: This is important. You can select On to silence the shutter during shooting, but if you are using a flash, the flash will not fire. So I leave this off.
- Starting storage folder: I select New Folder to create a new folder for each new focus shift sequence. I want my sequences of images in separate folders.
Then, just select Start and step away from the camera. I make sure there is no movement in the room when I shoot. That means I do not let anyone into the studio, I turn off any ventilation which could move the subject and I try to stay still. Any small amount of disturbance could cause the subject to move, and then the sequence of focused images would be compromised.
After the sequence of images has been photographed, I remove the card from the camera and transfer the images onto my computer using a Sony QXD card reader. I rename the folders with the name of the subject, date, and location.
Focus Stacking
Now that you have a stack of images, you can use a focus stacking software package to composite the images into a single, fully focused output image. Nikon made a great decision allowing you to choose how to process your final images. There are a number of good focus stacking software applications on the market, and the one I use is Zerene Stacker.
I simply add the images to Zerene Stacker and allow the software to align and stack the images into a final composite image. As I start the process, I can view each input photograph. In some cases, I may have taken too many shots, in effect photographing beyond the subject. I simply remove these input files and the software will re-align the images and develop the composite.
The Final Verdict
While I was at The Huntington testing the Nikon D850 Focus Shift feature, I created focus stacks in tandem shooting with my traditional method where I tethered the camera to a computer and used Helicon Remote software. The results were nearly indistinguishable to me. So, I decided to write down what I believe to be the pros and cons:
Pros:
- Extremely accurate at moving the focal point
- Excellent exposure accuracy with Nikon R1 Wireless Close-Up Speedlight System
- Great to use out in the field; no need to tether to a computer
- No special software needed
- Easy to use; easy to understand
Cons:
- Need to estimate how many images you need to take; you may overshoot and waste flash batteries and time
- Need to estimate the focus step width, or use or create a table for reference
- Requires more steps than tethered shooting with focus shift software: Take photographs, transfer to computer, then stack. When you are tethered, the images are already on the computer.
My final verdict is high praise for Nikon and the Nikon D850. This is an exceptional innovation and the quality of output images appears to match identically to the results I get with a focus shift software package – the exposure accuracy may be better with the D850. And the Nikon D850 provides a unique benefit which makes it an essential tool for anyone who is using focus stacking to create their work: You can shoot untethered in the field, allowing you to create images you could never have achieved this easily before.
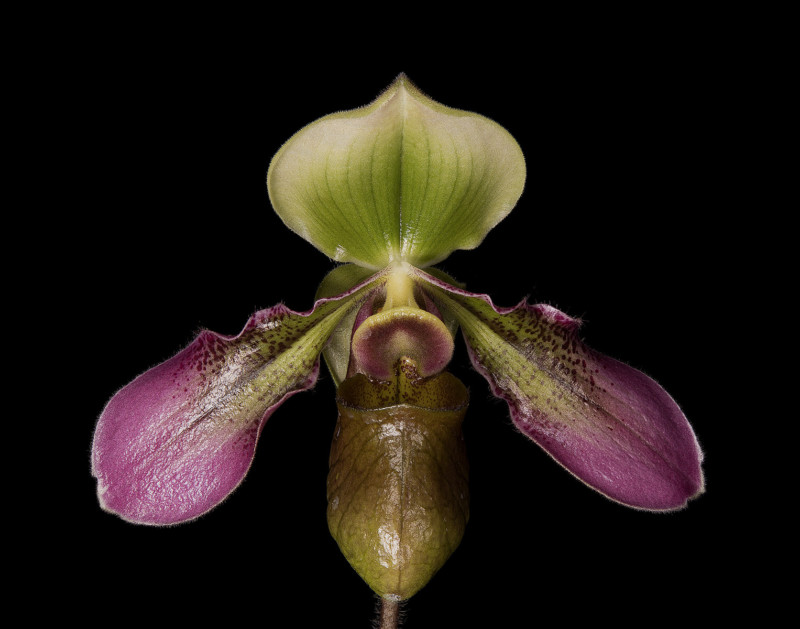
About the author: David Leaser is an award-winning fine art photographer and author from California. He is known for his highly detailed, close-up photography of botanical subjects. A key feature of David Leaser’s photographs is their extreme detail at closeup range. Leaser’s work has been compared by critics to 17th-century botanical painters because of the lifelike detail of his subjects against dark backgrounds. You can find more of his work on his website.
Image credits: Header library photo by Aaron Logan and licensed under CC BY 1.0