How to Photograph Bioluminescent Oceans
There are certain natural phenomena that most photographers would love to capture. Aurora, eclipses, meteors, rainbows, eruptions, lightning and tornados all present challenges to the photographer, not least of which is (with the exception of eclipses) having a camera pointed the right way when they happen. Bioluminescent algae is no different in this regard. Like all the most incredible natural spectacles it is hard to predict and tricky to capture.
Where to find it
The main issue with photographing bioluminescent oceans is finding the algal blooms in the first place. I’ve had emails from people in places like Japan and America who admired my images and then asked me where and when it occurs. They seemed to believe that this was a regular occurrence, like the tides, that could be easily predicted and viewed from specific locations. Unfortunately that is most definitely not the case and far and away your biggest problem will be finding the algae in the first place.
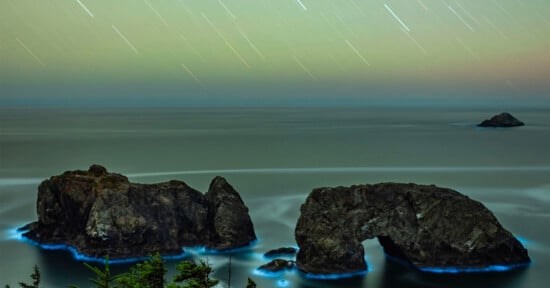
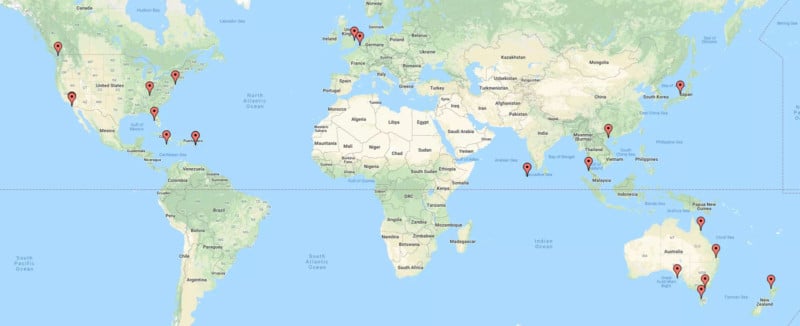
There are some locations worldwide where bioluminescent algal blooms have been known to appear and visiting one of these locations is definitely the best way of maximizing your chances of viewing it in the wild. It has been regularly seen in Puerto Rico, the Maldives, and America (particularly Florida) and also in several hot-spots around Australia. Here in Oz, the bioluminescence has been seen in Tasmania, Cairns, Port Lincoln, Port Phillip Bay, and the Gippsland Lakes – but I’m lucky enough to live a very short drive away from one of the most reliable hot-spots – Jervis Bay.
The common link between these locations is that they are at the end of a tidal circulation area, in which flotsam and jetsom traditionally wash up. The dinoflagellates in the water accumulate and get deposited in these areas on an incoming tide. In the case of Jervis Bay, the natural circulation of the bay often leads to the depositing of ocean matter on the beaches on the southern side.
“The primary source of flow-agitated bioluminescence is dinoflagellates,” the Scripps Institute of Oceanography writes. “These single-celled organisms are common members of the plankton—tiny marine plants, animals or bacteria that float on or near the ocean’s surface.”
So to maximize your chances of seeing the bioluminescence, concentrate on an area where there has been more than one previous sighting. Do proper research though, because there is a lot of misinformation out there. For instance, the tourist authorities in the Maldives (and several hundred tour operators and tourism websites) have been illegally using one of my photographs (taken in Jervis Bay here in Australia) for years, so don’t believe everything you see online – particularly if you’re expecting to see it in the Maldives!
When to find it
In order to see those glowing blue waves you need to be on the right beach at night and that means doing a bit of homework during the high tide that same day. Walk along the beaches where there have been sightings before (as the daytime tide is coming in) and look for a red algal bloom in the water. It’s not a dark red color, more of a light purple, but it is very distinctive.
There are various theories on what causes the algal bloom. I’ve spoken to researchers on the subject (who have used my images in their scientific works) and the general consensus is that they are a sign of imbalances on the water. This means that when there is one showing of algal bloom, there could well be another not long afterwards because the water simply does not recover that quickly. So if you hear of a sighting, it’s well worth checking out the same location a couple of days after that too.
How to spot it
Note where you see the red algae and then return at night. Bear in mind that tide and wind can easily move the algal blooms and you should be prepared to walk along the beach searching for it. On one occasion I saw a red algal bloom in some rock pools at a particular beach during the day, but when I returned at night I had to walk 2km to the east before I found the bioluminescence.
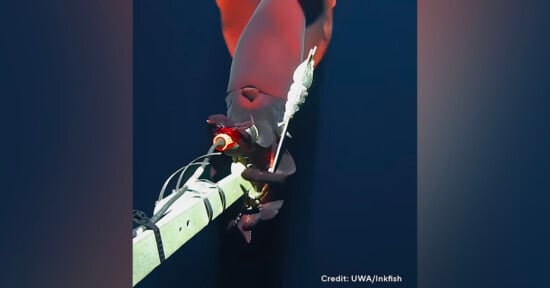
Also bear in mind that dinoflagellates only bioluminesce when the water is agitated. Therefore if there are no waves (such as at a lake) then you probably won’t see a thing. So grab a stick or chuck a rock in the water and see what happens. If you’re at the beach then take off your shoes and walk through the water along the beach and your walking will trigger the light show. The algae also get stuck to the plant-life and animal life and I’ve seen neon blue fish swimming through the water before.
How to photograph it
Typically speaking the same rules that apply for any long exposure/low light photography apply here. That means you need to open the aperture up as much as possible (fast prime lenses are excellent), use a high ISO and expose for 10 seconds or more. I always experiment with my exposures, starting off with a relatively quick long-exposure of about five seconds and then balance exposure time and ISO to get as clean and colorful an image as possible. You’ll definitely want to be shooting in RAW so you can get as much light information out of the shot in post.
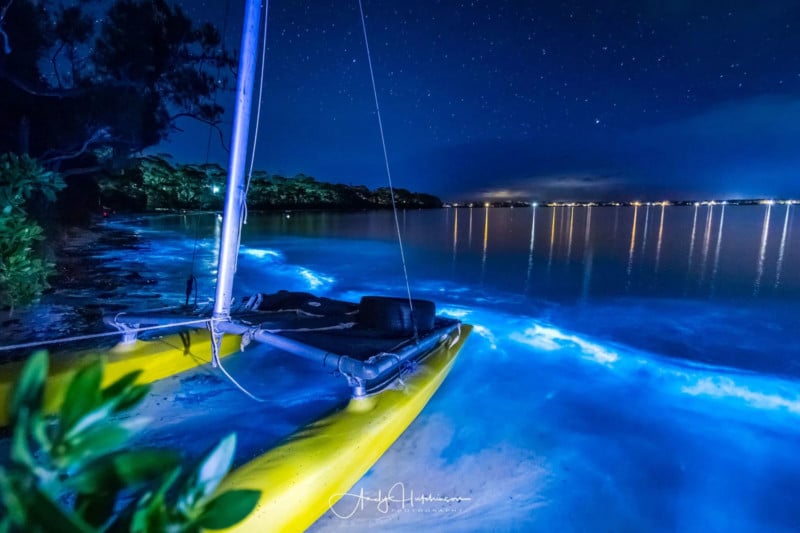
With regard to white balance, I find this much easier to handle in Lightroom and do not concern myself with getting it right on the beach. To the human eye, the algal blooms are actually a greeny/blue color, but since most photographers typically use an automatic night-time white balance setting (which will be very cool) they look dark blue in most photographs. I prefer the blue color myself and typically have my temperature set around the tungsten end of the scale at the 3100k mark.
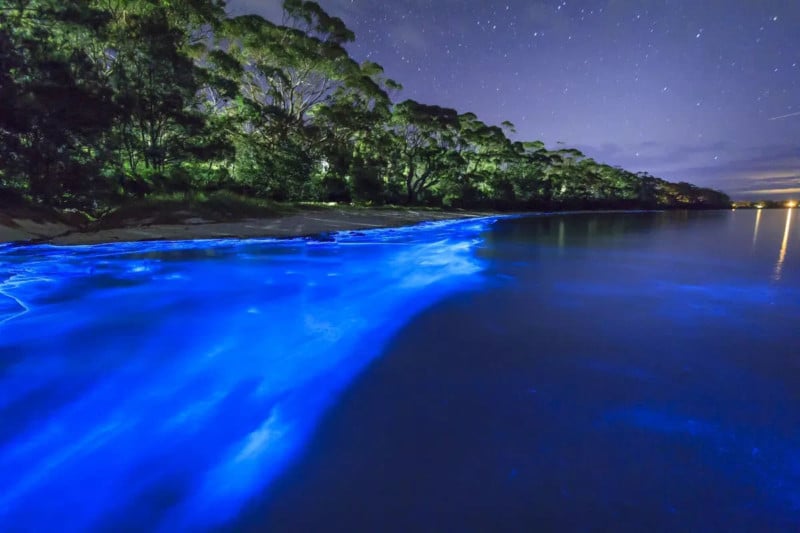
Obviously you will be shooting all of this on a tripod but, in your excitement, remember to mix things up a bit. Try shooting from very low angles, instead of head height. Remember that you can also alter your perspective too – my best shots were taken in the ocean looking back on the beach – to keep the tripod steady I pushed it as hard I could down into the sand and, as the waves were only ripples, it stayed perfectly stable for the duration of the exposure.
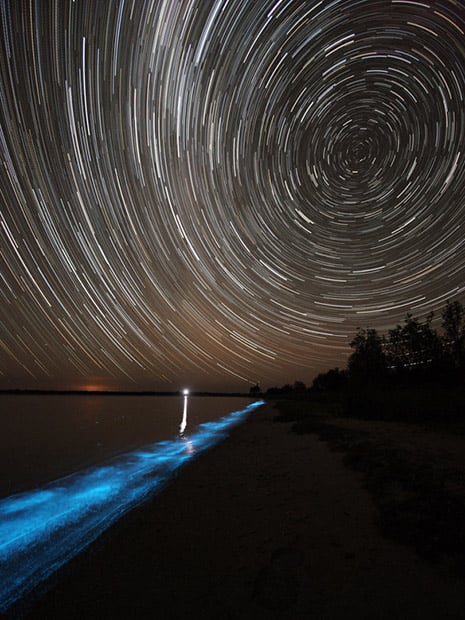
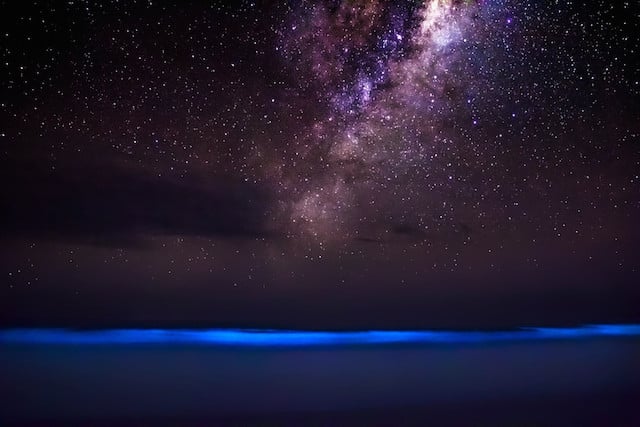
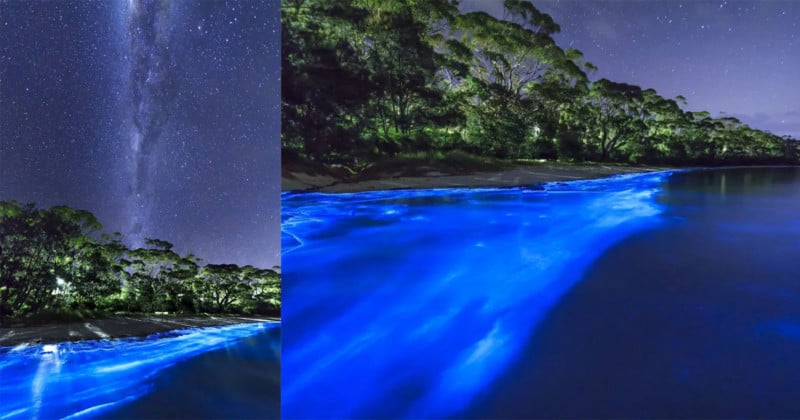
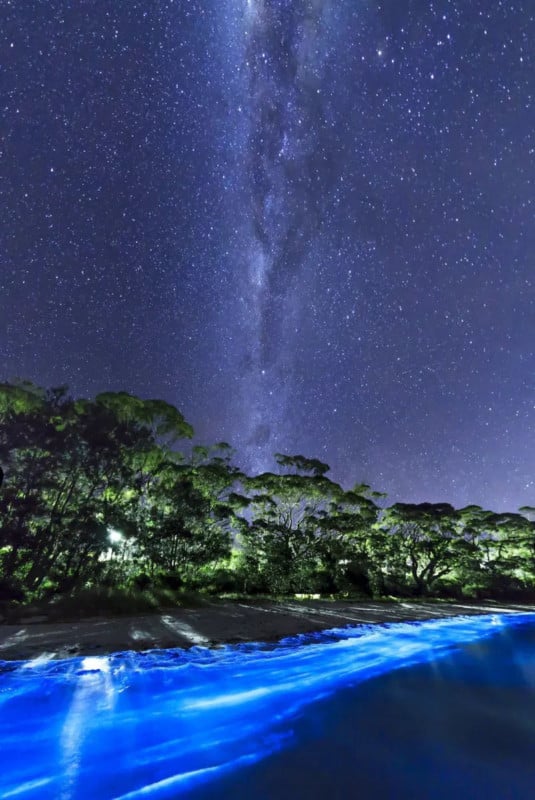
Including humans in your shot is perfectly possible by light-painting them with a torch once you’ve exposed for the algae. Alternatively, try and include the night sky in your shots – my favorite bio shot is one I took showing the Milky Way arching overhead.
Don’t forget to look
Remember to take your eye away from the viewfinder occasionally. As photographers we often forget to drink in the scenes that we are photographing, so focused are we on capturing it in the best way possible. And since natural phenomenon such as bioluminescent algae are rare, it’s entirely possible that you’ll only see it once in your entire life. So remember to look up from the camera occasionally and take a few shots with your mind’s eye for the memory bank in your head.
About the author: Andy Hutchinson is a photographer and journalist based in South Coast, New South Wales, Australia. The opinions expressed in this article are solely those of the author. You can find more of his work and words on his website, or by following him on Facebook and Instagram. This article was also published here.