6 Reasons Why Your Photos Aren’t Razor Sharp
Picture this: you come home after a great day out photographing and you’re excited to look through all the beautiful images you’ve captured. However, after importing them you realize that they’re all garbage because they’re blurry.
In a perfect world, you’d come home after every session with 100% of the images being tack sharp but unfortunately, that’s rarely the case. However, there are certain elements you should be aware of and take into consideration when in the field, that will reduce the likeliness of your images being blurry.
Listed in this article are some of the most common reasons why your images aren’t razor sharp.
#1. The Shutter Speed is Too Slow
The first and most common cause is a shutter speed that’s too slow. This can be because you’re using an automatic or semi-automatic shooting mode or you’ve manually chosen a shutter speed that isn’t ideal for the situation.
Typically, it occurs when photographing during the Golden Hour or other time of day when there’s less light. You’re unlikely to encounter this problem in harsh daylight.
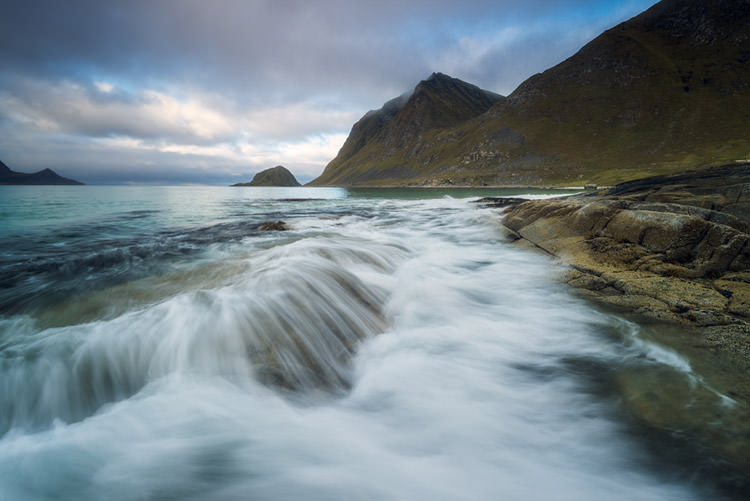
A rule of thumb is to never use a shutter speed slower than the focal length. For example, for a 14mm lens, I wouldn’t use a shutter speed slower than 1/14th of a second without a tripod. For a 200mm, I would avoid using a shutter speed much slower than 1/200th of a second or else it’s time to set up the tripod.
Alternatively, you can increase the ISO or use a wider aperture to obtain a quicker shutter speed. Keep in mind, though, that increasing the ISO and/or opening the aperture will also have an impact on the image quality.
#2. The Aperture is Wrong
This brings us to cause number two: you haven’t chosen an optimal aperture.
While there isn’t one correct aperture in each and every scenario, you should understand how it impacts the image. When using an aperture such as f/2.8 the overall sharpness will be lower than when shooting with an aperture of f/13.
At f/2.8, the sharpest point may be razor sharp but the rest of the image is out of focus, resulting in a blurry appearance overall.
When using a more narrow aperture such as f/22, you’ll notice that the overall sharpness is reduced. While the image is in focus from front to back, it is less sharp than what it would have been at a wider aperture.
Finding the ideal aperture for each scenario can be tricky to understand but it becomes easier the more time you spend in the field.
Techniques such as focus stacking are helpful when photographing scenes that have elements both close to and far away from the lens.
#3. You’re Causing Camera Vibration
Using a tripod is the most common tip when talking about how to capture sharp images. However, simply mounting the camera on a tripod won’t necessarily result in the sharp images you expect.
When pressing the camera’s shutter button, you create a small amount of vibration. While it might not seem like much, it’s enough to cause blur or softening when using semi-slow shutter speeds.
Make sure that you use either a remote shutter release or the camera’s built-in delayed shutter when the camera is mounted on the tripod. This will eliminate the vibration caused by pressing the shutter button and ultimately lead to a sharper image.
#4. The Tripod is Shaky
When I was new to landscape photography, I couldn’t for the life of me figure out why my images turned out slightly blurred: I used a tripod, the shutter speed was OK and I had a remote shutter. Wasn’t that the recipe for sharp images? Apparently not…
What I didn’t take into consideration was that my $20 tripod wasn’t sturdy enough to handle wind or even being placed in a slow river. Any motion around it caused it to vibrate, meaning that my shots were less sharp.
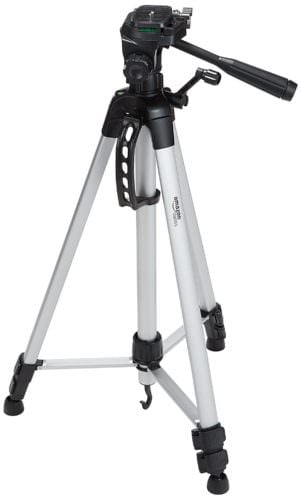
After breaking the third $20 tripod of the year, I decided to buy a higher quality tripod secondhand. Though it had been used for a couple of years, it was a good Manfrotto tripod and to my delight, it didn’t cause any vibration even in rougher conditions.
Your takeaway from this should be that you need to have a tripod that is sturdy enough to handle the conditions you normally photograph in.
It’s not necessary to go and purchase the most expensive tripod you find but I’d avoid the cheapest ones. The sturdier it is, the rougher conditions you can use it in. For example, I’d never use my light-weight hiking tripod for photographing Arctic seascapes.
#5. You’re Using a Low-Quality Lens
I don’t like focusing too much on the equipment you use as I’m a firm believer that you can capture beautiful images regardless of the tools you’re using. However, when it comes to image-quality there’s no doubt that high-end camera gear makes a difference.
You might have already heard someone say “you should invest in lenses rather than cameras”. The lens is most likely staying with you for longer than the camera and it’s more important when it comes to the sharpness of your images.
A low-quality budget lens isn’t nearly as sharp as a high-end version and even among professional lenses, there can be big differences in sharpness.
I recommend doing some research to find the best lenses for your camera within your budget and, if necessary, stick to having one or two rather than a bunch of them. You’ll be shocked when you see just how big the difference can be.
#6. It’s a Manual Error
The final reason we’ll look at is perhaps the one that hurts the most to hear; you’re focusing incorrectly.
Focusing shouldn’t be that hard, right? It sounds so simple! It’s not though, especially if you’re focusing manually… There are small margins and it doesn’t take much for the image to be out of focus. Here are two common scenarios:
1. Autofocus isn’t working well: While autofocus is a great tool on most digital cameras, it doesn’t always work as well as expected. This is especially true when working in low light as the camera struggles to see the details and find the correct focus.
2. You’re not manually focusing correctly: Manually focusing can be tricky. It’s a great way to get the exact focus you want but by focusing slightly too far in or out, you reduce the sharpness. Knowing where in the image to focus and how to obtain the sharpest focus takes time and experience to master.
Live View is of great help when you’re using manual focus. Zoom in 100% and fine-tune the focus until it’s at the sharpest.
The Final Step
Taking all of the above points into consideration will increase the likelihood of you coming home with sharp images. It doesn’t come without effort, though, and I strongly recommend consciously focusing on them when you’re out photographing.
A practice I’ve incorporated into my workflow is to regularly check the image display on the back of my camera and zoom in to see if it’s in-focus. I tend to do this each time I change my composition. It only takes me a few seconds but by doing so, I make sure the image is indeed razor sharp. If it’s not then I know I need to adjust the focus, shutter speed or some other element.
It’s better to make this a habit than to come home and find that all your images are out of focus and your efforts were wasted.