How to Fix Blurry Pictures and Take Tack Sharp Photos

Let’s consider a situation. You went out for a photo shoot with your trusty camera or phone. On location, all the photos looked sharp on the small screen and when you returned to base and opened the photos on your computer you found some photos had missed focus. Worse in some photos the entire image seemed shaken and out of focus.
Table of Contents
Problem #1: Camera Shake
First, let’s begin with understanding how a camera captures the image when you press the shutter button. The shutter opens for the duration set by the shutter speed and light falling on the camera sensor during this time gets captured as the image. And if the shutter speed is sufficiently slow it will capture light for a longer duration and along with it the movement of the light (in this case the reflection of the light from the subject).
If during the time frame when the shutter is open to capture, the camera is moved or shaken even by a tiny amount the movement gets recorded and the entire image (including the foreground and background) seems blurred especially at the edges. Single dots would turn into blurred lines in the image.

Camera shake happens even when you try to take a handheld image with the most stable hands you can imagine. If you hold up your hand at a distance and watch your fingertips you will find micro-vibrations and this gets translated to your camera too and eventually the image.
Solution: Use a Fast Shutter Speed
The first thing which you should try is to have the shutter speed as fast as possible. Maybe over 1/500 or even 1/1000. The faster the shutter speed the less camera movement gets captured and the sharper would be the image.
A commonly stated rule of thumb to reduce camera blur is to keep your shutter speed equal to your focal length when hand-holding your camera. So for example, if you are shooting with a focal length of 200 mm (full-frame equivalent) then ideally your shutter speed should not be less than 1/200th of a second.
This is just a general tip to keep in mind and it should be used with caution since this rule is rather old and does not factor in today’s modern camera technologies. You may be able to get away with using slower shutter speeds depending on your camera and lens.
Solution: Turn on Image Stabilization
Most modern lenses and even camera bodies have built-in image stabilization which is extremely suited for handheld shots. It’s advisable to have it on all the time, except for certain times which we will see later on.


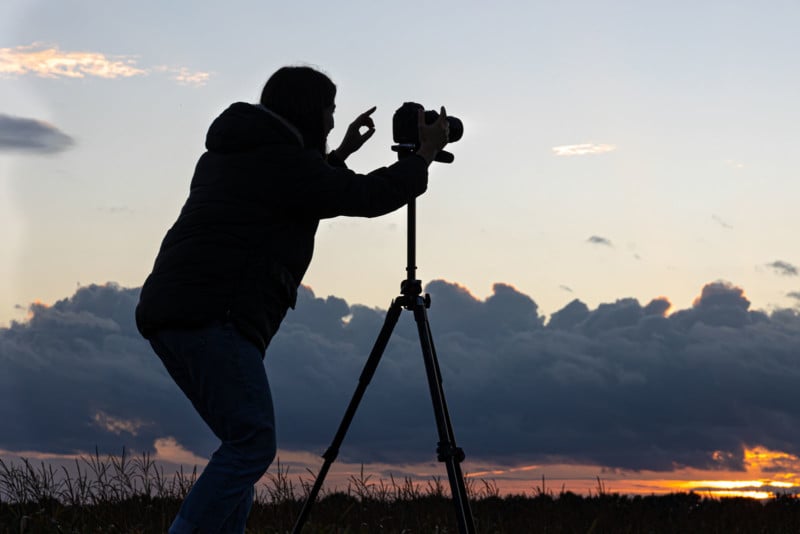
Solution: Use a Tripod
The most sure-fire way to reduce camera blur is to use the trusty tripod. Even while using the tripod if you want to reduce the minutest of vibrations (especially if you are doing astrophotography and the shutter duration is well beyond 10 – 15 seconds) incorporate these three settings/practices:
1. Use a remote shutter or a shutter release cable or use a timer to trigger the camera. Pressing the button to trigger the shutter causes a very small vibration which can affect the final image
2. Turn off the in-body stabilization (if the camera supports it) or the lens stabilization (if the lens supports it). These systems cannot detect whether the camera is handheld or on a tripod and thus might try to fiddle with the lens and actually create micro-vibrations even on a steady tripod)
3. Remove the camera strap or for that matter, anything hanging from your camera or tripod since these might get flung around in the wind and ruin your long-exposure shot.
Keep a note that the tripod itself should be on a sturdy surface. For example, if the tripod is on an unstable bridge or something with cars or buses going by then the whole purpose of the tripod could be defeated by the rushing air and road vibrations. Also, if you are shooting through the window of a car keeping your camera or arm rested on the window or the body of the car there are chances of a shake if the car engine is running.
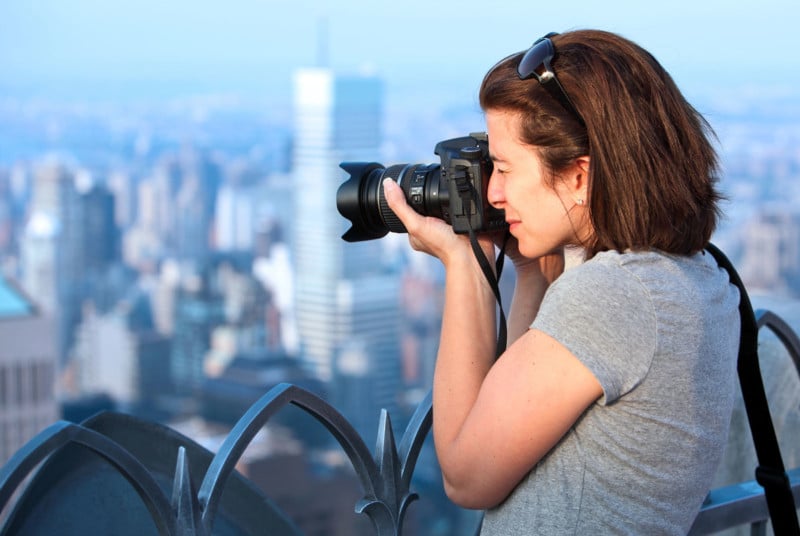
Solution: Hold Your Camera Properly
If the situation does not permit you to use a tripod then you can also try leaning on a wall or a sturdy object to balance and steady yourself. Leaning or resting the hand on a steady object gives additional support and greatly helps to reduce the micro-vibrations of your hand.
It is also important to hold your camera properly while shooting.
- Hold your camera’s grip in your right hand and cradle your lens with the left (if using an interchangeable-lens-style camera).
- Tuck your elbows in and prop them firmly against your torso for support to reduce arm shake.
- Place one foot slightly in front of the other to keep your body stable.
- Press your camera firmly against your face for additional stabilization.
Solution: Use Burst Mode
Sometimes using the burst mode on your camera also helps since the shots in the middle would be noticeably sharper as the initial jitter of the shutter button being pressed is reduced.
Problem #2: Moving Subject/Motion Blur
The second source of blurry images comes when the subject you are trying to photograph is moving. In this case, ideally, you would notice the background sharp and only the subject (or parts of the subject) hazy or blurry.

Solution: Use a Fast Shutter Speed
Again to reduce this one can have a higher shutter speed or try shooting multiple images in burst mode and picking out the sharpest one (usually the ones in the middle). While using higher shutter speeds, especially in low light conditions one needs to keep a tab on the ISO too because high ISO can bring in noise which reduces the imperceptible sharpness.
Problem #3: Focus Was Missed
This one comes up as the most frustrating one especially if you are shooting something crucial. You apply all the techniques of preventing blurry images and in the end, the focus was kept on the incorrect part of the photo. Especially if you are shooting with fast lenses (f/2.8, f/1.2, etc) if you miss focusing the camera will focus on the nose instead of the eyes. The depth of field is nearly razor thin at low f-stop numbers.
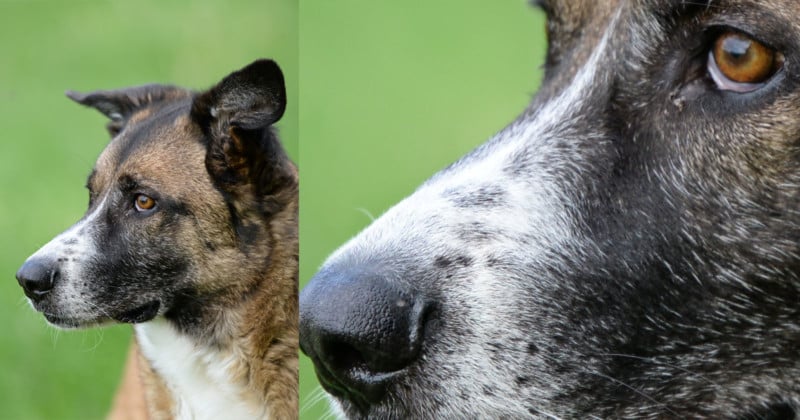
The issue is not easily detected during the shoot since the camera screens are very small and also of low resolution. Only once you open the image on a computer screen is when you find the issue.
Solution: Shoot Multiple Photos
To mitigate this issue to some extent you can take multiple pictures with AF – C (Autofocus continuous) mode and try moving the point of focus around and recomposing.
Solution: Use the Center Focus Point on a DSLR
Keep in mind that on a DSLR camera, the center focusing point is generally the fastest and the most accurate.
Problem #4: Low-Quality Glass
Why do you think professional quality and/or prime lenses cost a fortune as compared to the kit lens that comes with your camera? The major contributor is the quality of the glass and the precision assembly of each piece. If the glass is of poor quality and the different glass elements within the lens housing are not installed properly the light will get distorted and it will not focus accurately on the camera sensor leading to a less sharp image.
The same is true if you use low-quality glass filters like a polarizer or a UV filter. Even shooting through a glass window that might seem impeccably clean will reduce the sharpness of your final image.
Solution: Use High-Quality Lenses and Filters
So using high-quality lenses and filters will definitely improve the sharpness of your image to a large extent. This again would depend on your budget. Try to focus on investing in a good lens more than on the camera body.
Problem #5: Multiple Subjects
This issue generally happens if you are photographing multiple subjects and using a very low f-number. Since the depth of field is very shallow all the subjects (subjects’ eyes) will not be in focus especially if they are not at the exact same distance parallel to your camera (i.e. they are on different focal planes). Couples and group photographers especially need to be aware of this.

Solution: Use a Suitably Wide Depth of Field
One solution to this is to use a high f-stop number to have a wider depth of field and thus more room to play with. The other method is to make sure that all your subjects are more or less in the same plane of focus or at least have their faces in the same plane even if they are standing in rows.
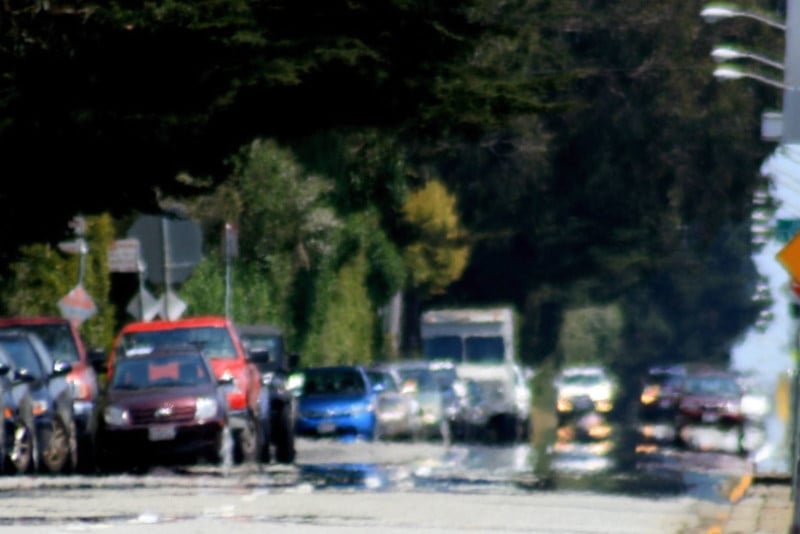
Problem #6: Atmospheric Conditions
The air quality you are shooting through plays a major role in determining the sharpness of the image. Too thick an atmosphere and the light will be distorted as it travels from the subject to your lens. This is especially true if you are trying to photograph subjects at large distances.
Dust and water vapor generally are the culprits for softer images, but heat also plays a big role. As the land heats up the heat waves form due to convection and the hot air rises. Cold air from the top comes down to replace it. This movement of air distorts the light waves thus creating a less sharp image.
There are two easy ways to mitigate this issue.
Solution: Wait for Better Conditions
First, if possible, try shooting when the sky/atmosphere is clear. Just as photographers often wait for optimal light to shoot photos, it can also be important to wait for optimal atmospheric conditions.
Solution: Get Closer to the Subject
The second way is to get closer to your subject which will reduce the amount of atmosphere between the camera and the point of focus.
Problem #7: Cropping to Small Dimensions
If you have tried cropping photos in post-production you have noticed the images becoming soft even though the original photo was tack sharp. This happens because when cropping photos we lose valuable pixels, and the resulting image may not be large enough to display sharply on a screen.
This is the same problem you will encounter when you try zooming in when taking photos on a mobile device that has limited (or no) optical zoom. The digital zoom is simply displaying fewer pixels on the same screen, which leads to a much more pixelated photo.
Solution: Use a Longer Focal Length
To prevent or reduce cropping images try to use longer focal length lenses if you are shooting with a camera with an interchangeable lens and/or if you are shooting on a mobile device try to use optical zoom as much as possible.
Solution: Zoom with Your Feet
A much cheaper solution to getting a longer focal length lens is to get closer to your subject and thus preventing or reducing the possibility of cropping.
Having a higher megapixel camera (along with a very sharp lens) also helps in keeping the image relatively sharp post-cropping too.
Problem #8: Dirty Front Lens Element
In a typical photo shoot, the camera gets tossed around frequently, and if you aren’t in the habit of putting on the lens cap every time you aren’t using it, the front glass element will get every chance of collecting dust or getting smudged, say while changing the lens or even when taking out or keeping the lens back in from the camera bag.
Smudged lenses are especially common on mobile devices since they are constantly pulled out and touched and they don’t have a lens cap to protect the lens in the first place.
Solution: Wipe Your Lens with a Cleaning Cloth
Keep a small cloth handy to clean the front element of your lens and try to avoid touching the glass with your bare hands.
Problem #9: Using Lens Attachments
Lenses are built for a specific camera or mount. The sharpness is the maximum if the correct lens-and-body pair is being used. Adding extension tubes or teleconverters between the lens and the sensor introduces foreign elements (even though there is no additional glass for the light to pass through) for which the lens was not certified or built. This will invariably reduce the sharpness albeit the amount depends on the quality of the extension tube or the teleconverter.
Adapters allow photographers to use different manufacturer lenses on their cameras. Again the lens was not built for this and the cons of using an adaptor may include the reduction in the sharpness of the image.
Depending on the situation it might be better to crop than to use a teleconverter.
Problem #10: Flare, Glare, and Backlighting
If you have a situation wherein the subject is backlit and the light or a part of it is directly hitting the lens there is very high contrast and the image will come out noticeably less sharp.

This boils down to the quality of the glass. Newer and modern lenses are able to handle this situation much better as compared to older lenses. Lenses with more elements such as zoom lenses also generally exhibit more flare than lenses with simpler designs due to the number of internal pieces of glass that can scatter incoming light.
Solution: Reposition Yourself to Reduce Bad Lighting
Hence try to avoid very high contrast photos like shooting directly into the sun and/or lowering the contrast by adding a front light to the subject. Upgrading to a professional lens would be an expensive alternative.
Solution: Use a Lens Hood
It can also be a good idea to use a lens hood on the front of your lens to block unwanted light rays that cause flare in photos.
Problem #11: Anti-Aliasing (AA) Filter
An anti-aliasing filter-also called an optical low pass filter (OLPF)-is a small filter that is present over the image sensor in your camera and prevents interference patterns from spoiling images.
It is accomplished by softening the image, which may seem counter-intuitive, but there are typically many fine details in a scene beyond the resolution of a sensor. Because of this, the sharpness of the image decreases although it’s not that perceivable at the first glance. Using cameras with no AA filter can help keep the sharpness to its maximum.
But again it’s not necessary that just not having the filter will make the image sharper.
Although the above list might not be exhaustive in any sense it does cover the most common issues and the next time you are on the field with your trusty camera and get blurry images you will at least be able to track down the cause.
Image creditsPhotos from Depositphotos