Wedding Photography Lighting Tips, From Preparation to Reception
![]()
My name is Jimmy Chan, and I’m the wedding photographer of Pixelicious in Montreal, Canada. I decided to challenge myself and write a comprehensive, in-depth guide to wedding photography in any lighting situation. As the title suggests, it will cover from preparation to reception and beyond, dissecting the characteristics of light while offering many step-by-step actionable tips to delight your next client.
Wedding photography is essentially an amalgamation of portraiture, landscape and even macro photography (among other things). Although this article only showcases wedding images, because that’s what I do, the essence of light touches all genres.
A long read indeed but I promise it to be worthy of your time.
Preparation
After properly greeting my client, I embark on a light hunt, essentially scouting the location for preparation photos. This usually involves a room with a window where I can hang the dress. Very often the bride has yet to be ready with hair and makeup, so I take the opportunity to set up the room.
Time is perhaps the biggest constraint in wedding photography. How I see light and how I utilize it comes down to speed. My goal is to capture a series of memorable photographs within a short amount of time. Window light, as the sole light source, works well because:
1. It’s relatively large next to a person, therefore soft.
2. It’s directional.
These two characteristics contribute to the quality of light, something highly desirable in portraiture. It’s worth emphasizing that I am not concerned with the quantity of light. Cinematographers, who I often work side-by-side, also like window light because:
3. It’s a constant (or continuous) light source.
Would you believe that all three images above were taken using the same window light? Simply by changing the camera’s perspective, I can capture moments that look radically different. The bride barely needs to move, yet she is photographed back-, side-, and front-lit. Once we combine different focal lengths and orientations, we end up with a variety of images in no time.
Again, speed is key. Let’s look at another example where the window light is leveraged as a soft box:
The reason why inexperienced photographers struggle with backlight is that they let their cameras dictate exposure. When the camera sees a bright light source, such as a window or the sun, it will underexpose to preserve the highlights. As a result, your subjects will be seen as silhouettes.
Do cars on the street add value to the image? If not, then feel free to overexpose, either manually or through exposure compensation.
Ceremony
My preference is to avoid using flash during ceremonies, unless absolutely necessary. Not only is it distracting, churches are known to prohibit flash photography. If you need to setup flash, please ask for authorization first.
The best advice I can give is to arrive early and ask the priest or officiant for any restrictions. Respect the rules, always.
When I attend weddings as a guest, I am naturally curious to observe how the photographer handles a dark church. There was one instance where the photographer attempted on-camera bounce (pointing upwards), then repeatedly looking at the screen after successive adjustments.
The flash kept firing brighter and brighter, but the photographer’s facial expression fell somewhere between frustration and helplessness.
Perhaps a live wedding ceremony isn’t the best time to practice exposure. To preserve your sanity, it might be a good idea to simply turn the flash off.
Outdoor ceremonies can be tricky because we are at the mercy of Mother Nature. Rarely will a couple tie the knot during sunset when light is best. Do your best to preserve the highlights and focus on capturing the moments.
Portraiture
Here’s a dirty secret: brides always pray for the blazing sun but they actually hate it. Especially during summer, it becomes scorchingly hot and unbearable. The bright sun is actually very challenging to photograph, here’s why:
1. If you position your subjects facing the sun, their eyes will squint.
2. If you position your subjects on either side of the sun, it will cast a harsh shadow that splits their faces into two, hardly flattering for portraiture.
This means that the safest option is to position your subjects between the camera and the sun. This gives a golden rim light that shines through the bride’s hair, veil, and dress. However, it is recommended to juxtapose them against a darker background, such as trees or buildings. Otherwise you risk in overblowing the sky.
Backlighting is a matter of personal preference but it also helps separate your subjects from the background. Photography is about creativity and experimentation, why not try a silhouette under the bright sun?
There isn’t much to say when it’s overcast. The light is soft and easiest to work with. This gives creative freedom when it comes to composition and subject positioning. If your client is worried about the stormy skies, do your best to convince them in heading out!
I am purposely leaving out group pictures because we already have a fantastic article on that subject here on PetaPixel.
Reception
The venues generally do a fine job decorating their space. In addition to capturing the ambiance, I am also avoiding my own light stands in wide shots.
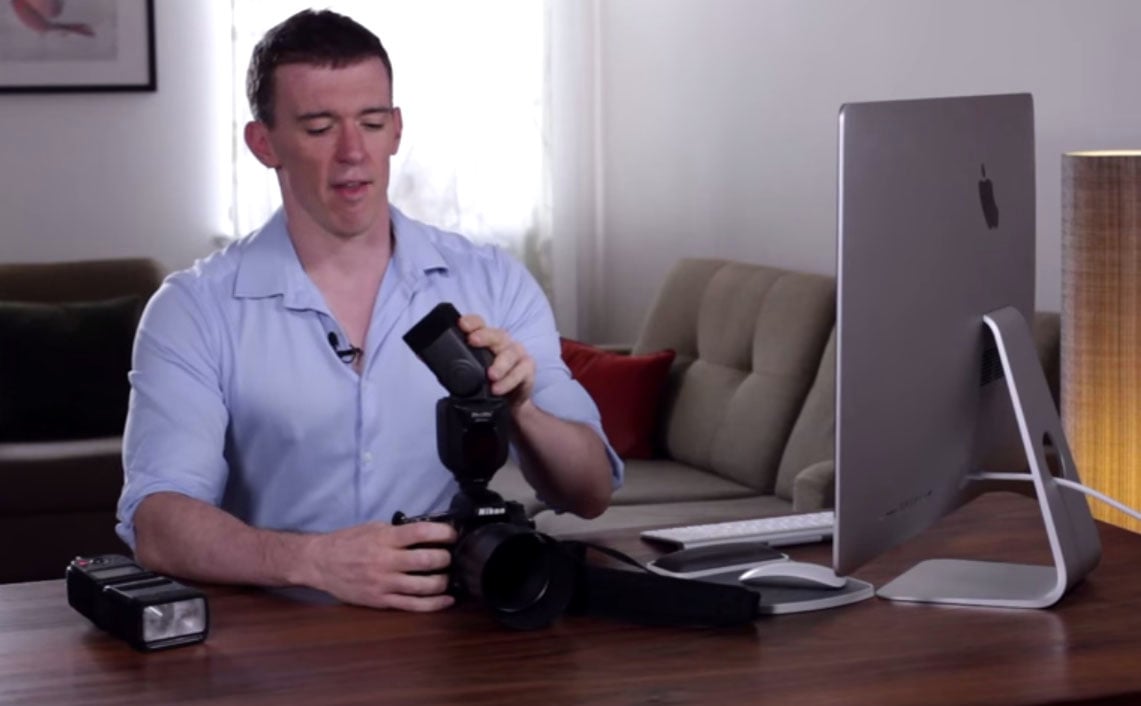
I use up to three flashes during the reception: two on light stands (opposite corners) and one on camera. If you have always been intimidated by flash photography, reception is perhaps the best time to experiment. Start with one flash, then add a second one once you become comfortable, then add a third one, etc.
Did you know that B&H has a superb video on lighting, featuring Jerry Ghionis? I encourage anyone to watch it in full, but those who wish to learn on-camera bounce (chances are you will start with this), fast forward to 1:18:35:
In short, if you point the flash straight up, you risk having the bounced light right on top of your subject, causing “raccoon eyes”. To avoid this, pull back the flash head slightly, say at 45 degrees.
Then rotate the flash head slightly, either left or right. This technique gives soft and directional lighting that is very easy to work with. The downside of on-camera bounce is that it tends to overexpose the ambient light so it’s best to tame it by setting your shutter speed closer to 1/200s (whatever flash sync limit on your camera). Similarly, slow down the shutter speed should you desire more ambient light.
My preference is to go full manual when adjusting flash power for consistency. I would simply “pick a number and go from there” but with experience, I tend to use 1/64 to 1/128 power when the rim light is close. Anything across the dance floor would fall between 1/16 to 1/32 power, with a grid to narrow the light. On-camera bounce will depend on the height of the ceiling (and its color) and the distance between you and your subjects, so it can vary between 1/4 to 1/32 power.
Another great video that expands on the topic of lighting can be found here.
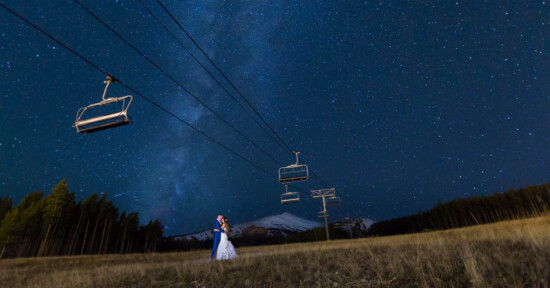
Going Above and Beyond
Now that you captured all the big moments, do you just pack up your bags and leave?
I suppose you could, or would you attempt to delight your client by going above and beyond? What makes an image sing is the absence of light. Join the dark side and unleash your creativity, even if all you have is one flash.
Now over to you! Did you find this article helpful and would you be interested in reading more? Looking forward to everyone’s comments below.
About the author: Jimmy Chan is a wedding photographer based in Montreal, Canada. The opinions expressed in this article are solely those of the author. You can find more of his work on his photography wedding business website, Pixelicious.