Countering Stryker’s Punch: Filling the Black Hole with Photoshop and GIMP
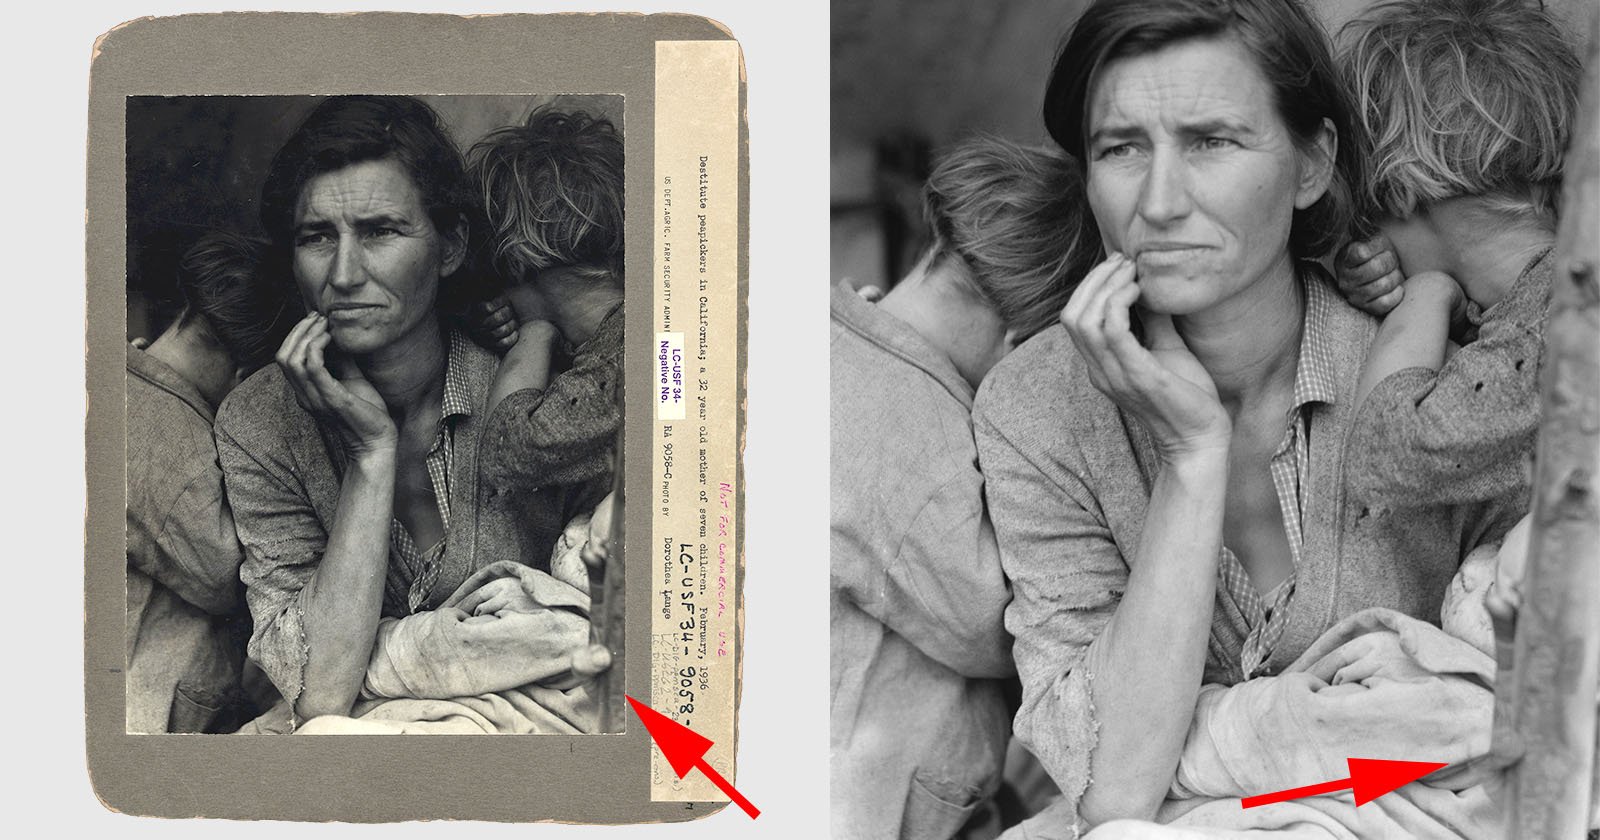
The visual record left behind by the United States Farm Security Administration (FSA) photographers has, according to New York Times critic Charles Hagen, come to “represent one of the most ambitious attempts ever made to depict a society in photographs (Hagen, 1985).”

Early during his tenure, Stryker would hire a small but remarkable group of photographers who would go on to express new documentary styles of depicting rural America during the Great Depression. Walker Evans, Dorothea Lange, and Ben Shahn, among other notable artists, all served under Stryker, who in many ways was a pivotal support to them during times of acute economic hardship, and was a strong advocate towards their subsequent post-FSA careers.
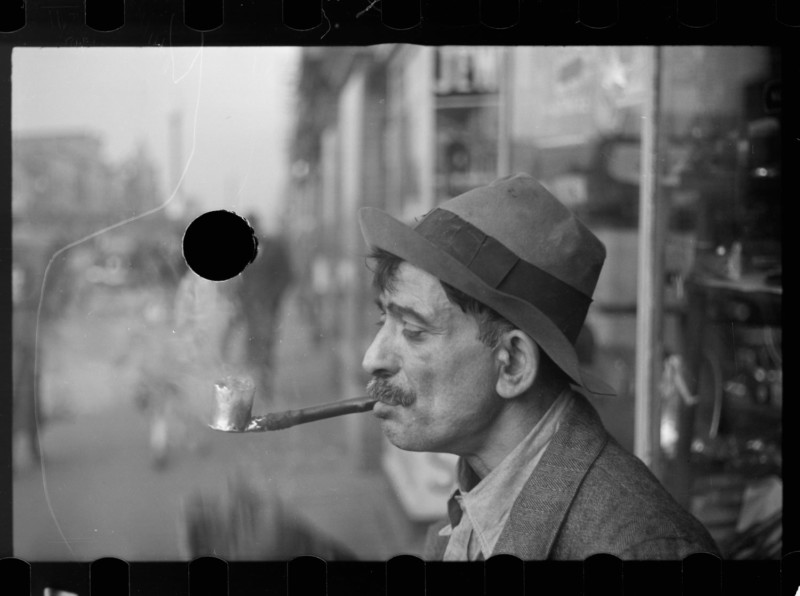
As his staff would send back their negatives from the field, it was Stryker who would determine which images would be printed. Those that did not pass his visual inspection he would “kill” by punching a hole in the transparency with a hole punch. To this day, articles continue to lament this past practice, which has certainly affected Stryker’s legacy and the resulting historical visual record.
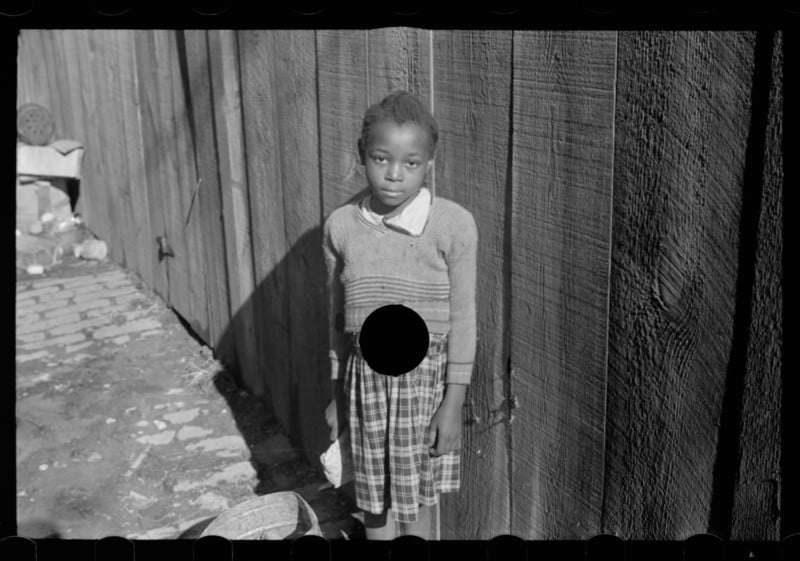
However, with today’s advanced editing tools it is interesting to ask if these black holes might be revisited and perhaps algorithmically filled in just a few mouse clicks? And if such a workflow was consistently successful, could it be automated across a large quantity of hole-punched images?
Gathering Test Images and Comparing Tools
To begin it was deemed best to start with a clearer sense of the total number of negatives that were killed yet were still archived. Luckily the Library of Congress’ Prints and Photographs Online Catalog (PPOC) hosts the Farm Security Administration/Office of War Information Black-and-White Negatives as a digital collection.
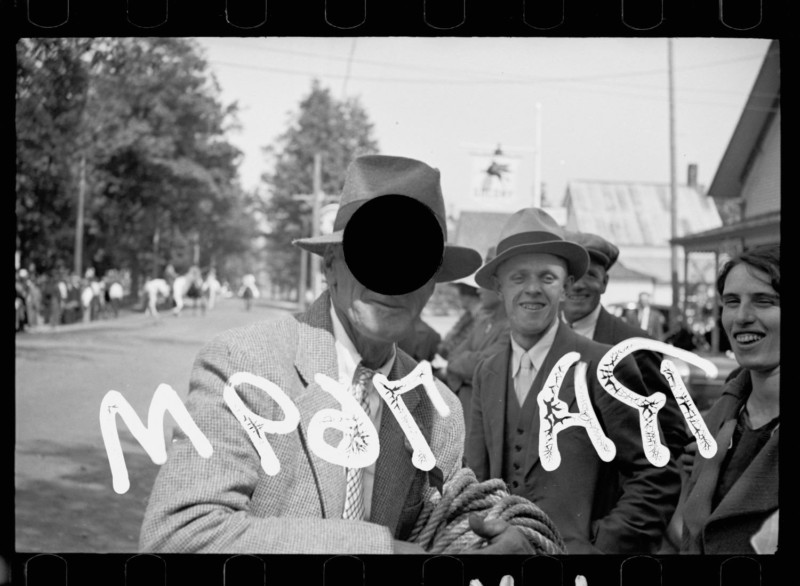
Within this collection, each punched negative has a note in its bibliographic record that states, “Negative has a hole punch made by FSA staff to indicate that the negative should not be printed.” The note entry is an indexed field of the descriptive record, so its contents are searchable. A quick lookup, then, for “hole punch” resulted in 2,472 total images. Examples with either complex detail surrounding the punch or in cases where the hole has completely removed significant image context were excluded from this initial study.
Content Aware-Fill first became available in Photoshop CS5 in 2010. With new software releases over time, Adobe often makes iterative optimizations to their tools and the algorithms that these features depend upon. The workflow tests that follow were conducted with Photoshop CC 2017.0.1 on an Apple MacBook Pro (OS X 10.11.6, 16GB RAM, 3.1 GHz Intel Core i7 processor, 1TB SSD).
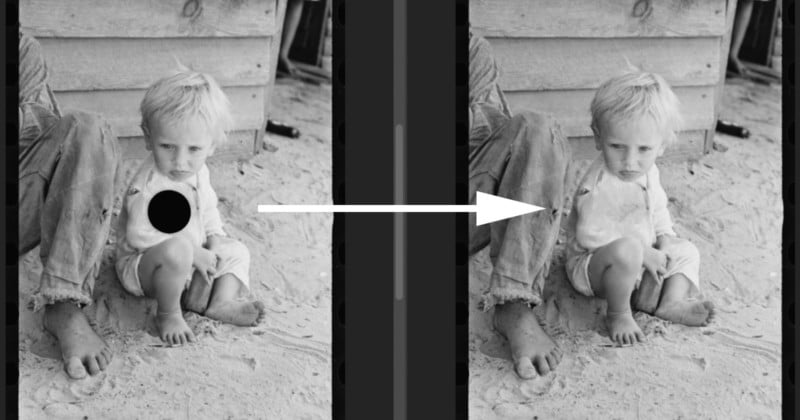
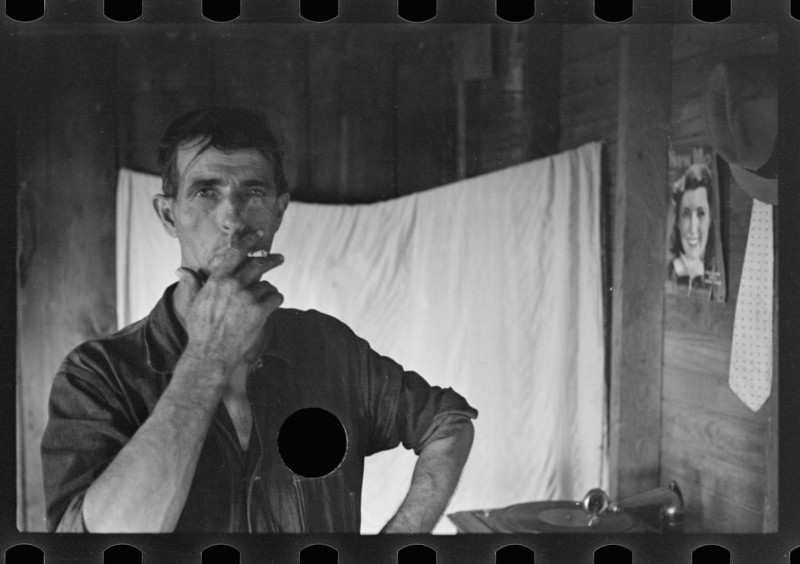
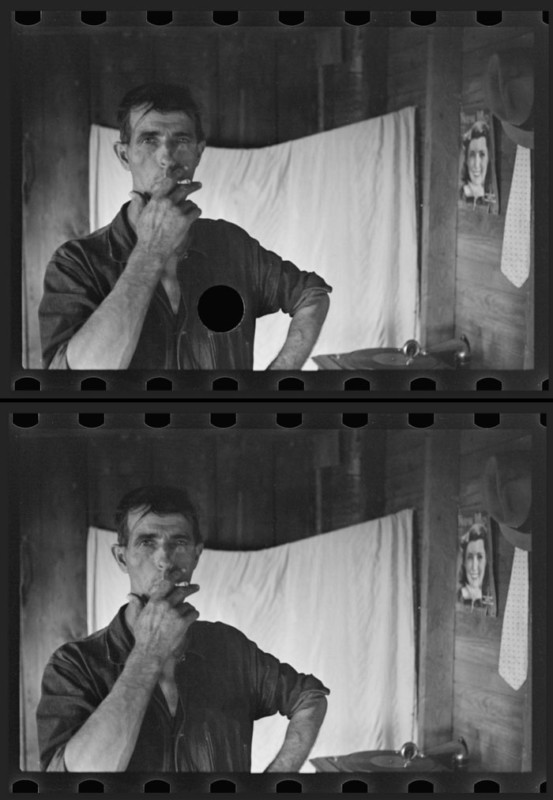
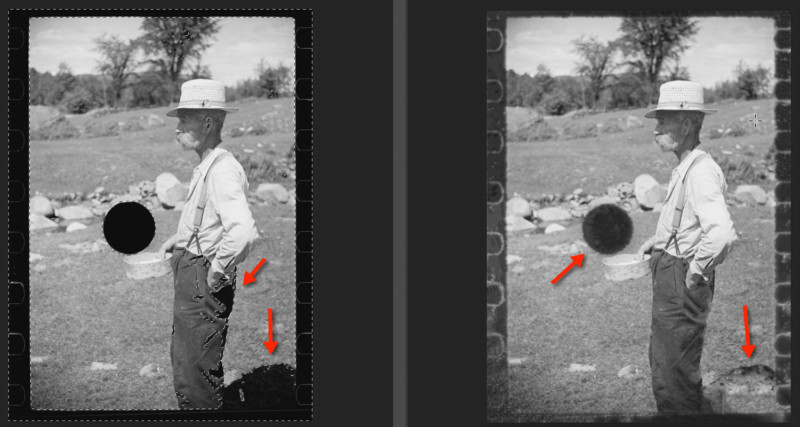
Here is an example of how Content Aware-Fill was used on one of the FSA negatives:
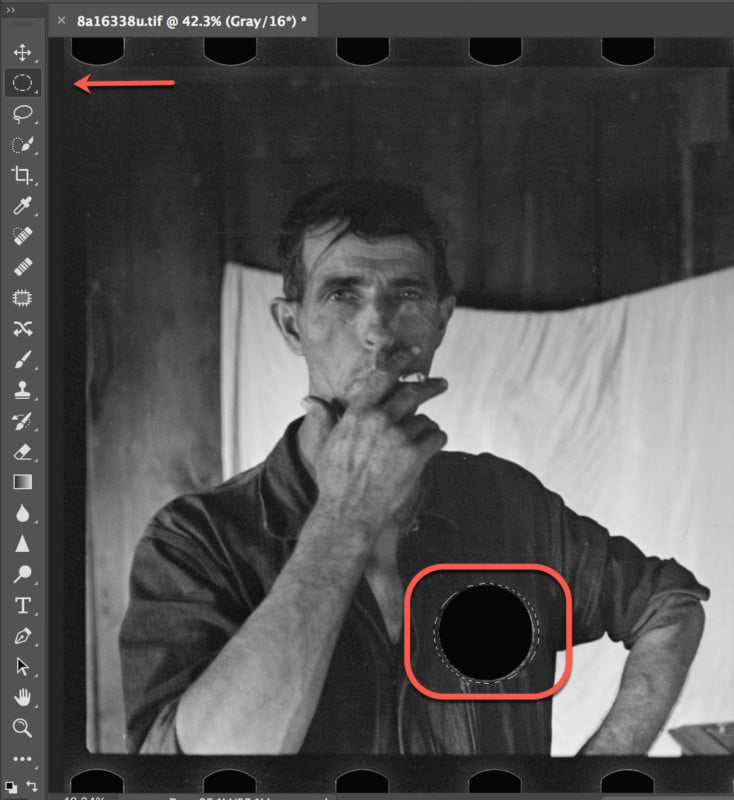
Using Photoshop’s elliptical marquee tool, a tight selection was made around the hole’s edge.
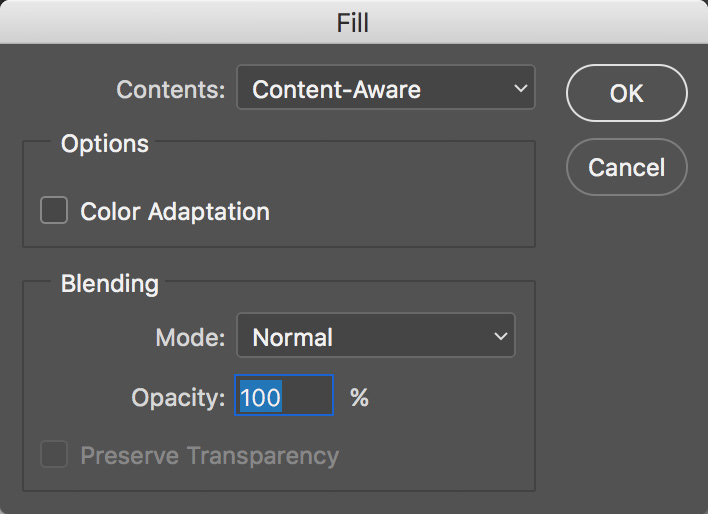
From Photoshop’s Edit menu > Fill > Content-Aware > OK.
Deselect. Done…
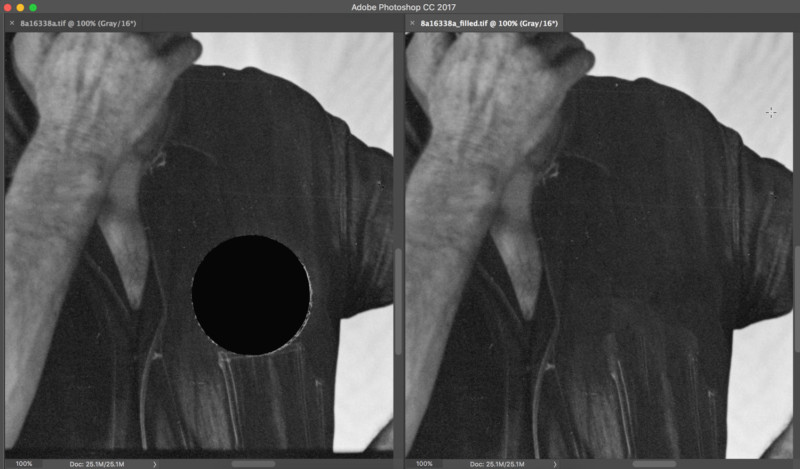
That the entire process takes four clicks and roughly 10 seconds was a promising revelation. Equally encouraging was the seamlessness of the resulting fill. Here is a 100% detail of the mend from the previous image:
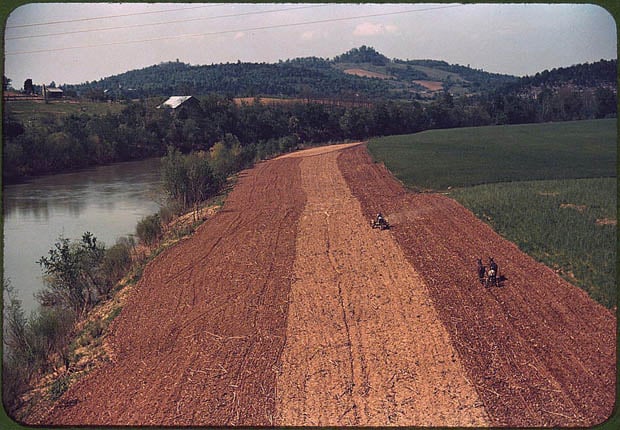
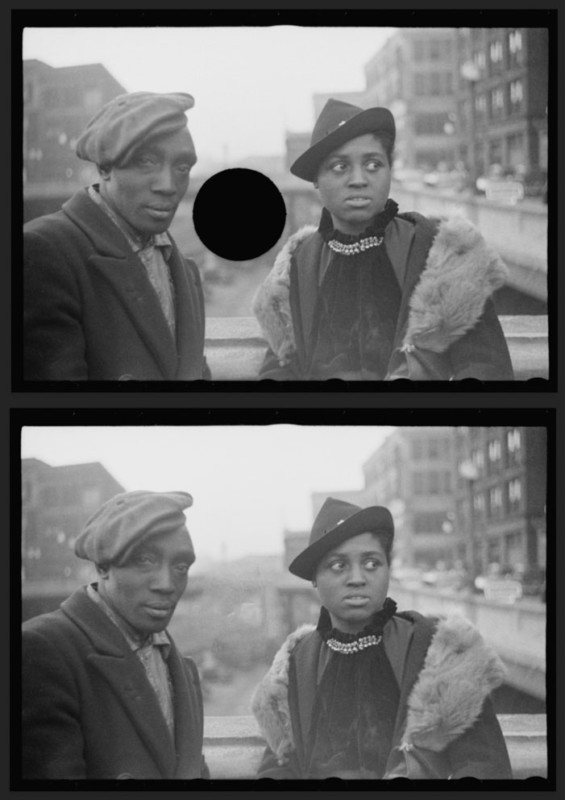
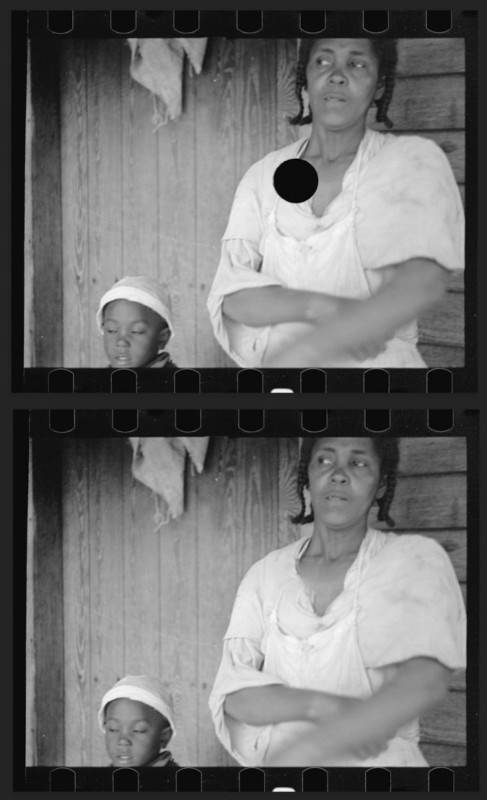
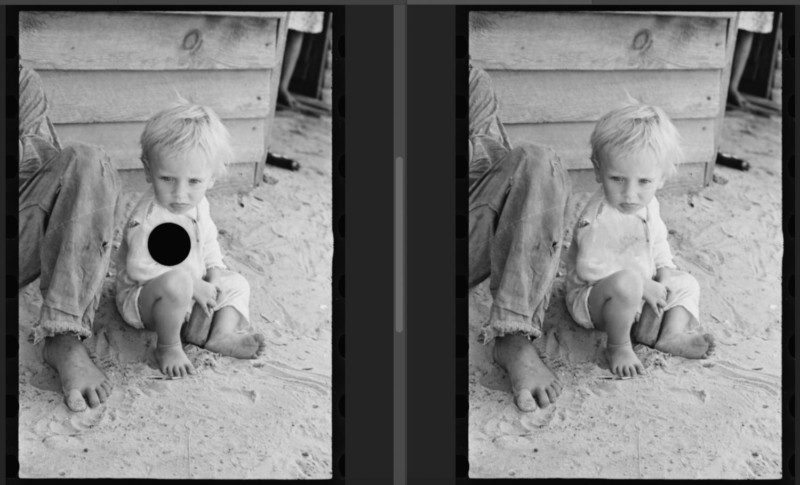
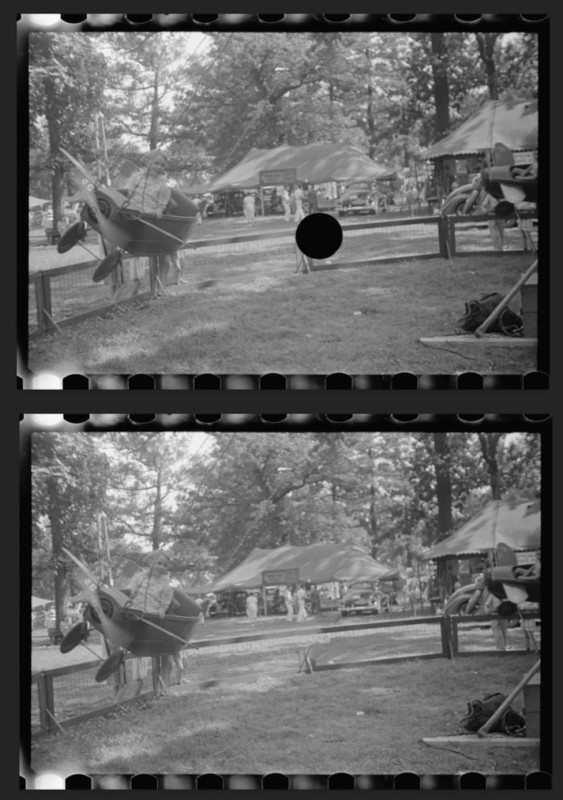
The following are examples of other images that were similarly filled using Photoshop:
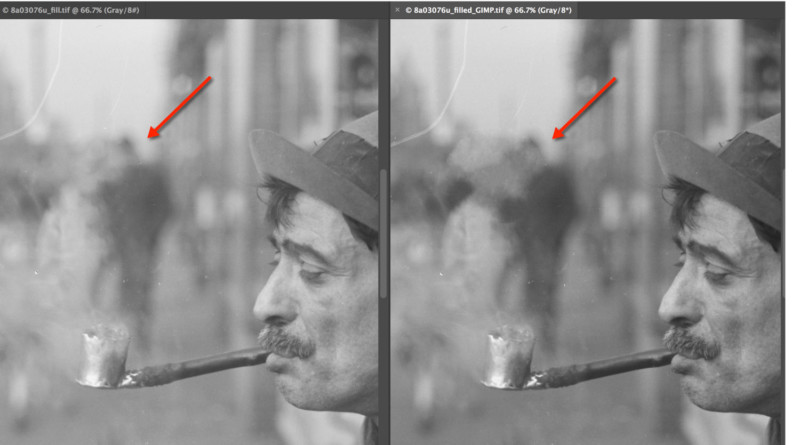
It is interesting to note that besides Photoshop’s Content-Aware Fill, GIMP’s Resynthesizer plugin also offers similar functionality within a piece of image editing freeware. Though Photoshop’s tool gets much of the attention for being the Swiss-army knife of quick and effective image filling, Resynthesizer’s code actually pre-dates the release of Content-Aware fill.
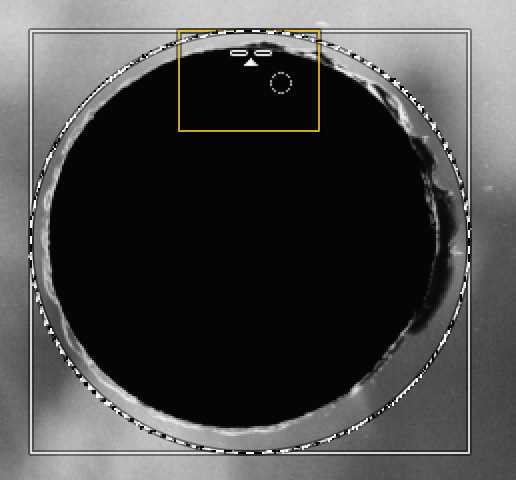
GIMP’s latest v.2.8.18 loaded with the Resynthesizer plugin was used to test usability and effectiveness against Content-Aware fill on comparable images. One of the details that immediately became apparent when employing GIMP was how ingeniously designed the built-in fine selection guides were within the software’s ellipse select tool. As a result, very precise selections could be much more easily made than with Photoshop’s elliptical marquee tool:
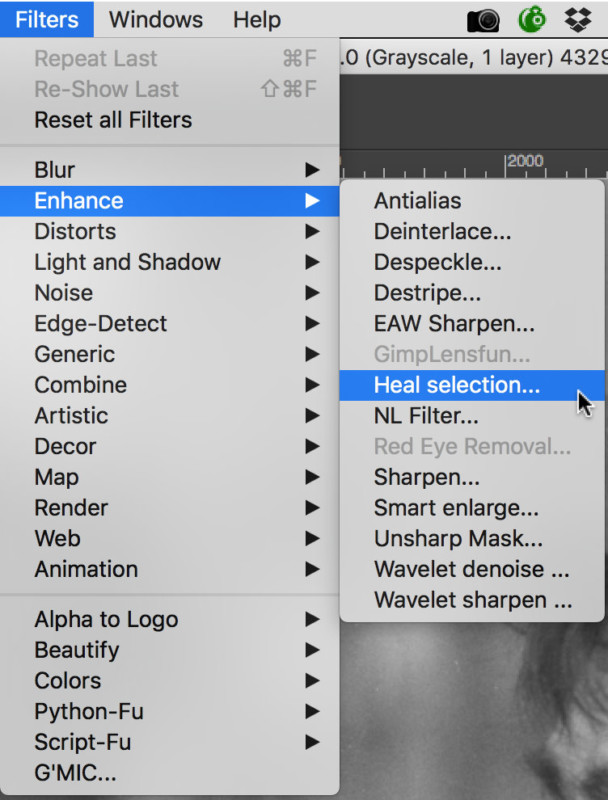
After selecting the hole, the subsequent workflow steps, though nominally unique to GIMP, were in essence the same as Photoshop’s. In the GIMP, Filters > Enhance > Heal selection were chosen:
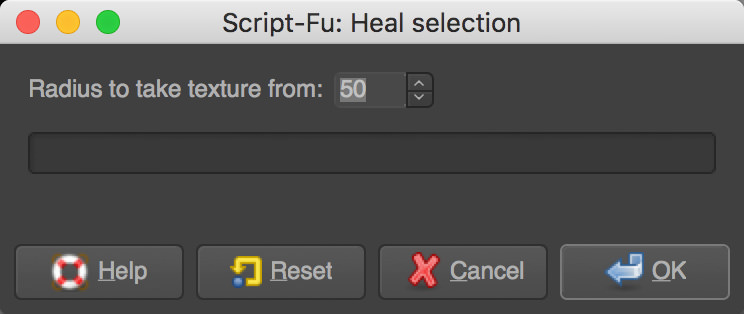
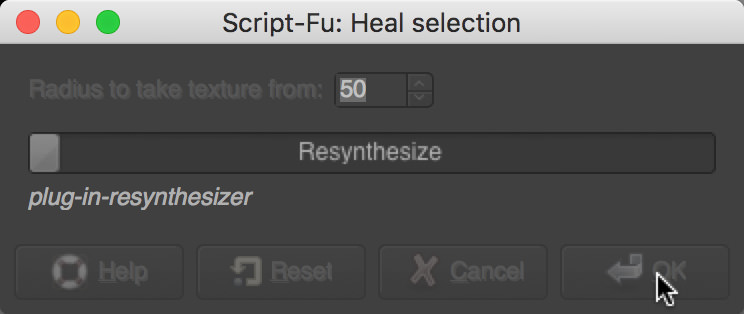
This was then followed by a dialog box where the sampling radius around the selection could be tweaked. The radius setting affects the region of texture sampling that is used to inform the Resynthesizer plugin’s algorithm on how best to heal the selection:
Once initiated, the plugin ran noticeably slower than Photoshop’s Content-Aware fill command. Based upon further sampling from four test images, each run in both programs, the following trend emerged. What required Photoshop on average 10 seconds to accomplish, from selection to fill, GIMP took 34 seconds to finish the same set of operations. And though the resulting visual analyses were subjective, the healed holes in GIMP were consistently more conspicuous and not blended as well as the ones that Photoshop filled. However, the differences between programs in this regard were subtle on average.
Testing Automated Selection and Filling
The last question is whether such image processing could be automated, from selection to final image filling. Photoshop is a flexible piece of software that allows for several different approaches to similar editing issues. However, it is important to remember that one of the guiding principles of this investigation was to find simple strategies that were effective and repeatable.
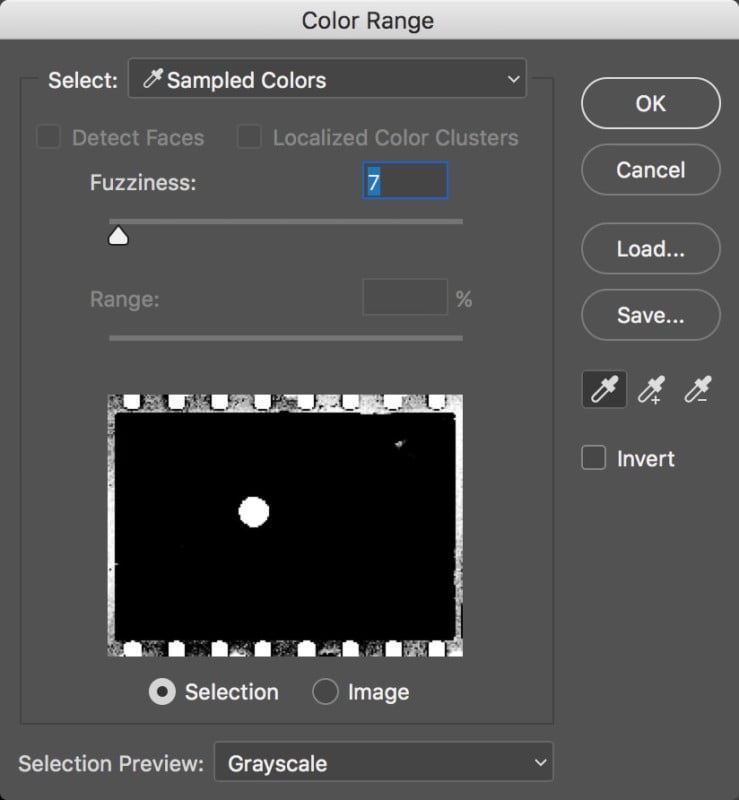
The biggest challenge in attempting to remove all manual steps from the established Content-Aware Fill workflow was to automate the initial hole selection. For this, Photoshop’s Color Range selection option was tested. Color Range allows for a selection to be drawn around areas within an image that have a particular color. The color can be sampled from within a given image and be set with an eyedropper tool. As the FSA images are all grayscale, the color range setting for the selection tool was pegged at a black level found in one of the image’s holes and was then used thereafter across all the batch processed images. Once the Color Range selection tool settings were tweaked to satisfaction, the tool’s deployment along with the Content-Aware Fill steps were recorded into a Photoshop action, which was then run across a source folder of hole-punched images in an automated batch.
The initial action step then was Select > Color Range. This brought up a dialog box where the following choices were made and the black eyedropper was used to sample from the hole:
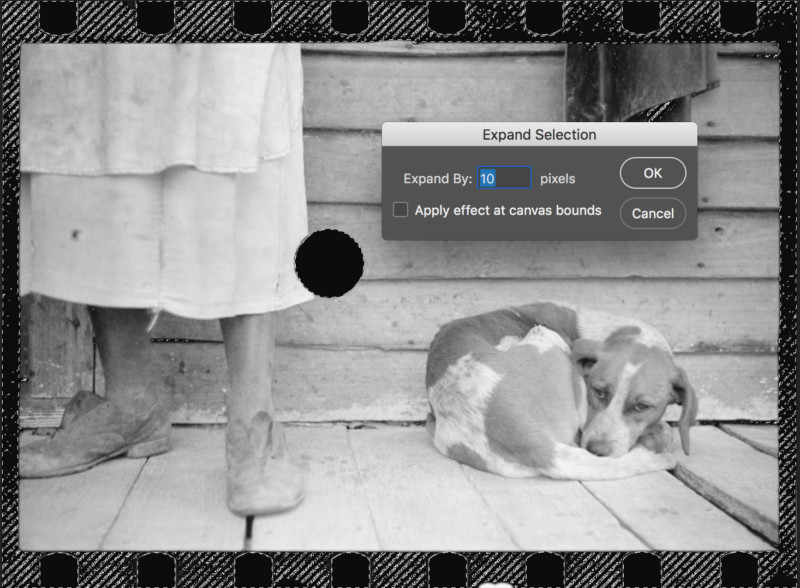
Select > Modify > Expand to give the Content-Aware fill tool some additional image data from around the hole to sample from:
Edit > Fill > Content-Aware
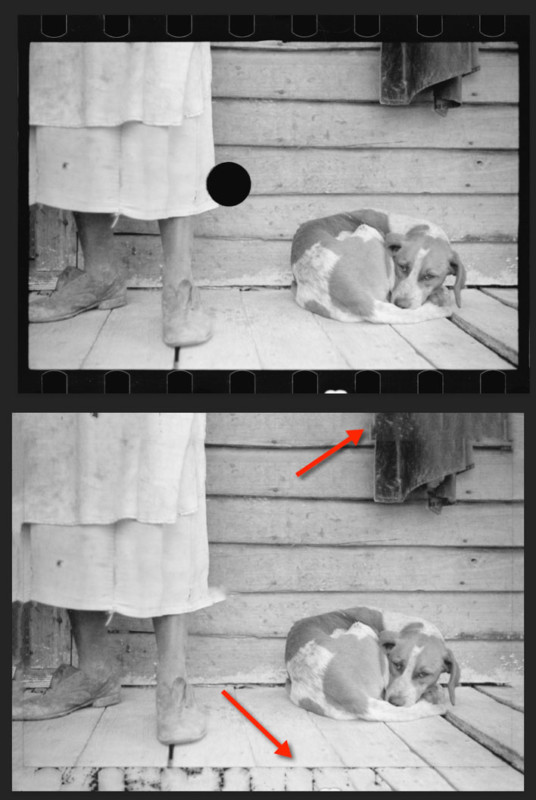
As the example shows, the auto selection process was not exact enough to limit the resulting fill to just the punched hole. Film edge perforations were also selected through the Color Range process and as a result underwent extraneous Content-Aware fill. Though somewhat promising, further automation trials also exposed additional problems with imprecise selection. Beyond edge perforations, other random areas of the image that have similar black values to the punched hole can also be included in the selection. These extraneous areas often gave Content-Aware fill confusing information to work with and led to mixed results.
Summary
As the results of this study indicate, automated image filling currently has limitations of scale when faced with attempting to rebuild highly complex image detail or to fill in the loss of entire objects (e.g. faces). However, when used in conjunction with more manual methods, automation can potentially be employed in a hybrid manner to achieve enhanced post-processing throughput on large image aggregations.
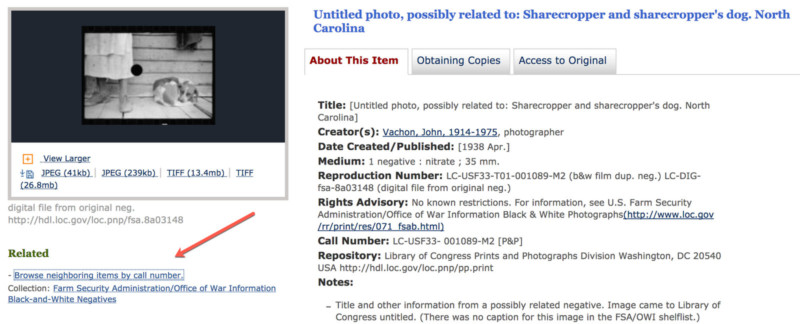
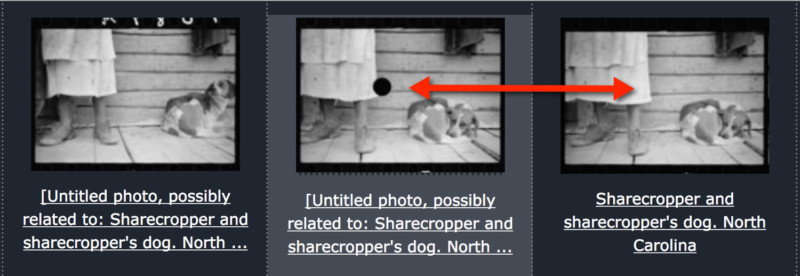
An area of potential future research on the examples in this study includes the use of neighboring negatives. Though all the hole-punched negatives are technically untitled, the Library of Congress, through manual visual analysis, has enhanced the catalog records of these images to include information on other known, titled, and related un-killed images (note the phrase, possibly related to: in the killed images’ title fields). In the case of the 35mm images, the related killed and un-killed images most likely were shot on the same roll of film. A browse by call number link below a given killed negative’s thumbnails brings the user to a screen where related images can be viewed in a grid.
In the example depicted in Figure 23, the two neighboring images were most likely shot in rapid succession on the same film roll.
Could such un-killed images be used in the future to check the accuracy of related filled images? Could these un-killed images be used in some way as source data by a fill tool to better inform the tool on how to more accurately perform its work?
Finally, it is interesting to step back and consider the nature of the hole-punched FSA negatives from their original creation on mostly 1930s-era 35mm black and white film. If it were not for their recognized visual value, safe transfer to the Library of Congress in 1944 (as requested by Stryker), initial digitization in the 1990s, and subsequent re-digitization between 2010-2014, there would be limited image data to work with today. That such image repurposing as described in this study is even possible is largely based upon a compelling confluence of transcendent photography, collection building foresight, careful digitization decisions and execution, open online access, and clever software algorithms that continue to be refined by intelligent minds.
Yet, what are we to make of these surrogate negatives? Though they are not based upon standard content replication like their hole-punched brethren, the software-filled versions still hold a certain spell and feel of visual symmetry. From an archival standpoint we may even regard them as born-digital objects in their own right. Perhaps in the end they may simply be best considered informed guesses on fragments of displaced history.
As time goes on, and software tools are further enhanced, and perhaps someday the negatives are re-digitized once again to even higher standards, it will be fascinating to re-run similar fill routines on the images to determine if our best visual estimates inch any closer to a truth that we will never be able to fully perceive.
About the author: Michael J. Bennett is Head of Digital Imaging and Conservation at the University of Connecticut. There he oversees the digital capture and conservation operations for the University’s archives and special collections. Previously he has served as project manager of Digital Treasures, a digital repository of the cultural history of Central and Western Massachusetts and as executive committee member for Massachusetts’ Digital Commonwealth portal. You can find more of his work at Tundra Graphics. This article was also published here.