Tutorial: How to Batch Process Your RAW Time-Lapse Photography
Time-lapse photography seems pretty straightforward, right? You just capture a stream of images over a designated time frame and put them together in post-production to create your video. But as simple as that may sound, there are a few basic elements to the post-processing of your images that can greatly alter what the final product will look like.
Here to go over just a few of those basics, including batch-editing for color correction, de-flickering images and more, is J.P. Morgan of The Slanted Lens.
The video tutorial above is about as simple as it gets, breaking down the post-production of time-lapses into their most basic elements.
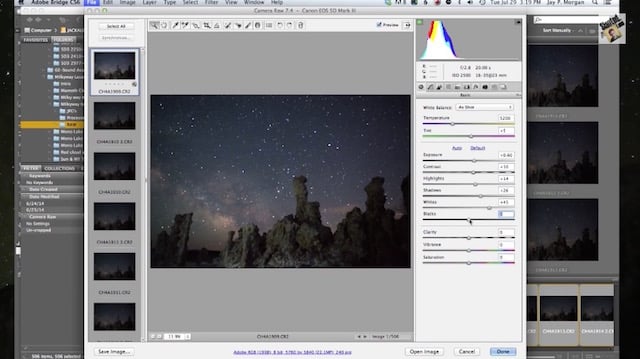
Morgan begins with batch-editing a number of images he captured for a time-lapse of Mono Lake in Northern California, after which he explains how to properly account for exposure changes if your time-lapse was shot in aperture priority mode.
The video is short, but for those who are just now getting into time-lapse, it offers a great jumping off point for once you’ve got your images captured and sitting at home on a hard drive waiting to be used.