DIY: How to Make a Pinhole Camera Out of Concrete

It’s Sunday, which might mean doing your best to keep your mind off of the workweek to come, or already setting about planning next weekend. If you happen to be doing the latter, and there’s room in your schedule for an interesting photography DIY project, we’ve got something for you: a do-it-yourself concrete pinhole camera.
The design and idea come to us from user amuu over on Instructables. As her entry in the website’s Concrete and Casting Contest, she decided to create a concrete pinhole camera that works with standard photographic film.
The overall steps involved are: making the cast, pouring the concrete, de-molding, decorating the camera (obviously optional), making and attaching the pinhole, shutter and film winder, and loading up the film. Once everything is set up, you’re ready to snap some pinhole photos.
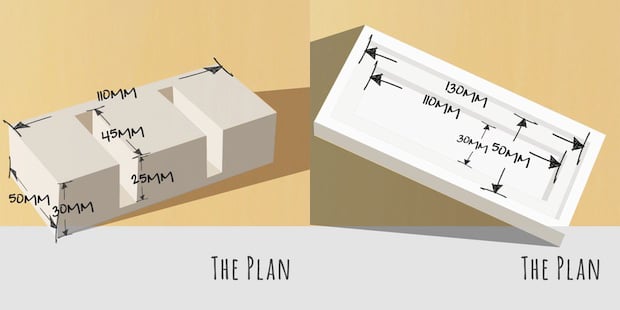
To make the mold, simply put some 5mm laminated foam board and pens together by following the above plans for the body and base. The final mold should look something like this:
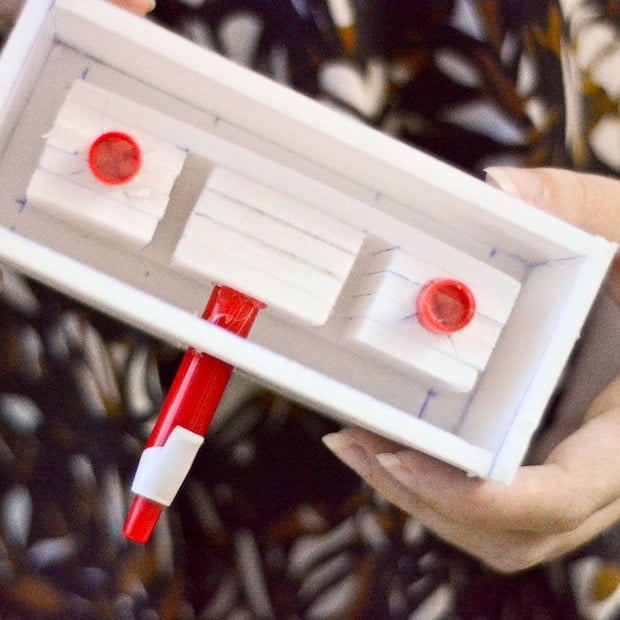
Then mix your store-bought concrete and pour it into the molds. The pens will keep the holes for the pinhole and winder open while the board guides the concrete into the proper shape to create your camera. Once the concrete has set, dig out the interior foam and scrape off the stuff on the outside to reveal your newly created camera body and base:
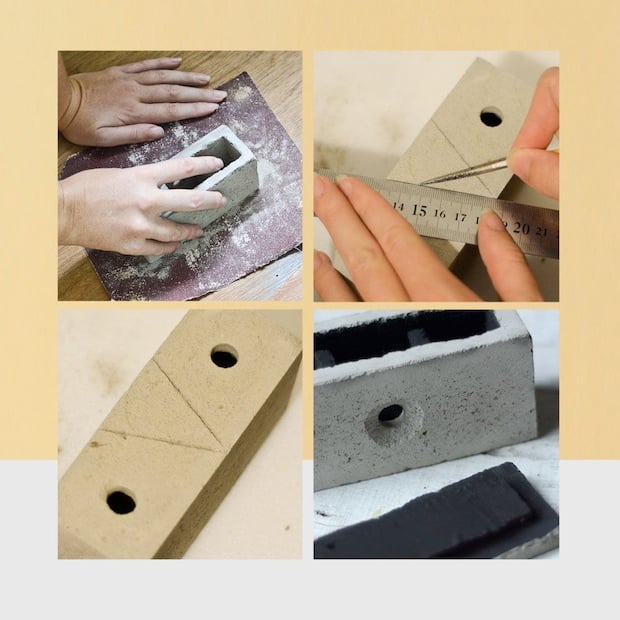
If you choose to decorate your concrete now is the time (amuu added guidelines so she had an idea of the field of view), after which you will create a pinhole by poking a hole in a square of old soda can and glue it inside the body.
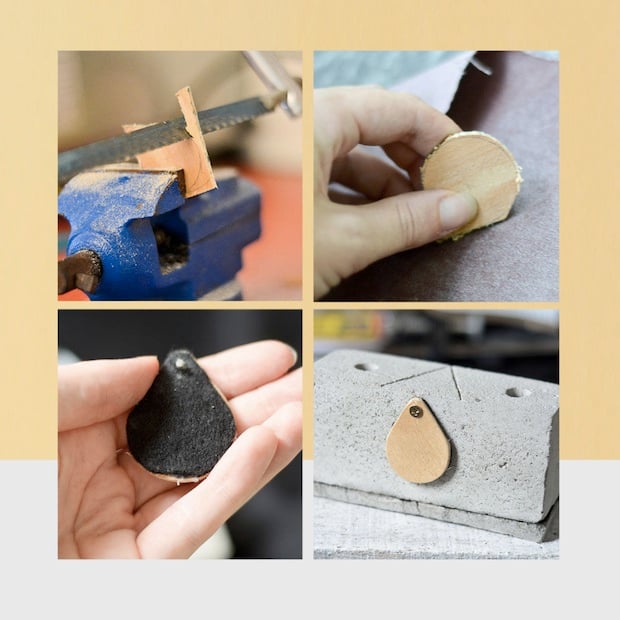
Lastly, you’ll need to create your “shutter” and film winder. For the shutter, amuu used some old plywood to create a tear-drop shape, glued some black felt onto the back, and screwed it into the concrete. Her film winder was made from two pieces of wooden dowel, one of which she cut a slit across with a hacksaw.
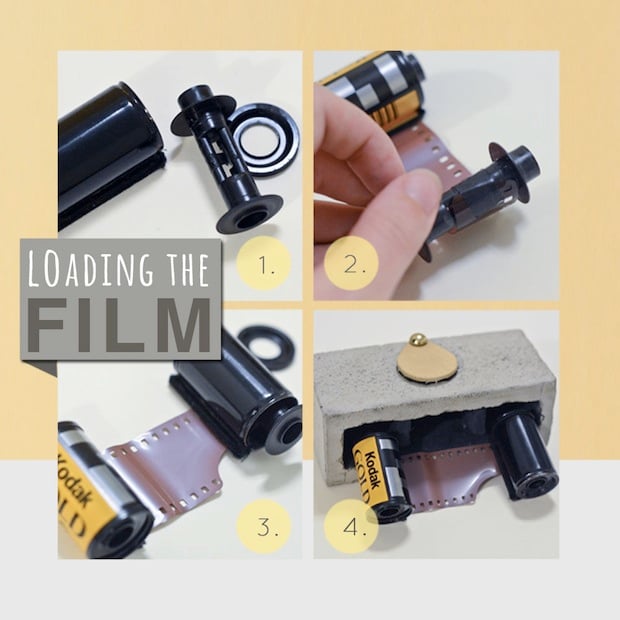
The final product should look something like what you see at the top. Regular film loads into the two compartments using a fresh canister and an old canister to grasp the other end. When you want to advance film, simply use the winder. When you’re done, switch the winder to the other side and rewind the film back to the start.
She hasn’t gotten her first roll developed yet, but as one astute commenter pointed out, she should probably have added something (maybe felt) inside the camera so the film doesn’t scratch as it’s rolled. We’ll have to wait until she uploads the first set of sample photos to see if that actually became a problem.
Obviously, we didn’t go into too much detail, so if you want to make this yourself, be sure to check out the full Instructables tutorial. And if you like the design enough to make one yourself, don’t forget to cast your vote for amuu at the top of that page and leave her some feedback and/or encouragement in the comments.
Image credits: Photographs by amuu