A Behind-the-Scenes Look At How 35mm Film is Developed and Printed at a Lab
If you have your 35mm film processed and printed at your local lab, have you ever wondered how it’s done? In this post, I’ll take you on a behind-the-scenes tour on the entire process.
Either way, it’s still around and you might as well put it to some use. Load your favourite film, and spend the morning or afternoon out photographing your favourite subject.
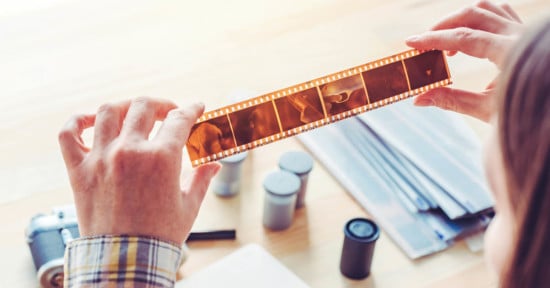
Once you have finished your shoot, the satisfying sound of the rewinding film should be music to your ears. With a smile, head into your local film lab to get your marvellous shots processed. At this point you should be smiling as you have captured images on the original camera sensor – film! ….and nothing beats the original, right?
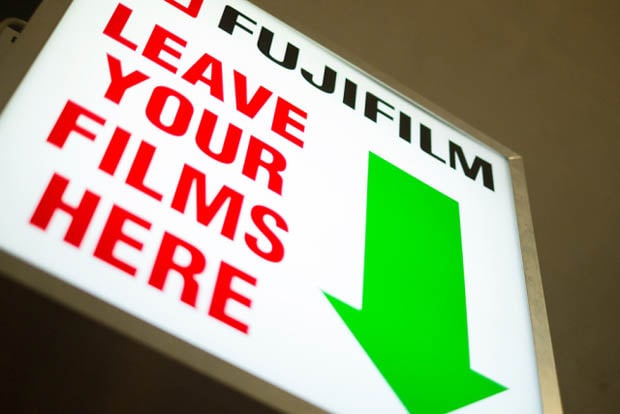
So now your film has been dropped off. You can continue on your journey while the staff at the film lab go ahead and turn your art into memories. Your little favourite film’s journey is just about to begin.
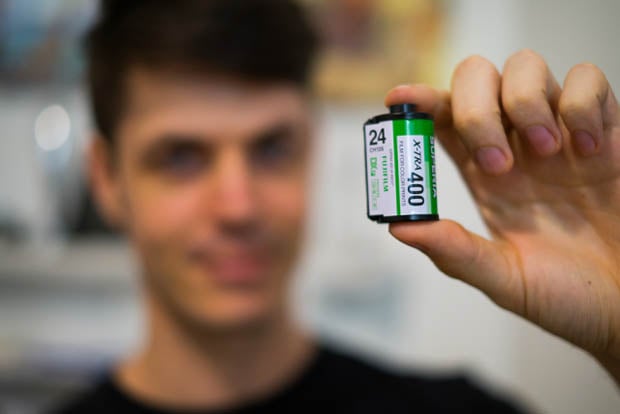
The next part of this story is what happens when you leave. Enter the lab technician, in this case Derek from Fremantle Camera House.
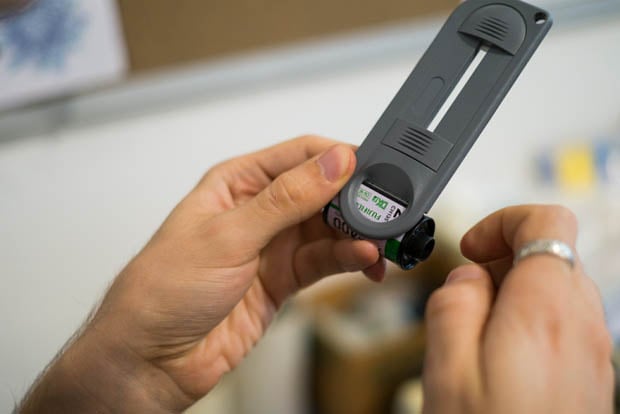
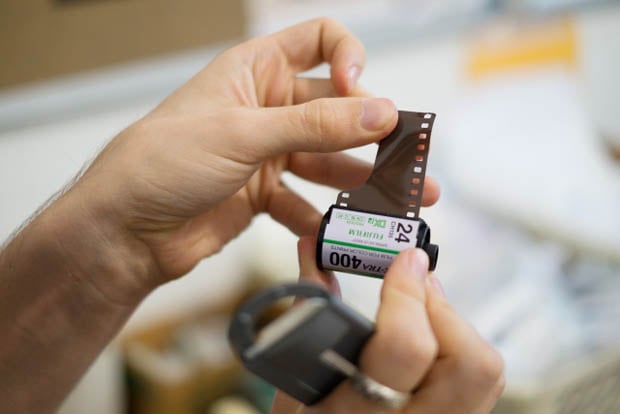
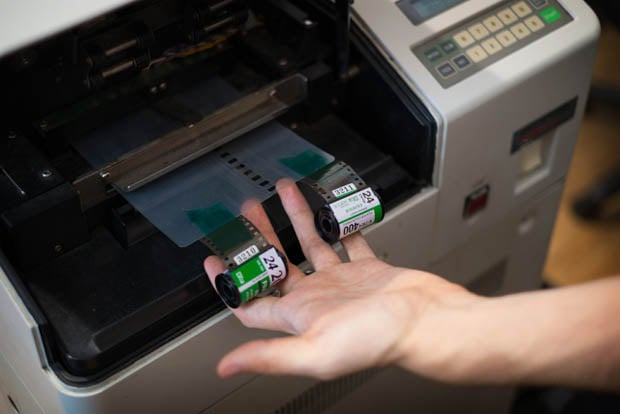
The first step the lab technician will do is retrieve the end of the film out of the exposed canister using a film picker. This can sometimes be one of the hardest steps as some old cameras tend to bend the end of the film back on itself when rewinding.
At this point the film is still remains light sensitive so it’s not like the canister can be opened in daylight to overcome this bent film problem. The portable dark box was created for this very problem.
If the technician can’t get the end of the film out by using the film picker or special lab tape then the film is put in the dark box and the canister is opened by force to be rolled manually into a temporary 35mm canister. However, as you can see below, Derek had no trouble using the film picker.
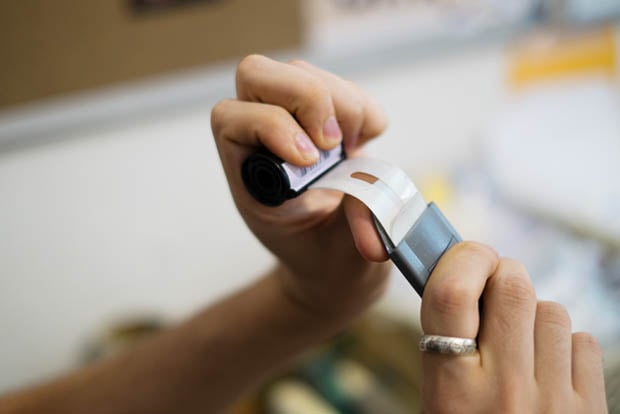
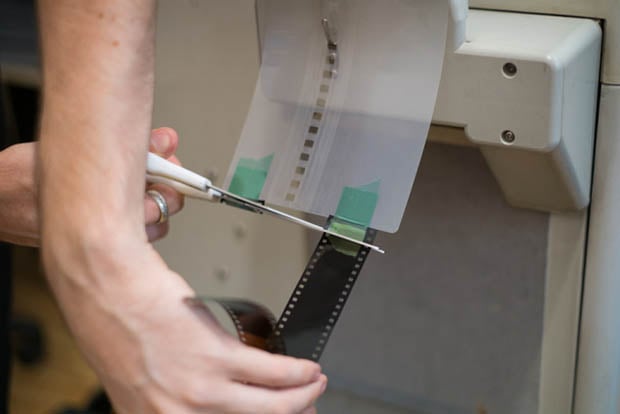
Once the end has been removed the film canister is placed in a special holder which allows the end of the film to be cut square.
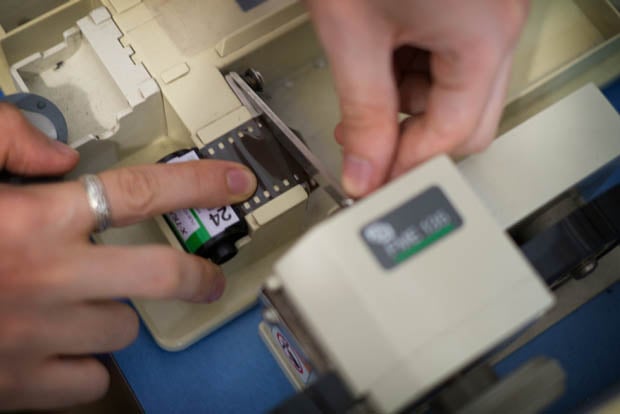
Once cut, the film is stuck to a leader card using special tape which won’t peel off during the developing process. As you can see in the below picture the leader card is made from a flexible transparent plastic.
Two films can be stuck to the outer sides of the leader card. It is important to apply tape to the both sides of the film and leader card to ensure no film falls off in the developing process. The leader card features small rectangle holes located down it’s centre. The holes catch onto sprockets which guide the leader card and film through the processing machine.
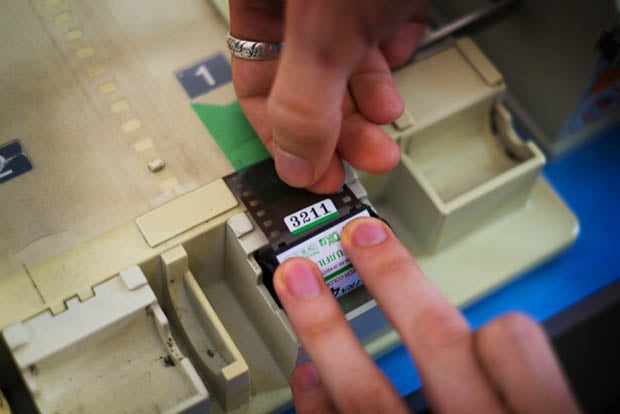
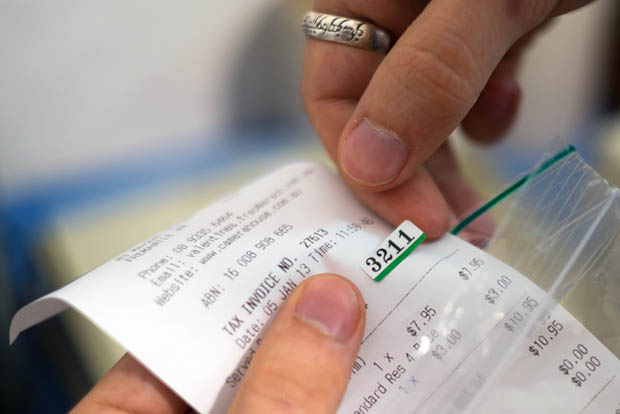
It’s very important that one customer’s films aren’t mixed with another customer’s. To stop this from happening a unique serial number called a twin check is stuck to the customer’s order and the corresponding film. The numbers can then be matched once the film has exited the processing machine.
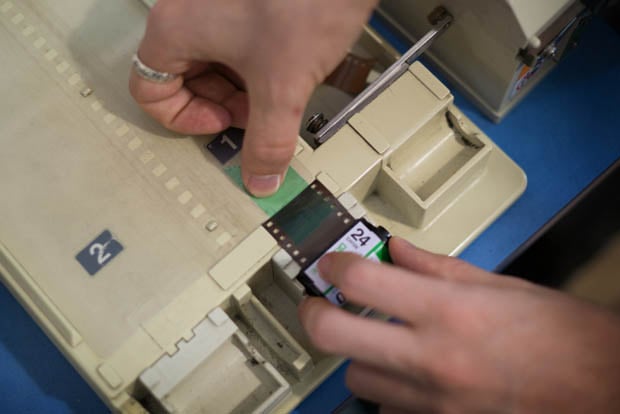
Now the film is Ready for Processing.
The leader card is inserted centrally and the machine automatically moves the leader card forward. You can see here Derek has his hands under the film to stop them falling down and exposing the film to light.
At this point the door of the machine is open. Once the leader card is level with the horizontal silver metal plate the door can be shut and locked which will then make the machine light tight.
One of the scariest things that could happen at this point for any film lab is a power blackout. It’s happened to me countless times. During a power black out the machine shuts down and the undeveloped film gets stuck in one of the tanks/baths.
Fortunately, this Fujifilm machine has a manual crank winder on the side. So if a power blackout were to happen, all the technician would have to do is slowly wind the crank for the film to continue on its journey through the processor.
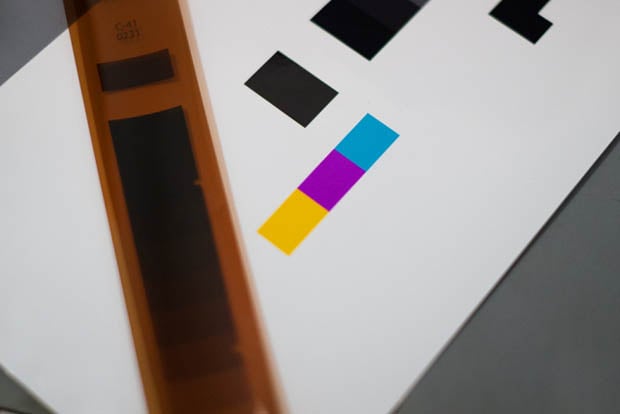
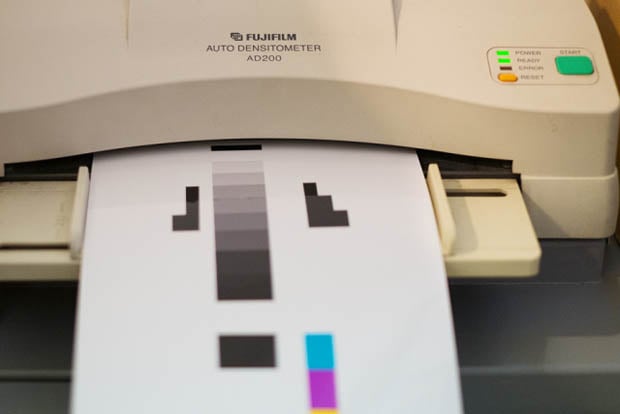
I should have mentioned this at the start… It is imperative that a well maintained photo lab run control strips at the start of every day or second day if they are a busy lab. This is VERY important. Once the control strip has been developed, it is measured by a densitometer. The results from the densitometer are then used to calibrate the the machines, ensuring that colour levels and chemistry are correct.
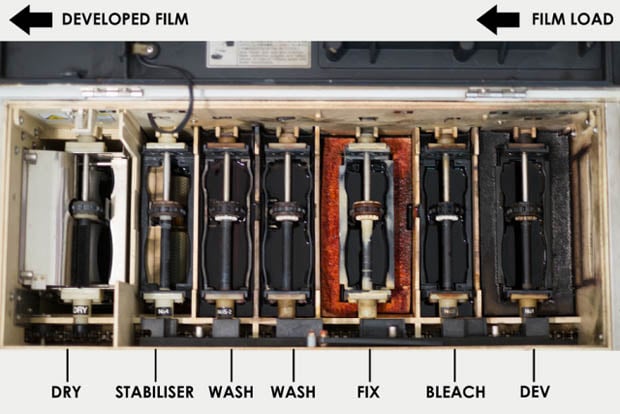
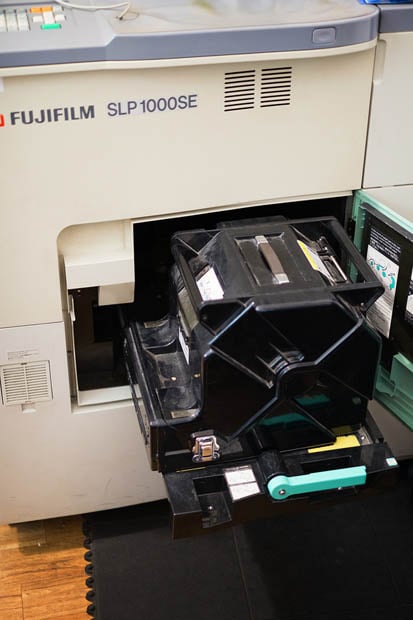
By now the film has well and truly entered the processing machine. The film will undergo a transformation from undeveloped to developed through a series of processing tanks (baths) found inside the machine (the inside of the processing machine is shown below).
The process is called a C-41 process. The steps the film will undergo as it travels through the machine are described below:
Process 1: Developer – The developer produces a silver image in the film emulsion layers from the latent image produced when the film is exposed. At the same time, the developer – which is locally oxidised by this reaction – combines with couplers incorporated in the emulsion and produces colour dyes. The quantity of dye produced is proportional to the amount of silver image produced.
Process 2: Bleaching – This bath converts the metallic silver image formed during development back into silver halide in order to make it possible for the fixer to remove the silver from the emulsion.
Process 3: Fixing – The fixer dissolves the bleached silver image and the unexposed and therefore undeveloped silver halide originally present in the film emulsion, which can then be washed out by the wash.
Process 4 and 5: Washing – A water wash as commonly found in larger processors, works by removing all processing chemicals and by-products from the film emulsion. Correct wash water rate and temperature are critical for long term dye stability.
Process 6: Stabilising – This contains a wetting agent and and other propriety chemicals featuring uniform drying of the film and long term stability.
Process 7: Drying – The film is heated to remove any water.
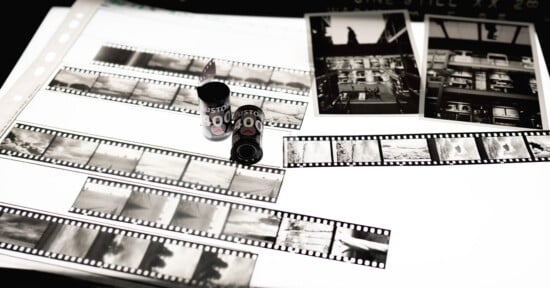
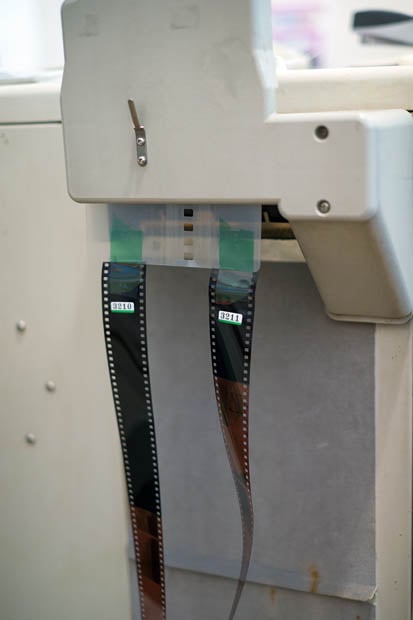
Once the film has finished going through the C-41 process, the technician then cuts the film off the leader cut and hangs them on a stand often referred to as a tree. The film is placed on the tree in time due order.
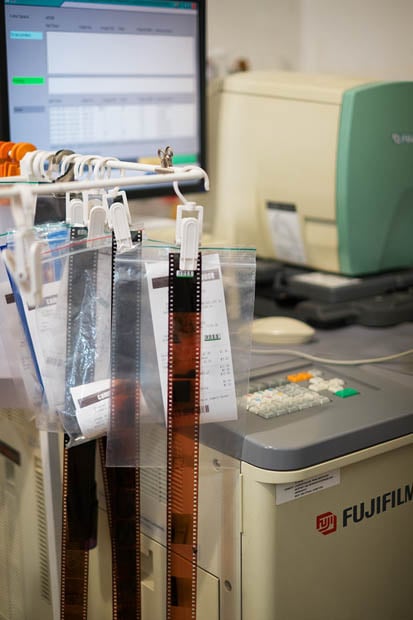
Once the lab technician has balanced a sample roll of photo paper (called a paper control strip) through the densitometer, then scanning and printing the roll of developed film can go ahead.
A roll of 6″ matte photo paper is loaded into the black paper cartridge. The light sensitive cartridge slides into the side of the Fujifilm Frontier 340 ready for printing.
Back when I worked for Fujifilm, a funny story happened (funny for me not the workers). A store (which will remain nameless) had a new warehouse worker. One day about 30 rolls of 6″ light-sensitive paper arrived in the store’s warehouse.
The new worker approached the photo lab and told the staff some boxes had arrived for them. The staff in the lab were terribly busy and asked the warehouse worker to bring the paper to them as they didn’t have a spare second to retrieve them.
Being keen to lend a hand the warehouse worker arrived with a full trolley of 30 rolls of paper. I was told the look on the lab managers face was priceless. You see, what had happened was the warehouse worker had keenly removed the paper from the boxes.
This normally wouldn’t have been a problem, but the worker went a little too far: he had removed the paper from the light sensitive bags, therefore exposing the 30 odd rolls of paper to light, making them exposed and unusable. It cost the store approximately another $6000 to replace the paper. To this day I still laugh, though I really shouldn’t!
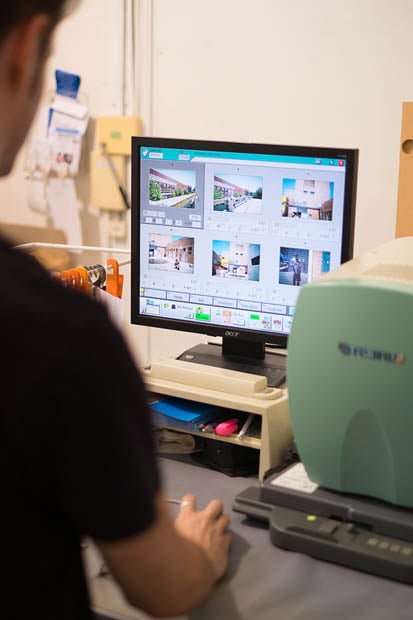
The developed film then goes through the 35mm scanning mask on the Fujifilm Frontier which then turns the negatives into positives.
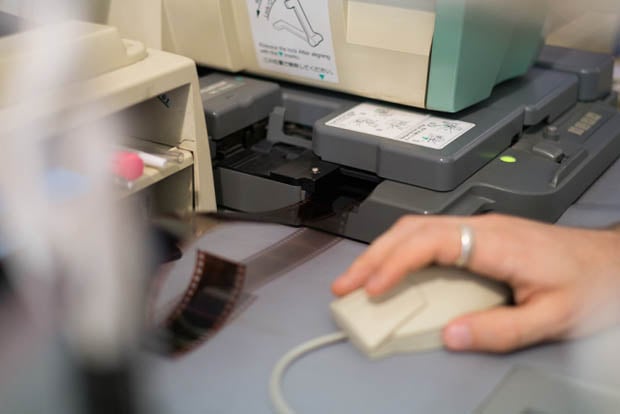
Once the film has been scanned at a high-resolution, the negatives will show as colour positives on a screen (good photo labs will use a calibrated screen to ensure the colour and exposure are correct).
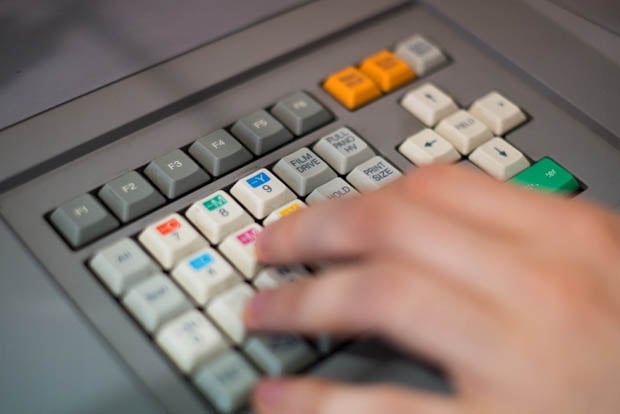
It is at this point a good lab technician adjusts each picture using a unique keyboard. Different amounts of Cyan, Magenta and Yellow can be added or subtracted to each photo to ensure colour is correct. Adjustments are also made for exposure to each individual photo. Printing from negatives is a skill, which is why you should always ensure the lab technician you use is highly trained in this area.
The roll of film photographed in this story ended up being developed, scanned and burned to CD.
So now you know the life of a roll of film, from being shot to being printed. The process does take some time to master for the new worker and if procedures aren’t followed things can go terribly wrong. In my time I have heard of some disasters with some labs losing film, negatives being incorrectly cut, or, even worse, films going to the wrong people.
I suppose as time flies by film is becoming a niche market. Photographic stores like Fremantle Camera House have been in the same location for over 50 years (not under the same business name) and are happy to print from a variety of film types. I am glad a store like this one still exists.
It is so nice to see a teenager holding a film camera and wanting to buy film. After all, isn’t that were photography started?
Imagine a world without film. There is something about film which digital can’t reproduce. Hey, I’ve tried — it’s just not the same. So to all the film users out there, I salute you. You are the photographers, the snappers, the image makers and the niche – keep up the great work.
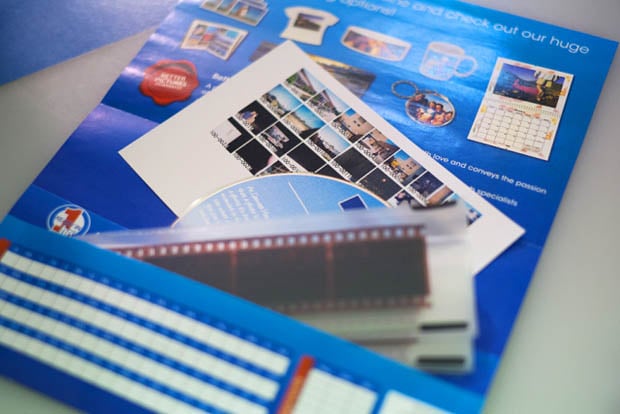
Thanks to Blair Gauld for letting me use your film for this story. As you can see that the film above also included an index print, which is great for knowing which images are on the CD.
Thanks also to Fremantle Camera House and Derek (great lab technician and film buff) for letting me photograph this story. If you have 35mm, 120, 110, E-6 or C41 film that needs to be developed, printed or scanned then contact Fremantle Camera House to see how they can help.