My Top 10 Tips for a Brand New Photographer, From a Slightly-Not-So Brand New One

Hello. My name’s Tom. After two years of tinkering around with DSLR photography, I believe that I may have passed an important milestone and successfully made the transition from amateur to enthusiast. I am by no means great, but I am aware of how great I’m not, which I’m told is a significant step.
I guess what I wanted to do was help out those who are brand-spanking new to the game, the people out there sitting on their beds with a D3300 and a kit lens. Because I was you very, very recently and I know there’s that little plateau at the start where you start thinking, “What’s the point?”
So, without further blathering, here are my Top Ten Tips for a Brand New Photographer. Obviously, I invite anyone to dispute or add. These are just things I wish I’d known in the first few months.
#1: Aperture Priority for Outside, Shutter Priority for Inside
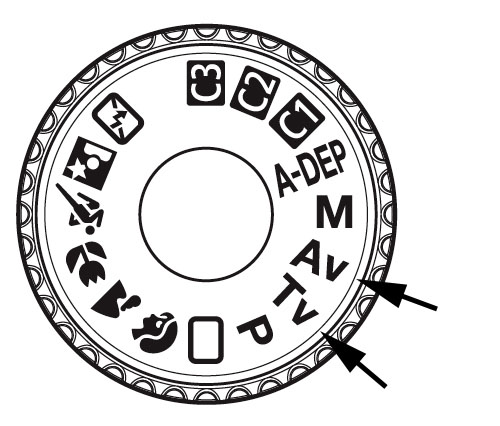
Okay, so I can already understand that some people will disagree with such a glaring over-simplification, but bear in mind that I’m aiming this at people with lower-end bodies and kit lenses. The low light ability on both is not going to be that great, so as a simple starting rule, this works. When you have light, crank up the aperture for that beautiful bokeh. When you’re indoors and it’s dim, work around the shutter speed.
#2: Shoot in RAW as Much as Possible
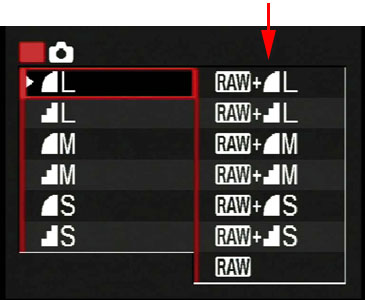
I have so many JPEGs that I desperately wish were in RAW format. Half the fun of photography is in the development. I love Lightroom. I love fiddling around with sliders. The difference you can make to a simple portrait is astounding. Yes, you can edit JPEGs in Photoshop, but RAW captures so much more information. You’ll be amazed how well you can save under-exposed shots, or how much more fidelity you have available when adjusting curves.
#3: Limit Your Use of Auto-ISO
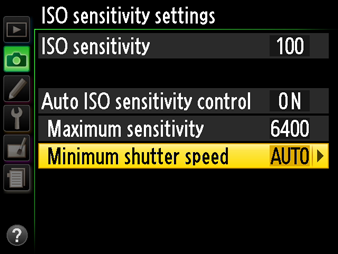
Auto ISO is great when you’re starting out. I think most cameras offer it. It basically means that you don’t need to worry too much about that aspect of your shot. When you’re on the go, it’s incredibly useful. But again, your first camera might not have great low-light performance, so anything over 1600 ISO is going to look pretty horrible when you get it onto a larger screen.
Most DSLRs have an option in the menu settings in which you can cap the maximum ISO. I find this incredibly useful. It means, if I take sports photos on a cloudy day with my piece of crap 300mm telephoto lens, I can cap the Auto-ISO at 1600, and be reasonably sure it will maintain consistent lighting. It also allows your camera to use ISOs between stops, meaning that if the shot needs an otherwise unattainable 965, it can have it.
#4: Turn the Viewfinder Grid On
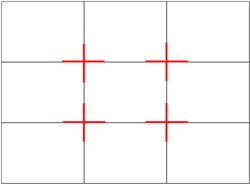
The Rule of Thirds is (or isn’t, depending on who you ask) incredibly important in photography. Google it, if you don’t know what I’m talking about. When I started out, I didn’t quite have an eye for lining up my frame. I think I’m better now, but I still use the Viewfinder Grid to help out. It’s especially useful for making sure your shot is level.
#5: Seek the Golden Hour
Unless you’re a couple of hours away from something spectacular, this is pretty much imperative for landscape photography. Sunrise and sunset (particular the window known as golden hour) are when you should be taking your landscape shots. It’s all about patience. If you’re doing an outside shoot with a model, you’ll want the same time frame. There’s no replacement for beautiful, textured sky than what nature provides as the sun sits on the horizon.
#6: Purchase a Fast Prime Lens
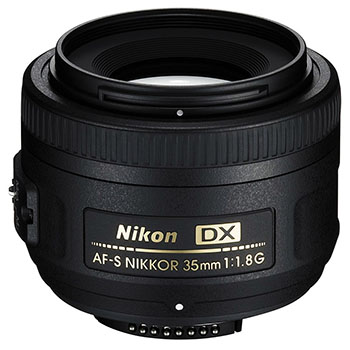
As far as I’m concerned, this is the most important tip in this list. I remember the day I purchased my 35mm 1.8G lens. I was just about to pop down to Tasmania for a weekend. I figured I’d take my camera with me to get a few happy snaps. But then I found that lens for $200 in the city and my weekend away turned into a full-on photographic mission.
The most important step in totally engulfing yourself in the world of photography is to say good-bye to your kit lens, and both Canon and Nikon produce affordable prime lenses that will immeasurably boost your confidence and passion.
I just can’t stress enough how thrilled you will be to make the upgrade to a fast prime. Sure, you’ll eventually need other lenses, but a 35mm or 50mm 1.8g will be the thing that kick-starts a lifetime of desire and financial despair. Or at least it did for me. I started off with a Nikon D5200 and a kit lens. I know have six lenses and three bodies. I need two more lenses and I’ll be satisfied. Well… for now…
#7: Have Fun with Cropping
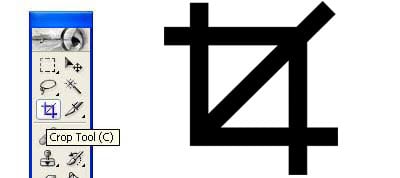
It took me a long time to figure out how people on Flickr had produced beautiful, panoramic landscape shots with their D7000s. Then I realised, they were just cropping the top and bottom of the shots. I felt incredibly stupid for not noticing this. Seriously, your RAW files will be huge. You have so much space to play with. Unless you’re printing these suckers on 40-inch canvases, you can afford to lose empty space. Your pictures don’t have to be a standard size all the time. In fact, you’ll notice an incredibly positive response when you play around with them.
#8: Go Easy on the Clarity Bar
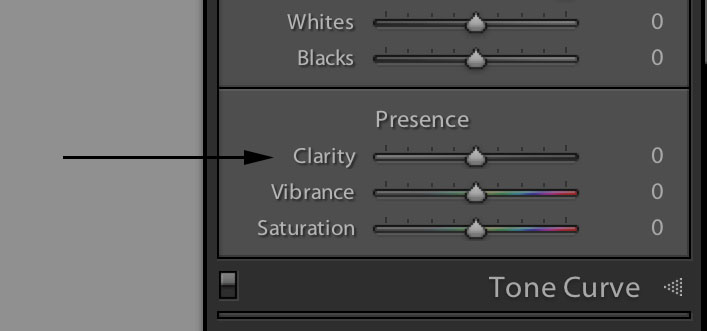
Pretty simple one. Don’t overuse this sucker. There’s something about it that we all like the look of when we first start out. But it’s kinda like a young kid eating too much Nutella. It’s okay when you’re young, but if you try getting anyone over 18 to eat that crap, you’ll look immature. There are times when it looks great, but there are many more times when it looks bad.
#9: Get Stuff Printed
I heard this tip a lot when I first started out, but never really pursued it until about a month ago. Now I know why. Almost nothing you look at on your monitor looks better than a physical thing that you can hold and show people. High resolution images were not designed to stay on computers.
I have a portrait of my housemates and myself on the wall of our living room. It looked pretty terrible on my monitor and I was hesitant to let them print it. But it’s now framed, on a wall, and it looks freaking awesome.
And also, have you seen how cheap it is to get stuff printed these days? 16 cents a photo down at some places. Yeah, it’s not the greatest quality, but don’t try and tell me the nostalgic days of photo albums are over when I can go and get 100 photos printed for $16.00 measly dollars.
#10: To Photograph Beautifully, Photograph Beauty
When I first started, I put way too much pressure on my camera to produce something from nothing. I was one of those guys who ran around the backyard shoving my camera as close as I could to flowers to create bokeh. I continually expected midday landscape shots to be something I could easily beautify in post. I figured lighting was something that could be worked around in Photoshop. But somehow, the most simple trick to photography was the hardest thing to wrap my head around.
Now I think I’ve kinda got the idea. If stuff looks nice to my eyes, then it’s probably going to look good through my camera. It’s a lot less effort and a lot more satisfying to produce a beautiful image with no post work, rather than turning something bland into an over-produced mess. A picture of my hot female friend sitting in my back yard is nice, but a picture of my hot female friend sitting on a bench at the beach as the sun sets is going to look infinitely better. And that way I don’t have to do a creepy (and badly done) job of Photoshopping a bikini on her.
About the author: Tom Overend is a Melbourne-based journalism student. His passions include photography, videography and one day wooing former Home and Away star Rebecca Cartwright. He’s relatively capable at two of these three things.
Image credits: “The Teacher” by John George Brown, Rule of thirds grid by Michael Hernandez