What Photographers are NOT Considering When Using High ISO

It’s no secret now that modern cameras have taken photographers to new heights with their ability to shoot at and above ISO 1600. Personally, I can now shoot in situations where previously, I ‘had no choice’ but to use flash or put the camera down, so it’s no surprise many photographers are taking advantage of high ISO to be able to shoot in poor existing light.
In these situations I often see many photographers posting pictures online of shots taken at say ISO 6400, 1/60th at f/1.2 — just because their camera will achieve that. At this light level, you may as well put your camera away because most pictures taken at this level will often come out with a less than satisfactory result — not always, but most often.
Don’t get me wrong. I’m not saying never take pictures in bad light. Sometimes you don’t have a choice and sometimes adding lighting won’t be appropriate, so its all about making smart decisions that suit the scenario you’re in.
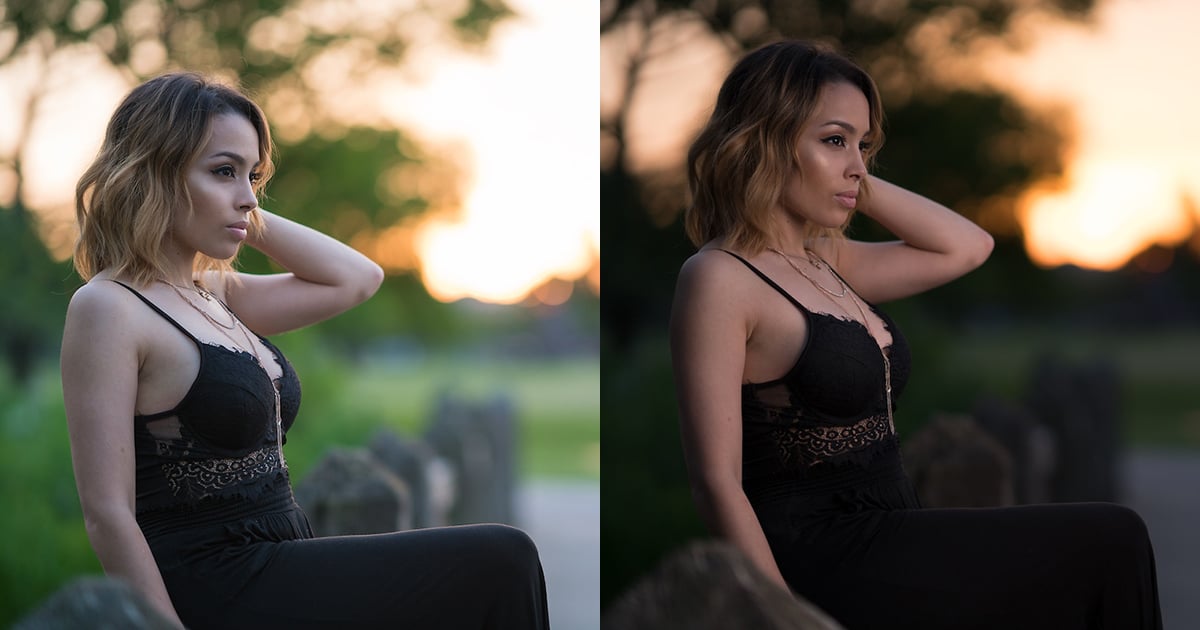
So in such situations what is the answer? Well LED is a great option and my favourite LED light is the Ice Light by Westcott. Using this light I can achieve very natural looking pictures in low light as long as I balance the exposure between the ambient and the Ice Light as much as possible.
Unfortunately, an LED light is not always the most suitable option in low light. For starters, it’s a constant light and in event situations it is not appropriate as it needs to shining in subjects’ faces constantly and they need to be used at a close distance and don’t offer a wide coverage.
I am often asked about how I light my subjects backstage at fashion weeks, so I will use this scenario as an example for this article. Before I start, let me ask you one question: Are you interested in flash, but hesitant to try it? Now lets get some of the excuses of ‘why you may not use flash’ out of the way…
“I’m a natural light shooter”
“I specialize in natural light”
“Natural light is more original”
“I’m a purist and shoot things how they are”
“There’s no need to shoot flash when I can handhold down to half a second”
“With the new high-ISO sensors, there is no need for flash”
“Flash is too complicated”
“I don’t like the way flash spoils pictures — making them look unnatural”
“Skin tones and backgrounds often come out orange”
Well, now that we have all the excuses out of the way, let me introduce you to the new way of making the most out of existing low-light combined with high ISO and ‘FLASH’.
Background
I have been experimenting with light and supplemental light sources since the beginning of my career as a professional photographer — not because I wanted to be creative, but because I realized that adding/subtracting light is one of the best problem solving tools available to photographers. When I was working at my first freelance job at a local newspaper shooting ‘advertorials’ I would sometimes be faced with shooting up to 10 assignments within 8 hours, and with travel time eating at the clock, I had to work efficiently and find solutions to problems within minutes.
Most often the problems I faced had to do with lighting. I’d be faced with a wonderful background yet horrible light where the subject needed to be positioned and with no assistants to help with reflectors, the only alternative light source that could deal with indoor and outdoor lighting were speedlights.
Photographers can go years and never quite get the hang of flash. Some of the best photographers in the world couldn’t use flash to save their careers, yet they still manage to be successful. The moral of the story is that flash is an alternative lighting solution and creativity tool that may not work for everyone. It can be very complex or very simple, depending on how you learn to use it.
A lot of keen photographers tend to pick up flash as a means of being creative, and sometimes this is the wrong approach, yet with the right attitude. There’s nothing wrong with having the desire to introduce flash into your work as means of being more creative, but the downside is that by doing so, you’re most likely missing many of the important steps along the way in understanding how flash works.
Often, the following mistakes are often made:
- Flash looks very obvious, often due to over-exposure and incorrect white balance.
- Flash is directed at angles that look un-natural and/or unflattering to subjects
- Backgrounds are too dark or too orange
Probably the biggest issue that comes from starting out with ‘using flash creatively’ is that the photographer learns to use flash in a way that only works for certain ‘ideal’ situations, similar to what they may have seen from a YouTube video. Everyone is looking for shortcuts, without going through the necessary steps to understand exactly how flash works. Unfortunately, going through those steps requires a lot more time than I can put into this article, and requires sufficient practical time — so feel free to attend one of my upcoming workshops or seminars — PLUG!
Problem Solving Tool
Enter, the ‘problem-solving’ way of learning. By changing your approach to consider flash more so as a ‘problem solving tool’ you’ll be putting yourself through the necessary steps to understanding the way in which flash works from inside out. Through this article I will illustrate with work I have done at various fashion weeks around the world and give you a little insight into what I do behind the scenes of major fashion events. There are many ways to utilize flash with high-ISO and this is just one of the ways I do it.
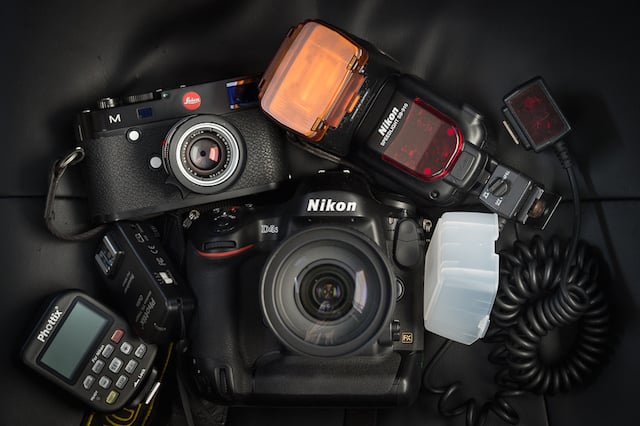
Lets start with my equipment. My primary kit consists of a Leica M camera, a Nikon D4s, AF-S 24–120mm f/4G lens, an SC–29 off-camera flash cable and a Nikon SB–910 Speedlight using a tungsten gel and basic diffusion dome. I’ve recently started using the Phottix Odin wireless system and so far it has been fantastic and most importantly reliable – something I can’t say for the Picket Wizards I previously used. This is what I use for 90% of my work. Practically, when using one flash, the cable is preferred as it serves two purposes: One, it’s more reliable than a wireless system, and two, it wraps around my neck in standby mode when not in use.
Typically, I will be the one holding the flash, usually above my head in centre or to a side, often to the left, depending on the angle I need it. Mounted on the flash is often the tungsten CTO-balanced (orange) gel and a basic diffusor that comes with the flash. I’m often asked why I don’t use larger softboxes/umbrellas, Gary Fong attachments or other light modifiers. The answer is simple – I NEED FLEXIBILITY.
Unfortunately, there is not one lighting modifier that can do everything in any situation. For those unaware of, or have not used light modifiers, they are attachments that fit onto the end of the lens that shape, direct and control the direction and spread of light.
Each modifier has a purpose, and at the end of the day, what I need is something small and versatile to work with – enter the basic speedlight with softdome attachment. This attachment is designed to spread light as wide as possible from a small clip on attachment. A lot of photographers believe it softens the light, and while it may reduce a little harshness, its primary purpose is to spread light over a wide area.
So why is this versatile? Well, backstage I work in small spaces and while I do see the odd photographer running around with a huge softbox, it really is not proper etiquette to do so. Many photographers come backstage with the purpose of shooting pictures that look like they were taken in a studio. This way they can run back and upload to Facebook and portfolio as if they had just done a fashion shoot…..so it all depends on what your goals are.
Personally, I think it is poor form to be moving around with such large equipment in small, confined spaces. There are some photographers that shoot lookbooks or specialty shoots but they are usually tucked away into a corner and don’t get in others’ way.
My role as a photographer at a major fashion show like Mercedes-Benz is either in official photographer or designer photographer (house) capacity. This means I need to do a lot of different things in a very short amount of time. Once I’ve finished shooting hair and makeup, I need to shoot pictures of the models in their first looks, then shoot them in line during the show.
While the show is running I remain in a fixed position, trying to stay out of the way of stylists, hair and makeup crew and show designers and producers. This is no simple task, even from a fixed position, so my creative options are limited. This is ok because I only really need pictures of girls in their outfits, preferably full-length format, but usually it’s half to three-quarter length because I’m so close to the models.
In this situation, a few things are key. I need to shoot quickly and use lighting that is versatile and spreads light wide and as evenly as possible. When faced with this challenge there is no better camera for the task than the Nikon D4s. Not only is its high ISO ability amazing, but it can focus extremely accurately in low light, and do it quickly. As much as I love using my Leica, I can’t manually focus as I’m holding the flash in my left hand so there is no better option in this scenario.
Typically, I am shooting at ISO 1600–6400, or even 12,800 at times, trying to keep the shutter at a minimum of 1/125sec, but preferably at 1/250sec at f/4–8. So straight away you can see what I’m doing here. I’m not shooting pictures for great bokeh and risking focus error. I am shooting pictures that have adequate depth of field so I can see my entire subject(s) in sharp focus, with all details in the outfits visible – this is ‘Fashion Week’ after all.
So already, this is one major advantage modern digital cameras have over previous film cameras or previous generation digital cameras. I’m also keeping my shutter above 1/200sec. While a rear sync option can help with keeping pictures sharp with flash at slow shutter speeds, it is of no use when the flash is blending with the exposure in the environment. Rear/slow sync is only achievable where the flash completely overrides the light hitting the subject (remember that).
Technical Setup in full manual exposure:
- Set your ambient exposure FIRST (leave flash off). Often I will have a desired shutter and aperture in mind and then set the ISO based on that desired combination. Often I set my exposure a little under so that I don’t blow highlights and I gain a slightly faster shutter speed.
- Turn on the flash and set it. I will consider my average distance to subject for my pictures which is usually 1.3–2 meters and set the flash power to that distance scale in manual flash mode.
- The tungsten (CTO 3200K) gel on the flash serves to balance color so I’m not throwing daylight (5200K) at a tungsten environment, where the colors become mixed.
- White balance I usually set using a custom setting or I dial in a color temperature between 2800–3500K depending on the envinronment.
Lighting goals:
- Light must look as natural as possible
- Shadows must be placed carefully by the correct angle of light
- Skin tones and white balance of the scene must be accurate
In The Field
The following images have not been altered, manipulated or retouched. Only slight curves and white balance adjustments have been made.
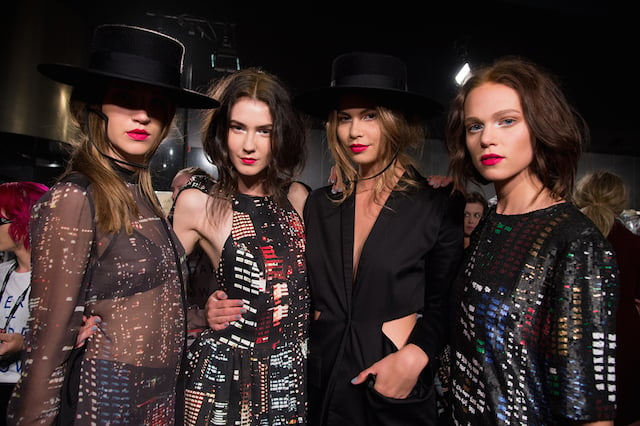
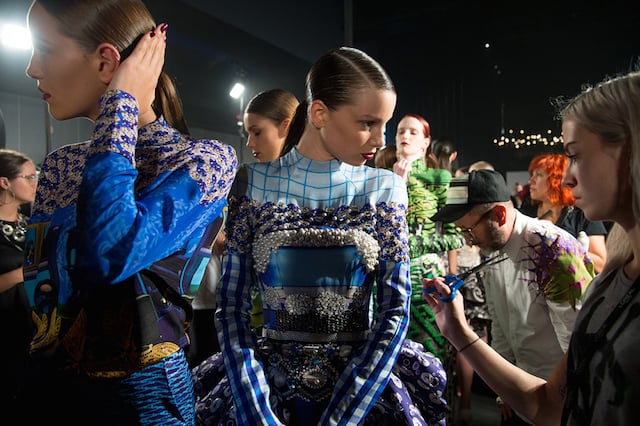
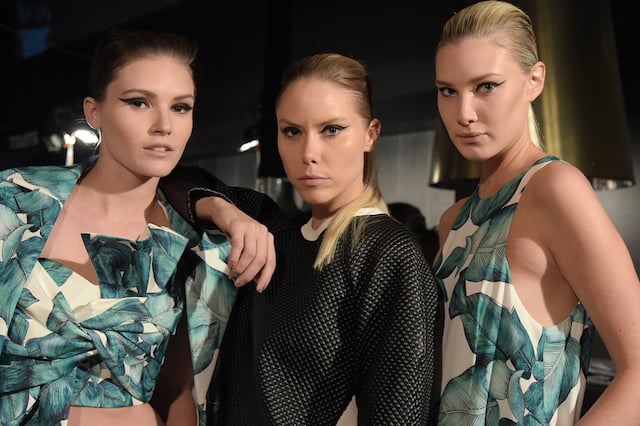
When shooting groups, the priority is to try and light the subjects evenly. Having the flash ‘on-camera’ wouldn’t work because the model closest to the camera would be exposed differently to the models to her right. Therefor I am holding the flash out to my left and firing towards the middle girl. Making a picture look like natural light is all about the angle of the flash and the resulting shadows.
In our day-to-day lives we are used to seeing light drop from above, with shadows underneath facial features, so holding the flash at a height above the models’ faces will create a similar looking light as if its coming from the ambient light in the room, and not from a flash.
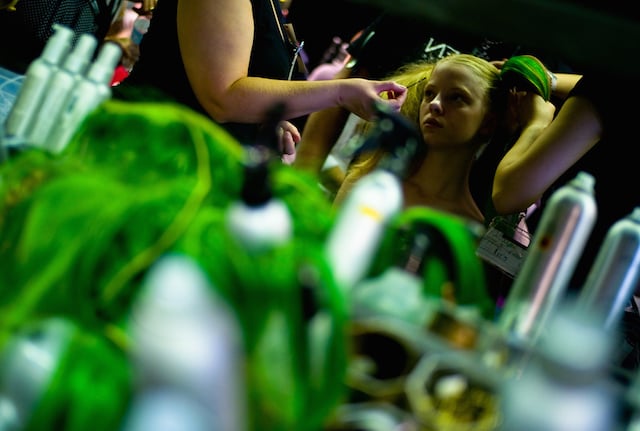
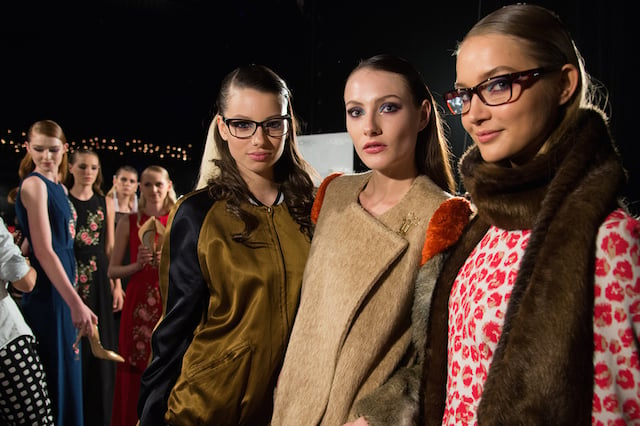
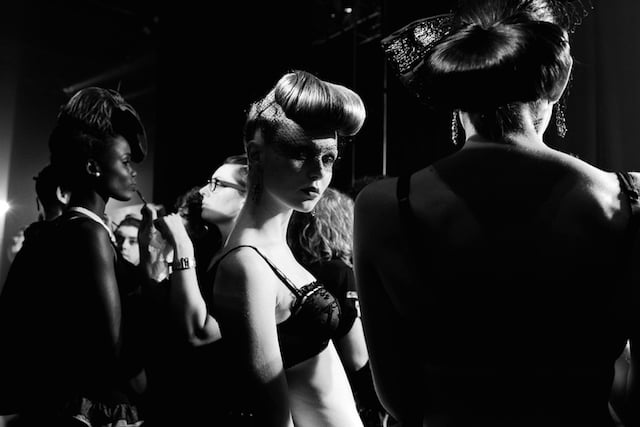
The key to getting soft lighting is to have the light source nice and close to the subject. That way you’re using less flash power and will achieve less reflections on the skin as a result. Shooting at high ISO also works in your favour as flash power is at a minimum. Here I am holding the flash slightly above the model to my right. A larger light modifier would result in a larger catchlight in the eye, but remember, I am showing you how to use ‘one’ tool to do it all in a fast paced situation.
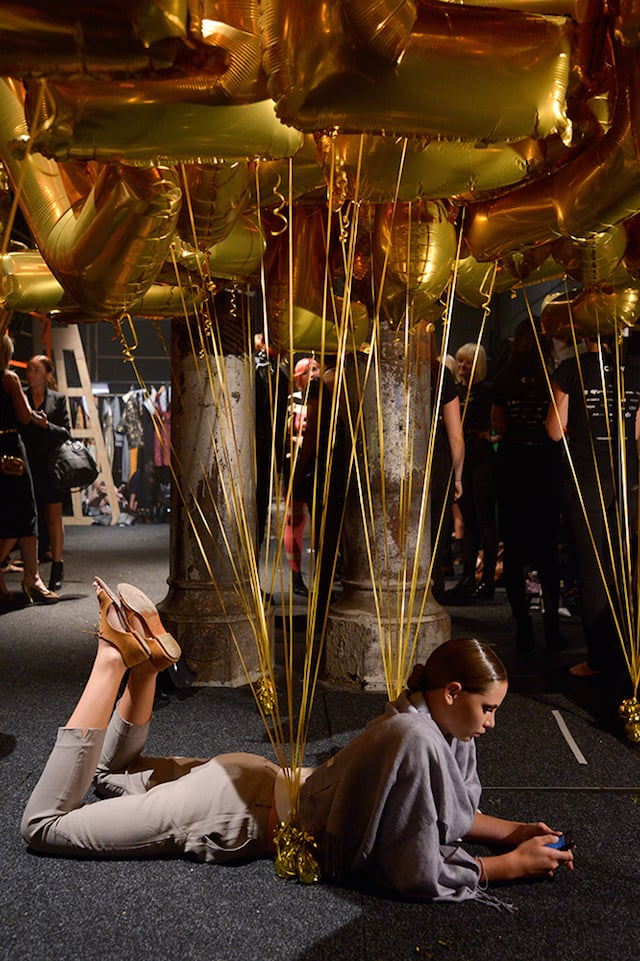
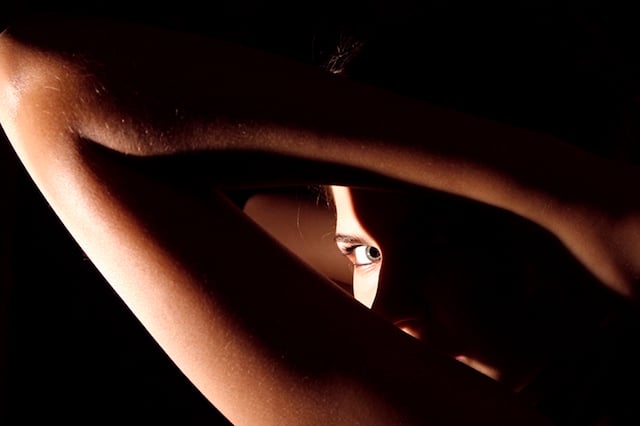
My goal was to shoot this model relaxing on the floor but the problem was that the only light on the model came from the light from behind — there was no ambient light on her face. I then placed the flash in front of the models face, slightly above and to her left. This creates a soft shadow on her right side, with a more natural looking image. All I needed to do was match the flash power to the exposure of light coming from behind her and I achieved my goal.
Because I had quite a sufficient amount of side/backlight, I decided to lower the flash power slightly. In these situations, I can step back, hold the flash further away or stop down the lens to control the amount of flash power hitting my subject(s). Here my focus was on the girl centre of frame but to avoid the strength of the flash hitting the foreground subject left of frame I held the flash even higher and more to my right, and feathering (pointing it away) the flash above the subject. This is what helped create a very natural looking picture.
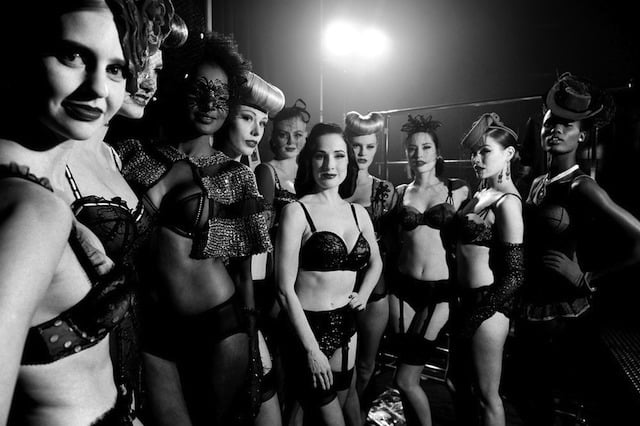
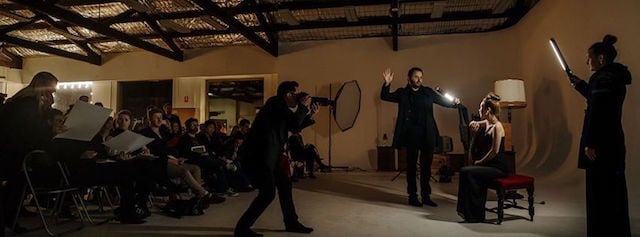
Where doing setup shots I don’t mind shooting at 1/125sec. Because I was using a Nikon D3S at the time I preferred not to exceed ISO 1600 and wanted a f/5.6 aperture for sufficient depth of field to cover most of the women in the frame. Instead of taking the usual front on group shot, I created an angle that lead into my main subject Dita Von Teese. To keep the exposure the same on all subjects I needed to have my flash at an equal distance away from each person. I asked someone to hold my flash to my right, and here is the result.

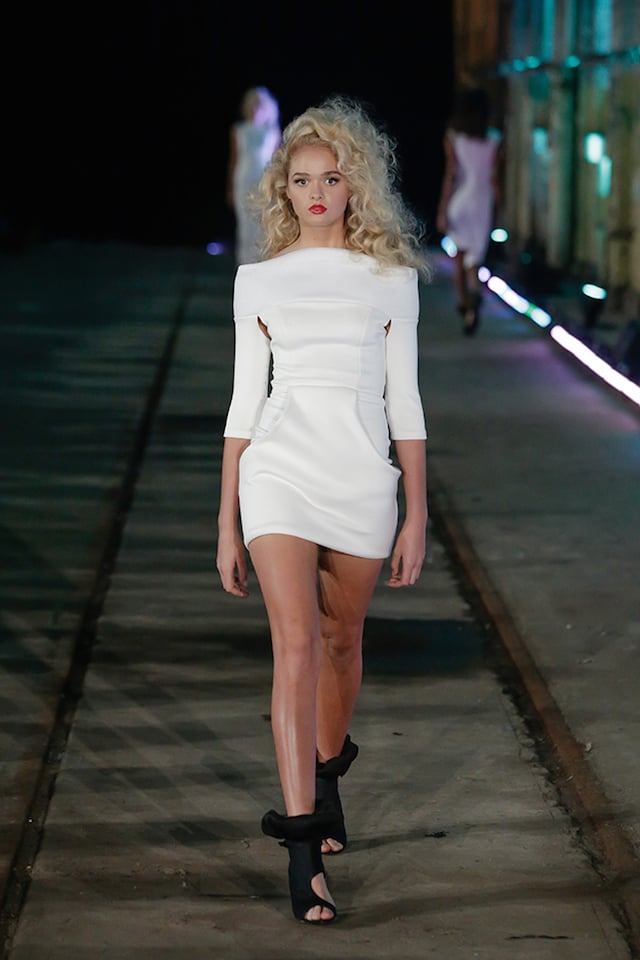
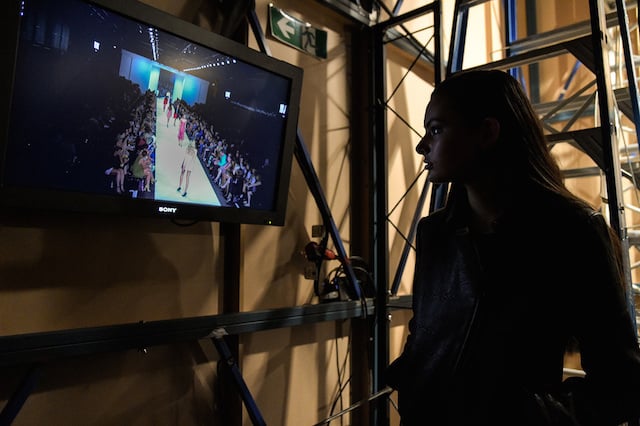
Here is a creative technique I chose to show the motion of the models going back and forth from the runway. Shooting at 1/8 sec and using slow sync, was able to time this picture in a way that creates a surreal look into the action. The key to capturing this shot and getting a sharp picture was to prefocus on the distance where I knew I would shoot, stopping down the aperture for depth of field in case of focus error, and using rear sync and ensuring that my flash would override the ambient exposure hitting the subject.
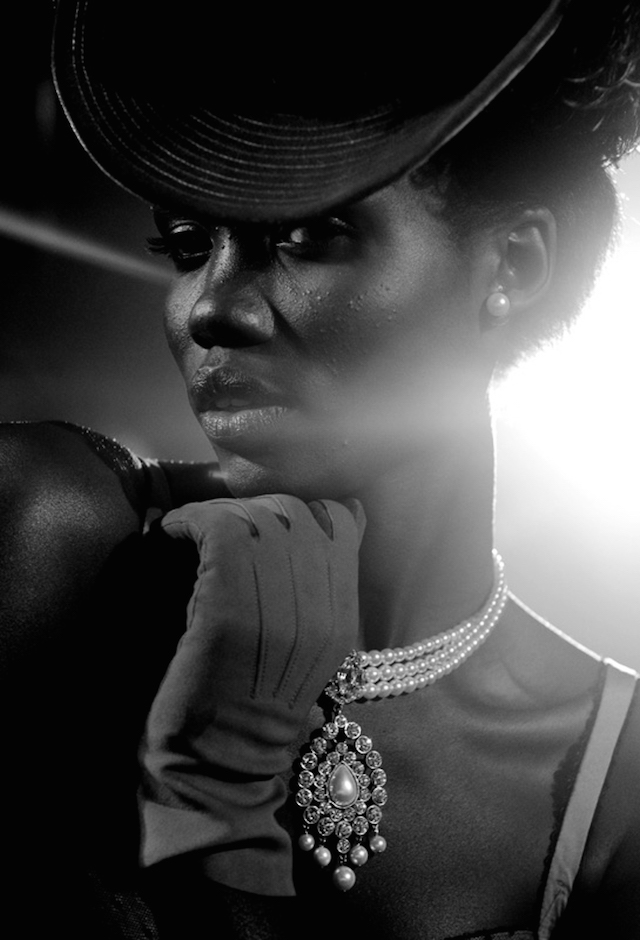
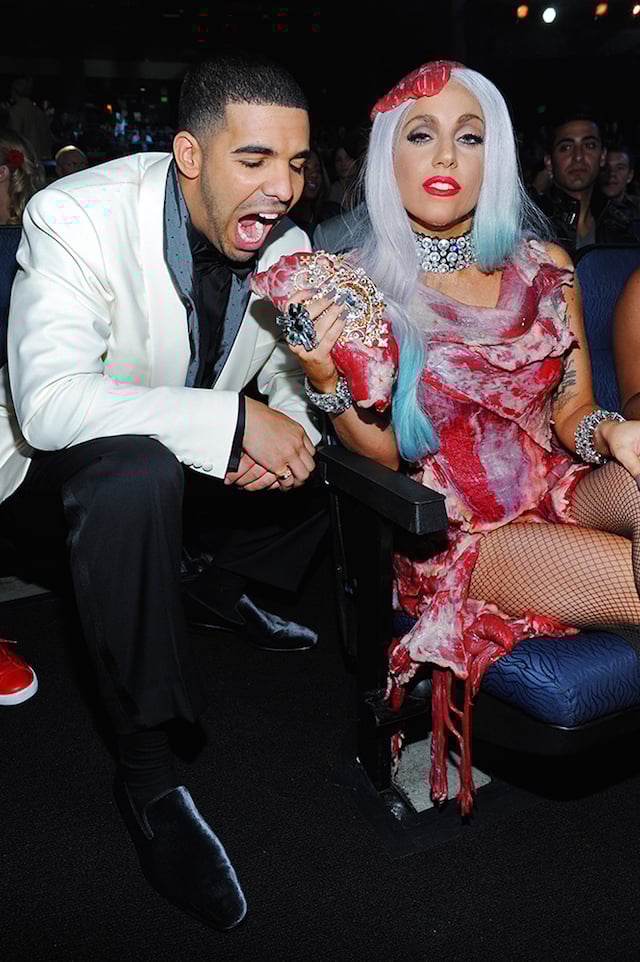
With a lot of backlight that was wrapping the model’s face from her left/behind, I added some fill flash from her top right to create this picture. I could have easily not used flash at all, but I like the details gained on the right side of her face and her top hat.
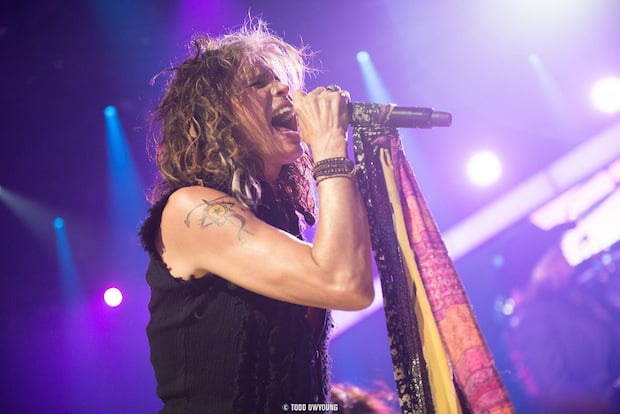
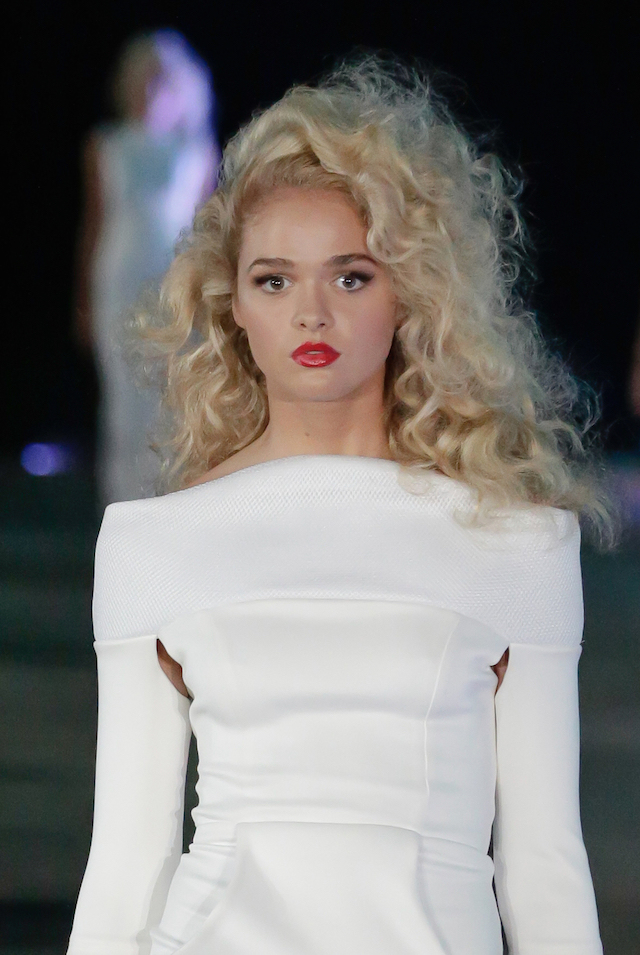
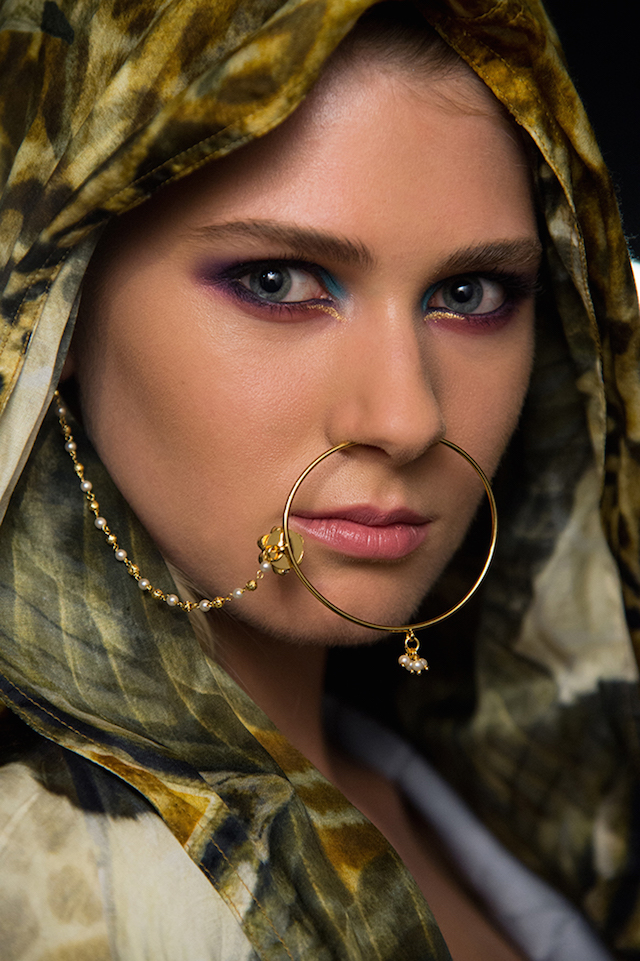
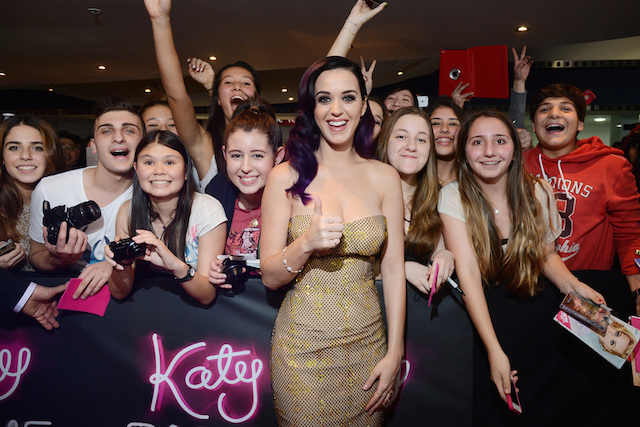
Alternatively, if I decide I want to make more use of the ambient light, I’ll push the ISO even higher to 6400 and throw my flash in from the right side to be the key light. The result is a very soft light thanks to the combination of high ISO, low flash power and close flash distance to subject. If I had shot this at ISO 400 the flash would be very obvious and the background would be pretty much black.
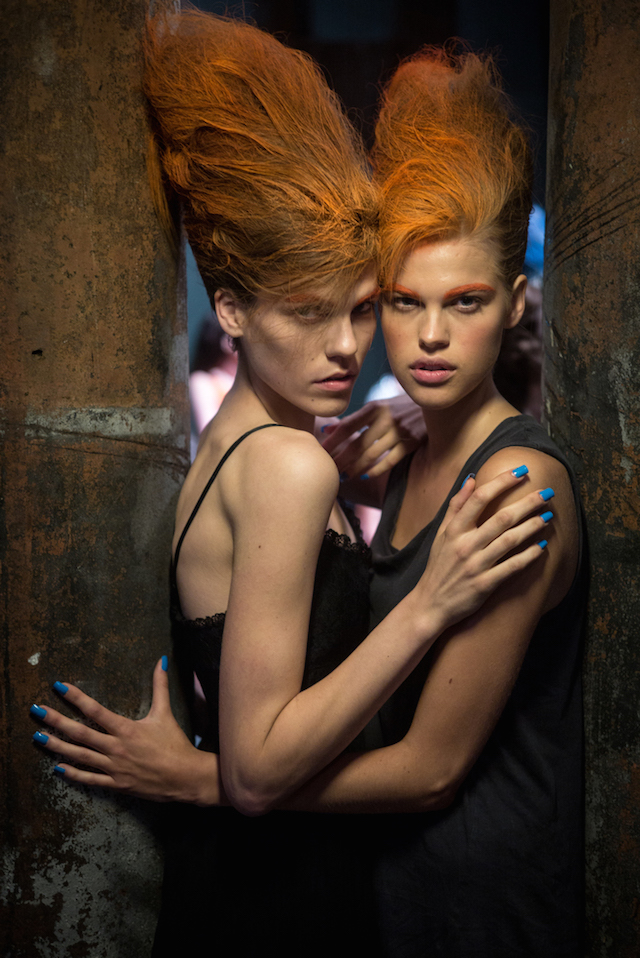
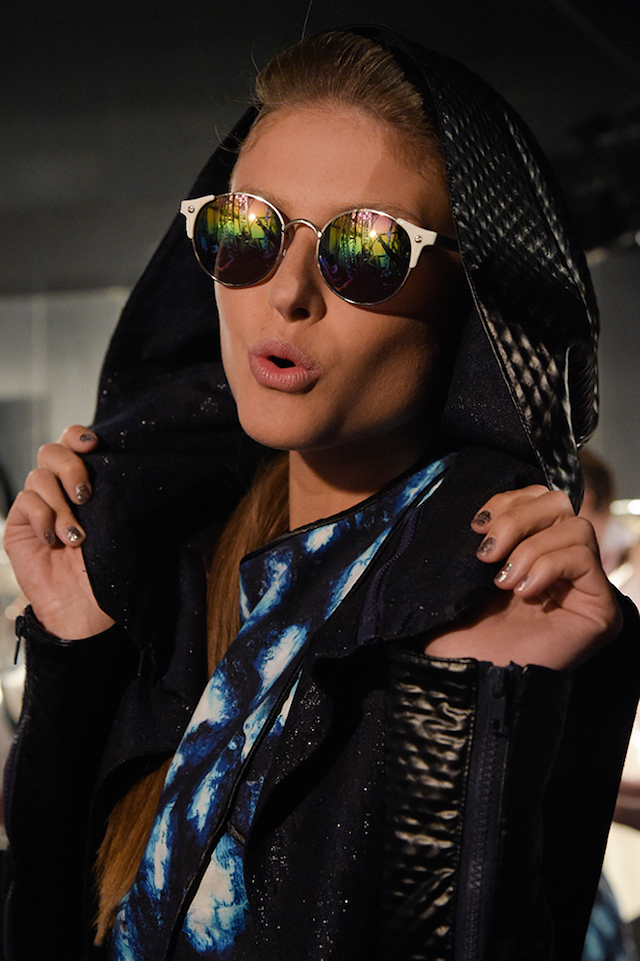
The key to achieving natural light in any situation is to shoot from the ‘shadow side’. Not only does it create a certain mood in this picture, but it looks a lot more natural and eye catching. It also happens to boost the contrast ratio. This area was extremely dark, with barely any light on my subject, so I asked someone to hold my flash to the right of frame and here is the result. Each time I shoot I also take at least 3 frames and either move myself or the flash so I get a variety of different looks in the one take. This increases my chances of achieving a great result.
As a contrast to what I’ve been demonstrating, here is a picture that does the opposite. Here I have only given enough exposure for the flash power, resulting in a shot that has no background and isolates the subject. This is a very different result because my goal is different. I didn’t want to show the environment and felt this would be stronger, so as this model pulled back her hair I moved the flash on the left side and fired. I don’t like to shoot this way too often at fashion week as I feel its more important to show an environment as opposed to taking a picture that could have been taken in a studio, anywhere.
Final Words
Before I finish, I’d like to stress that this technique of shooting in low light with the setup I used is only really good for large open spaces. The is because the diffusor I’m using is throwing light wide and if you’re shooting this way in a small room, especially with white walls, where the light will bounce everywhere and you won’t be able to achieve the same look.
Good lighting is about controlling the light with the right technique and especially the right modifiers on the end of your flash. There are all sorts of modifiers that allow such control, and maybe I’ll discuss them in another article, but for now, this technique will work well in open spaces indoors and outdoors. I actually use the same techniques when shooting red carpet and social events as well.

While reading this you may have doubts about shooting at such high ISO’s and questioning the quality of the files. Keep in mind, I would never deliver poor file quality to my clients and here is the proof. This shot below was taken at ISO 6400 and looks like ISO 400 on film – simply amazing.

Lastly, its important to always be looking for available light ‘only’ pictures so you’ll need to keep an open mind because some pictures are better shot as they are.
What I’ve offered here in this article really isn’t difficult, but you’ll be surprised just how many ‘great photographers’ are not shooting in this way, and achieve less than satisfactory pictures as a result in similar situations. The best photographers I’ve ever worked with have always found ways to adapt to their situations and I believe flash is a more than necessary tool for use combined with high ISO in low light situations.
I’m not saying it is always going to be the answer, but more often than not, if you’re shooting at an exposure of less than ISO 3200 1/125sec at f/1.4 you could probably benefit from using flash, or at least LED — and you can make it look natural if you follow the steps in this article. If you have any questions please ask them in the comments section below.
About the author: Kristian Dowling is a Melbourne, Australia-based celebrity photographer. His photographic roots came from street photography, a passion he still follows today, while other areas of his professional experience include news, sport and documentary.
Working with the world’s biggest names on key assignments, his experience has taken him to the world’s most important events including Beijing Olympics, Cannes Film Festival, NY Fashion Week, MTV Music/Movie Awards, and most recently on tour with Pop Star Katy Perry.
To see more of his work, head over to his website or follow him on Twitter, Instagram or Facebook. This article originally appeared here.