Film Photography Technique Tips for the Digital Photographer
Film photography is similar in many ways to digital photography, and most of your standard digital photography techniques apply to film too. You just have to understand the peculiarities of film and its limitations and you’re good to go.
That will be explained in detail in this article, which presumes readers are already reasonably proficient at digital photography and are embarking upon film photography for the first time.
Film Speed
The sensitivity of a film is referred to as film speed. A slow film is one that’s less sensitive and a fast film is one that’s more sensitive.
Film speed is measured in ASA. Functionally, it’s the same as ISO on a digital camera. You won’t often be faced with any other measurement of film speed, but the most common alternative is DIN standard 4512. This is an old system and the only time you’ll have to use it is if you’re using a very old camera.
Often the film box will state the DIN number alongside the ASA rating. Just in case, here is a handy table:

Essentially, all you need to remember is 100 ASA (ISO) is 21 DIN and each additional 1° of DIN represents a third of a stop of exposure sensitivity.
Shooting in Low Light
I will be pilloried for saying so, but I just don’t recommend shooting in low light with film. There is film that can be shot at up to 6400 ASA, but I find the grain, contrast and lack of shadow detail not worth the exercise.
The main reason fast lenses were so popular before digital was due to the relatively slow films available at the time. As films got faster, wide aperture lenses became less common.
One further complexity is that at long exposures, film suffers what is called reciprocity failure. That’s when the film performs at below its rated ASA during long exposures. How much exposure you’d need to add depends on each film. If you are determined to do bulb exposures, look up how to calculate it in the film manufacturer’s specifications.
I don’t enjoy doing long exposures on film. It’s possible, but it’s much easier to get it right by trial-and-error using a digital camera. As a general rule, if the light level, film speed and maximum practical aperture demands a shutter speed that would result in camera shake or subject motion blur, then I just put the film camera away and go to digital, or find a way to better light my subject.
The flip side to film being slower than digital is you can get really slow film. This makes it possible to take wide aperture photographs in broad daylight with a hint of motion blur. By over-exposing, you can get far more than a hint of motion blur. Do this with a digital camera with a base ISO of 100 to 400 at midday and even shooting in RAW won’t save you.
In fact, try it; take a narrow depth of field shot on medium format with midday shadows and motion blur. That would say ‘film’ in a way that would be extremely difficult to reproduce with digital.
Flash
The traditional solution to photography in light too low to shoot with a wide aperture alone is to use flash. Done with skill, this can work out very well. To my eye, on-camera flash comes out better than with digital flash photography. I do like the look of on camera flash and black and white film. Certainly, it comes out better than an underexposed image.
Artificial Lighting
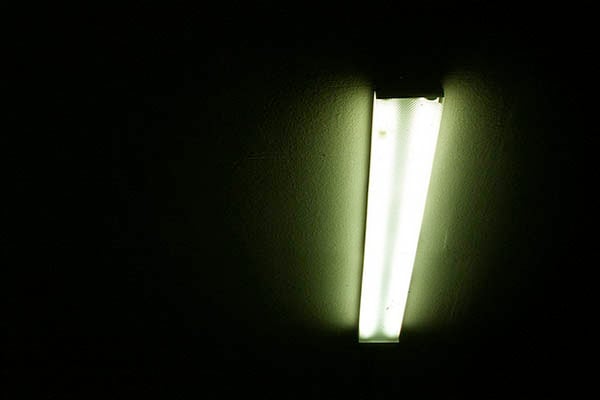
Film has a fixed white balance. Most colour film is daylight balanced. Shooting under tungsten or fluorescent light adds further complexity. Whereas electronic flash has a colour temperature close enough to daylight, tungsten and fluorescent light are of a different colour temperature and nature. In the old days, you’d buy tungsten film, but today the vast majority of film is daylight balanced.
Colour temperature is traditionally corrected with optical filters. For example an 80A filter will cool Tungsten light to approximate daylight. This comes at the penalty of two stops of light cut by the filter. Another more modern approach is to fix it in digital post processing and you may lose only a little bit depth.
If you are using flash or strobes with tungsten balanced film, you should employ a CTO (orange) gel over the light source to bring the colour temperature back to the equivalent of tungsten, just as you would with a digital camera. In a situation of changing or tricky cross-lit white balance, I will usually choose monochrome film instead of colour. It’s a lazy cop-out, but remains sensible advice.
Fluorescent tubes and LEDs not only have a strange colour temperature, but flicker too. The solution is to make an exposure of 1/60s or longer to avoid uneven lighting. This fix applies to digital photography as well.
As for the colour temperature, I would simply guess whether it is closer to daylight or tungsten and use the appropriate film. If in doubt choose daylight film, because a little amber colour in the light gives the scene a little warmth and atmosphere.
Setting Film Sensitivity
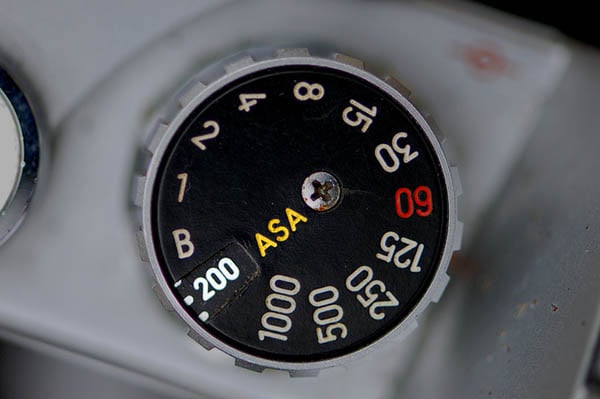
Older film cameras that have a meter required you to set the film speed manually through a dial, whereas most modern film cameras can take care of setting the film speed for you. Not to be confused with Nikon’s designation for crop-frame sensors, DX is a system by which electrical contacts in the camera body pick up a reading from the film canister. The film has a DX pattern on it (not all do) set the camera film speed to DX. If not, set the film speed manually.
Note that if the canister does not have DX contacts, most DX cameras default to 100ASA. If your film is other than 100ASA and lacks a correct DX code, for example, it’s some funky small production film, or bulk-loaded from a 100 foot roll, first consider whether this will be a problem with your camera. There are some interesting workarounds available for this situation. When I bulk-load film, I often recycle used 135 film cans with a correct DX code for the film that I intend to load.
Also, some modern consumer-grade cameras don’t have the facility to override DX. If so, you might be able to get round this with exposure compensation, if available. Sometimes, I want to use film rated at 1600 ASA, but the camera’s meter doesn’t go that high.
If all else fails, just shoot away and treat the film as if it were rated at whatever the camera thinks it is rated at. This will under- or over-expose the film and tell the lab that you shot it at 100ASA. I’ll tell you about re-rating film next.
Pushing and Pulling Film
Many people don’t know that you can adjust the film speed in development. What you do is shoot the film at up to three stops over (two is better) and clearly label the can. It’s not common in high-street stores, so it helps to make good eye contact with the lab-technician and say clearly “Please push two stops” and wait for him to mumble an acknowledgement and write the instruction on the order slip. Otherwise he might well forget and then you’ll have to rely on latitude and that’s usually only good for one stop of under-exposure. BTW, I wouldn’t bother pushing one stop; it’s usually not necessary.
Pushing is relatively easy; they just stop the machine and let it develop longer. Pulling is hard to do in a commercial processing machine, but straightforward to do by hand. Note that many labs hand-process black and white film, so you may have more luck asking them to pull it, especially if you go to a good artisan lab. I don’t normally pull film as print film has great over-exposure latitude.
Note that pushing increases grain and contrast and loses some shadow detail. Pulling reduces grain and loses some highlight detail. If I want more grain, I’ll push it. I find it more effective and reliable than altering the developer chemistry. Cropping also enlarges grain, but you lose some sharpness and contrast and shadow detail are not affected.
Latitude
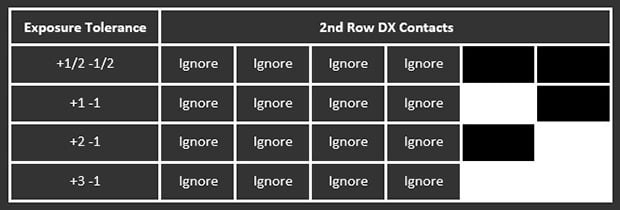
Print film has tremendous latitude compared to digital sensors. Films vary, but you can shoot most print films at between +3 and -1 stops of exposure. The precise latitude can be found on a technical data sheet, or if you know how to do it, you can read it by looking at the DX code on the can. I will teach you how to do this, because unlike film speed, latitude is very rarely written on the can.
This is a bit silly, as I can’t recall seeing a camera that could read the second row of contacts, not even Fujifilm Natura cameras that rely heavily on latitude in their exposure programs. It’s especially silly, because it is humans metering by eye that would benefit more from using latitude than automatic cameras would anyway.
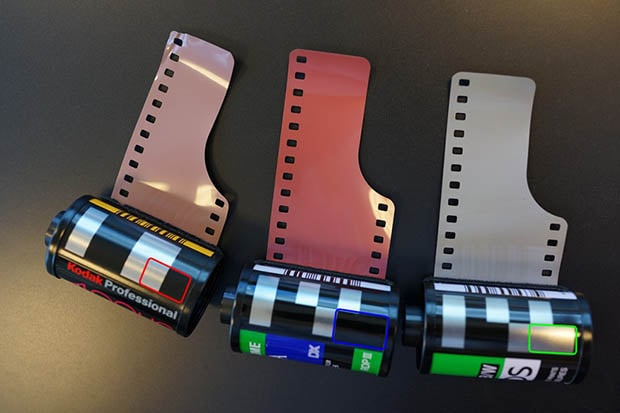
In the picture above, the two red highlighted contacts reads +1/-1 stops of latitude. The blue highlighted contacts read +half/-half and the green contacts read +3/-1. You can confirm this from the table below.
In practice, having lots of exposure latitude means you don’t need to be spot on with your exposure. As you over-expose, you will lose highlight detail. Conversely, as you under-expose, you may start to lose shadow detail. It’s best to get it right, but when I am working with high-latitude print film in a meterless camera, I tend to err on the side of over-exposure and give an extra stop of exposure for good measure. This is Old timers would say “Expose for the shadows”.
In fact, you are supposed to be using something called “The Zone System” to balance shadows and highlights. Read up on it if you want to learn more. As a general rule of thumb, if the scene has a high dynamic range and your key subject is not the brightest part of the image, then expose to keep shadow detail. Let the emulsion’s greater over-exposure latitude handle the tricky highlights. This is the opposite of the way you’d do it with a digital camera, where you might try to avoid blowing out the highlights. Try it and once you have the hang of it, it will make a lot of sense.
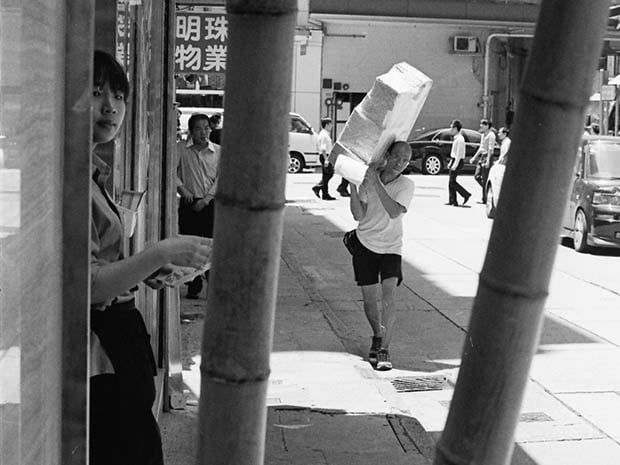
Latitude relates to the flexibility of setting the film’s mid-tone exposure. As a side note, dynamic range describes how many stops of variance the scene can encompass. In this scene below, I exposed for the shadows and relied on film’s wide dynamic range to carry the highlight detail. You can still see details on white shirts in the midday sun.
In the second example below, I had no time to plan my exposure as I was busy dodging a bicycle messenger cycling across the road. As a result, I exposed sloppily without adjusting the centre-weighted meter. The image on the left is as scanned. The one on the right has been adjusted in Photoshop to bring up the shadows. It kind of works, but it’s not as natural looking as a proper exposure would have been.

Slide film, on the other hand, has great dynamic range, but narrow latitude. It has to be shot at precisely the correct exposure, to within less than a stop off. I can’t guesstimate it by eye to my own satisfaction. Most metered cameras can handle it, but the best are the Nikon matrix-metered SLRs.
Where it will bite you in the behind is when you’re using a camera with a dodgy meter or shutter, or a camera designed for mercury batteries but used with alkaline batteries of a different voltage. Unless you can be sure to meter correctly, don’t shoot slide film. Whenever I see the Lomography website, I am astounded at the skill or good fortune of the photographers that post good images shot with slide film and cameras with no exposure control at all. It’s not as easy as Lomography would have you believe.
Using Expired Film
Film is a chemical process. Chemicals degrade with time. Colours can shift, but the biggest effect with expired or poorly stored film is it gets slower. Therefore, I sometimes deliberately over-expose old, expired film.
Slide film is very temperamental and should be stored as cold as possible, slowly brought to ambient temperature, shot before it expires and developed immediately. Print film is much more tolerant and 25 ASA to 400 ASA black and white print film is all but bullet-proof.
Processing Film
Most film emulsions with unusual processing requirements are no more. Kodachrome, for example required a special process that can no longer be found. Today, most labs offer only three processes:
- C-41 is the colour negative process
- E-6 is the colour slide process
- B/W chemicals process monochrome print film
I prefer to develop colour film in a lab. It can be done at home but it’s cheaper, easier and required less kit to get it done commercially, even when pushing. Bear in mind that slide film and black and white film can cost triple to be done in a lab. Black and white print film can be developed by anyone that can follow a cookbook and is cheap to do at home, so I do all mine that way.
The other reason to do your own black and white film is control. Most labs don’t specify which of several available developers and protocols will be used, or how old the chemicals are. This can have a significant effect on the grain, tone curve and quality of the image.
If you’re bored with your photography, colour negative film can be developed in slide chemicals (E-6) and colour slide film can be developed in negative chemicals (C-41). The latter is more common. This messes with the colours to creative effect. You end up with a colour negative with strong hues. I love it, but it’s not for every roll.
Make sure your lab knows you want to do this not all labs will cross process. Whatever you do, don’t get a lab to cross process movie stock in a conventional C-41 or E-6 machine. It will leave a nasty gunk all over the inside of the machine, on the rollers and on other people’s film.
You can even cross process colour film in black and white chemicals. You get a thin but contrasty black and white image with strong grain. This needs to be over-exposed and pushed a stop or two or you will have no mid tone detail and no shadow detail at all.
Black and white film can’t be cross processed in C-41. It just comes out blank, and the lab-tech will laugh at your naivety. Some specialist labs can even reversal process certain black and white negative films with clear film bases, but if you want black and white slides, you’re better off with a film designed for it like Scala or Fomapan R. You can process these as negatives too.
Scanning
Many digital photographers like to scan, being accustomed to editing and storing images on a computer and sharing the results on-line. Whole books can be written on this topic and I will go into greater detail in subsequent article, but for now I will provide a simple summary.
Some labs will scan on a drum scanner, especially large format film. I scan mine at home on a flatbed scanner that is designed for film. Other people I know prefer to photograph back-lit negatives with a DSLR and a macro lens. There are pros and cons to each process, but they all get the job done. Just don’t buy one of those little dedicated film scanners with a camera inside. I have tried several and they all gave horrible scans and scratched my film.
Enlarging and Printing
The best way to enjoy your slides is as slides and best way to enjoy your negatives is as prints. When I print, I like to print big. 35mm film can easily be printed to 12″x18″, but finer-grained films are best for this unless you want grain to be a big feature.
Note that I said “feature”; it’s not like ugly chroma and luminance noise. It is a feature; it contributes to the look and feel. It is worth finding a good lab that does optical enlargement. Digital labs are more common, but they will just scan at 1200 to 2400 dpi, then re-sample and print on a digital printer at 300dpi. Optical enlargements get the most out of your film and look much better.
Most digital labs don’t print larger than 12R except by special order, as this is the biggest they can make from a 3:2 format image on a standard roll of printer paper. A good print is a sight to behold.
Conclusions
The use of film has pros and cons over digital. If you understand the differences, you can use it to best advantage. The important thing is to get out and start shooting. You’ll learn from your mistakes and take pride in your triumphs.
About the author: Dan K is a photography enthusiast based in Hong Kong. He’s passionate about collecting film compact cameras. You can find him on Tumblr and on Twitter. This article originally appeared on Japan Camera Hunter.
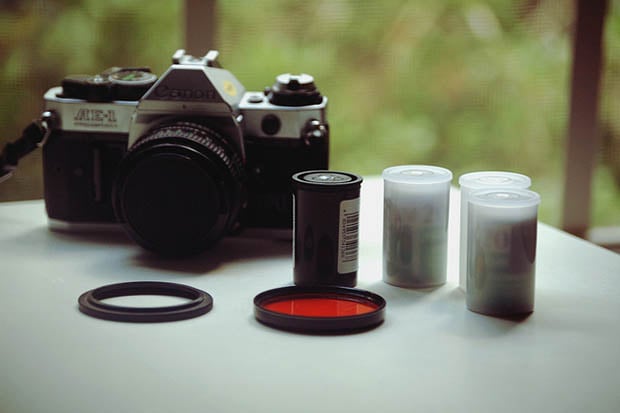
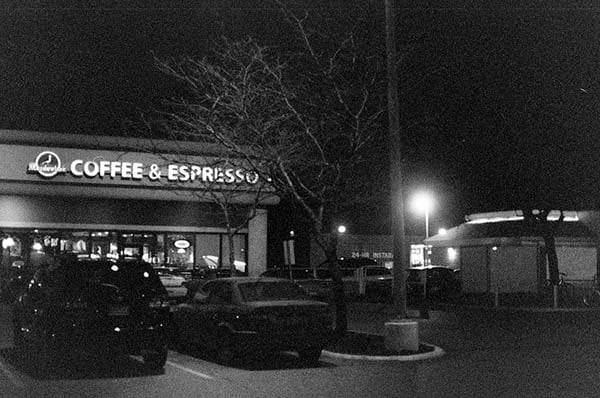
Image credits: Film Photography by InspireFate Photography, Meadowlark by jdaviddean, Fluorescent by bredgur, Shutter Speed Dial and ASA Selector by Steve Snodgrass, Expired film effect by 96dpi, C-41 by renee.hawk