How to Back Up Your Pictures Using an Android Tablet and External Hard Drives
In this post, I will share some of my techniques and experiences of backing up photos using a tablet while traveling.
Like most other landscape/nature/travel photographers, when I am on a multi-day or multi-week photo tour, I face the problem of backing up my photos from the memory cards. A laptop computer is a nature choice for most people. With a laptop, we can copy files between the memory cards, laptop disk drive, and external disks. We can even do some light editing.
Not anymore. I am now older (and hopefully wiser), I want to travel as light as possible but still get the job done. “Light” is a relative term, though. We nature photographers need to carry lots of big and heavy photographic equipment such as lenses, camera bodies, accessories, tripod and ball head, in addition to outdoor equipment such as sleeping bag, tent, sleeping pad, stove, crampons, etc.
Anyways, to lighten my load, I’ve done lots of research. Basically, I studied the following four options:
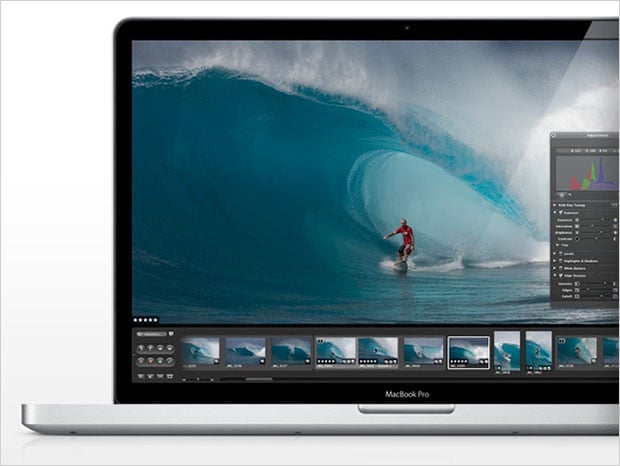
- Finding a light and small laptop or netbook computer. A laptop is the most versatile options. You can run all kinds of programs on it, including favorites like Lightroom and Photoshop, Canon Digital Photo Professional, or Autopano Giga. However, even the “ultra-light” 11-inch MacBook Air still weights a hefty 2.4 pounds and runs only 5-hours on battery. You also need a power supply and maybe a case, with further add weight. In addition, going through airports’ security checkpoints with a laptop is really a pain-in-the-neck, as we all know.
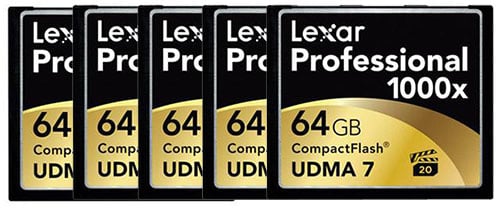
- Buying a bunch of high capacity CF cards. This should work, but it is an expensive solution. Right now, a Lexar 128GB CF card costs as much as a Canon 17-40mm F4 L professional lens. Ouch! Besides, after working with computer storage systems for many years, I know storage devices can fail at any moment. I always maintain at least two copies of data. This wills double the cost. Moreover, how to you make copies when you travel? Sure, on some high-end camera bodies you can copy between cards, but most cameras do not support this feature. Many have only a single card slot.
The price of media will drop eventually. However, I am a firm believer that even the most experienced photographers can benefit from reviewing the shots each day. Checking images on the tiny camera LCD for composition and focusing is never a productive and pleasant endeavor. This is the situation that you really need and want a big screen.
- Get a special “backup storage and viewer” such as Epson Epson P-7000 Multimedia Storage Viewer (discontinued) or HyperDrive COLORSPACE. These products have a card reader, a small LCD screen and an internal HDD (some are just HDD enclosures so you need to supply your own HDD). It is in fact a small, single-purpose computer. The problem is that their screens are tiny. Moreover, they are expensive and cannot do anything other than copying files from cards to disks.
- Using a tablet and two external hard disk drives (HDDs). I found this is the best solution for me so far. You probably want to bring a tablet with you anyway so you can check emails (if you are lucky enough to have internet access) or read books when the light is harsh outside in the high noon.
Tablets are much lighter than laptops — my Nexus 7 table weights merely 340g/12oz. Their battery life is normally much longer (8-10 hours). They have fairly large screens (Nexus 7 sports a hi-resolution 7-in screen) for us to do some critical reviews of photos. Most importantly, using it, I can copy my photos from a CF card to two HDDs for backup. I successfully used this system on my recent 10-day trip to the Canadian Rockies. I brought with me only one 8-GB CF card and another 4GB CF card, and I never worried about running out of memory cards!
Hardware
Getting the tablet to work with your HDDs and card reader is not straightforward, though. It requires some extra cables and software.
First and foremost, you need to use an Android tablet (or even an Android phone). An iOS device such as iPad does not work because Apple limits the way it can be used. Sure you can use the Camera Connect Kit to copy photos into an iPad. However you cannot get the RAW files out of the iPad by copying them to an external disk drive or uploading to a online service such as Dropbox (there are some limited ways of get the JPEG versions of the files out with apps such as Goodreader, but that is not what we want). You have to wait until you get home and plug the iPad to your PC or Mac so you can copy the files from the iPad to your computer.
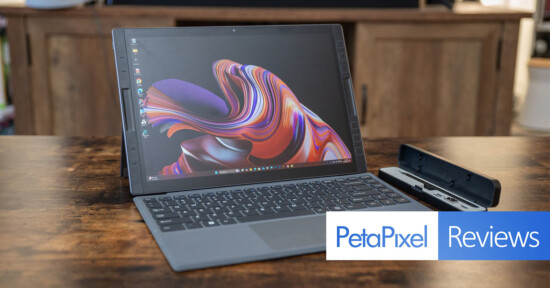
In the future I might use a Windows-based tablet. However, as of this writing, Windows-based tablets are just not ready for the prime time.

Here is a list of hardware items you need to bring:
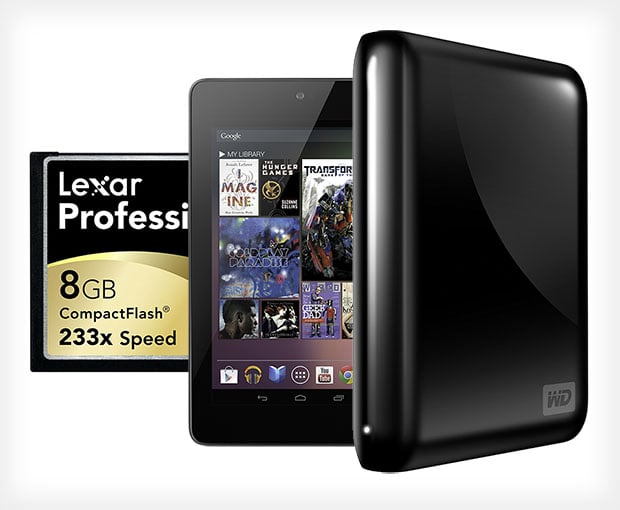
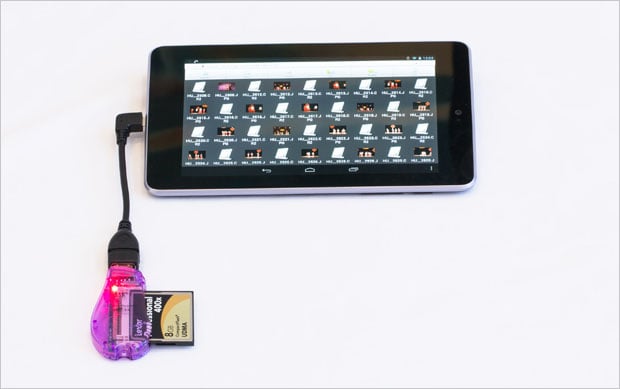
- An Android tablet or cell phone. I am using a 32GB Nexus 7, as shown here. It is a good compromise between screen size (7-in) and portability (340g). It is so light that I don’t hesitate to put it in my backpack. I sometimes connect it to my camera in the field and run DSLR Controller so I have a giant external viewfinder. Super cool. However this will be the topic of another article.
I’ve heard that others have successfully used a Samsung Galaxy Note II or other phones for this purpose. If you are satisfied with the small screen size when reviewing photos, then can even leave the tablet home. Talking about ultra-light!
Not every Android device can be used in this way, though. You need to do some research first. At the very least, it must support USB OTG (On-The-Go) functionality.
- A micro-USB OTG cable. They are very inexpensive, so I got a few from monoprice.com and Amazon.com for less than $2/piece and I carry an extra with me. Warning: if your configuration does not work, chances are it is caused by a bad OTG cable.
- A card reader to read your CF/SD card. I am showing a very small and simple CF card reader in the picture. There are other more fancy ones that can act as both a card reader and a USB hub. Note if you use the one with a USB hub, you can copy files directly between your CF/SD card and portable hard disk drive without the need of using the tablet’s storage as an intermediate buffer.
- Two portable external hard disk drives (HDDs). Although the photo shows only one HDD, I always carry two of them. Always, always, maintain at least two copies of your data!
- A USB-Mini USB Y Cable. This is for connecting the HDD to the tablet. Most tablets’ USB port cannot supply enough electrical current to power up external HDDs. The Y cable has an additional USB connector (the red one here) to provide the additional power. If your HDD does not come with one, you can get it from places like monoprice.com or Amazon.com.
- A 12-DC-to-USB Car charger or other charger. This is for the additional USB connector of the above-mentioned Y-cable when I car camp. It provides additional power juice needed by the HDD. Of course, if I stay in a hotel/motel, I will use a regular wall-charger with USB port instead. You need either the wall-charger or this car charger, or both, for your cell-phone and your tablet anyway, so this is not something extra for you to carry.
If you go backpack travel for a prolonged period of time and need to back up your photos, you can use a portable power-bank or a solar charger. They charge your phone as well.
You might think that these are lots of things to carry. However, keep in mind that when you use the much heavier traditional laptop solution, you still need to carry the HDDs, the card reader, and a mini-USB cable (for connecting the HDD to the laptop), and the USB charger for your phone. So the only additional item you need to carry with the new tablet solution is the OTG cable, which is tiny and weight next to nothing. You also need to replace the regular mini-USB cable with the Y-cable.
Software
Here is a list of software you need to install before you take your trip:
- First, you need to root the Android system. Otherwise you cannot connect the external HDD to it. There are many different ways to root the system. You can search the web for more information, if you have not already done so, or if you don’t understand the concept. A standard warning: rooting the device might make “brick” your device or lose the warranty. Do it at your own risk.
- Once the device is rooted, go to Google Play Store to download the free “Stickmount” app. It will connect (mount) the HDD/CF/SD to the Android file system so that you can access files on these device.
Note: Stickmount supports FAT/EXT file systems. If you HDD is formatted using NTFS or exFAT, you will not be able to see the disk. Luckily, solutions are available. Read the documents of Stickmount for how to download additional programs that support these file systems.
- You also need a file manager/explorer app so you can find/view files. I use ASTRO File Manager / Browser, or the ES File Explorer File Manager. Both are free as of this writing and both are excellent. Either will work fine.
Note: By default, Android can only display JPEG files as thumbnails. You can see the names of RAW files but you cannot see the thumbnails. You can still copy the RAW files even you cannot see the thumbnails. However, if you want to preview your images on the device, you should shoot RAW+JPEG.
Another solution for RAW shooters (almost all landscape/nature photographers are) is to purchase the Photo Mate Professional app and use it as the file browser/manager. It’s a useful tool that allows you to browse RAW files and even do some limited editing.
Operations
Step 1: Copying Image Files From the Memory Card to the Tablet
- Open the file manager app such as ES File Explorer File Manager. Create a temporal folder, say “Day 1”, somewhere in the internal storage of your tablet.
- Put the memory card into the card reader, and connect the reader to the tablet via the OTG cable.
- The Stickmount program should automatically mount the CF card and you will see a message.
- In the file manager app, navigate to the memory card folder (Stickmount should show its name in its message. If not, the folder is normally under /sdcard/usbStorage/sda1, if you use Nexus 7. Other systems might be different). You should see your images. Select the images (I normally just use “Select All”), and click “copy”.
- You then navigate to the temporal folder you created in Step 1 (“Day 1”), and click “paste”. The system will start copying files from the memory card to the tablet. This may take a while. You probably want to turn off the auto-sleep function of the tablet.
The following are some screen captures to help you understand how to navigate through these steps.
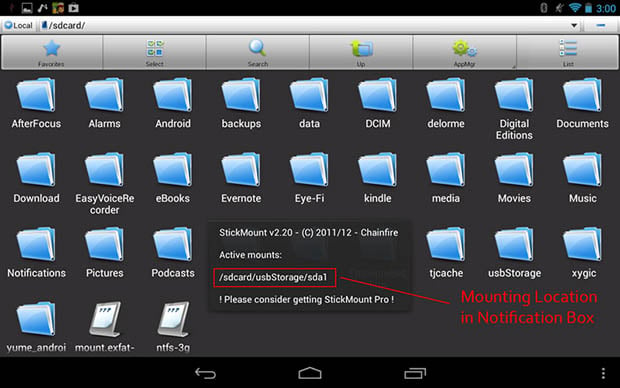
After you insert connect the card and carder, Stickmount will display where the card folder is mounted in its notification box.
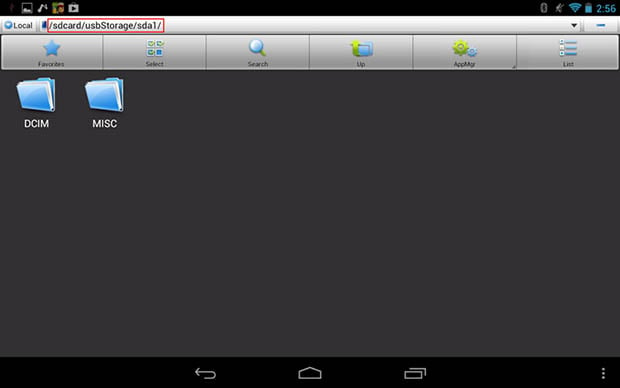
In ES File Explorer, go to the folder, you will find the folders on the card. The image files are typically located under “DCIM”.
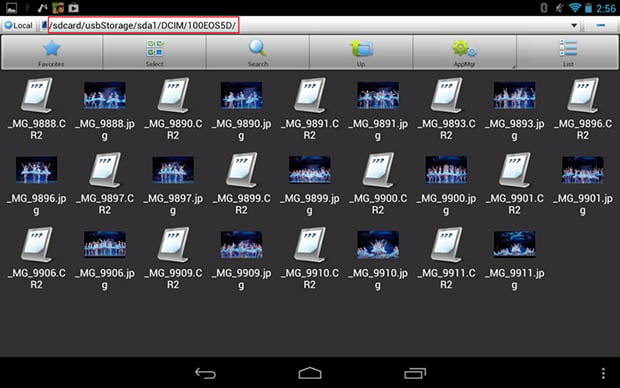
Go to the image folder,you will see image files. The system cannot display RAW files by default (but you can still copy them).
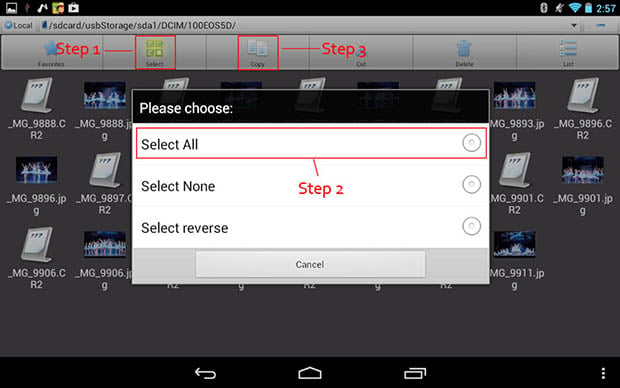
To copy all files, do the following: (1) Hold the “Select” icon until the popup box appears on the screen. (2) Click “Select All”. (3) Click “Copy”
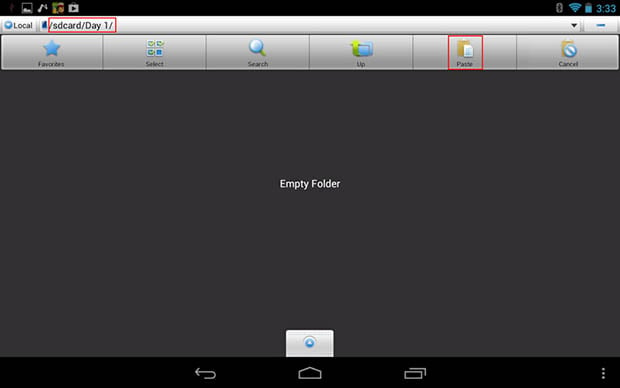
Finally, go to the temporal folder, click “Paste”. Files will be copied from the memory card to here.
Step 2: Copying Files From the Tablet to the External Hard Drives

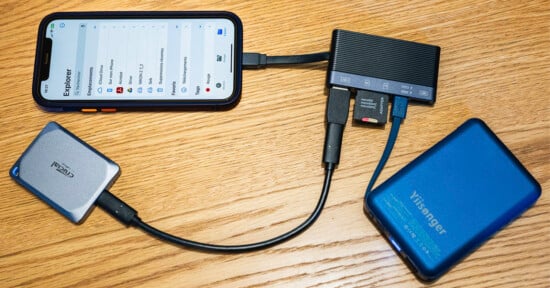
- Connect the external HDD to the tablet via the Y cable and the OTG cable. Connect the additional USB connector of the Y cable to another USB power source: a car charger (shown here), a wall-charger, or a portable power bank, etc., depending on your situation.
The Stickmount program should automatically mount the HDD and you will see a message. If not, unplug the OTG then plug back.
- In the file manager app, navigate to the temporal folder (“Day 1”), select all files, and click “copy”.
- Go to the HDD folder (again, the folder is normally under /sdcard/usbStorage/sda1, if you use Nexus 7). If you see files on the HDD, you are in the right place. If you don’t see any files in the folder, the mounting operation was unsuccessful. Try it again.
Before you leave home, copy one or two small files to the root director of the HDDs using your home PC and remember their names. Doing so will help you to confirm the HDD has been correctly mounted.
When you confirm the directory, click “paste”. The system will start to copy files from the tablet to the HDD. This may take a while, so you probably want to do something more interesting while the disk is busy — like cooking dinner, setting up tent, or reading.
- After the copy is done, make sure you unmount the HDD inside Stickmount before unplug the HDD, otherwise you might damage the data on the disk.
- Repeat these steps for the 2nd HDD.
- After you have two copies of data stored on HDDs, you can format the memory card now. You can also delete the temporary folder in the tablet or phone if it has limited storage size.
There is no need to post more screen captures, since the operations are very similar to the previous steps.
Finally, if your card reader has a built-in USB hub, you can connect the card reader to the tablet, and connect the HDD to the USB hub, so both the card reader and the HDD will be mounted at the same time. You can then copies files directly from the memory card to the HDD.
Other Thoughts
In the future, I probably will use two 128-256 SD cards (128GB will be more than enough for me on a 2-4 week trip. Others might need more), or two low-power external SSDs (Solid State Drives), to replace the two HDDS. The solution will be much smaller, lighter, and much more reliable (no moving components). Moreover, it does not need the Y cable since the SD cards consume much less power. However large capacity SD cards and SSDs are still expensive (although much cheaper than CF cards). I expect their price will drop significantly in the next two years.
Will Android is a good OS and Nexus 7 a good table, it has its limitations. I have to root the system – no problem for someone like me who knows technology, but it can be a headache for some photographers. I cannot calibrate its display for accuracy. Finally I cannot run Lightroom or Photoshop for some rudimentary editing while on the road.
I am still waiting for the perfect light-weight, Intel-based tablet running Windows. The newly released Lenovo ThinkPad Tablet 2 looks very promising, but I want something even lighter and smaller, something using a 7 or 8-inch screen instead of a 10-inch one. I guess that I still have to wait at least a year or two, though.
Finally, I said iOS devices will not work. I will probably get some nasty mails form fanboys. You can actually connect external HDDs to an iPad if you jailbreak it. However, it’s a significantly more complicated process. Moreover, Apple discourages you from doing this and makes it harder and harder with each new generation of iOS. You don’t know what will happen next. In addition, I love to use Nexus because of the excellent DSLR Controller. Last time I checked, it still does not run on iOS.