What is Rembrandt Lighting and How to Use It for Portrait Photos
![]()
Photographers who shoot portraits are likely familiar with Rembrandt-style lighting as well as other styles such as loop, butterfly, and so on. This is especially true if you have taken a lighting class or have been reading up on the subject. You may be using this specific type of portrait lighting in previous images and might not even realize it until reviewing later. (Ask me how I know).
Table of Contents
What is Rembrandt Lighting?
Rembrandt Harmenszoon van Rijn (1606-1669) is part of the group of painters referred to as The Dutch Masters. His overall works spanned several genres but our interest is in his portrait works, both of others as well his self-portraits.

The self-portrait by the artist seen in Figure 1 shows the lighting style that now is associated with him. Images are typically low-key (dominated by darker tones) and the light is directed towards the face from roughly a 45-degree to 60-degree angle to the side of the subject.
The light is also positioned above the subject by around 30 degrees. Keep in mind that these degree numbers are a good starting point, but you’ll likely need to adjust to achieve your desired final look, as we’ll see shortly.
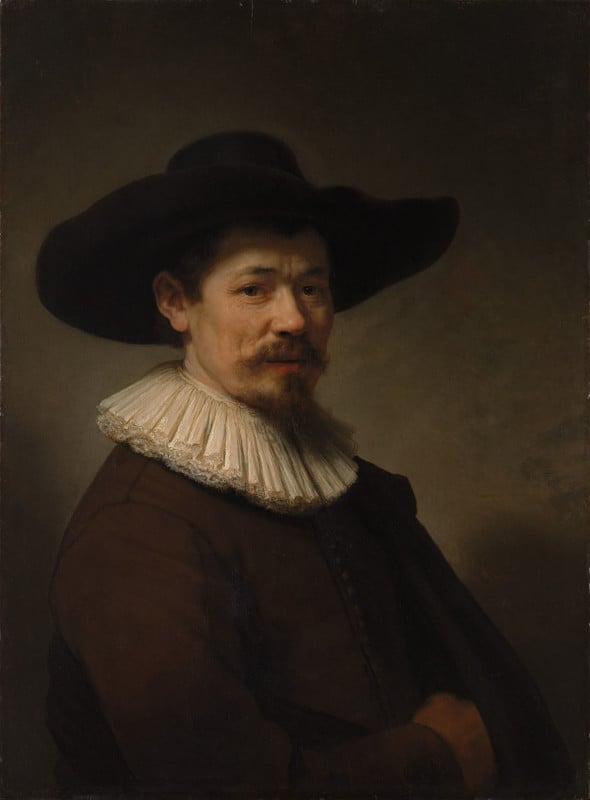
This placement of the light source creates light broadly on one side of the face, while the other side receives a small, triangle-shaped portion of light under the eye, often referred to as the “Rembrandt patch.”
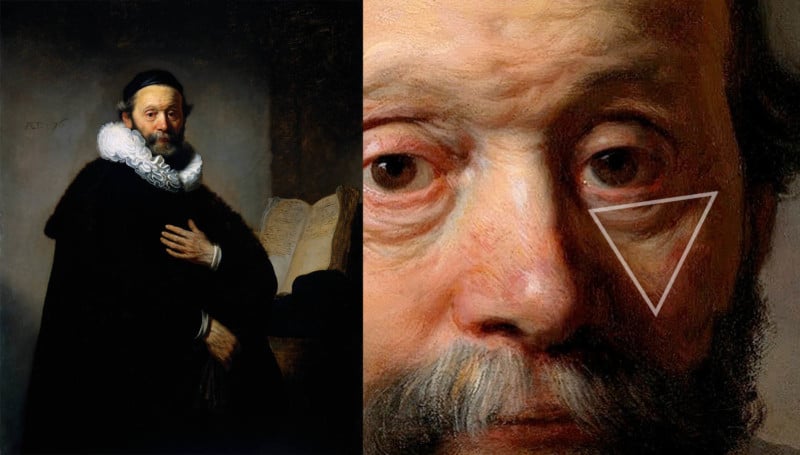
The eye above the triangle may have more or less light depending on one’s preference, but the catch light from the light source should be visible.
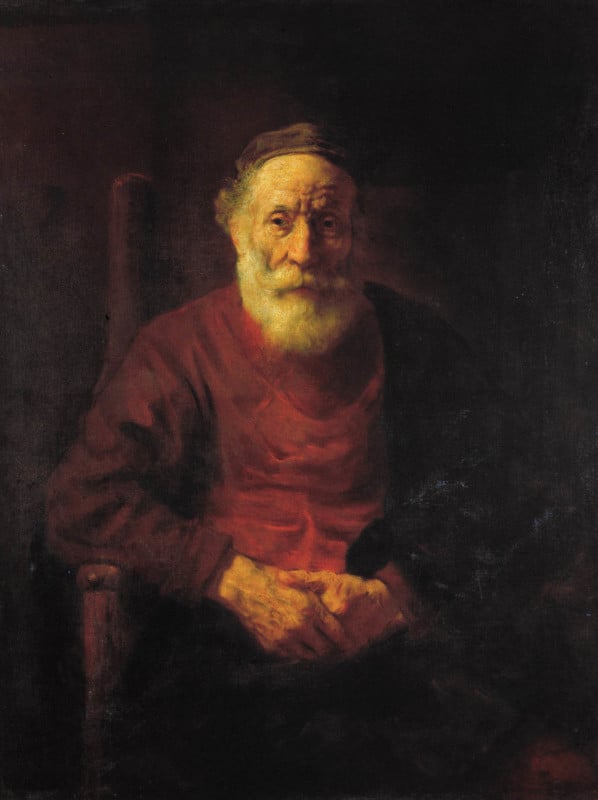
The resulting portraits have a formal look and a mood all their own.
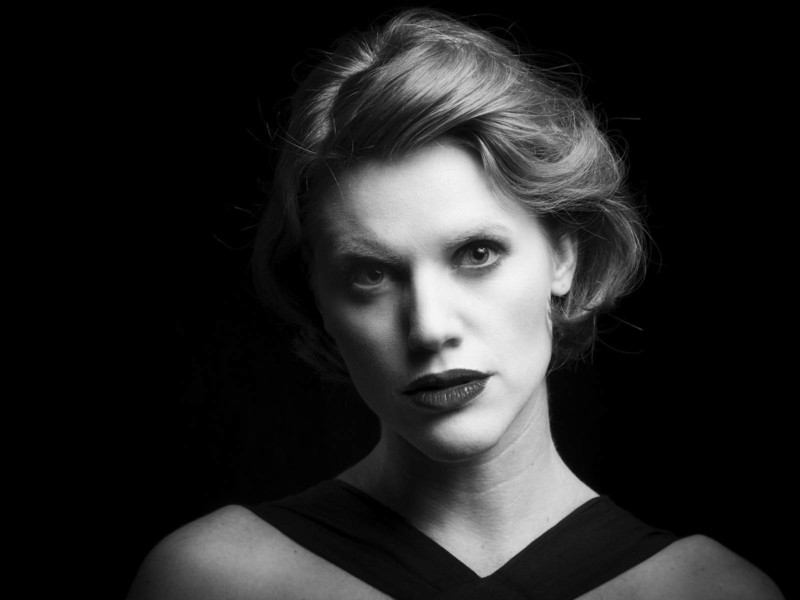
This look has endured for centuries and is one of the most popular ways to create a dramatic look in portraits for photographers and painters alike. It is also easy to set up from a lighting perspective, only requiring one light in most cases, as demonstrated in Figure 2. With that in mind, let’s see how to create this lighting style.
How “Rembrandt Lighting” Was Coined
Although the term “Rembrandt lighting” is named after the 17th-century Dutch master painter whose portraits are known for the lighting concept, it was actually coined in Hollywood in the 20th century by renowned movie director Cecil B. Demille.
Demille recounts in his 1959 autobiography that while shooting his 1915 movie The Warrens of Virginia, he borrowed portable spotlights from the Mason Opera House in downtown Los Angeles. His idea was to “make shadows where shadows would appear in nature.”
Samuel Goldwyn, the head of Paramount Pictures at the time, thought the lighting was horrible and commented that illuminating only half the actor’s face would cause people in the industry to feel the film was only worth half the price.
Demille, however, came up with a clever idea: he told Goldwyn it was “Rembrandt lighting,” leading Goldwyn to reply, “For Rembrandt lighting, they pay double.”
And thus, a new lighting term was born. Rembrandt lighting would go on to become commonplace in both filmmaking and portrait photography.
Lighting Setup
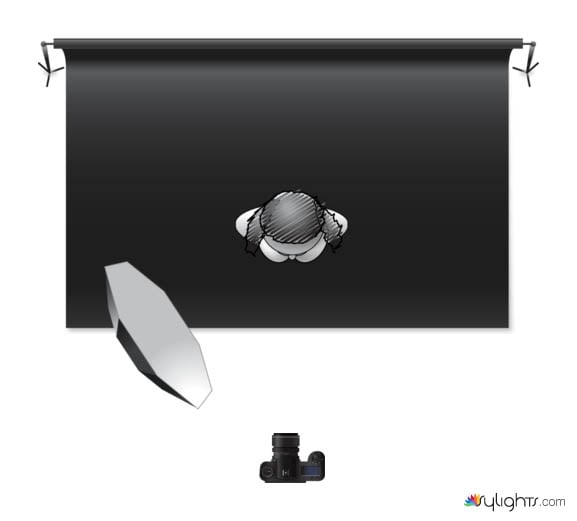
To begin the setup, I’m going to start with one strobe in a Phottix Raja 65 (26in) round softbox. I’ll have my subject set about 4 feet from a dark background and place the light to camera left at about a 55-degree angle as shown in Figure 3. That light will be set above the subject’s height by a couple of feet. How high exactly will depend on how far the light is from the subject. Of course, this is just the initial placement, and I’ll be tweaking this to create the final effect.
In Figure 4 you can see Jane in position in front of my gray muslin backdrop. You can see a hair light in the upper right corner that will get used eventually, but at first we’re just going to be shooting with the main light to camera left of Jane.
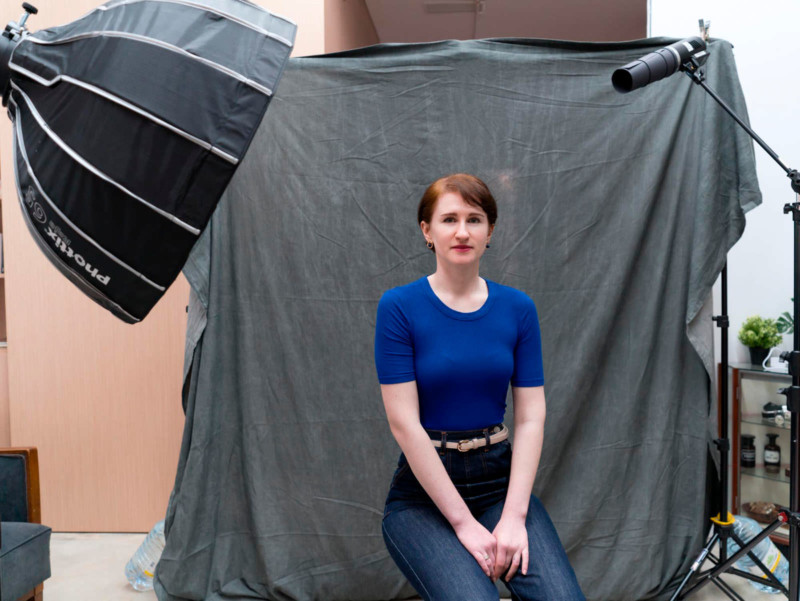
Figure 5 shows the view from the subject’s perspective, showing how the light is placed in the initial setup. I think it is important as the photographer to put yourself in the subject’s position. This helps you understand the subject’s view of the set, as well as offers you the opportunity to confirm your light is correctly lined up in relation to the subject.

With the pieces in place, a quick test photo will confirm whether you placed the lights correctly to achieve the telltale triangle of light under the eye. Alternatively, if the modeling lights on the strobes are bright enough and the other lights in the room are off, you can see the effect in real time. Depending on the result, you can reposition the light, or subject if necessary, to get the lighting just as desired.
Note: I’m using studio strobes in this demonstration that have modeling lights, but they are not very bright. Instead of turning off the overhead lights, I made test shots. If you are working with strobes with bright modeling lights, or you are shooting with continuous lighting, you may not need test shots.
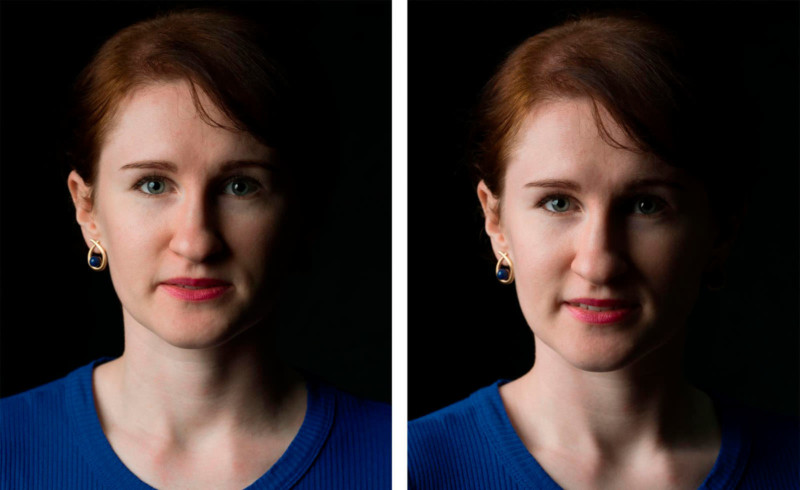
Figure 6 shows my initial shot and then the result after tweaking the light position. The shot on the left is pretty close, but I want to tighten up the “triangle” under her left eye. Moving the light further around to Jane’s right side (camera left) takes care of this.
Let the Light Loose
If your goal is to keep the background dark and subdued, it can be difficult if you can’t get your subject far enough away from the background, as light will spill onto the background. One thing you can do to mitigate this is to use a grid. If you have a grid for your softbox, beauty dish, etc,
Using a grid helps keep the light from the source spreading onto the backdrop. Many of my examples in this guide, such as Figure 6, were shot against a medium gray muslin backdrop. I used a grid on my softbox to keep the light only on Jane, resulting in a deep, inky black background.
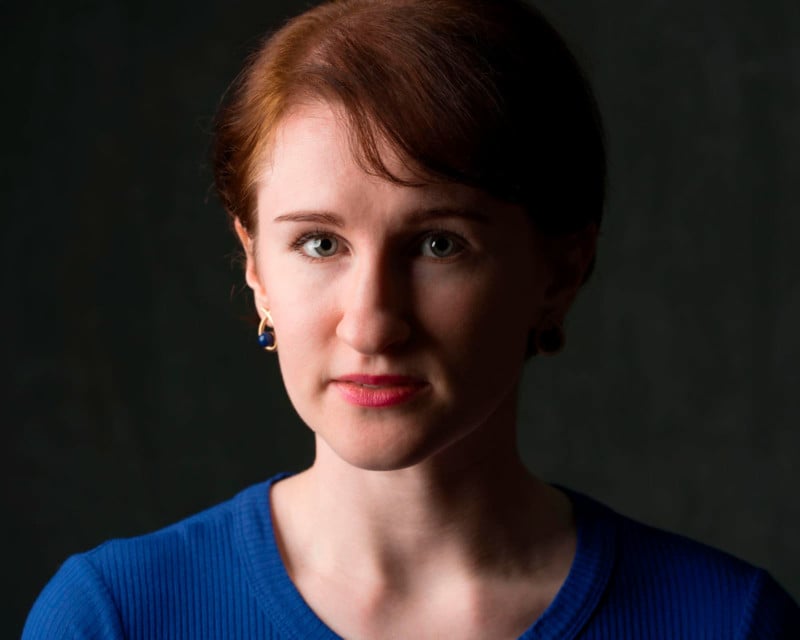
Figure 7 shows the same scene without a grid on the light. The background doesn’t get much light here, but it is visible and helps define the shape of Jane’s shoulders and head. You can vary the brightness of that background by having your subject closer or further from the background in a one-light setup like this.
The other thing I like about using a grid is it keeps the light from straying onto other areas on the subject themselves. As the Rembrandt style is often a low-key and moody look, keeping the light only where you want it can emphasize the effect. In Figure 9, Matt’s photo was made with a 22-inch beauty dish with a tight grid. The resulting image shows his head, neck, and some of his shoulders with little to no spill anywhere else.
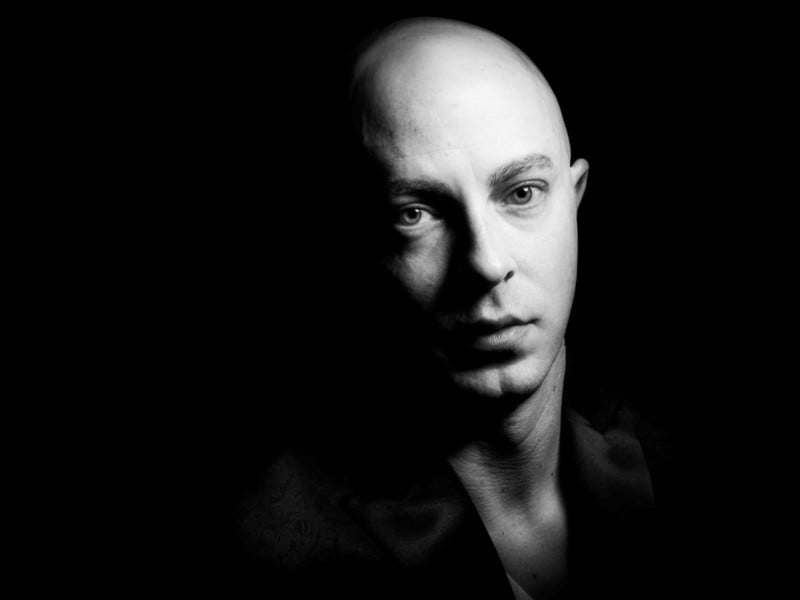
Not Only for Close-Up Portraits
My examples up to this point have all been close-up portraits. However, there’s no reason you can apply this to longer and even full-length images. Figure 9 shows Rembrandt lighting in use on a full-length portrait. I would go as far as to say it’s quite a bit more than full-length, considering it captures her dress and the veil.
The lighting on her face is unmistakable, with the triangle under her right eye. The strong side lighting inherent in Rembrandt lighting also emphasizes the texture of her dress, as well as letting the veil fade nearly into darkness to camera left.
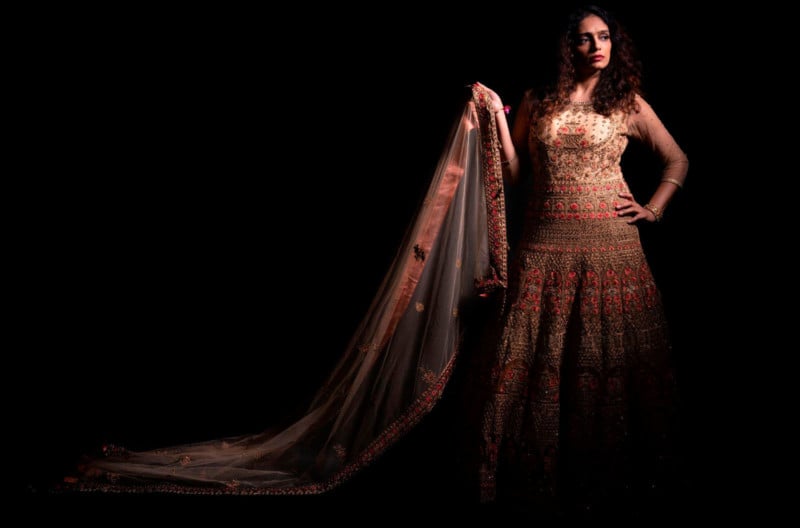
Variations on Rembrandt Lighting
Taking what we’ve learned up to this point, we can now add some other options into the mix. In Figure 10 I added a hair light to add some definition to Dugen’s hair. This light is far enough behind his head that it doesn’t spill onto his face and change the lighting present there.
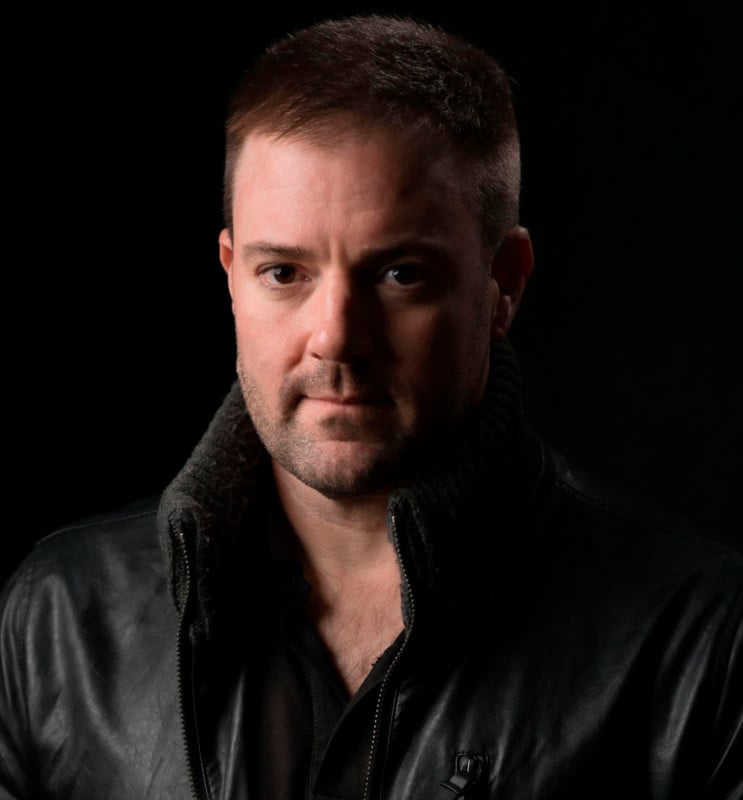
The hair light provides some nice definition without spoiling the overall mood and tone of the shot. A similar setup was used for the lead image in this article, but you can see the hair light is placed higher above Rebecca’s head in that shot.
Rembrandt lighting can be shot using short or broad lighting to change the look. Broad lighting is when the side of the face being lit is facing the camera. In Figure 11, we see more of the left side of Colleen’s face in the image while the right side of her face is turned away from the camera.
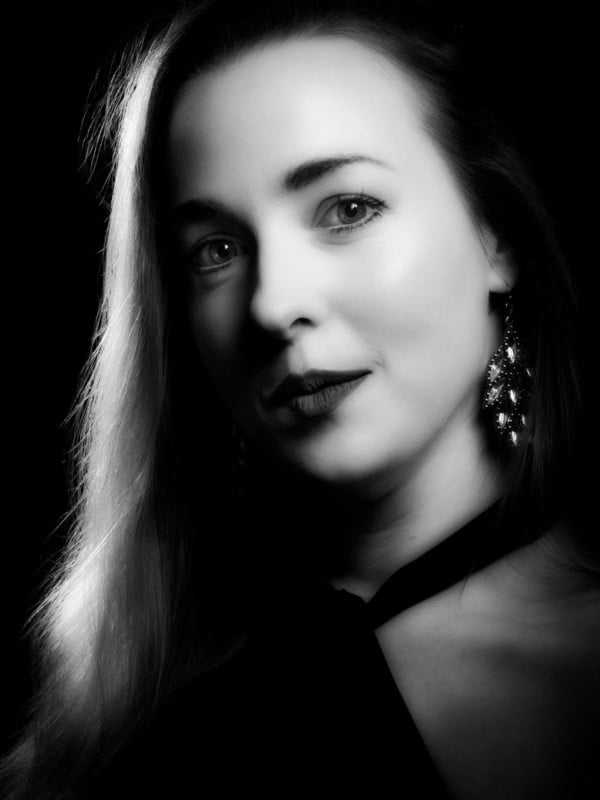
The image of Dugen shown in Figure 10 is an example of mild short lighting, as the light side of her face is turned away from the camera. It’s not a very short light but is still considered such. Keep in mind that short or broad lighting can be more dependent on the position of the camera than the lights.
Figure 12 shows Mandy demonstrating very short lighting. Instead of asking Mandy to turn and then me repositioning the lights, I moved to her left (camera right) to capture this very short light. It is so short that her nose is breaking the line of her right cheek, which is often considered taboo by many portrait photographers.
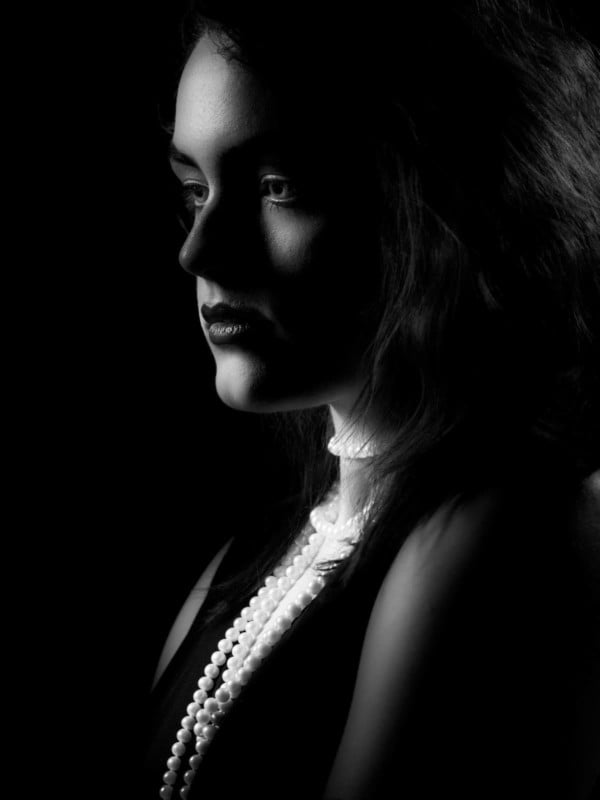
While I tend to agree that breaking the face line with the nose is not often a great look, I love the overall spooky effect here. The Rembrandt style combined with this extremely short lighting creates something unique here. It may not be everyone’s cup of tea, but that’s the point.
The Point
It’s important to arm yourself with the knowledge of lighting techniques and how to create them. There is no better way I can think of to become better skilled at lighting than to emulate popular styles like Rembrandt lighting. By understanding how to create various lighting styles, you will also learn how to modify them to fit your need and style.
Once you have learned and practiced techniques like this lighting style, you won’t have to think so hard about getting good light. Then you’ll be able to spend more energy on how to modify and make your lighting your own.
Image credits: Photographs by Brandon Jackson