What is Butterfly Lighting and How to Use It for Portrait Photos
Butterfly lighting has long been a “go-to” setup for fashion close-ups as well as other portraits where one wants to emphasize cheekbones and frame the face in shadows from below the chin.
Table of Contents
What is Butterfly Lighting?
Butterfly lighting is a basic and popular lighting pattern used by portrait photographers in which the main light is above and in light with the subject’s face and the camera.
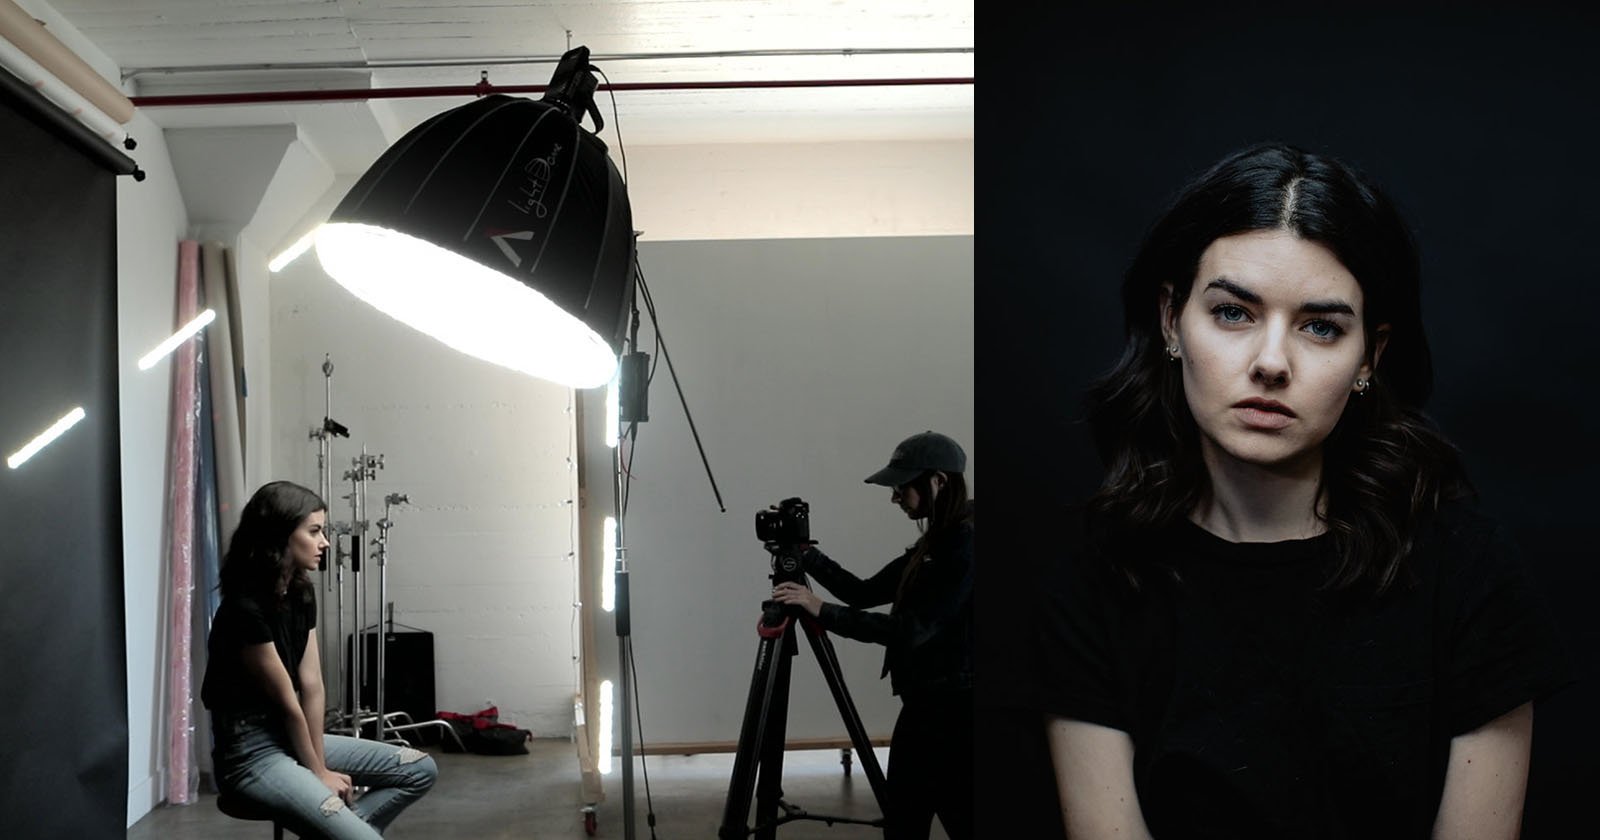
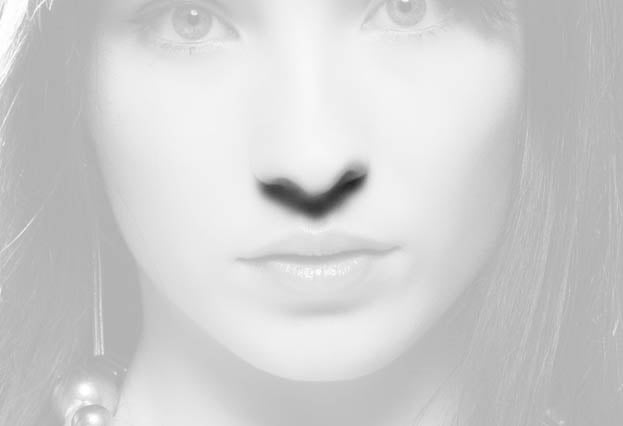
The name refers to the “butterfly”-shaped shadow seen under the nose, like the one seen in Figure 1 of Alison. I say “usually” because the shadow may not be as strongly defined as in Figure 1 depending on the relative size of the light source and how much the light is diffused.

This style is also referred to as “Paramount lighting” with its roots in Hollywood films and portraits from as far back as the 1930s.
Why Use Butterfly Lighting?
Butterfly lighting is a popular setup because it has the effect of slimming the face due to shadows that are created on both sides of the face. This provides a flattering look that emphasizes a subject’s facial features, highlighting the eyebrows, cheekbones, and nose in a photogenic way.
Other reasons to pick this lighting pattern are that it is versatile, is easy to set up, doesn’t require a lot of fancy equipment, and creates a natural look.
How to Set Up Butterfly Lighting
The great thing about this style of lighting is that it doesn’t require a great amount of equipment. In fact, it can be done with one light easily enough but having a light stand with a boom or extension arm will make it much easier to get the light into position. If you don’t have that option, you may find that you need to offset the light a little bit in order for you to get the camera in the right position.
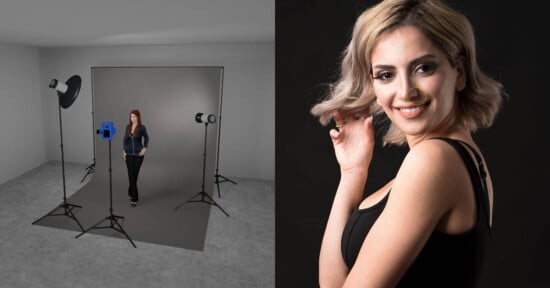
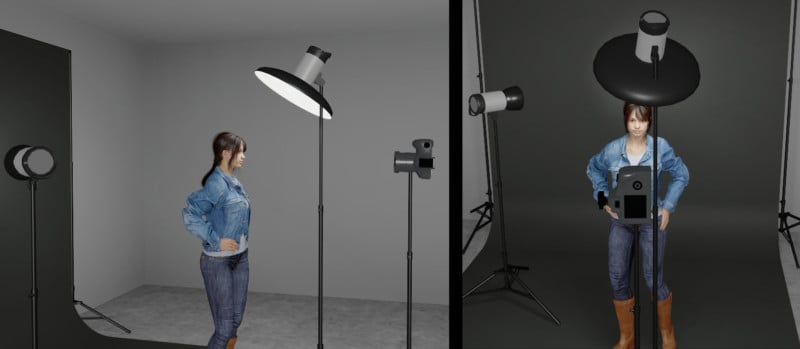
Butterfly lighting is created by placing the main light directly in front of and above the subject as shown in 3D diagram in Figure 2. In this virtual example, generated by set.a.lite 3D, you can see the camera is very close to being in line with the light stand in order to get the desired angle between camera, subject, and light. Of course, where your camera and light stand end up will vary depending on the lens used and the view you are trying to achieve.
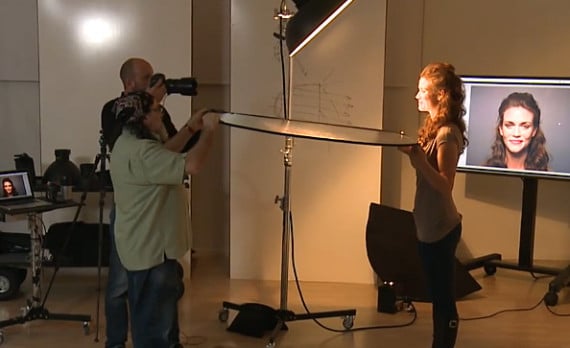
If you have access to a boom or extension arm, this can make creating this style easier and can give you a bit more freedom of camera placement. You can see me in the studio using a 20” extension arm for my beauty dish in Figure 3. I use this extension arm often for portraits and headshots, and it basically lives on the light stand to which it is attached in the photo.
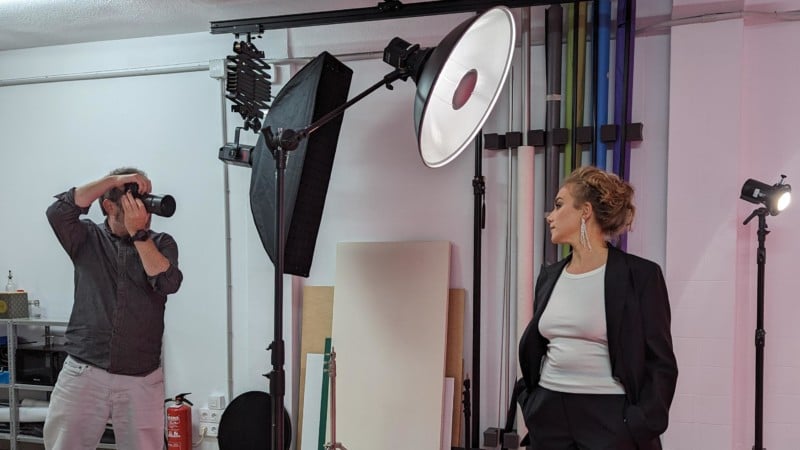
Note: When using an extension arm like the one pictured in Figure 3, it is important you either have a stable, heavy light stand on which to mount the arm or place weight on the base of the stand (or both!). The offset weight of the light and modifier from the stand centerline can make the stand easy to tip over.
If you don’t have an arm or boom you can still work around the light stand to keep the light directly, or as close to directly above the subject as you can. Like most things in photography, a rigid adherence to the “rules” doesn’t necessarily make for better photos. I should also point out that some eagle-eyed readers might recognize the ceiling-mounted rail system for lighting in Figure 3. I bring it up because if you’re thinking that’s another, even better way to keep light stands out of your way, you are correct.
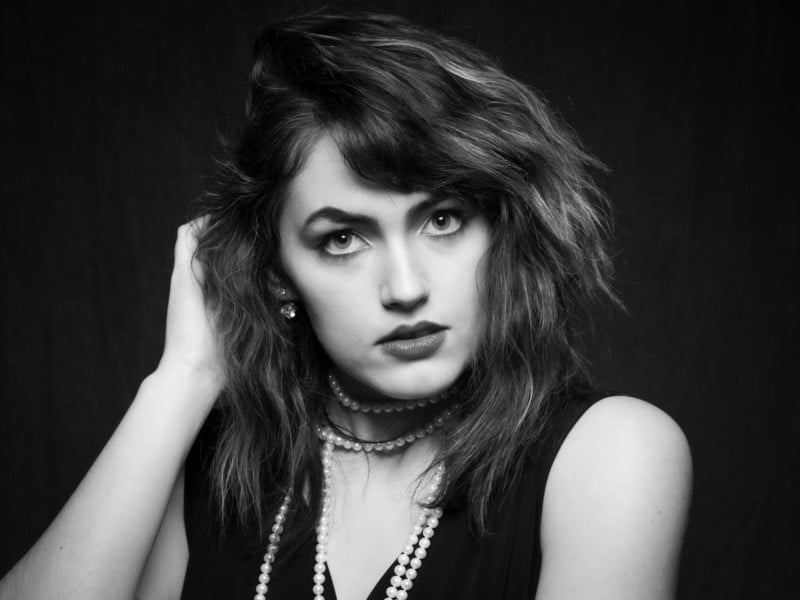
While all the images in this article leading up to this point were shot with or show a beauty dish, other modifiers can be used as well. In Figure 4, the light is a 65 cm (25.5 in) round softbox and both inner and outer diffusers are in place. The shadows that are created on Maya’s face by the butterfly lighting are present, but they have a softer appearance due to the slightly larger and more diffuse light source.
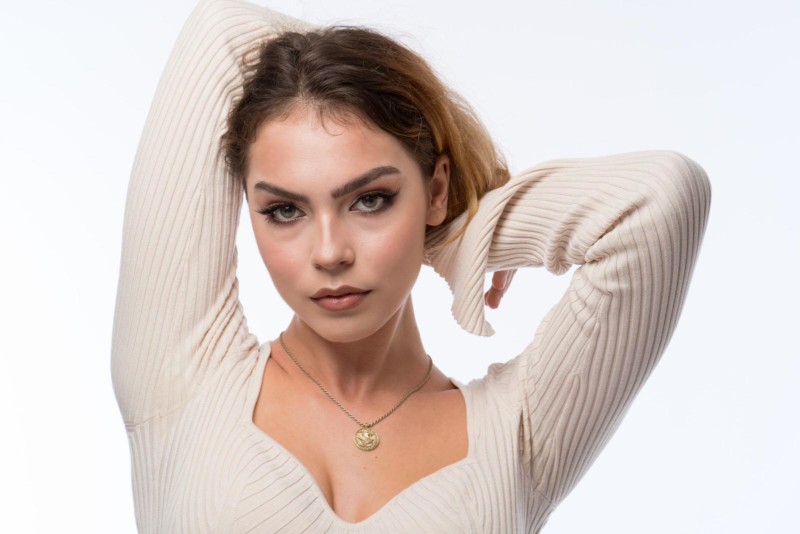
If I wanted to create a sharper, more defined look, I could remove one or even both of the diffusers. This can the quality of the light in different ways, so it is a good idea to experiment with your own modifiers to see how the overall light quality is affected when removing diffusers. The end results will often vary, as the placement of the flash tube within the modifier can be different from the light type/brand/model being used.
In the case of the Phottix Raja 65 used in Figure 4, I think this modifier works well with both diffusers in place, and it also creates an interesting look when both diffusers are removed, but when just using the inner diffuser alone, I don’t like it. This is of course purely subjective, so be sure to try out your own lights and see how yours can be best set up for use in Butterfly style lighting. You’ll likely find a configuration you like the best.
One Light Only?
There are opinions out there that butterfly lighting is only a one-light setup, but I feel the defining point of this style of lighting is the position of the main light, not how many lights are present. In the previous examples, including the 3D diagram, there is a second light either lighting the background (figures 2, 3, and 4) or being used as a hair light (figure 1).
All that being said, learning to light using one light is something I believe every photographer should learn. Developing a strong skill set using just one light will greatly benefit you down the road. The leading image of Mandy for this guide was shot with only one light, and it works for the goal she and I had for that shoot, and I wouldn’t change it. That said, I think it is obvious by the images I’ve placed in this guide that often add extra lights into the mix for my sessions.
Changing It Up
The image examples leading up to this point in the guide have all shown the subject looking directly at the camera, but to be clear, that’s not the only way to use this style of lighting.
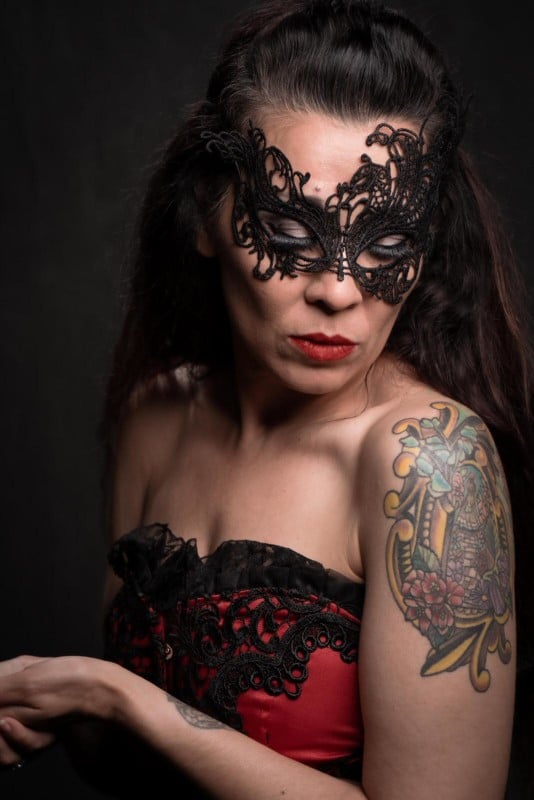
Figure 5 shows Liz shot using butterfly lighting to create a dramatic portrait where she’s looking down and out of the frame. The high angle of the main light from the butterfly lighting style not only creates the namesake shadow under the nose, but it also makes the mask she’s wearing really “pop.”
It can be easy to think that Butterfly lighting is only for close-up portraits, especially since I’ve only been showing that type of image in my examples so far. Figure 6 demonstrates how this style of lighting is useful for portraits showing more of the body. In fact, I love the effect it creates when used for longer portraits.
In Figure 6 I have the beauty dish pointed so that the light is falling off towards the bottom of the shot. This helps draw the viewer’s eyes to Nora’s face in this shot, and overall creates some great shadows throughout the image.
I want to point out that while I really like this shot in Figure 6 enough to use it as an example, it does show how attention to detail is important when using strong and direct lighting like this. Nora’s left hand and her chest are as light, if not a little lighter, than her face in this shot. This can draw the viewer’s attention away from her face. I should have tilted the dish up a little higher to avoid this, but I didn’t catch it at the time. I could have fixed this in post before using it here, but why not share it as an example of what to watch out for?
Butterfly Lighting is Not Forgiving
Butterfly lighting clearly adds drama and depth to portraits, but with that ability comes the need to pay attention to details. With its smallish main light source, this lighting style can be very contrasty and may not always be that flattering to the subject’s skin. Any blemishes, lines, and similar skin concerns can be exaggerated using this type of lighting style. This is especially true of 22” and smaller beauty dishes that are silver on the inside.
Good makeup and even a bit of retouching might be in order for the most flattering images. The image of Rushana in Figure 7 was shot with a 22” beauty dish with a brushed silver interior, which is a pretty harsh light source. She has very good skin to begin with but even so, we had a professional makeup artist working with her before the shoot. Even with that, I ended up doing a little bit of skin smoothing in post due to how harsh this type of light can be.
Figure 7 also demonstrates how butterfly lighting doesn’t necessitate the subject’s face being perfectly straight up and down. We have the head tilted here, and we still have the nose shadow.
Conclusion
So butterfly lighting seems simple on the surface as it requires very little to create this type of lighting, and that’s true at least where equipment is concerned. That simplicity can lull you into not paying attention to details and this type of lighting excels at emphasizing the bad as well as the good in your photo. The good thing is that practicing it and getting better at wrangling this fickle beast will make you a better photographer for it.