Use Light More Creatively: Exposure Is More Than Just Correcting for Light

There’s much more to exposure than just correcting for light. It’s one of the most powerful tools you can use creatively.
In a previous article, I discussed how the camera records the amount of light in a scene and then sets the exposure accordingly. I used my analogy, likening the camera’s sensor to a tray full of glasses. You hold that tray under a shower for a set length of time, and while some of the glasses will fill to the top, others will half fill. Meanwhile, some areas receive no water at all, and the glasses remain empty. However, on average, they are half full.
Similarly, your camera’s sensor is covered in receptors (called photosites). You can imagine that these will fill with light corresponding to the areas of differing brightness in the scene. Where there is a lot of light, the photosites fill to the top. Others may not get any light at all and be empty. However, most will sit somewhere in between. The full photosites record the white areas of the picture, the empty ones record black, and the others in between create all the tones, from shadows through mid-tones to highlights. Nevertheless, on average, they will be half full of light.
That, of course, is a hugely simplified and not entirely accurate description of what is happening, but it’s a useful way of understanding exposure.

The Importance of the Histogram
On your camera and in editing software, a histogram is a type of bar graph used to represent the distribution of light in the picture. Using my analogy, the more photosites that are filled with light at a given brightness, the higher the peak.

On the left is black and on the right is white. Between those extremes lie the shadows, midtones, and highlights.
On a DSLR, you need to look at the photo you have just taken to view the histogram, or use Live View. However, mirrorless cameras are superior because you can usually switch the histogram on, allowing you to view it live. You will need to search online for your camera model and instructions on how to enable the histogram. However, it is essential to note that camera displays are not calibrated. Therefore, a scene may appear brighter or darker than when viewed on a calibrated computer screen. However, when examining the histogram, you can determine if the highlights are blown out or too dark, so it is an excellent guide to getting the exposure right.
Images and their Histograms
A Black to White Gradient
The histogram is available in most development and editing software. Here is a screenshot of Lightroom showing a gradient from black in the top left, through ever-brightening shades of gray, to white. The histogram represents the number of pixels at each brightness. There are fewer dark and light pixels on either end of the histogram, as seen in the top left and bottom right of the image. The picture primarily consists of a range of midtones.

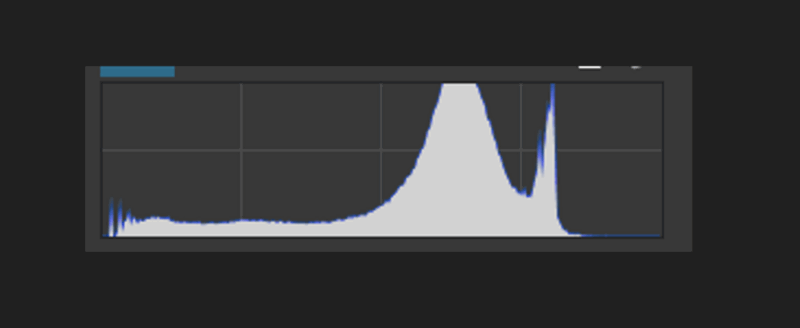
A High Key Photograph
Note how the following high-key (bright) picture, taken in the fog, has no blacks and very few darker tones. This can be seen on the left-hand side of the histogram, where there are very few pixels. The posts and their reflections are mid-tones, seen on either side of the center line of the histogram. However, note the significant number of highlights in the scene and the corresponding peak on the right. This histogram is a screenshot from DxO Photolab 8.
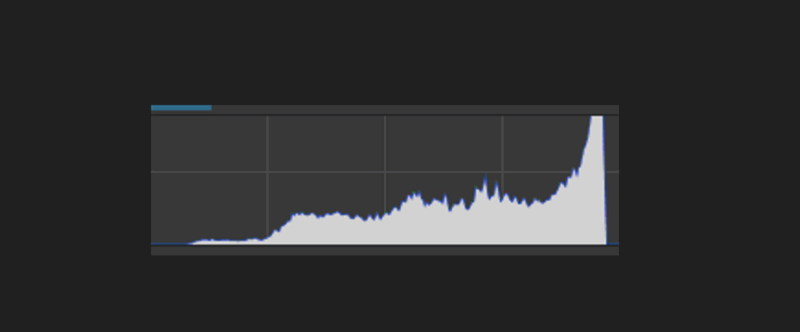

A Low-Key Picture
Now look at the histogram of a darker scene. The histogram is pushed to the left because there are many pixels in the blacks and shadows, and far fewer in the mid-tones and highlights.


A Wider Tonal Range Photograph
In this picture, you can see that there is a relatively small area of black and shadows on the dog. This is reflected in the left-hand side of the histogram, where there is an even spread of darker tones. The sun is also shining on the dog’s coat, and those areas appear brighter, closer to mid-gray. The large area of green grass appears brighter, which is represented by the high peak, to the right of centre on the histogram. The water in the background is brighter still, though it has a more even tone, and the final narrow peak on the right represents that.

Your Camera Can Fool You
Often, the world is sometimes halfway between white and black; we call this mid gray. The following photo is of a gray card. You will have to take my word for this: the camera has reproduced it at the same brightness as it is in real life.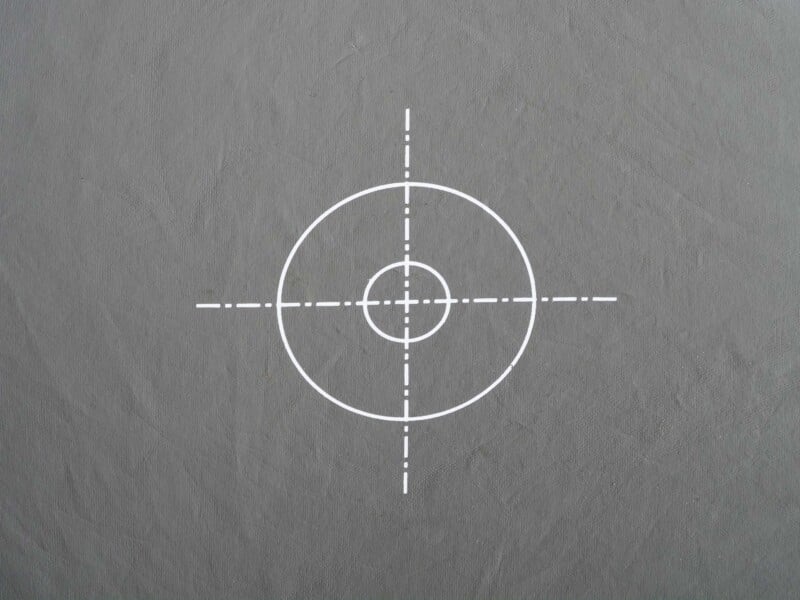
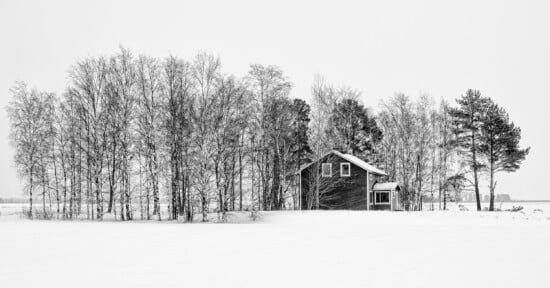
But what if the scene you are shooting is not mid-gray? What if, instead, it is mostly white, like a winter scene? Your camera will still expect the world to be mid-gray and will reduce the exposure accordingly. Consequently, that white becomes gray. That’s probably not what you want.
Try it. Find a piece of white paper. Next, draw a small X in the middle so your camera has something to focus on. Now zoom in on the paper so it fills the frame. Take the photo and look at the histogram. The picture won’t be white as you might expect, but gray. Instead of the histogram being pushed to the right, it is in the middle.

To achieve a correct brightness, you need to increase the exposure. This process is called Exposure Compensation.
Our cameras Are Not All The Same
I am assuming you are shooting in aperture priority mode, as I suggested in a previous article. All exposure compensation does is change the shutter speed to let in more or less light.
The exposure compensation adjustment varies from camera to camera. You may have a +/- button that you must press first. You then turn the main control (command) dial on the camera’s back to increase the exposure. Check the camera’s display to see this happening. Increasing the exposure results in a positive value, while decreasing it gives a negative value.
On cameras with two control dials, one may be set up to do this without needing to press a button. Meanwhile, a few cameras have a dual-function dial where you press it in to change the function from adjusting the aperture to applying exposure compensation. An online search for “Exposure compensation (your camera model here)” will quickly show you how it works on your specific camera model. If you haven’t bought a camera yet, then do consider getting one with two control dials; it makes shooting much simpler.

So, if you are photographing a white horse in a snowstorm, you must increase the exposure. Take a photo of that paper again, but this time adjust the exposure value (EV) to +1. The same applies when shooting on a beach with white sand, in the fog, or any other scenario where the scene is bright.
Photographing a Black Cat on a Coal Pile
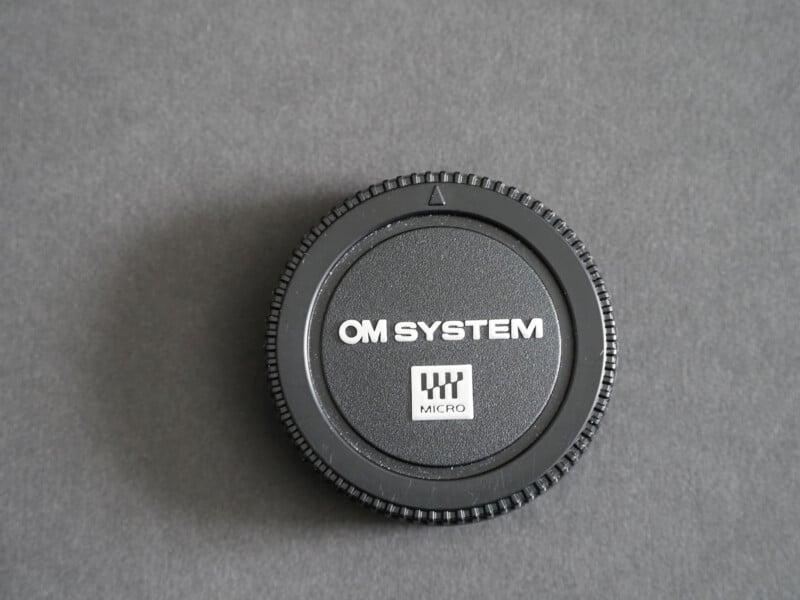
The reverse is true if you are photographing, say, a black cat sitting on a pile of coal. For example, consider the following picture of a camera body cap sitting on a black card. Without compensation, the subject doesn’t appear black but gray. Therefore, to correct the exposure, I must add negative exposure compensation.
Give that a go too. First, reset your camera to zero exposure compensation. Now find something black to photograph. Fill the frame with it, and take a shot. Did it come out gray? This time, add -1 EV to darken it down again.
Exposure Compensation is Creative Power
Another important aspect of exposure compensation is its creative use. By deliberately decreasing or increasing the exposure, you can emphasise the contrast between dark and light areas.
In this first image, it was a stormy day, and the water was dark blue. The eider was lit from behind me by the low but diffused autumnal sun. I reduced the exposure to -2 EV. That darkened down the water and prevented the highlights of the duck from being blown out. It was shot at ISO 200. With a 400mm lens at f/4.5 and a shutter speed of 1/3200.

In the following image, the evening sun was hidden behind the clouds, but the bright sky was illuminating the river. By reducing exposure in the camera to -1.3 EV, I was able to make the river stand out against the darker landscape. This was further exaggerated in development software.

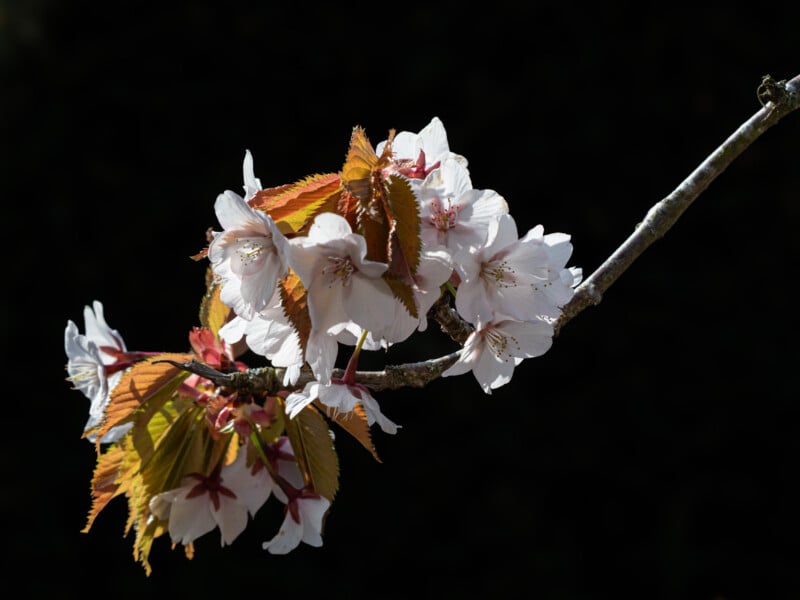
Similarly, this blossom was brightly lit by the sunshine while the background was darker. Reducing the exposure by – 0.7 EV darkened the background further and prevented the whites from blowing out.
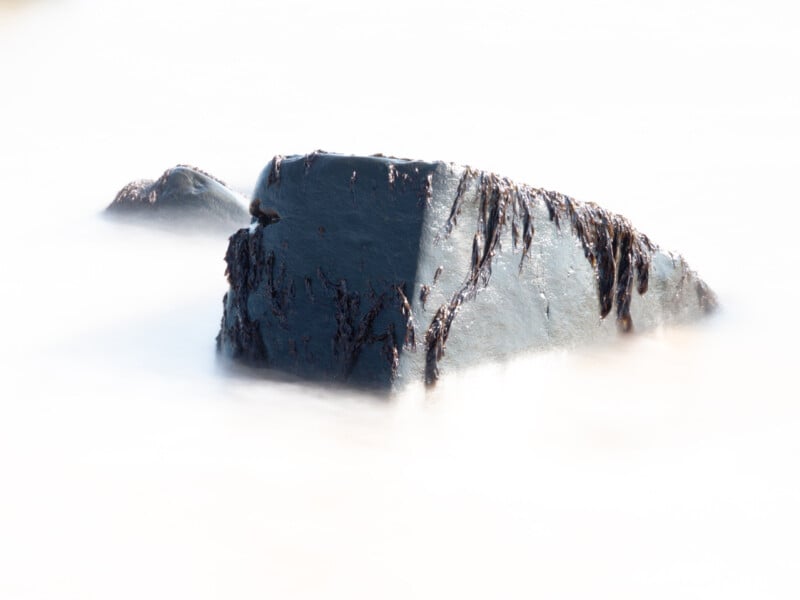
Meanwhile, adding +2.3 EV to the following image gave his long exposure a strange, otherworldly feel.
In Conclusion
It’s worth experimenting with exposure compensation, both to correct the lighting to more closely resemble the world as you experienced it and to use it artistically.
Consider how bright the scene is compared to mid-gray, and whether your camera is over- or underexposing the shot. Also, look for scenes where the contrast between light and dark is already strong and consider how you can adjust the brightness or darkness of the photo to make the subject stand out against its background.
Finally, learn to use the histogram. It’s a useful tool that can help you gain a better understanding of exposure.