What is HDR Photography?
HDR photography may seem complex, but it is a surprisingly simple tool that can open new photographic doors. Most people have encountered HDR photography without thinking about it since smartphones automatically produce HDR images.
HDR photography allows you to capture all values within a scene, showing more detail than you would otherwise get. Whether documenting interior spaces for real estate images or creating dramatic landscape art, HDR photography can help you get the most out of your camera and photographs. This guide will walk you through how and when to use this technique and the tools you will need along the way.
Table of Contents
What is HDR Photography?
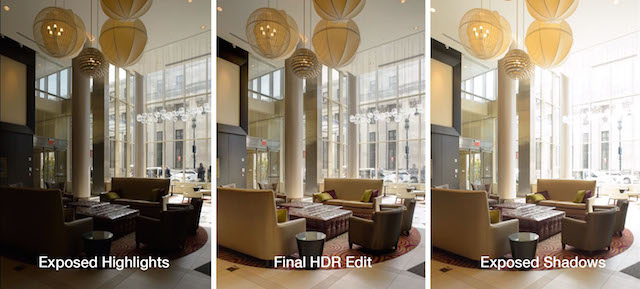
Before diving into how and when to use HDR in your photographs, it’s essential to understand what HDR means and why it matters. HDR stands for high dynamic range. Breaking it down further, dynamic range refers to the difference between the darkest dark and lightest light within a scene. Cameras are limited in how much dynamic range they can capture — and it is much less than our eyes can see. HDR photography is a technique used to capture the full value range within high-contrast scenes, providing all highlight and shadow information in a single image.
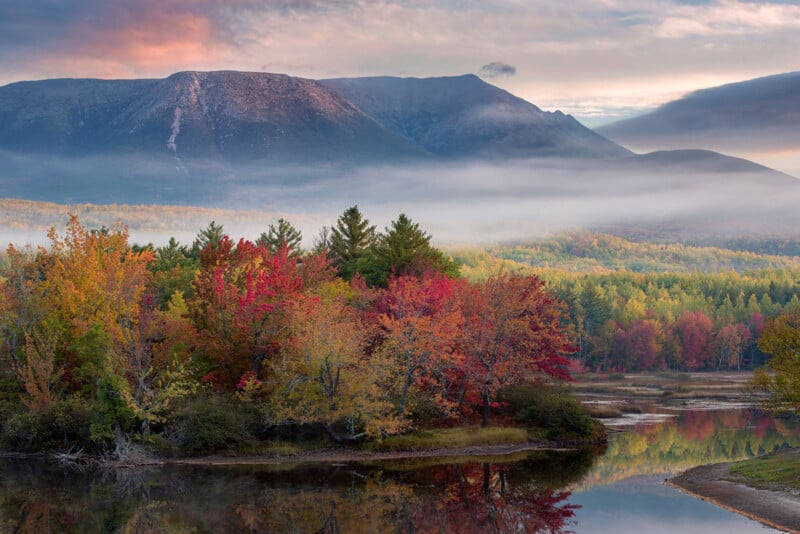
As an example of dynamic range in photography, picture a scene with the sun shining on a snowy mountainside with dark rocks jutting out of the snow in shaded areas. This scene has a large dynamic range between the shadows and highlights. You typically have to choose whether to expose the snow or the rocks and end up with either blown-out highlights or solid black dark areas. This results in no texture or detail in one of those areas, which is undesirable. However, with HDR photography, you can capture that vast dynamic range in a single photo.
There are a few ways to accomplish HDR photography, which will be covered later. But all methods rely on merging multiple images that are exposed for different parts of a scene. Some methods are automatic, so you don’t even realize your camera is taking numerous photos. Your smartphone is an example of this. Other methods require manual work on your part.
When Should You Use HDR Photography Techniques?
HDR techniques expand the dynamic range beyond what a camera can capture in a single frame. They allow you to capture and even enhance detail across the entire luminance range. As a result, HDR photography is a handy tool for any high-contrast scene, though it can also be a stylistic choice.
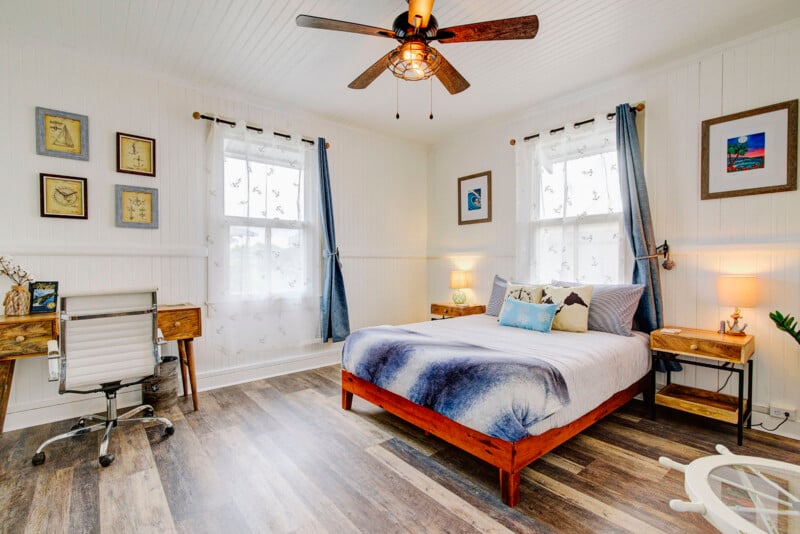
HDR photography is most frequently used in three genres: Landscape, architectural, and interior photography (such as real estate). All three often include high-contrast scenarios, limiting what you can capture in a single image. When photographing landscapes, it is common to deal with bright skies and dark foregrounds, especially during sunrise and sunset. Likewise, exterior architectural shots will likely involve dark buildings with sunny skies. Capturing all the desired detail in one shot is challenging in the best conditions and sometimes outright impossible, but HDR opens up more possibilities of what you can document.
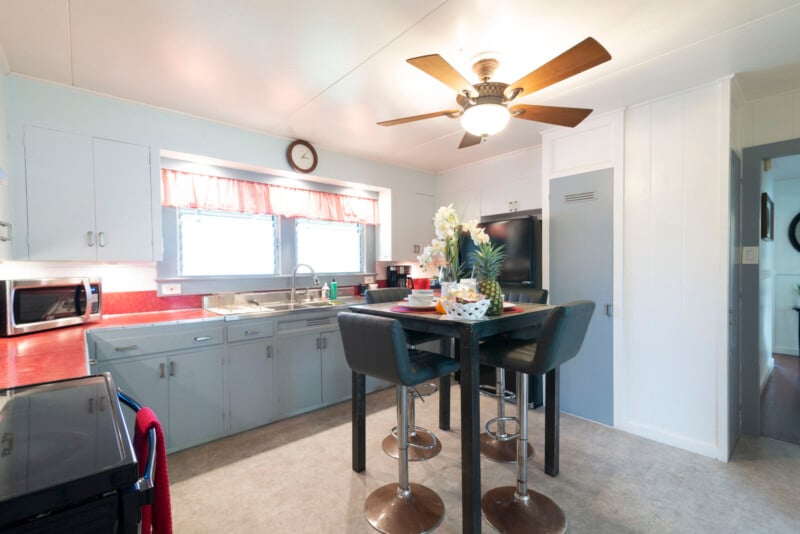
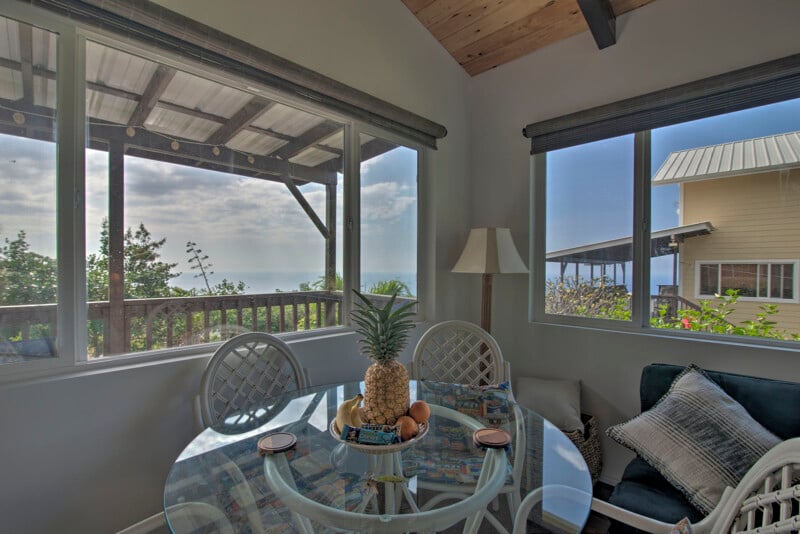
Interior photography can be even more dramatic than landscapes or exterior architectural work regarding dynamic range. Darker interior spaces with bright windows offer challenging exposure situations. Without HDR photography, windows will be blinding white voids, which is especially problematic if you are attempting to showcase a view. Another possibility is well-exposed windows but excessively dark interiors, which won’t show off the space.
You’ll notice that the three genres mentioned all feature minimal movement of subjects in the frame. The images you take to create an HDR image will be merged, so anything that moves over the course of those images will appear multiple times in the final HDR shot or cause ghosting. Because of this, HDR is not great for portraiture, wildlife, street photography, or other similar genres.
Necessary Equipment for HDR Photography
Although HDR photography may sound complex, it doesn’t require much in terms of equipment. The only requirement is a sturdy tripod. As mentioned above, movement throughout creating an HDR image is problematic, which also holds in regard to camera movement. Because of this, you’ll want to keep your camera on a tripod when creating HDR photographs.
Although not a requirement, a wireless remote (or app that functions as such) may also come in handy. Touching the camera to release the shutter, even with a tripod, can result in slight camera movements. This is especially true if you are using long shutter speeds.
Bracketing Settings for HDR Photography
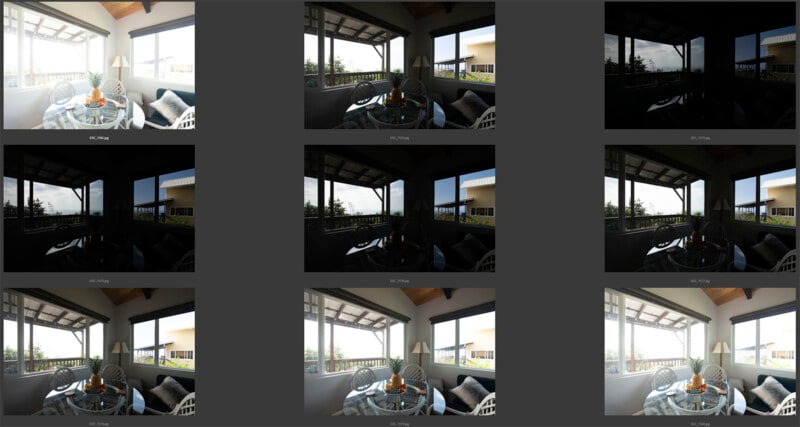
The basics of HDR photography are straightforward to learn. To create an HDR image, you’ll need to take multiple pictures of the same scene with different exposure settings, a technique called exposure bracketing. This process results in some overexposed, properly exposed, and underexposed images. You can create HDR images from as little as three brackets or as many as nine or more. Which number is best depends on the scene and the HDR style you are going for, though three to five is the most common.
There are two ways to bracket for HDR photography: Manually or using Auto Exposure Bracketing (AEB) settings. To manually bracket, you will need to adjust the exposure using ISO or shutter speed for as many shots as you require. You won’t want to bracket with aperture, as this will change the depth of field in each bracket and will not result in a sharp final result. Alternatively, you can use the exposure compensation setting (many cameras offer a dial) to change your exposure. Typically, bracketing involves consistent stops between each frame, though this isn’t necessarily a requirement. You could underexpose by one stop and overexpose by two if the situation calls for it.
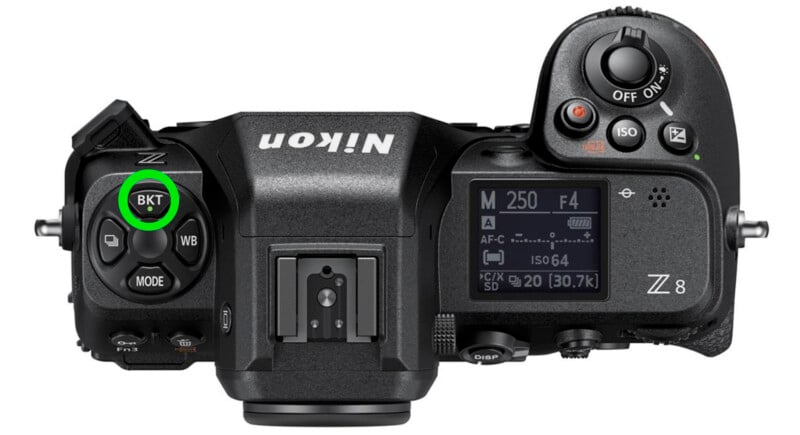
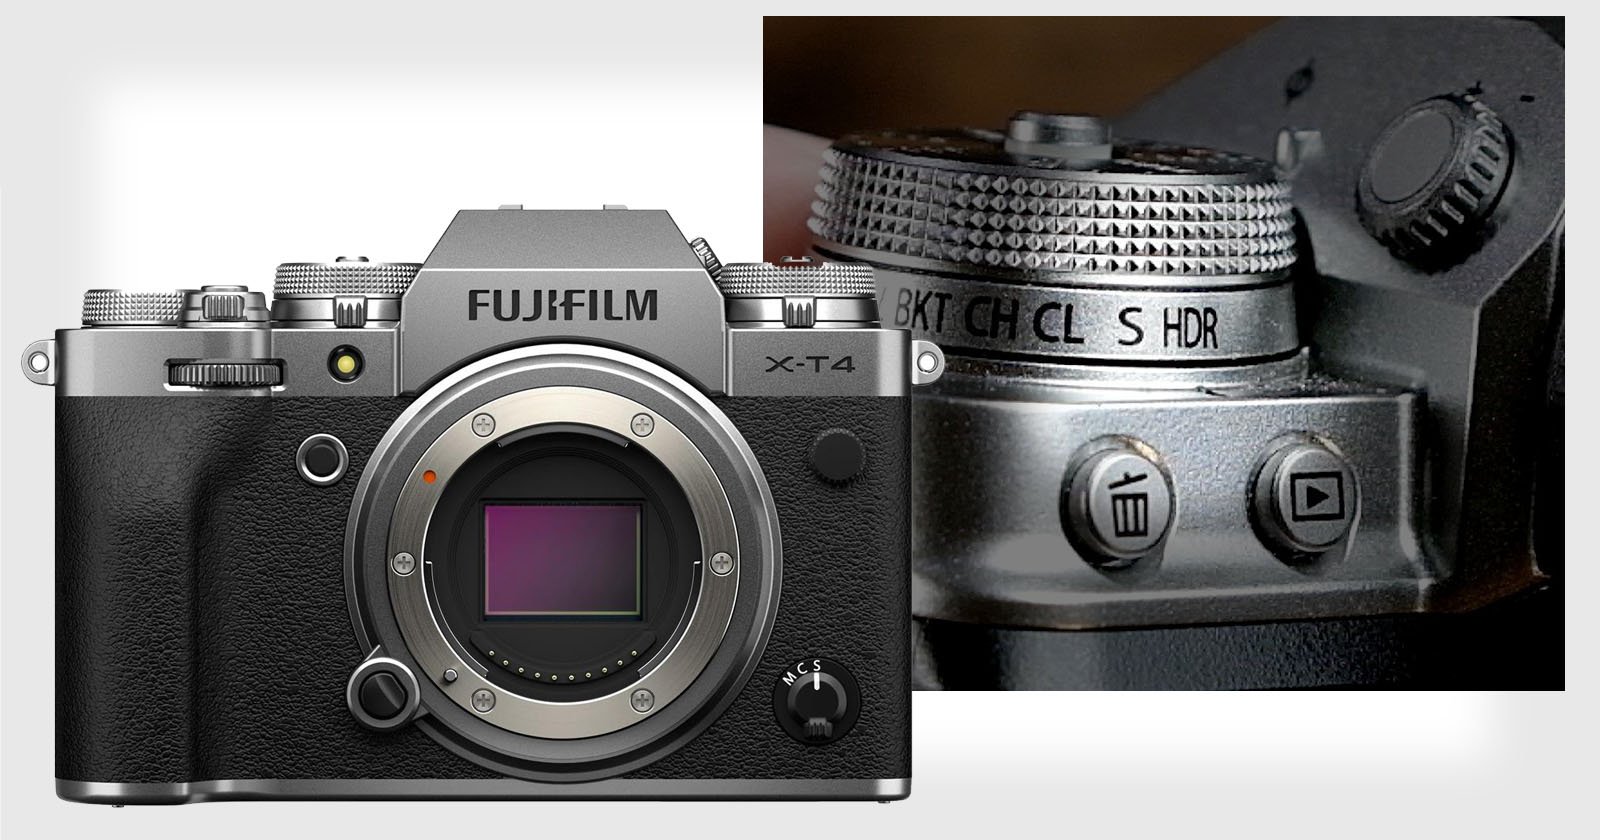
While manual bracketing works perfectly fine, most cameras will offer automatic exposure bracketing (AEB) settings to make the process faster and easier. You can even set most cameras to take all the bracketed shots with one press of the shutter instead of taking each bracket one by one. This is ideal because, as mentioned, any movement in the frame or of the camera can cause issues when merging your brackets. So, the faster you take your bracketed images, the better.
A camera’s AEB mode requires you to choose a number of bracketed images along with the exposure value (EV) between each shot. The EV number indicates how many stops will be between each frame. Each camera manufacturer offers different settings, though most will provide bracketing options of three, five, or nine frames. EV options typically include 0.3, 0.7, 1.0, 2.0, or 3.0 stops. Certain EV settings may limit the number of brackets you can take. For example, on the Sony a7 III, at 3.0 EV, you can bracket a max of five images, while at 1.0 EV and lower, you can bracket up to nine frames.
As with the number of brackets, there aren’t any hard and fast rules for how many stops to bracket. Different situations call for different settings, and the final look you are after will also dictate which is best. That said, one full stop is typically the best bet.
Other Camera Settings for HDR Photography
Beyond AEB modes, there are a few other important considerations for camera settings. As mentioned earlier, you will want your aperture to remain consistent throughout the bracketed sequence to avoid any changes in depth of field. Because of this, it is most common to bracket with the camera set to Aperture Priority mode. This will result in the camera changing the shutter speed while maintaining a constant aperture. If you want your ISO to remain consistent, turn off auto ISO and choose the best value for the scene.
Just as you don’t want any changes to the depth of field, you also won’t want any focus shifts throughout a bracketed sequence. So, to avoid this, set your focus before starting your brackets and then switch it to manual focus.
How To Create HDR Photos In Camera
Many cameras offer built-in HDR settings, allowing you to create an HDR image right in the camera. The camera will do all the work for you, including the bracketing and file-merging process. You’ll end up with a fully processed HDR file immediately.
Each camera manufacturer will offer different options and settings for this. For example, Sony’s HDR mode requires .JPG as the file format. Then, you can select between 1.0 and 6.0 EV or Auto EV. Nikon allows you to save the RAW files of the individual shots used to create the HDR image and provides an additional option to adjust how much the boundaries between images are smoothed. Canon offers a special setting built for moving subjects. Be sure to refer to your particular camera’s manual or menus to see your options for in-camera HDR photography.
How To Create HDR Photos Using Software
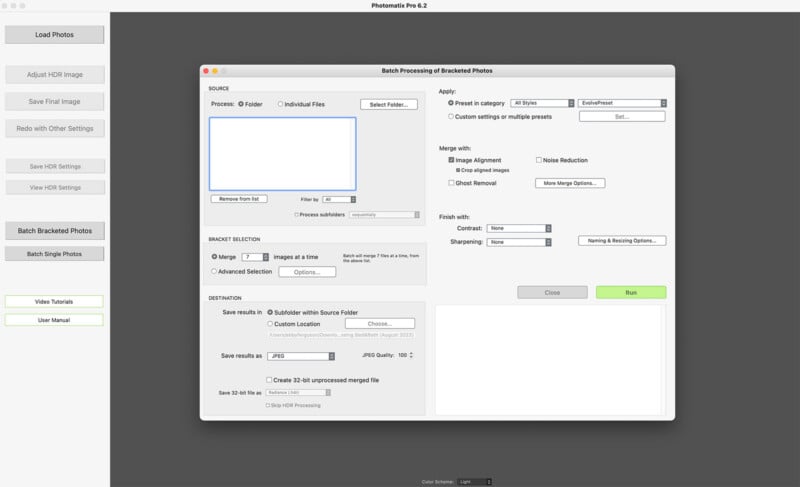
The most common way to create HDR images is by using software to merge bracketed shots on a computer. To create an HDR image using software, you’ll load a bracketed set into your chosen software. The program will then merge them together into one file, pulling in relevant details from all values. Most HDR software will provide a range of settings to fine-tune the HDR look; you don’t necessarily need to create a dramatic, highly textured HDR image.
There are many programs available to tackle the merging process. Photomatix is one of the more popular options, as it is extremely powerful, fast, and full of valuable features. It offers lots of controls for fine-tuning the look of your HDR images, along with presets to get you started. Plus, it allows for automated batch processing, ideal for an entire shoot of HDR images, such as real estate work.
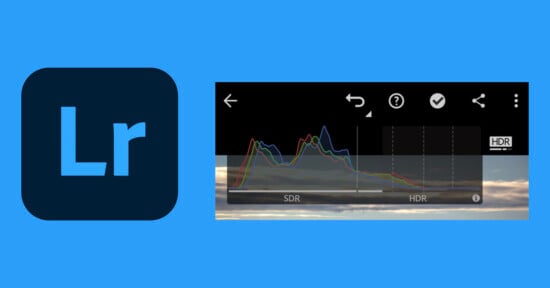
Luminar Neo is another excellent option, and you’ll also get access to Luminar Neo’s advanced editing tools once you have your HDR image. Or, for a free option, Luminance HDR is surprisingly powerful and versatile despite the fact that it’s free. You can also merge bracketed images to create an HDR photo in Adobe Photoshop.
Conclusion
Although HDR often gets a bad rap, it can be a handy tool. It can allow for even more creativity in your images, but it also serves practical purposes. The key to HDR photography is dialing in bracketing settings for each situation and developing your desired look using HDR software. Perfecting this method may take time, but it is an invaluable skill for landscape, architectural, and interior photographers.
Image creditsHeader image by Jeremy Gray. All other photos by Abby Ferguson.