Image Quality is More Than Megapixels
![]()
The megapixel count of a camera is often viewed by consumers to be the benchmark number for telling whether or not that camera is “good.” If that were true, however, why do photographers not just buy a 108-megapixel smartphone to use as their primary equipment? The answer: because image quality has to do with far more than just megapixels.
While megapixels are a factor in image quality, they are in fact a very small part of what makes up a good high-quality image. Other factors that contribute to your image quality are sensor size and type, file type, lens choice, and you, the photographer.
Sensor Size and Type
Medium format is generally always better than full-frame, full-frame is generally always better than crop. I don’t care what year your crop camera is from, a Phase One back from 2005 is still better as far as image quality goes. In fact, a 4-megapixel Canon 1D from 2001 will probably provide much better baseline image quality than a 103-megapixel phone.
The catch is in the size of the photosites, of the tiny light cavities on a sensor that detect light. In short, one photosite is equal to one pixel. The more of them you have, the higher the resolution. Each photosite is like a scoop. The larger the scoop the more ice cream it can get. Therefore, a tiny high-resolution sensor will perform a lot worse because it won’t capture as much light and therefore has decreased dynamic range.
This is why even though it is possible to make an extremely high-resolution APS-C or full-frame sensor, no company has really wanted to do so.
Some manufacturers, like Sony with the Sony a7S line, have gone the other direction, opting to use larger photo sites for lower resolution but higher image quality and low-light performance. This is why if a camera is high-resolution, it will typically have worse low-light performance.
Check out my comparison between a Canon 5DS and Canon 5D Mark IV.
The Canon 5DS is a 50.6-megapixel camera but has worse quality at high ISO and in low light than the 30.1-megapixel Canon 5D Mark IV due to the smaller photosites (4.14 microns vs 5.36 microns, respectively).
File Type
The age-old discussion (and sometimes debate) of JPEG vs RAW is settled if what you’re after is maximum image quality. Shoot RAW. Although your camera will capture the same pixel resolution, the raw file will have more information that will give you greater flexibility when post-processing your images.
For example, if your scene demands a high dynamic range, you are better off shooting RAW because a great deal of information in the light and shadows will not be discarded by the camera processing the data into a JPEG file itself.
Naturally, shooting in RAW will result in larger file sizes, but that is well worth the benefit of having all the original light data to work with.

Lens Choice
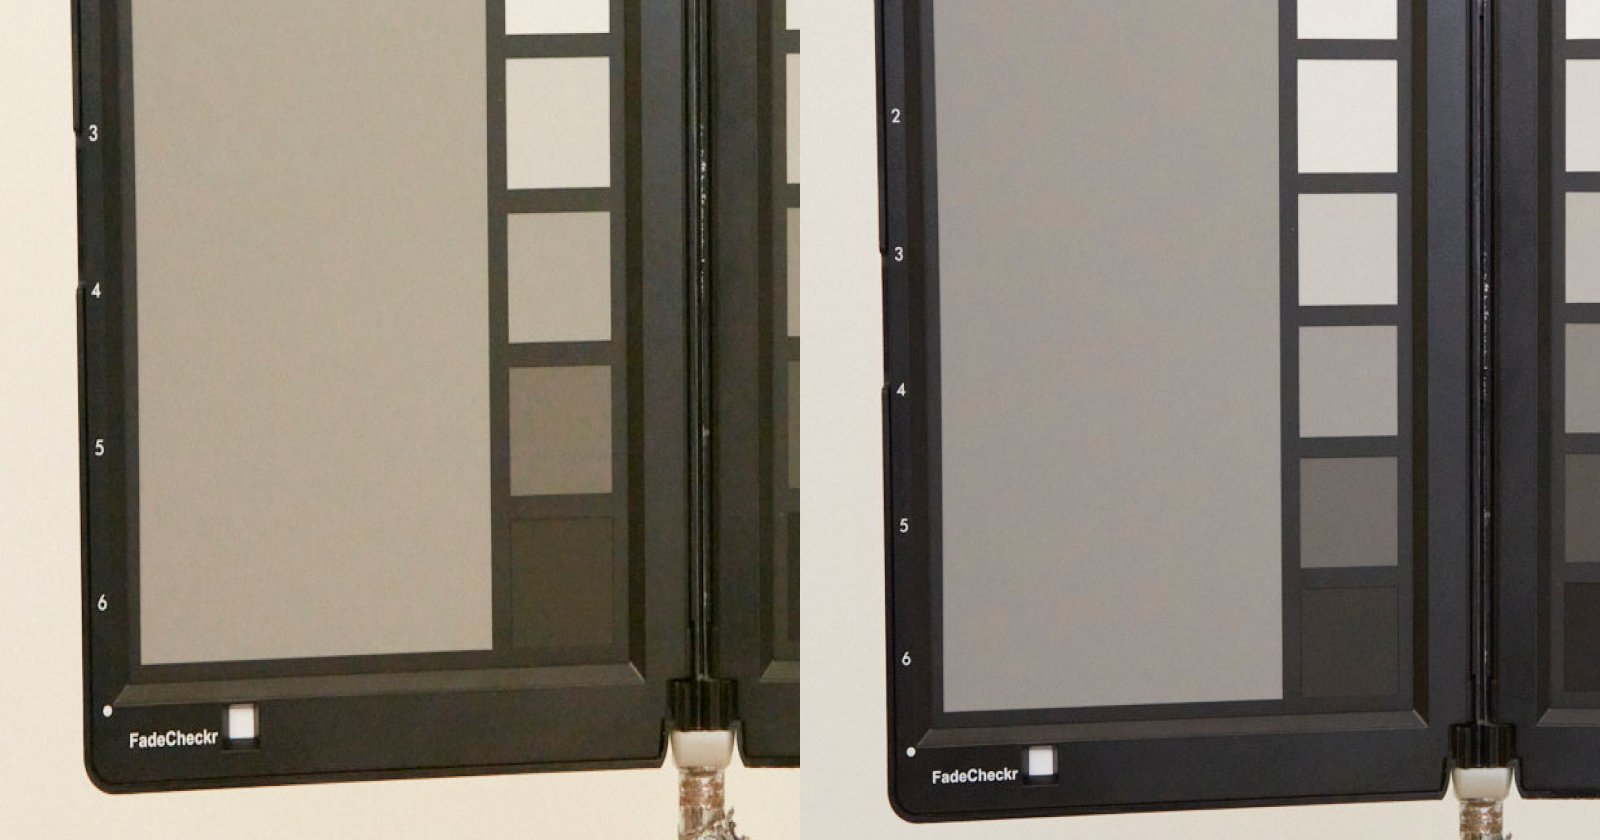
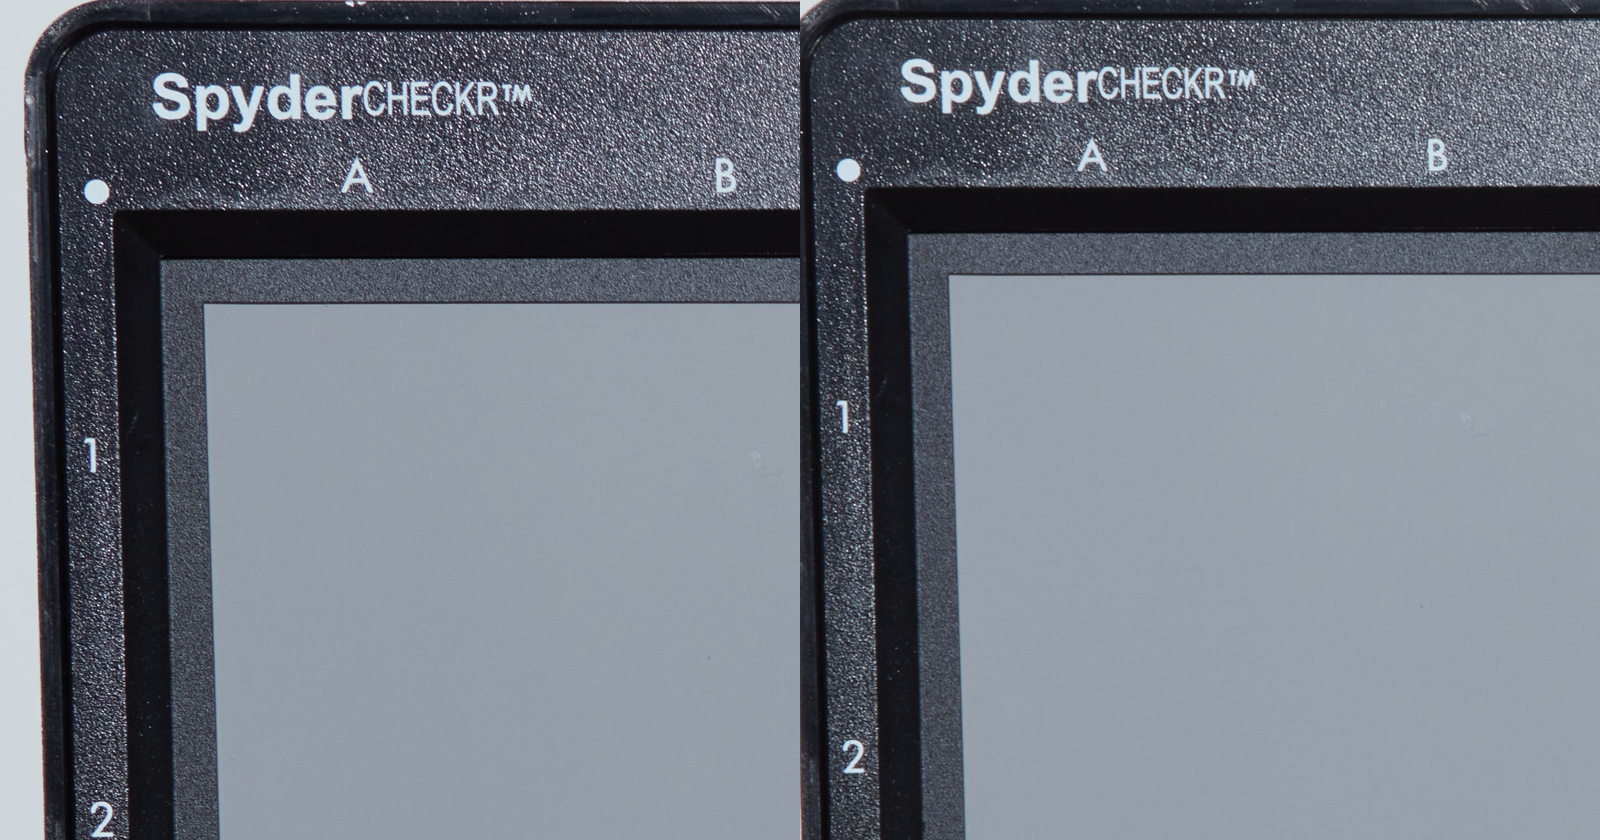
Take a look at these corner crops of two images that I shot with very different lenses. They were both taken on my Canon 5DS.
You can clearly see how one image is worse than the other. This is because lenses come at different quality levels, and of course won’t be able to resolve the same amount of detail or maintain optical quality toward the edges of the frame. In fact, the lenses I currently own are frankly not enough to take the full potential of the 5DS body. Nonetheless, they are enough for what I do. Should the job call for it, there is always the nearest equipment rental business.
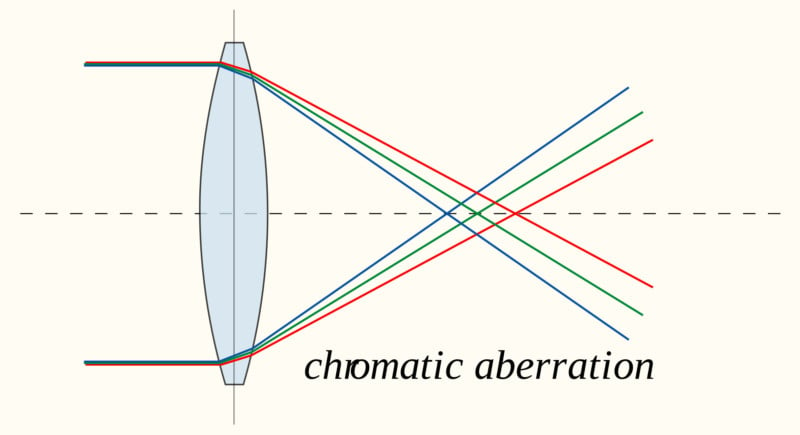
One of the biggest problems with lenses is that they have chromatic aberration. This occurs when the color changes along high-contrast edges.
When light rays pass through a lens, they will disperse. Because light is composed of different wavelengths, they will disperse at a slightly different angle separating the light rays. In simple terms, once the lens fails to focus all parts of the colored light to a single point or plane, chromatic aberration occurs.
Another thing to consider is reflection and diffraction inside the lens. If light rays reflect from the glass several times they will make the whole scene fuzzier. This is why a lot of high-end lenses are covered in the anti-reflective coating.
Diffraction will occur when light is passing through a narrow opening such as the aperture. This is why very few photographers ever use f/32. Generally anywhere between f/11 and f/13 is sharp but anything narrower will make the image worse.
The Photographer
You, the photographer, can do a lot to make the image quality perfect. One of the simplest things you can do is nail focus down. If you can’t get the image to be in focus, it will look low quality. Having a high-resolution camera will only emphasize it.
Another skill you should have is proper exposure. You should aim to have enough detail in both shadows and highlights without underexposing or overexposing your photo and losing details. Having to correct for poor exposures during post-processing will result in images of lower quality.
Does Image Quality Even Matter?
Having read this, you may wonder if image quality is even relevant. After all, isn’t photography about capturing fleeting moments in time? You may be right, and there are instances where image quality is the last thing that matters. Robert Capa’s photos of the D-Day landing, despite being anything but technically high quality, made history.
However, this isn’t always the case, there are instances where you need to capture detail and do it well. For example, I (probably) could not get away shooting a campaign or an editorial on my phone. But I could get away doing that at a party where the moment is more important.
For film shooters, image quality could also be unimportant, but it all changes when you take a high-quality film and use that. The difference is huge and you will quickly see that film grain, although cool and sometimes desirable, can be less than ideal when clear image quality is what you need.
So, overall, image quality matters in many professional applications to a significant extent, but you can get away with lower-quality images on social shoots. That said, don’t go crazy on your paid work and think that you need to always rent or buy the highest-end, most expensive gear. It probably doesn’t matter as much as camera companies would like it to — I’ve shot jobs on an old Canon 5D Mark II and no one batted an eye.
Image creditsStock photos from Depositphotos