The Image Quality Apps from Topaz Labs Let Me Do the Impossible
Many things that used to be true about photo editing are no longer the case, such as not being able to fix a subject that was accidentally out of focus or not being able to recover much detail when doing heavy noise reduction. Topaz Labs is a big reason as to why we can approach post-processing differently now.
Topaz sponsored this Showcase so that I can give you an overview of my workflow that uses these three Image Quality Bundle products, which really shows off their nearly unbelievable results.
Based out of Dallas, Texas, Topaz Labs is a software company that makes AI-based photo and video editing programs. Before you roll your eyes, I do realize that throwing “AI” into a product name these days is very trendy and as end users we hardly see any difference. This isn’t the case with Topaz Labs as you will clearly see in use how its machine learning recovers and improves photos well beyond working with only the pixels in the original image.
Topaz Labs’ most popular Image Quality Bundle includes Sharpen AI, DeNoise AI, and Gigapixel AI normally costs $259.97. But now through Monday, November 29, the company has an even bigger Black Friday discount on the software: the Image Quality bundle can be picked up for $99.99, which is a 60% savings off its regular retail price. If you’re into video work, you can get their “Everything Bundle,” which includes these three photo apps and Video Enhance AI for just $199.98 (normally $559.96). If bundles aren’t for you, you can still get 25% off individual licenses of DeNoise AI, Sharpen AI, and Gigapixel AI. Additionally, Video Enhance AI is available for $99.99, a 67% savings from the regular price of $299.99.
Before I dive into any of these programs, the first step in my personal workflow is to make basic adjustments to the RAW file in Capture One before outputting a TIFF file to Adobe Photoshop where I do more intricate editing. It’s here in Photoshop that I will run what I need from Topaz Labs and have it applied to its own layer for the most flexibility. This is not the only way to work with these products as you can also open images straight into them through Capture One and Adobe Lightroom or run them as standalone applications with the ability to batch process many images at once.
Topaz Labs Sharpen AI
After working on my RAW image in Capture One, I send it to Photoshop. By now, I would already know if my photo needs to go through Sharpen AI, DeNoise AI, or possibly both.
If only minor sharpening is desired, I would skip Sharpen AI and go with DeNoise AI as that has the ability to enhance some details as it runs its noise reduction. On the flip side, Sharpen AI can also perform some level of noise reduction as well, but from my experience, it’s going to work out better using the proper program for each specific issue. When a photo needs some serious sharpness recovery, that’s where I turn to Sharpen AI and it earns every penny I spent on it.
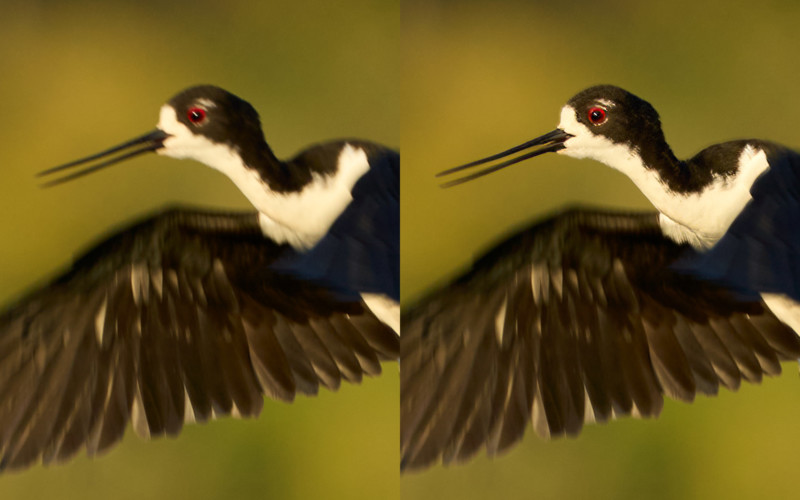
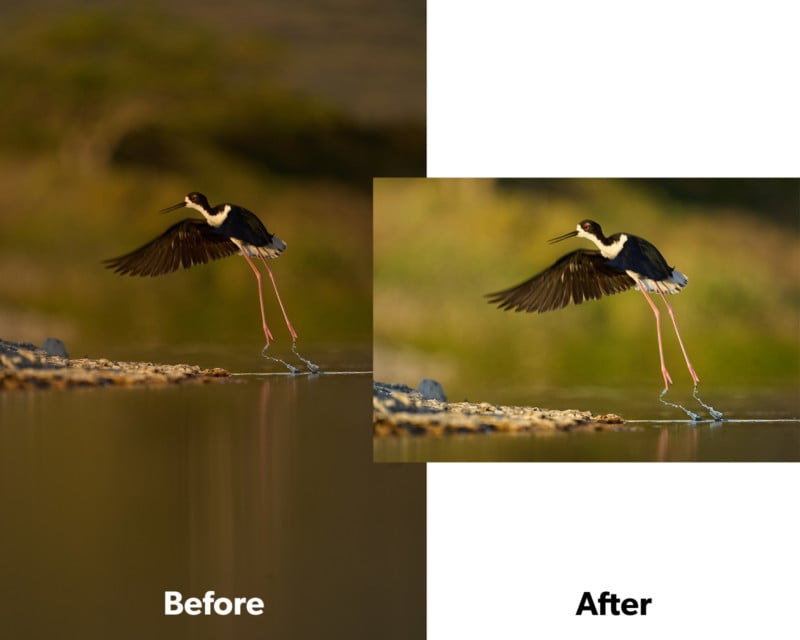
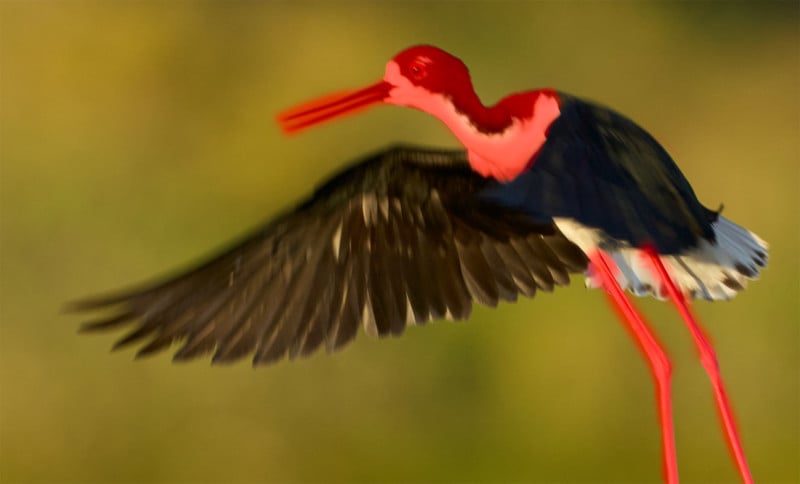
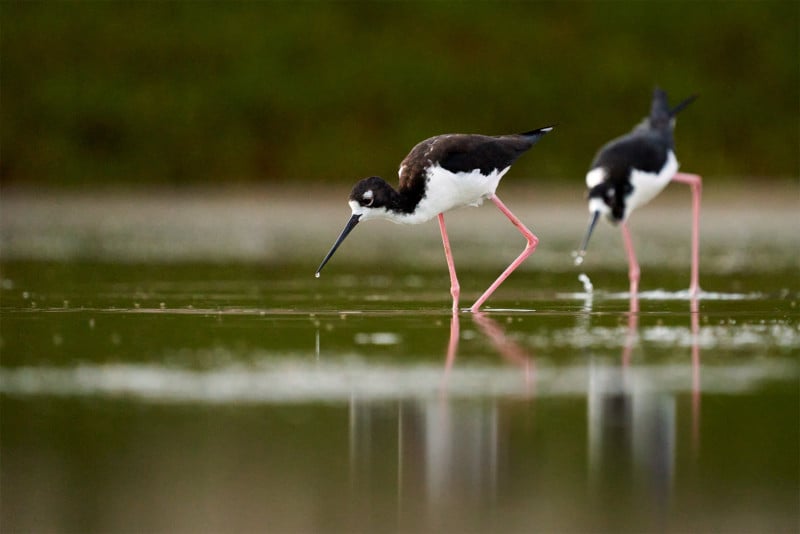
A couple of years ago, my example photo of the Hawaiian Stilt was destined for the trash bin. What I like about the photo are those long tendrils of water connecting its feet to the pond. Unfortunately, my camera settings were set for pictures of it walking along and my shutter was not fast enough to freeze the action when it burst out of the water. The head, and most importantly the eyes, suffer from extreme motion blur. Having taken the photo in Hawai’i, it’s not like I can just say “better luck next time” either.
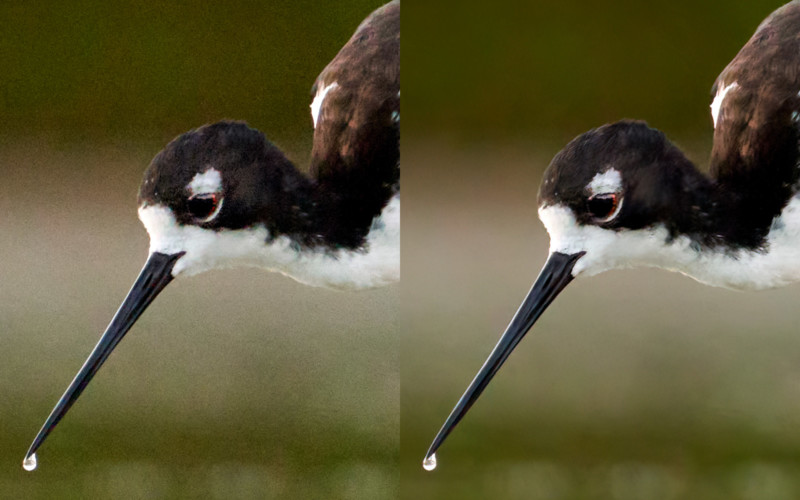
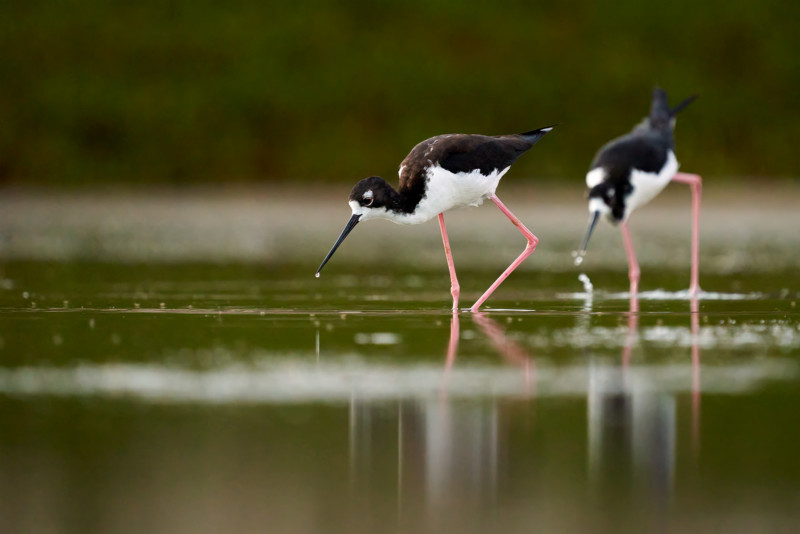
Inside Sharpen AI, the correction options are plainly laid out for simple understanding. This image has severe motion blur, so I chose the “Motion Blur – Very Blurry” sharpen model. From here, I’m able to adjust the amount of blur removal and noise suppression that is applied.
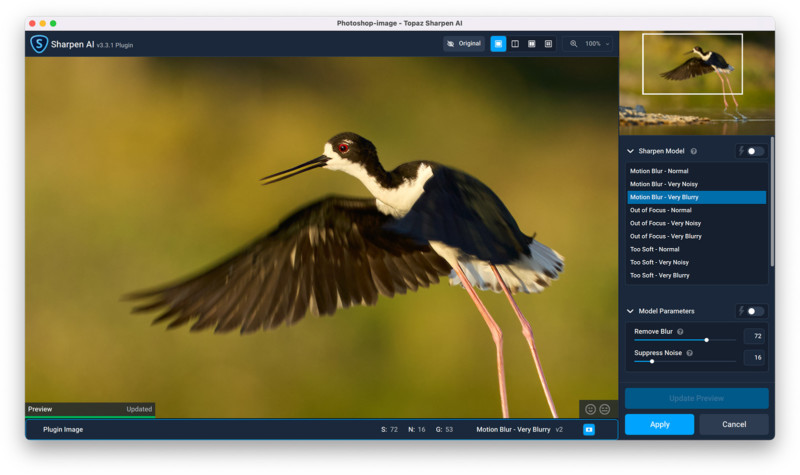
I can even create a mask so that my sharpening adjustments are only targeting the areas I’m concerned about: the head and the eye. If there are areas inside the mask that are coming out over-sharpened whereas the rest is being adequately corrected, I can also reduce the opacity of my masking brush to lessen its effect in specific spots. After creating a mask, I also use the Add Grain slider to match the noise between my adjusted areas and the original photo. This creates a seamless blend and now I’m ready to click Apply and continue finishing the image in Photoshop.

Topaz Labs DeNoise AI
If I were going to use both Sharpen AI and DeNoise AI on a photo, I’d complete Sharpen AI first and then load it into DeNoise AI second. After Sharpen AI, I treat that as the new original and can forget I ever made a mistake in the first place. Since I added grain back into the photo in the Sharpen AI step so that it had an even spread of noise, this can now be universally wiped inside DeNoise AI without worrying about doubling up the noise reduction in masked areas I already altered.
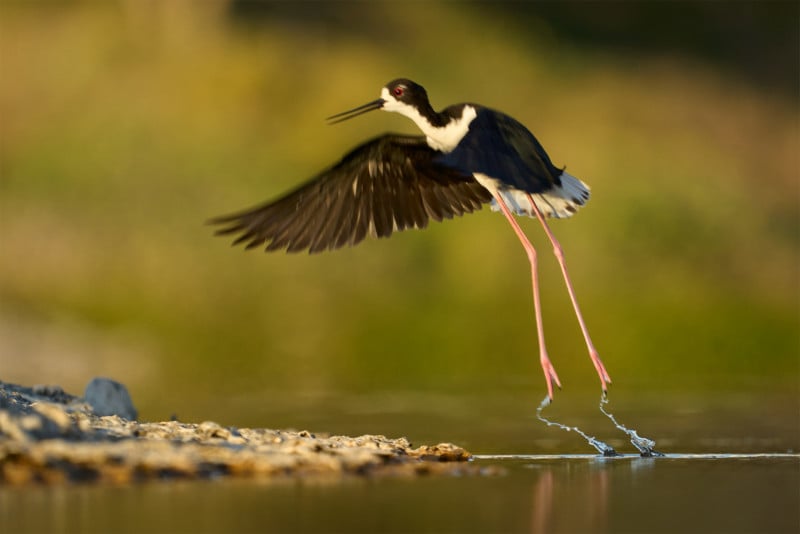
The previous image was shot at ISO 320 on a Sony Alpha 7C, and even though it had a deep crop to enlarge the noise, I felt we should look at something more difficult. To demonstrate the power of DeNoise AI, we’ll skip ahead in the day toward sunset where my Alpha 7R III was at ISO 4,000. This photo has also been cropped and had the exposure increased a stop and a half to further contribute toward the heavy noise.
Just as with Sharpen AI, the DeNoise AI program has a clear layout of tool in the side panel. First, I choose the AI Model from a few different options. Since this photo has a heavy amount of noise and was shot in low light, it sits between a few of the models. Simple enough, I can click the Compare button and see all four available AI model options being applied to my photo at once to determine which is going to give the best balance between noise reduction and retaining details. Personally, I went with Severe Noise.
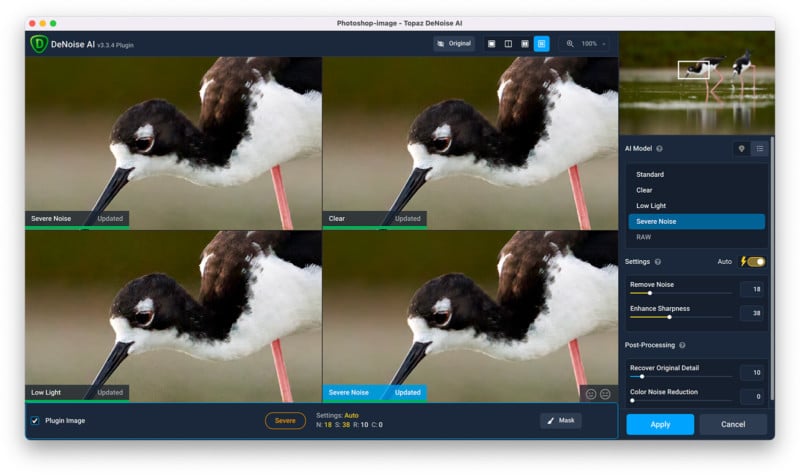
After choosing the AI Model, there are some more settings that I can tinker with to fine-tune my image such as Remove Noise and Enhance Sharpness. If the photo starts losing some of the finer details seen in the original noisy version, there’s a Recover Original Detail slider that I use quite often to balance out the effects. There’s also a Color Noise Reduction tool that I used to use more often in previous versions, however, Topaz Labs has gotten really good at taking care of these issues on its own.
Topaz Labs Gigapixel AI
Rounding out the Image Quality Bundle is Gigapixel AI. This is a program that’s capable of cleanly upscaling photos while maintaining details. The first photo I edited with Sharpen AI was only 3,535 by 2,357 pixels or about 8 megapixels after cropping in Capture One. That’s all fine and dandy for posting to Instagram, but I’ve found myself in situations where I post a deep crop to social media only to have someone asking for a large print.
Uh-oh. Trust me, it can be embarrassing when you have to say you can’t in those situations. Nowadays, I can use Gigapixel AI to greatly enlarge the photo while retaining the same original image quality.
The program is set up with the same visual design as the other two, and once again it’s very simple to use exceptionally powerful tools. In the Resize Mode panel, I can choose to either simply resize my photo by two times or more, or I can get specific by setting the exact width or height. When setting the exact width or height for printing, I can also select inches instead of pixels which opens up the option to set my pixels per unit — for example, 300 PPI.
Let’s say I’m not asking the world with my 8-megapixel edited photo. I simply want it to grow back up to being the 24-megapixel (6,000 by 4,000 pixels) image that the Sony Alpha 7C normally shoots. For that, I go over to the Width tab and enter 6,000 pixels. Next, there are AI Model options ranging from Standard, Lines, Art, Low Resolution, and Very Compressed. This is just a standard photo that isn’t ridiculously low resolution yet, so I’m sticking with Standard.
Following the AI Model selection, there’s a Settings panel to adjust Suppress Noise and Remove Blur sliders. From what I see, using the Auto settings works out just fine. There are additional settings below for reducing color bleed and face refinement if you find you photo needs these tweaks.
A Must-Have for Photo Editing
As a wildlife photographer, I encounter unrepeatable moments in time. That’s why for years I’ve used Sharpen AI to fix my mistakes and improve lens sharpness, DeNoise AI which lets me push my cameras a stop or two more than I used to, and Gigapixel AI to battle those big crops. It’s not often something that sounds too good to be true turns out to be the real deal, but Topaz Labs has it with the Image Quality Bundle.
Welcome to a PetaPixel Showcase, in which our staff gives you a hands-on with unique and interesting products from across the photography landscape. The Showcase format affords manufacturers the opportunity to sponsor hands-on time with their products and our staff, and it lets them highlight what features they think are worth noting, but the opinions expressed from PetaPixel staff are genuine. Showcases should not be considered an endorsement by PetaPixel.