Fallen Sequoias: The Story Behind This Photo Taken in 1977
Over the years I’ve often been asked how I went about making a certain image. That question is commonly asked in my workshops not only of me, but also my co-instructors, where open discussion about all images abounds. It’s a great question, because it gives real insight into the mind of the photographer.
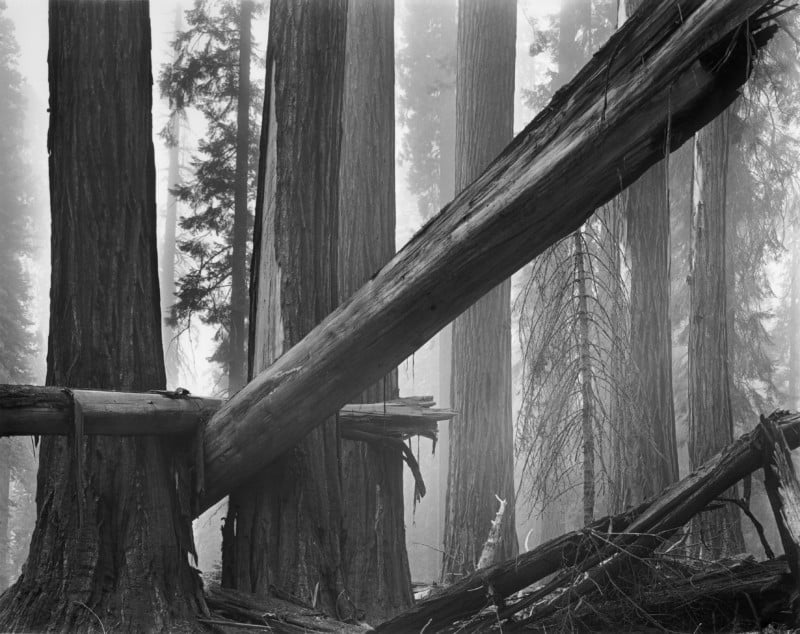
Let me dig back far into my past to choose one of my best-known images, Fallen Sequoias, to run through the key steps in the creation of the image.
The negative was exposed in September 1977 in Sequoia National Park on the western slopes of California’s Sierra Nevada mountains. Nine years before, in 1968, a standing Sequoia tree fell over on a cloudless, windless day. On its way down, it knocked over another Sequoia nearby. What caused the tree to fall is unknown. The very next day, yet another Sequoia tree inexplicably fell over – again with no wind providing the push – and it, too, knocked over another Sequoia.
My encounter with the scene came when my wife and I were staying in a cabin at the Giant Forest Lodge in the park, adjacent to the Giant Forest grove of Sequoias. On a foggy September morning, while my wife was in a meeting with National Park Service officials, I walked the three-mile Giant Forest loop trail in search of possible photographs. It was near the end of the loop that I came across the site of the fallen trees, which took my breath away.
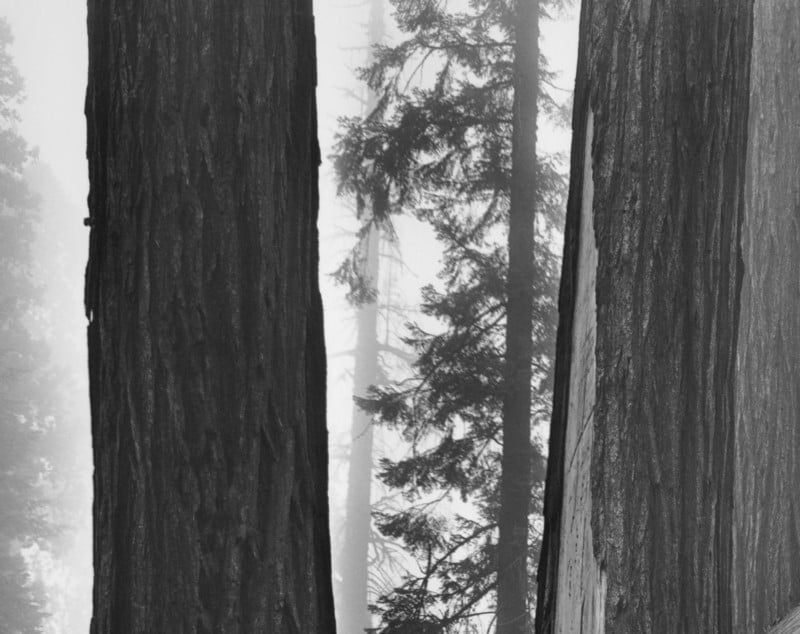
You cannot imagine the size of these trees without seeing them; they are just so overwhelmingly huge. The entire trail presented an unending series of the cinnamon-colored trees that dwarfed everything but the adjacent Sequoias. And suddenly there was the catastrophic scene of standing, downed, and angled trees, a completely unexpected sight.
It was so astonishing that I sensed there must be a wonderful photograph there, somewhere, but seeing the chaos of it all, I wondered how it could be successfully photographed. In particular, where could I place the camera to make sense of it all in a single image?
I was confused so I did what I felt was necessary. I set down my tripod where I was standing, took my backpack holding my 4×5-inch camera and lenses off my back and placed it next to the tripod, and slowly walked around the area encompassing the fallen trees to judge how it looked from every possible angle. It was a slow walk, filled with lots of backtracking, just to analyze where the most wonderful angle could be.
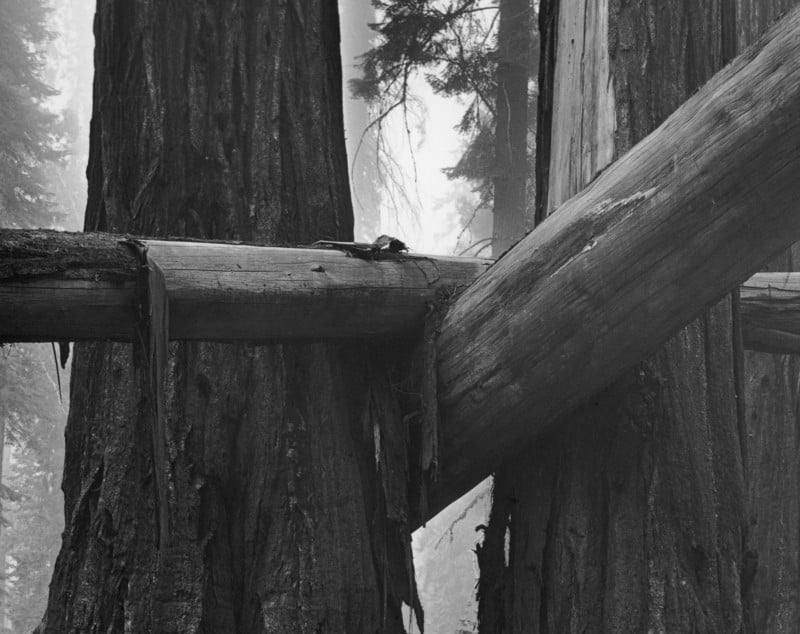
Eventually, I ended up at a spot not far from where I had initially placed my tripod. From that viewpoint, the huge tree at such a severe angle had a wonderful relationship to the logs and branches you see in the lower right corner of the image. (When I refer to the “huge tree,” it may be worth noting that that tree is about 14 feet or 4 1/2 meters in diameter.)
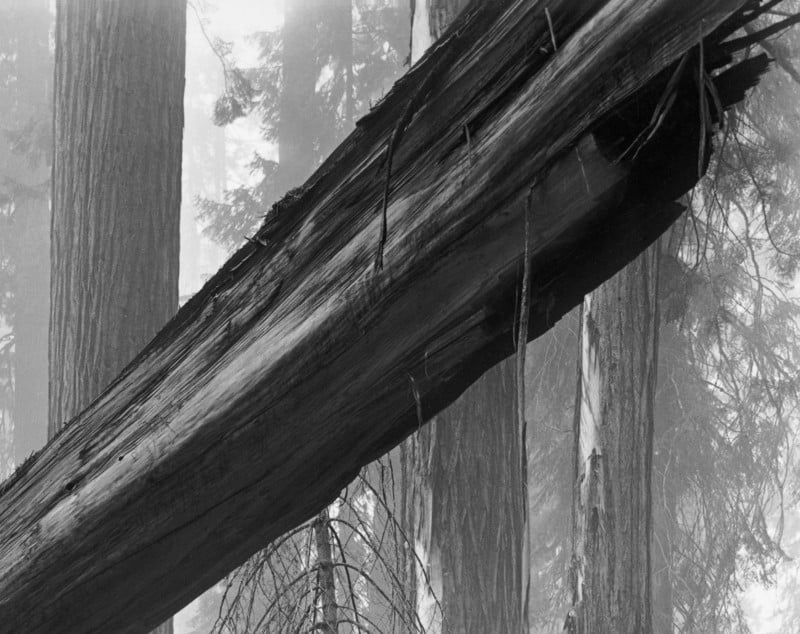
Yet there was a further refinement in the choice of camera position that was crucial. If you look at the lower portion of the angled tree and at the horizontal log atop it, you’ll see large and small strands of tree bark hanging from the trees. Now, follow the large angled tree up toward the upper right, not to the end, but just a bit short of that. You’ll see a strand of bark that begins falling down, but after it clears the dark portion of the log, it continues down, aligned with the right edge of the tree behind it. That alignment was absolutely critical to me, for if that long strand of bark were hanging in front of background foliage, it would have been a serious distraction. By aligning it with the edge of the standing Sequoia tree, the twisted strand merges with the tones and textures of the distant tree bark. Effectively, it disappears. This is an extreme example of the importance of camera position, but one that should be uppermost in every photographer’s mind when making any photograph.
To this day, I cannot fully comprehend the dynamics inherent in the scene, which is one of the things that fascinates me about the image. The huge angled tree is apparently wedged between the base of two standing Sequoias, while a large log lies on it horizontally. How that configuration could have occurred is a mystery to me. But there it is, adding to the dynamics of the situation.

My first exposure was as a vertical image, but the moment I tripped the shutter I felt something was wrong. I reviewed the composition and decided that I had cut off the full dynamic of the situation. With the rotating back of my Linhof Technika camera, I simply turned it to view the scene as a horizontal composition. It was immediately clear to me that this brought it all to life. I made a second exposure in the horizontal orientation, and that was it. I made no additional exposures, nor did I make any from another location. With careful meter readings, I placed the darkest sections of the branches in the lower right where I wanted to see detail, in Zone 4, and subsequently gave the exposed negative “normal development,” thus maintaining the inherent contrast of the scene.
I was extremely lucky that this happened on a foggy day. On a sunlit day –depending on the angle of the sun – I could have been fighting severely blotchy lighting, with sunlight hitting the trees in some places and shadows randomly hitting in other places. But under foggy conditions, the lighting was perfectly even on all the trees so the physical continuity of the trees was unbroken by spotty lighting. (And remember, all that film or digital sensors record is light levels, so spotty lighting breaks up the forms, often making things incomprehensible.) Furthermore, the fog – just the right density of fog – allowed the forest to fade into nothingness in the background.
In printing the negative, my basic exposure is set to give me the right degree of tonality on the bark of the trees – not too light, not too dark, and just enough to convey the presence of fog. Then I have to burn in the trees in the foggy background, first along the left edge, then in the openings between the standing trees above the angled tree, to make them visible in the final print. Blank spaces between those trees, rather than the hint of distant trees in the fog, would not have been satisfactory. They are all there on the negative but need to be carefully burned in to be visible in the final image. It’s not easy to do, but for me, it’s one of the joys of working in the darkroom.
Let me close with one final note about Sequoia trees that makes them unique among all tree species. As long as they are standing, they are living and growing. You will never see a standing, dead Sequoia tree — like snags of other trees that have died, but are still standing. Apparently, the only thing that kills a Sequoia tree (other than humans cutting one down) is if it falls over.
About the Author: Bruce is one of the most prominent photographic thinkers and educators in the world. His iconic book, “The Art of Photography, A Personal Approach to Artistic Expression,” is widely recognized as the bible of photographic thought, insight and instruction. Bruce is also known as one of the finest black and white traditional darkroom printers. His work is represented by galleries in the United States and Europe and is in the collection of museums and private collectors worldwide.
This article is courtesy of ELEMENTS Magazine: The ELEMENTS is the new monthly magazine dedicated to elegant landscape photography, insightful editorials, and fluid, clean design. Inside you will find an exclusive and in-depth articles and imagery by the best landscape photographers in the world such as Bruce Barnbaum, Christopher Burkett, Hans Strand, Erin Babnik, and William Neill, to name a few. Use the PETAPIXEL10 code for a 10% discount off the annual subscription.