An Intro to the Most Basic Photo Edits for Folks Who Don’t Edit (At All)

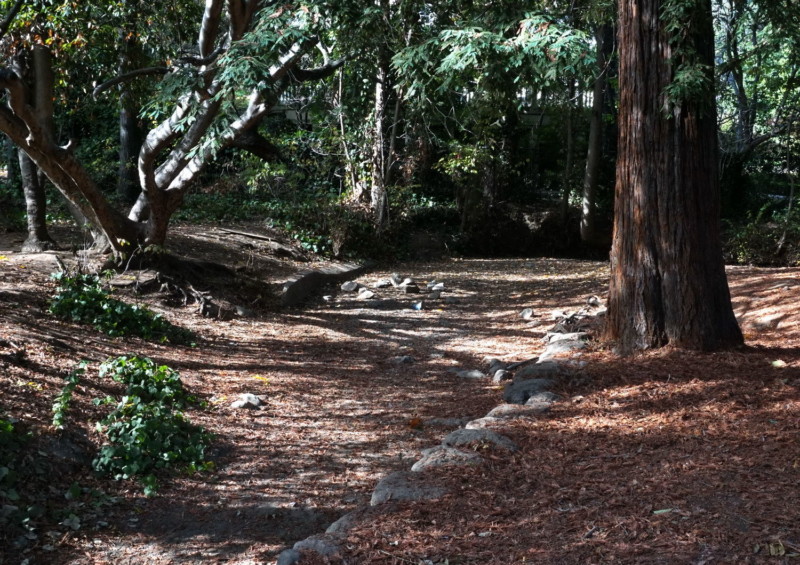
This article is aimed at folks who don’t edit their photos at all. If you aren’t editing you’re missing a lot of fun. Think of me more as a cheerleader than a teacher. I’ll show you simple edits that can be done in a few minutes. We won’t be adding non-existent clouds nor making fat people thin. This is just simple stuff. Let’s start with this shot.

My first step would normally be to level the horizon, or rotate until the trees or buildings were vertical. But this image didn’t need that. So well proceed to the second step, called “dehaze” which removes haze that you didn’t know was there until you removed it.


Now, before doing any more edits, save this as “filename-dehaze”. By saving your image with “save as” every step of the way, you can easily go back and try different things. Do you wonder what a given edit will do? Don’t wonder. Try it. You don’t have to keep it.
Next we’ll adjust exposure. You can play with brightness and contrast or use “curves”. This example used “curves” which allows you to adjust contrast or brightness in the highlights or the shadows, or both.

Next I cropped the image, eliminating the leaning tree on the right. Because I save every step, I can always return if I don’t like the way it’s going.
Next we’ll adjust color saturation.

Increasing saturation strengthens colors. But occasionally you might want to reduce saturation, for a pastel effect.
Now we’re almost done and we’ll sharpen the pic. It’s already sharp, but I call moderate sharpening a free pass to greater image quality. Watch out for over-sharpening, which adds “artifacts”, especially at high contrast edges. If you don’t exceed a radius of 2 pixels, you’re pretty safe.

Finally, I resize the image to 1500 pixels wide, for publication or sharing by email.
Because I saved every step I can always go back and play again.
And here’s the image converted to black and white.

I deliberately didn’t provide a lot of details for each step because I want you to learn by experimenting, rather than from what I tell you.
I do edits like this often, sometimes in just a few minutes. It’s great fun.