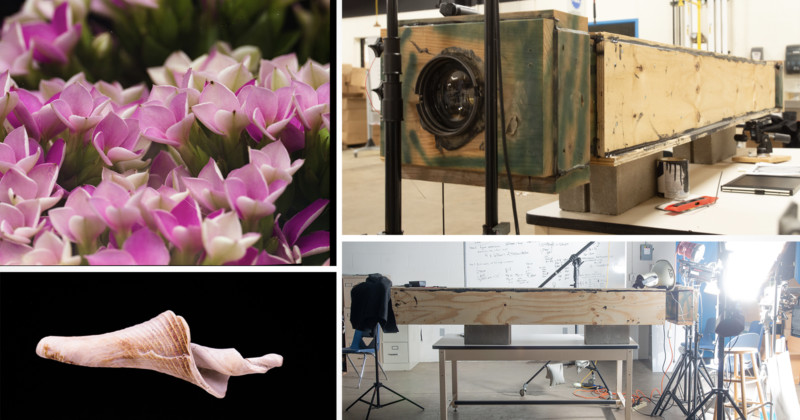
From Bombs to Bubbles: Repurposing a 610mm Spy Plane Lens for Macro Photos
You didn’t ask to learn about bellows extension factors, but we’re going to cover it with the most absurd camera that you may ever see!
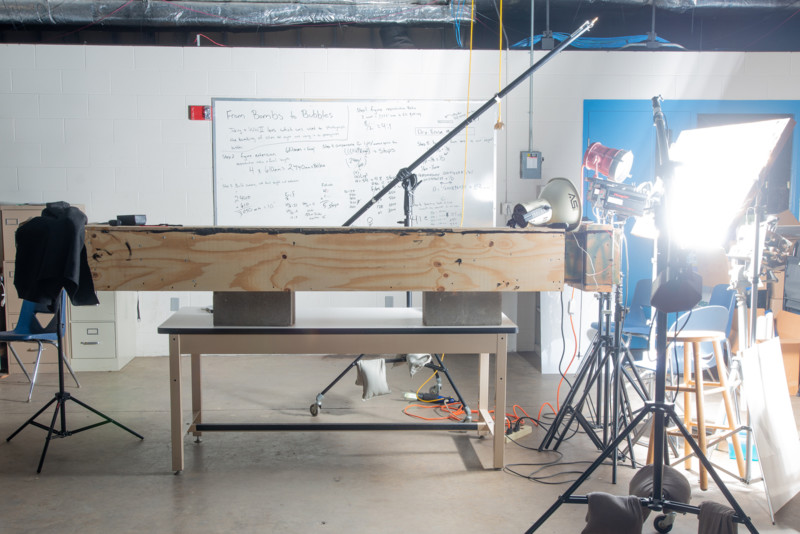
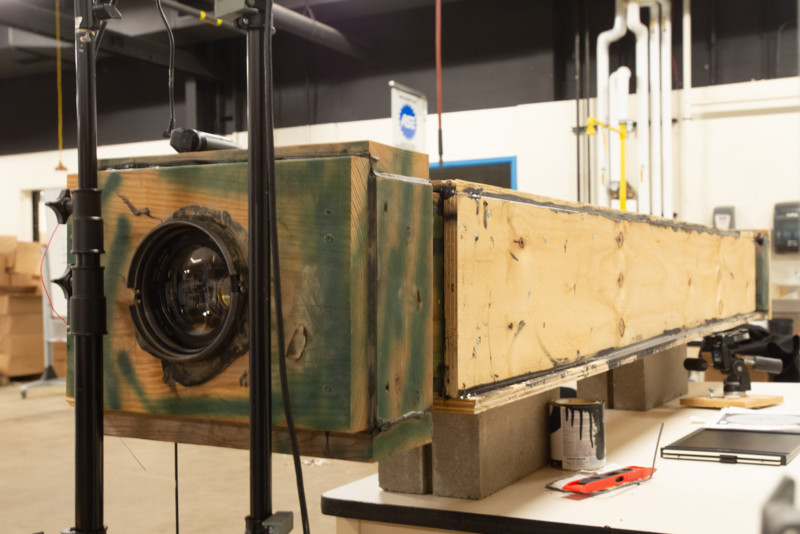
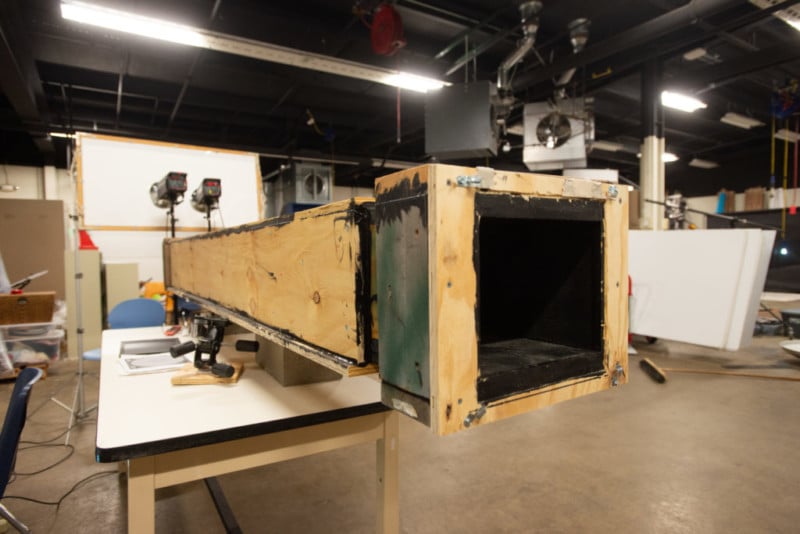
Built from over two sheets of plywood, scraps of 2x6s, old drywall screws, and the cheapest 610mm lens that I could find on eBay, literally every expense was spared. I would be surprised if I spent more than $200 out of pocket to create this 10-foot behemoth.
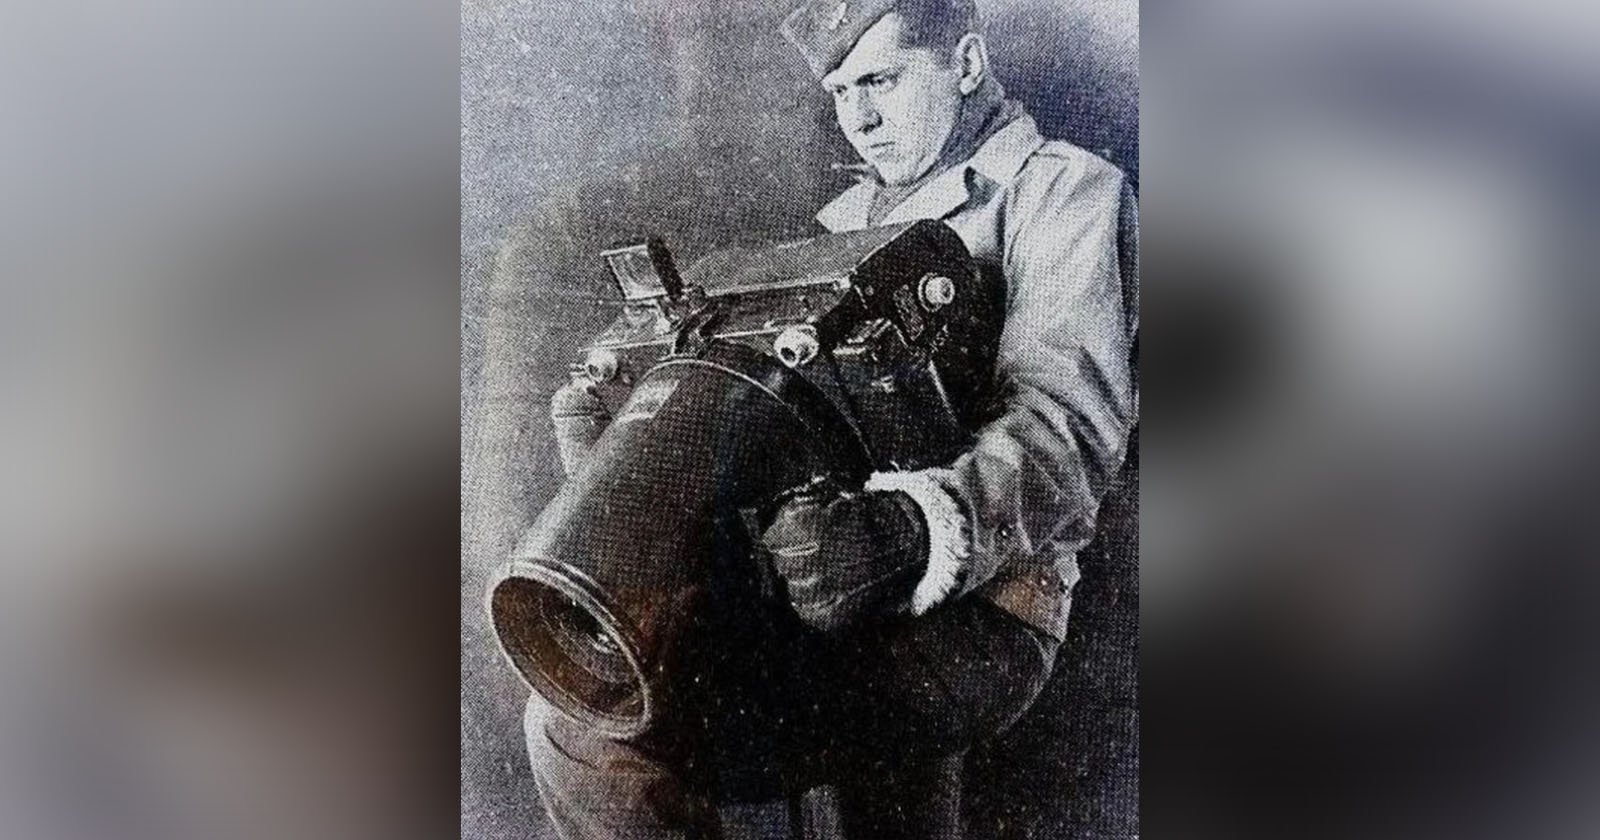
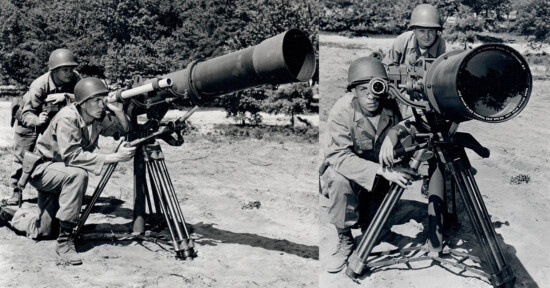
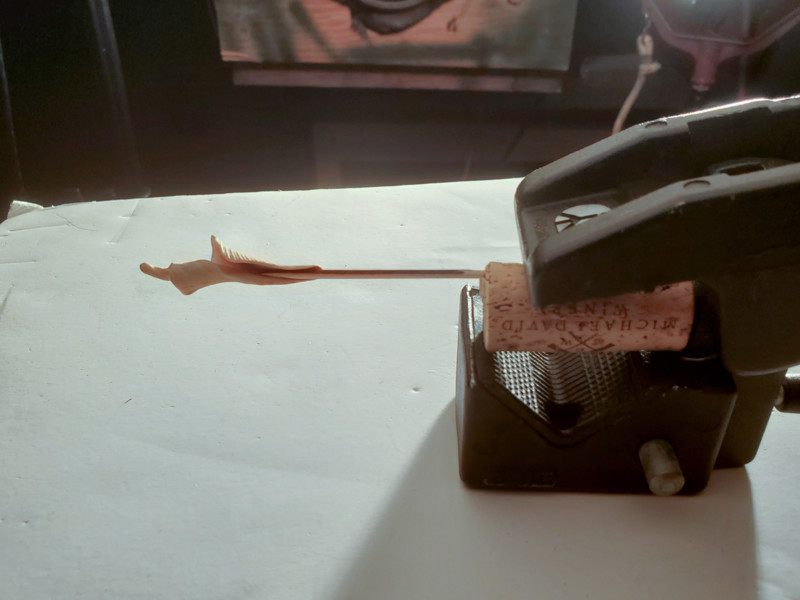
This lens is a reconnaissance lens from World War II. It was used to find targets to blow up, follow troop movements, photograph destruction, mapping, and more. We’re taking a working piece of history that was used to photograph ground targets from over two miles in the air and using it to photograph two-inch wide objects 30 inches away from the front element.
Related: This camera was used for aerial photos during WWII
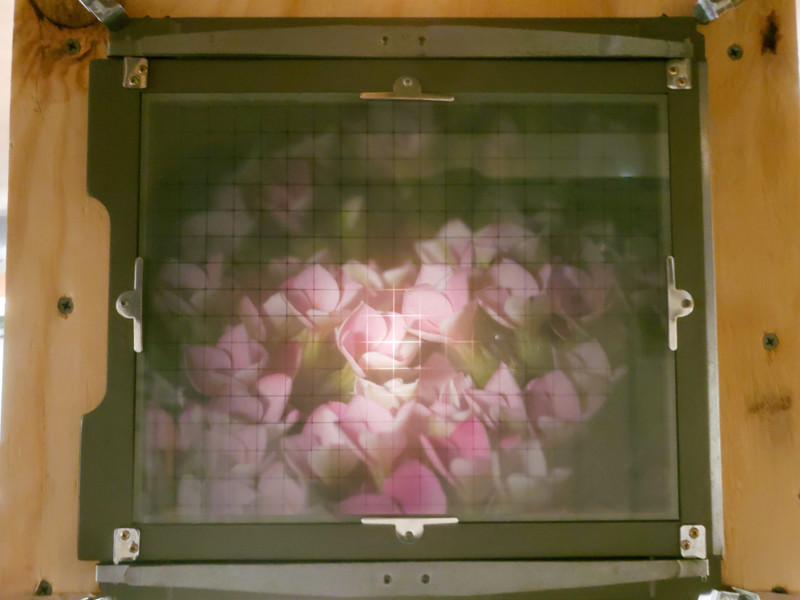
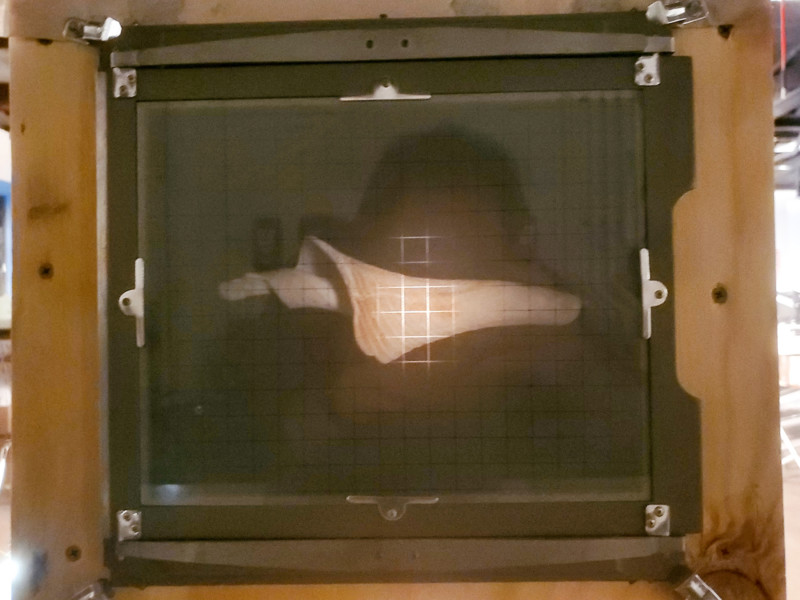
We will be using Kodak Portra 160 8×10 sheet film for this project. The original camera can be seen here. Other photos of the camera can be found on Wikipedia and here is the only image that I could find taken with this camera during wartime.
With this lesson, you’re going to learn how to calculate a reproduction ratio, how to calculate a bellows draw, how to compensate for light loss, where to focus, and how to calculate exposure when your meter can’t read high enough.
Choosing a Lens
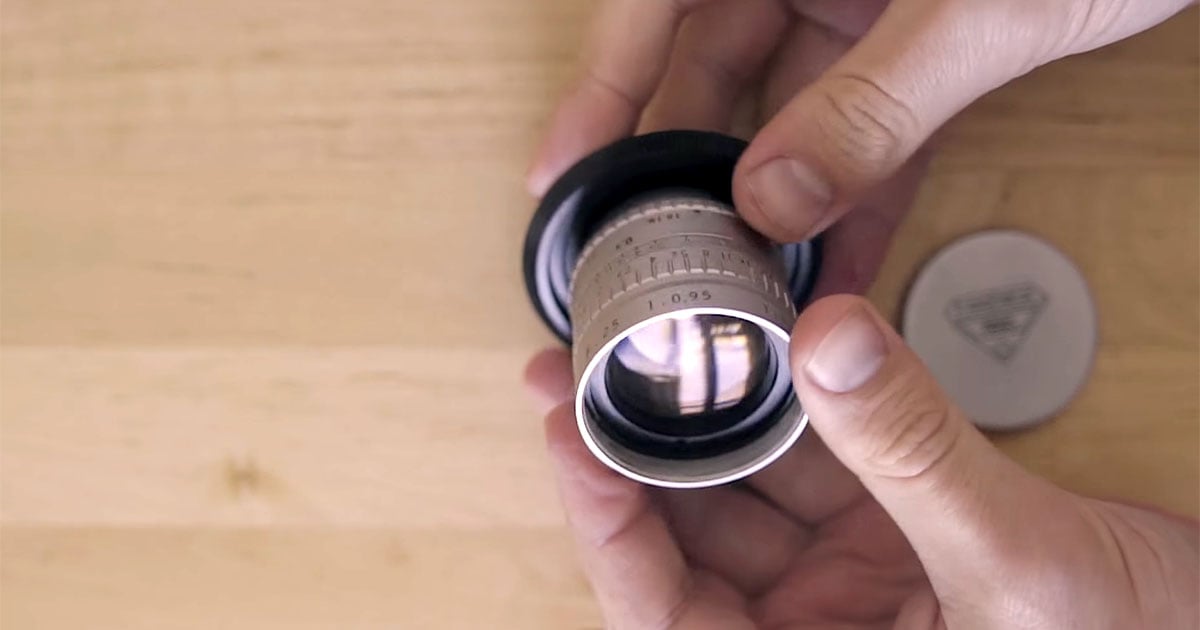
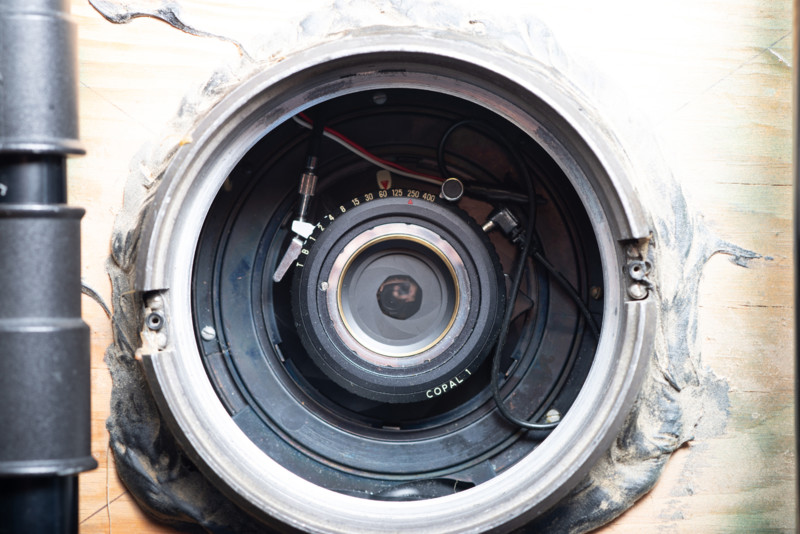
Originally, I wanted to photograph hummingbirds in flight with a smaller version of this camera. Therefore, I needed a long lens to give me adequate space between the front element and where the hummingbird would be feeding. So, I opted for a 610mm Bausch and Lomb Aero Tessar. These lenses can be had for cheap, like $70 on eBay.
The longer your lens, the farther you can have your object from the camera lens and still be in focus. If you use a short lens, you will need to have the item closer to the lens (the equations to figure distance are below). Also, the longer your lens, the longer your camera will have to be to achieve your desired magnification ratio, so keep that in mind.
Reproduction Ratios
I know that this camera is beautiful. It’s as much of a work of art as the images that it produces are. To build a camera of this craftsmanship, you obviously need to spend some time planning.
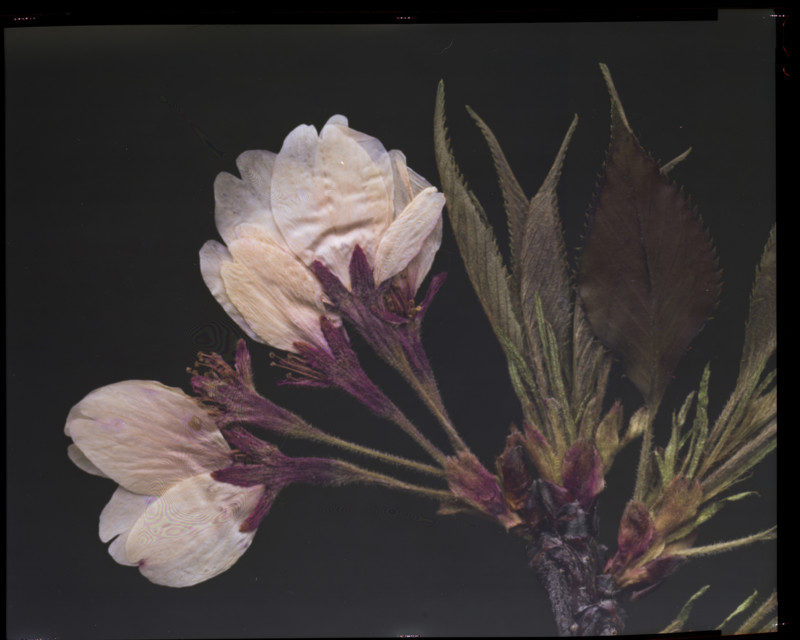
Like I said before, I wanted to use this thing to photograph hummingbirds in macro in flight. A hummingbird is roughly 3.5×4.5. That would fit on an 8×10 inch negative at 1:1 reproduction but it would also leave a lot empty space around the bird. At $27 per shot, you want to maximize that negative’s use so I needed to discover how large I could make the bird on my negative. This is called a reproduction ratio.
To find the reproduction ratio, I divided the size of the film, by the size of the bird so that the bird would fill the frame completely.
8″/3.5″ = 2.3
The bird needs to have space around the edge of the frame to account for movement so I settled on a 2:1 reproduction ratio. Every inch of bird would equal two inches on my film.
For this class, I decided to make the reproduction ratio 4:1 because bigger is always better. The math is the same but now every inch of subject equals four inches of film!
Bellows Draw
Technically, this is an extension tube because it’s solid. The math doesn’t change though. Bellows and extension tubes just put distance between the lens and the focal plane. This distance allows you to focus closer to your object. The further you push your focal plane back, the closer you can get to your object, thus increasing the magnification and the reproduction ratio.
This lens is a 610mm lens. That means that the distance from the convergence point inside the lens to the focal plane should be 610mm when focused at infinity. That is its focal length.
To figure out how long your bellows need to be, multiply your focal length by your reproduction ratio: 610mm x 4 = 2440mm of bellows extension (or a 2440mm extension tube).
Now, add your original focal length to that number and you will get the total length of your camera (this calculation is only useful if you have to build your camera or use a second set of bellows): 2440mm of extension + 610mm = 3050mm of total camera.
Exposure Compensation
Just like when using flashes in the studio, light density falls off as you move the light further from your subject. In this instance, we aren’t moving the light, we’re moving the focal plane. The light loss still follows the Inverse Square Law. If you double the distance, you lose two stops of light.
To find the specific loss of light intensity, in stops, follow the following formula:
- ((Bellows extension/Focal length)^2)log 2 = stops of compensation (remember, bellows extension is just reproduction ratio x focal length so ours is 2440mm)
- ((2440mm/610mm)^2)log2
- ((4)^2)log2
- 16 x log2
- That equals 4.8 stops of light loss that you need to compensate for.
Now, that was the hard way to do it. And that’s the way you should do it if you’re shooting transparencies. We aren’t shooting transparencies so we have a bit more latitude. In other words, we can estimate. The estimation formula is:
- Reproduction ratio +1 = stops of compensation
So for us:
- 4+1 = 5 stops of compensation.
Focusing Distance
Now, when you start using this thing you’re going to say, “Mr. B., it’s so dark, I don’t know when it’s focused!” Don’t worry, there’s a formula for that!
- 1/focal length = 1/bellows extension + 1/focusing distance
- Let’s get focusing distance on its own with some simple algebra:
- 1/focal length – 1/bellows extension = 1/focusing distance
- 1/610mm – 1/2440mm = 1/focusing distance
- 0.0016393 – 0.0004098 = 1/focusing distance
- 0.0011896 = 1/focusing distance
- Focusing distance = 1/0.0011896
- Focusing distance = 813mm from the center of the optical system (roughly the aperture)
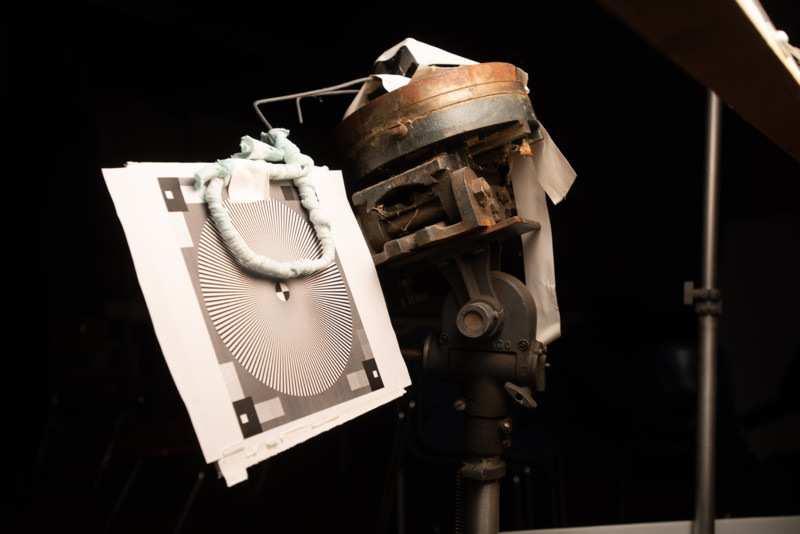
Now that you have your exposure compensation and focusing distance, consult the internet for a reproduction depth of field scale. The math is hard and it will be the same for every lens. I used this one, it’s midway down the page.
Find your desired depth of field for your reproduction ratio, add in your exposure compensation, and you’ll be all set to get to work dialing in your exposure!
Photography
We’re finally ready to take some photos with this thing, right? Of course not, there’s still more math to go!
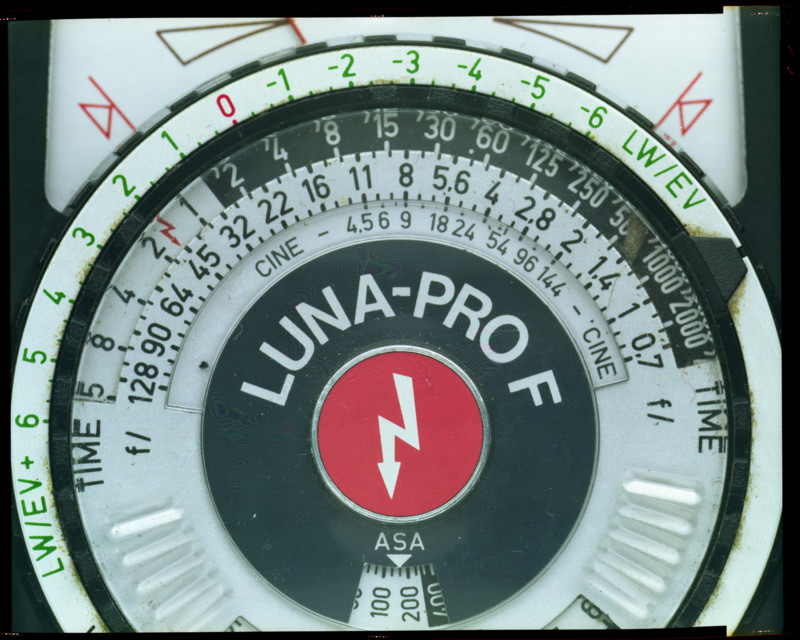
We’re shooting with a nominal aperture of f/32. With the five stops of compensation added in, we need to be aiming for f/181 or f/125 + 1 stop. I can look at my light meter and see that we’re already in trouble. It only goes to f/125 and it’s a bit flakey up that high to boot. Thankfully, we’re using Photogenic Powerlight 2500s with the digital readout. That digital readout is important because it reads in watt/seconds. So, if we can find a setting that works at f/32 on my meter then we can double the light five times to get the proper exposure.
For me, that happened to be 62 w/s for f/32. Use the calculations below and get shooting!
- 62 w/s = f/32
- 125 w/s = f/45
- 250 w/s = f/65
- 500 w/s = f/90
- 1000 w/s = f/125
- 2000 w/s = f/181
Note: At f/32 and a 4:1 reproduction ratio, the depth of field is only 1mm. It takes a minimum of 1000 watts of constant light placed four feet away from the subject in order to be able to focus the camera.

Pat Brownewell is in his first year of teaching Commercial Photography at the Elkhart Area Career Center where his father taught the same class for 26 years. He now seeks to teach his students the skills that helped make him successful in the competitive world of photography. More projects and lessons can be found on his class website. This article was originally published here.