How I Shot a Nova Terra Cosplay Photo in the Desert
As a photographer, I’ve never really planned my shoots too much. I kind of look at what I’ll be shooting and think of cool-looking images. Then I try my best to match what I’m seeing in my head through photography and sometimes post-production.
I couldn’t wait to shoot it. Lyz has a background as a very experienced model. Which means she’s absolutely incredible at following directions and understanding whatever creative vision I have for our shoots. So I had the idea of going to the desert in California for the shoot as I thought the yellows would contrast really nicely against the primarily muted blue tones of her character.
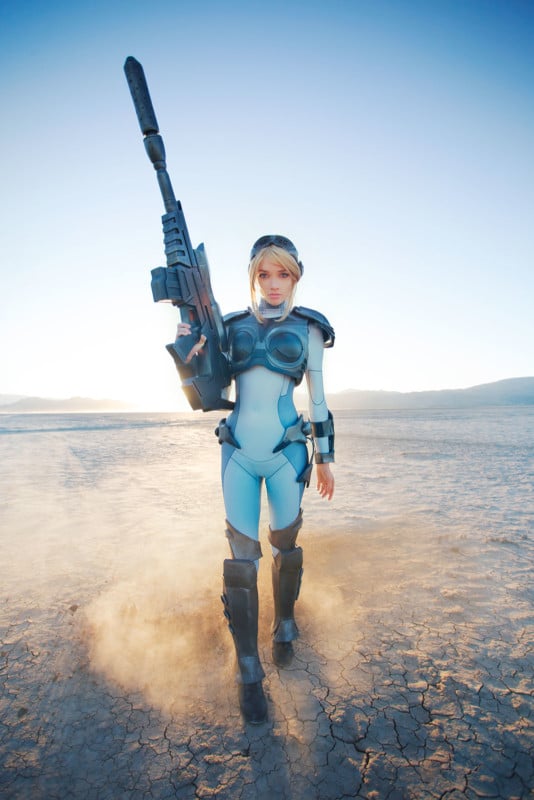
What I usually do before I go for the crazy poses is more regular stuff. Like this finished image here:
For the creative photo, I wanted it backlit since that’s often my go-to style in photography when I want to create dramatic shots. I don’t use any external flash or reflectors.
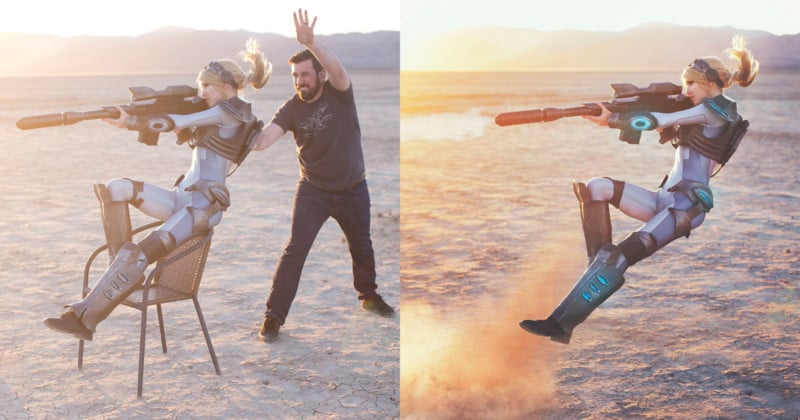
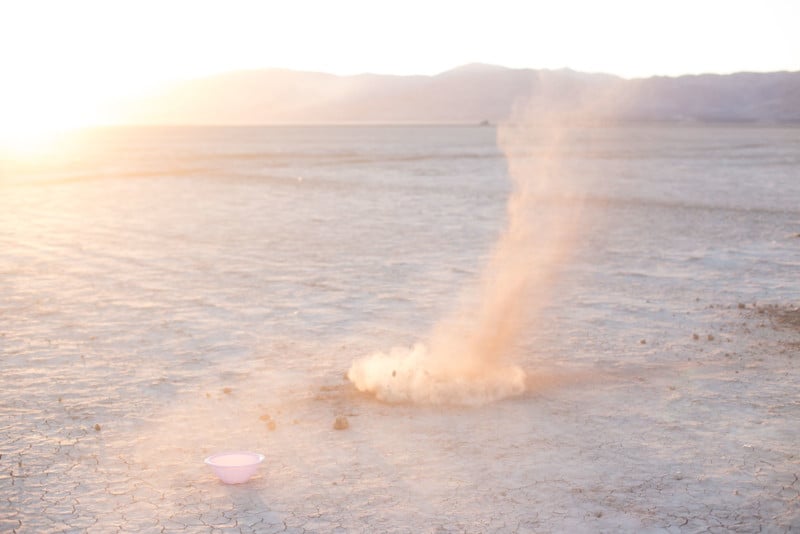
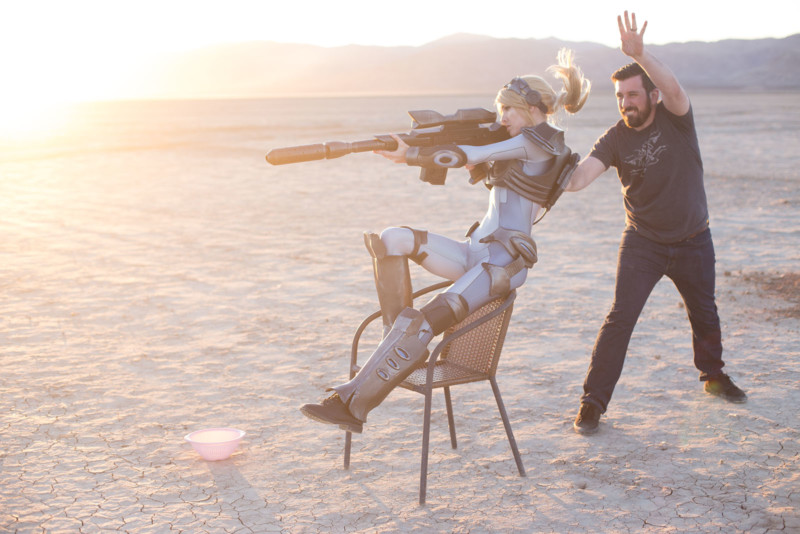
I also knew I wanted dirt flying around and that I wanted her in an impossible pose. So I asked her husband to load up a chair with armrests, a shovel, and a bowl. The last 2 items were for creating the practical effects that I wanted to shoot myself. It’s always best if you do it that way since the lighting will match the scene when you composite it in.
Finally, I wanted her to be airborne somehow but I couldn’t get it to look natural. Mostly with these things, there’s a lot of trial and error. It’s important that the people you work with understand this beforehand.
Eventually, her husband Sean had figured out what pose may work so he showed us.
I wanted to shoot the practical dirt effects in the scene as well. So I had Sean continuously shovel a bunch of dirt into the frame as I captured it landing on the ground. I didn’t end up using the bowl (but I left it in the frame because I’m lazy and knew it would be very easy to edit out).
I didn’t use a tripod for the shoot since matching up the layers is a very easy task. I was shooting with a Canon 6D and 50mm f/1.4 lens without any lights or reflectors.
Sean stood behind Lyz to support her and flick her hair up during the photo. As soon as I got the shot I knew I had it and the shoot was pretty much a wrap.
Here are the steps I went through during post-processing:
- Open up both photos. One with your subject and one with the empty background. Align them perfectly using the transformation tool while one layer is set to difference.
- Once aligned mask the empty layer (one without the person) with a soft small brush. Make sure your edges are perfect.
- Remove stray hairs, clean up the background and do your skin retouching if necessary. In this image, I also had to fix broken parts of the costume. See strap-on thigh and armor near the shoe.
- Dodge/burn to create shadow and light where needed.
- Mask in the dust images. Blend them until it looks right.
- Add any kind of effects you feel are missing. Here I felt the image looked odd without the gun firing so I added a blast from the gun and I lit up the glowing parts on the costume more.
- Final color grading. I do this by creating several curves adjustment layers and masking them.
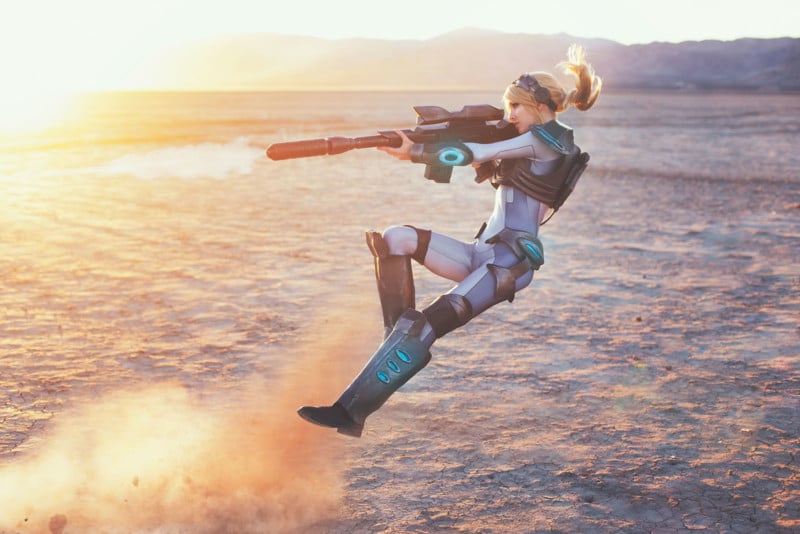
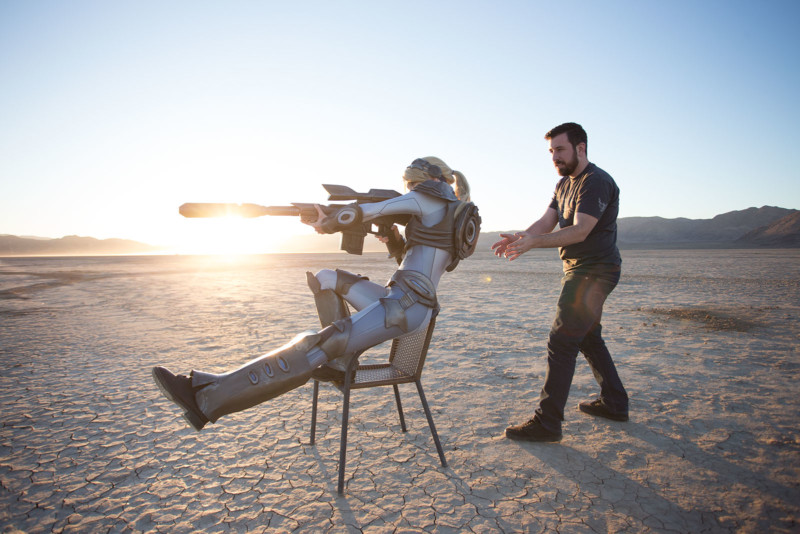
Here’s the finished photo: