Shooting Tethered Pays Off: A Guide for Photographers
If you’re a photographer, you’ve undoubtedly had the experience of taking a photo, looking at it on the back of the camera, and being stoked that you nailed the shot. But then you get home, download the images, and realize that it’s just a little out of focus, or the subject’s hair was in their face, or there was a strange wrinkle in their clothing. Shooting tethered to a laptop can alleviate problems like this, as well as provide other added benefits.
Why Bother Shooting Tethered?
The ultimate goal of a photo shoot is to achieve the artistic vision that’s in your head, so it’s best to eliminate as many obstacles that could cause problems as possible. One consistent challenge on shoots is that the LCD screen on the back of the camera isn’t extremely helpful or accurate at showing the images being captured.
Shooting tethered to a laptop takes just about all of the guesswork out of wondering if you’re getting the photos you think that you’re getting, plus there are several other added benefits. You have a much clearer view of what is being captured, and it allows you to make adjustments as needed before it’s too late. Tethering can be done in studio or on location, and doing it on location does require you to bring some extra gear, but it’s a surprisingly small additional effort that can pay off in spades. Some key areas that tethered capture provide benefits in are:
Overall Image Quality and Executing Vision
Seeing the photo as soon as you take it on a high resolution, color-accurate screen really lets you focus on what it is you’re capturing. It lets you really see the photo and notice small problems that you’d never notice on the camera’s LCD screen. I also find that seeing the photo full size lets me take a step back and gauge if the shoot is moving in the right direction creatively.
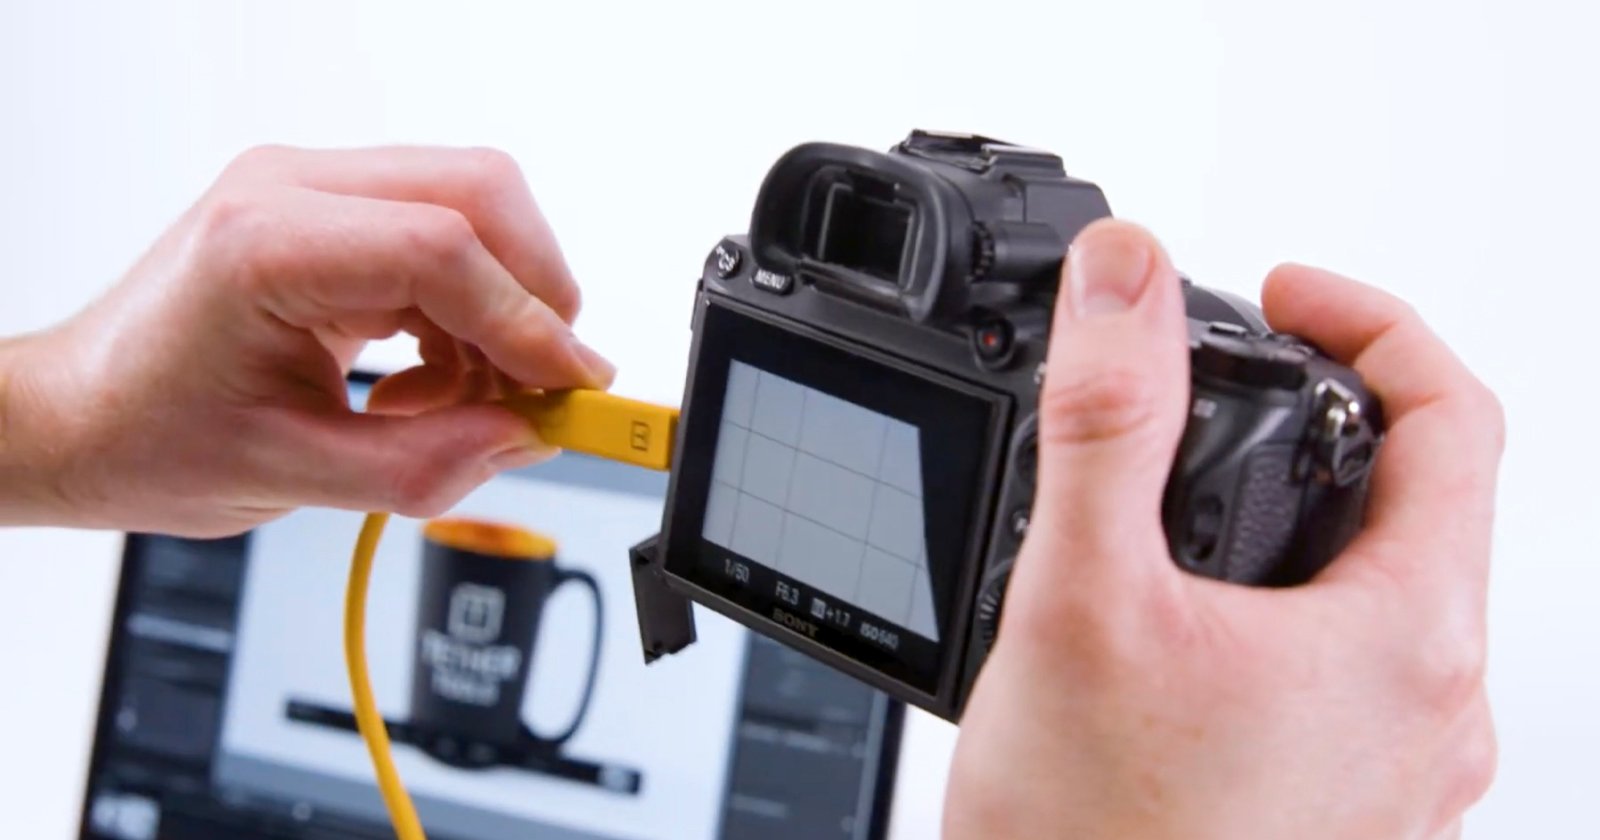
3.2″ LCD Screen vs 15″ Retina Screen
That tiny little LCD screen on the back of the camera is about 1 megapixel. Most cameras shoot somewhere between 20-40MP. That’s a lot of detail you aren’t seeing. It sure is better than nothing at all, but it doesn’t give a great view of what you’re doing. The tonal range of the camera’s LCD screen isn’t incredibly accurate either, especially in the shadows and highlights. The exact balance of light, critical focus, seeing if there are distracting elements in the frame, weird clothing wrinkles or expressions, blinking eyes, etc, are all difficult to spot quickly during a fast-paced shoot on the on-camera screen. Add in environmental factors like bright sunlight and it can become a guessing game.
Take this shot below, for instance. I knew I wanted to shoot tight and get a ton of detail, and I knew fine-tuned light balance was going to be a requirement. Too much blue would overpower the key. But that balance is delicate, and an LCD screen isn’t going to tell me much in a fast or accurate way.
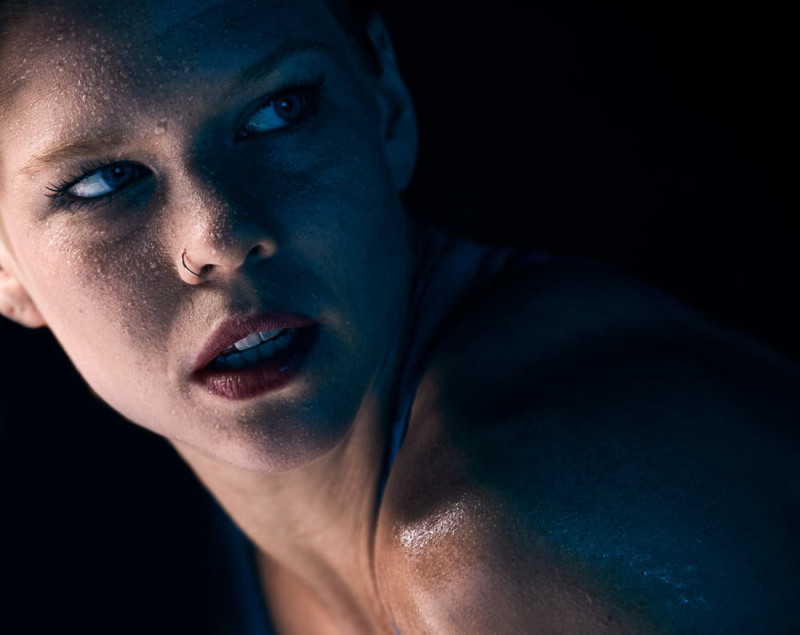
Because both critical focus and fine-tuned light balance were important, tethering was a no-brainer. I could really see that my photos were turning out well, and I wasn’t sitting there wondering if my shadows were too dark. Because I was shooting tethered, after every shot I could quickly and easily verify that everything was working right, and make lighting or camera adjustments as needed. This leads me to the next point…
Immediate, Automatic Post-Processing
One thing that has never been an option in-camera is to see edited images, right away. Anyone who has shot RAW photos knows how boring and flat they generally are, so being able to apply adjustments on the spot let you really make sure things are going well. The two most popular pieces of software used for tethered capture (more on that later) are Lightroom and Capture One, and both of them offer this functionality. This is also great for collaborating with other people or clients on set. Images can show up on the laptop immediately with adjustments and it can be a better reflection of the final images than you’d normally be able to show.
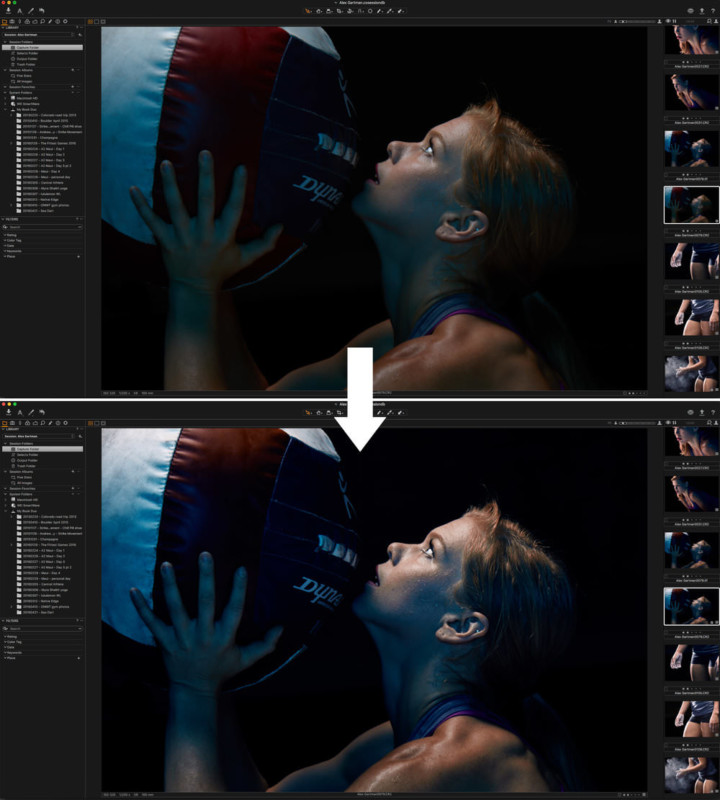
As you can see in the RAW photo (top), there was a hard blue fill but it doesn’t give a perfect idea of what the final shot will look like. I set Capture One to apply a preset that I created to each photo as I shot (bottom), which let me really hone the look.
What You Need to Shoot Tethered
There are some pieces of hardware and software that are required (and a couple that isn’t absolutely required but is super nice to have). Items marked with “required” are… required. Other items are very helpful but you can tether without them. First, let’s talk hardware.
The Hardware
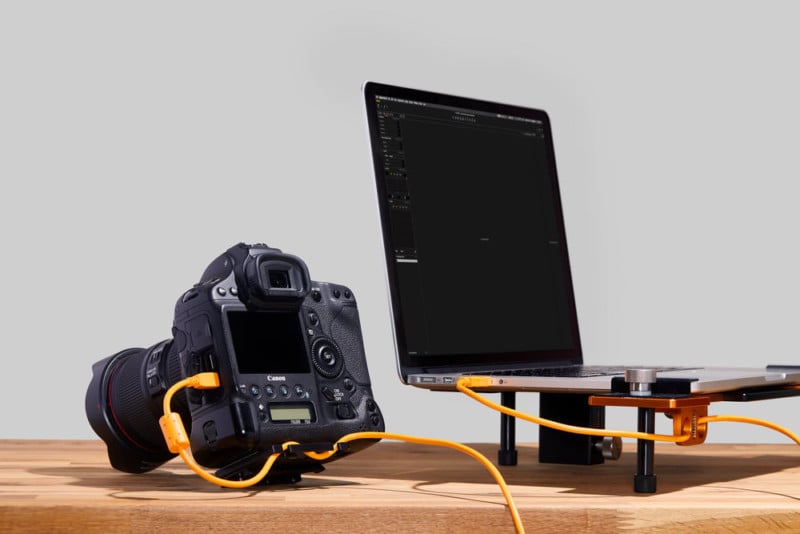
Laptop or computer (required). I use a 15″ MacBook Pro Retina which is my travel machine. I love the high-resolution screen, SSD, and thin profile. If you’re tethering in a studio, a desktop computer might make sense too, but my shoots are always on location, so my set up is designed for portability.
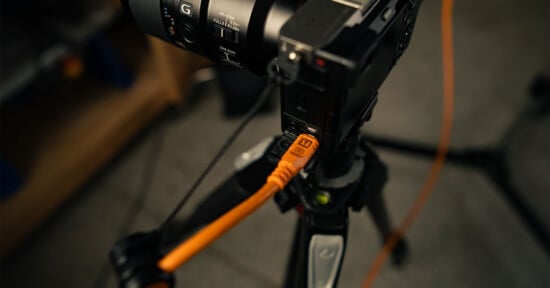
Tether cable (required). This is going to be a USB cable that has the corresponding connection that your camera has. These days, it’ll likely either to be USB 3 or USB 2. You can technically tether with any length cable, including those 3′ ones that most devices come with, but what you really want is a 15′ cable from Tether Tools (follow this link to find the exact cable required for your camera). The high visibility orange is nice to keep it from getting tripped over. Many new cameras have some sort of wifi function but I’ll stay right now that attempting to use that in any sort of practical way during a shoot will be entirely fruitless.
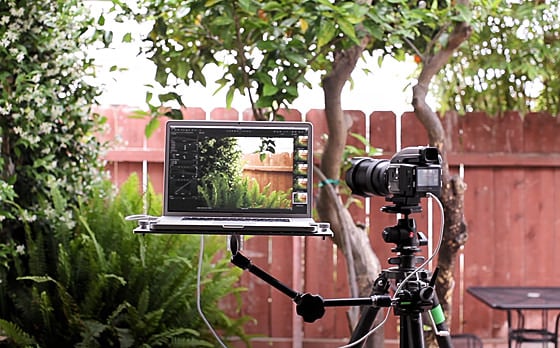
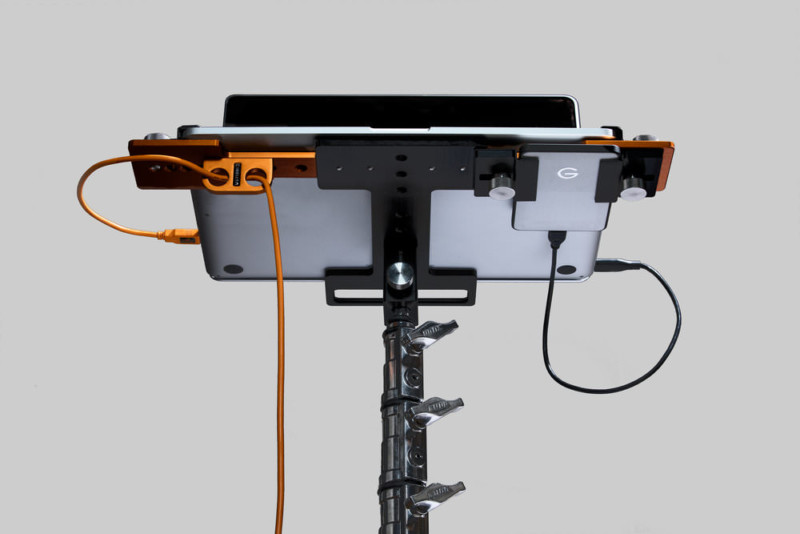
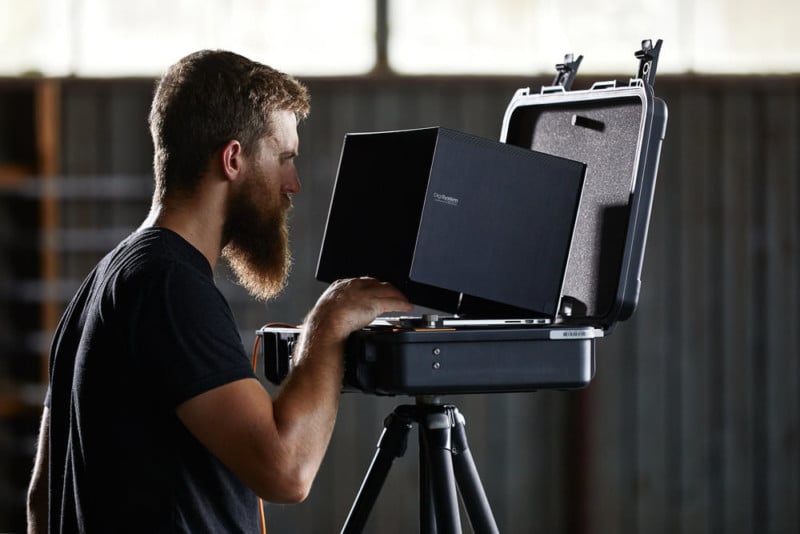
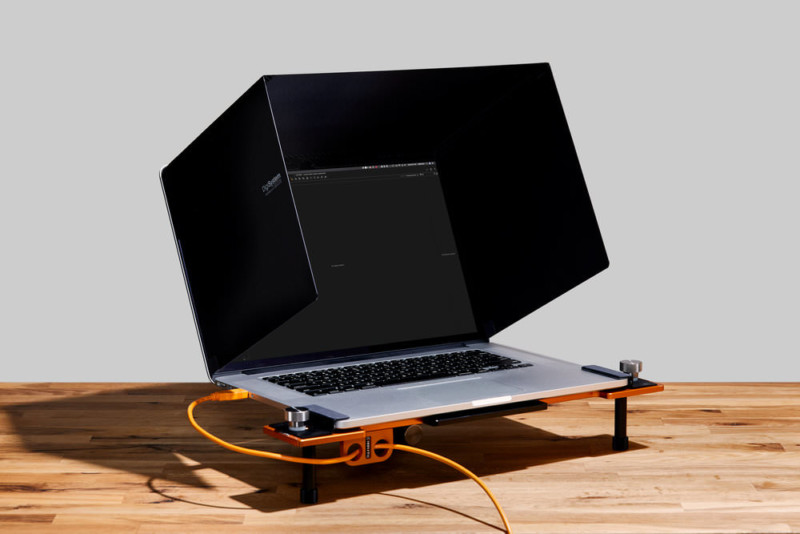
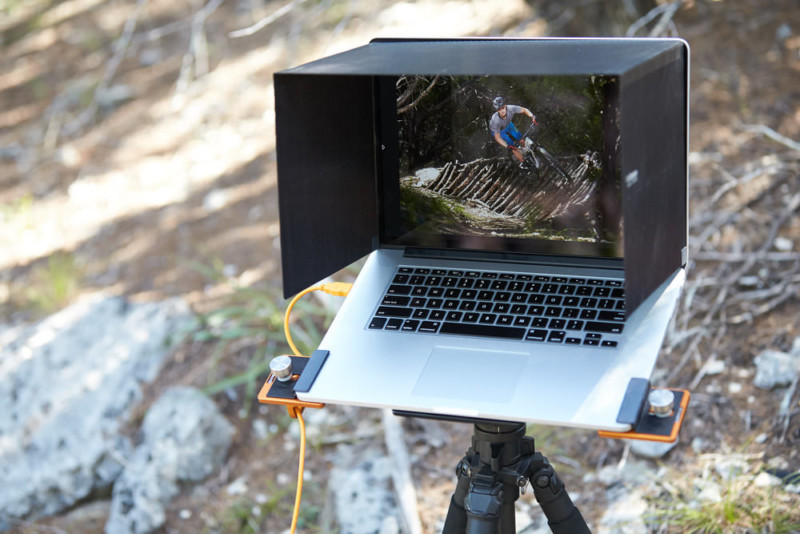
Tether table / platform. I’ve done some tethered shoots without a tether table and it usually a huge pain. You have to find something to set the laptop on or set it on the ground, and it always causes a slowdown when you’re trying to move quickly. A tether table is a bracket that allows you to attach a laptop to a light stand or tripod so you can place it wherever you want, at the right height. This one has clamps that attach to the bottom to mount accessories like hard drives, card readers, or cable management devices.
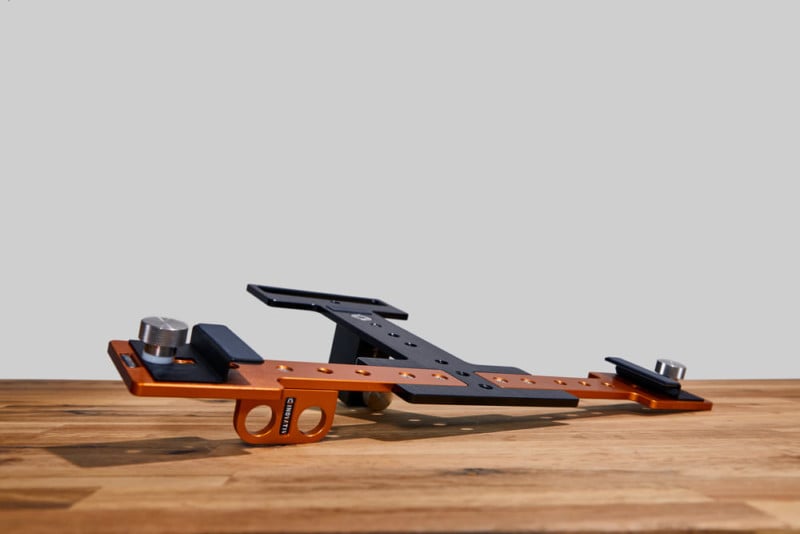
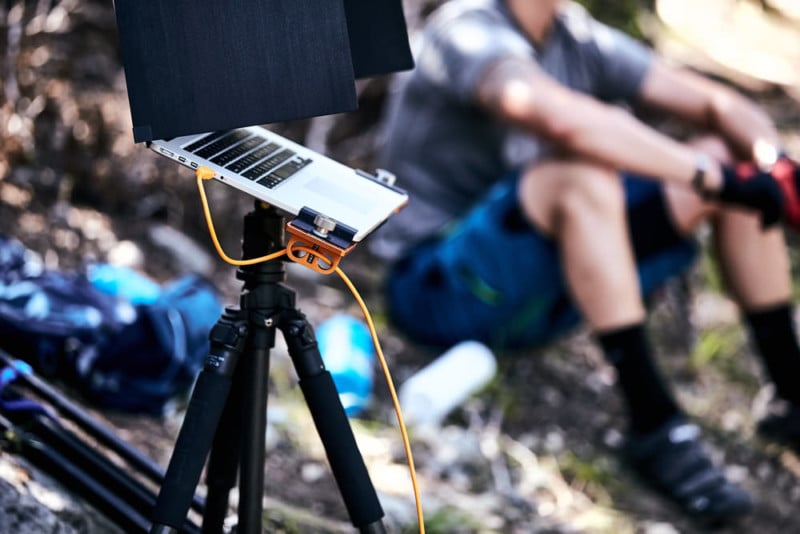
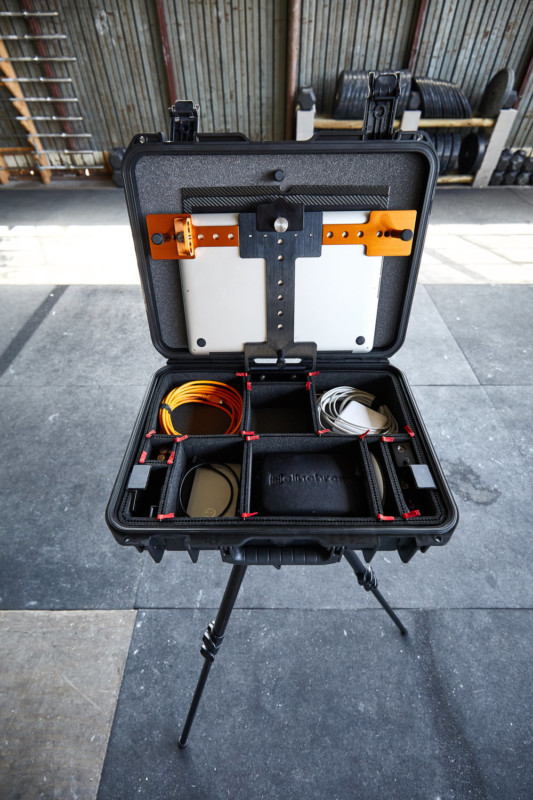
The table tethering system I have is the DigiPlate Lite Ultra Kit from Inovativ (price: $1040). It includes the basic, lightweight laptop table you see above, as well as a custom SKB case, screen shade, and other accessories. The basic bracket can be used on its own for situations where I’m carrying gear out to a location in a backpack and need to stay as light as possible. The added weight of bringing the unit, laptop, and carbon fiber stand isn’t substantial and in my opinion, is a small price to pay in order to elevate my image quality on location.
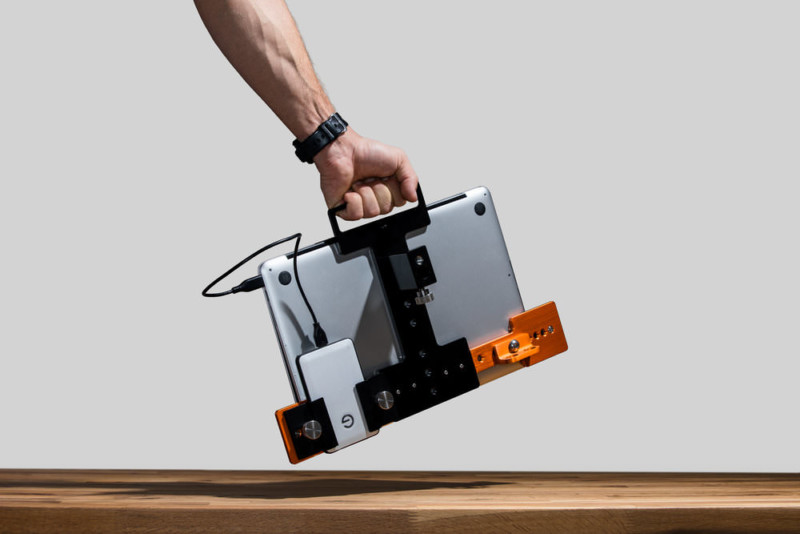
There are small clamps that lock down the laptop to the bracket, and a carry handle that make moving the setup easy with no risk of it falling off.
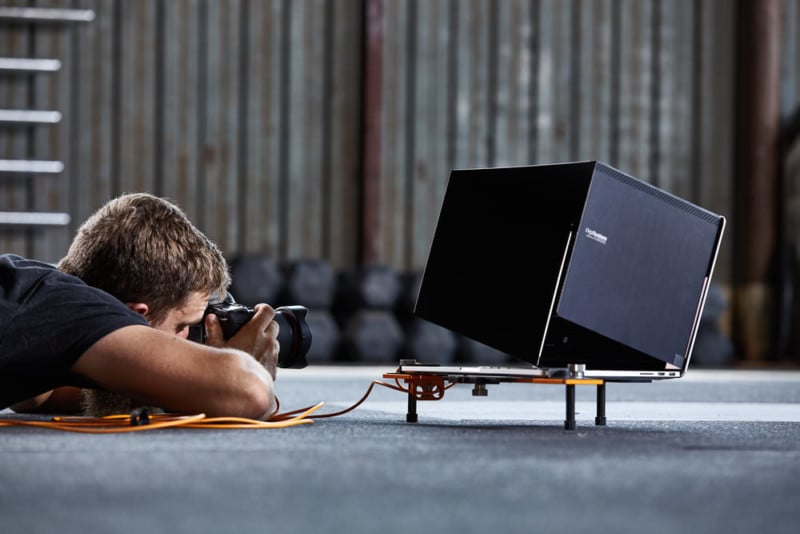
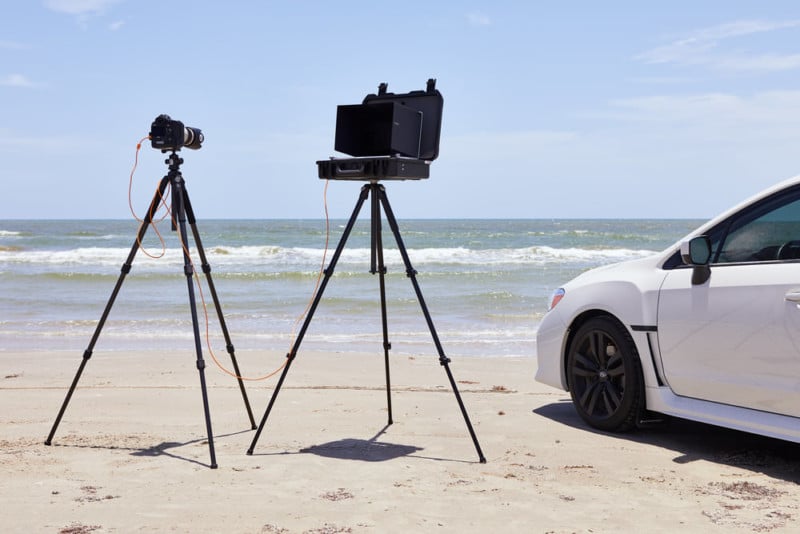
Below are photos from a hike-in location shoot in central Texas. We carried in two backpacks full of gear (cameras and lenses, Profoto B1’s, light stands, reflectors, etc), and the addition of the laptop and bracket, and carbon fiber tripod wasn’t much. The result was the ability to see my lights were doing in a bright environment with a lot of distracting background elements.
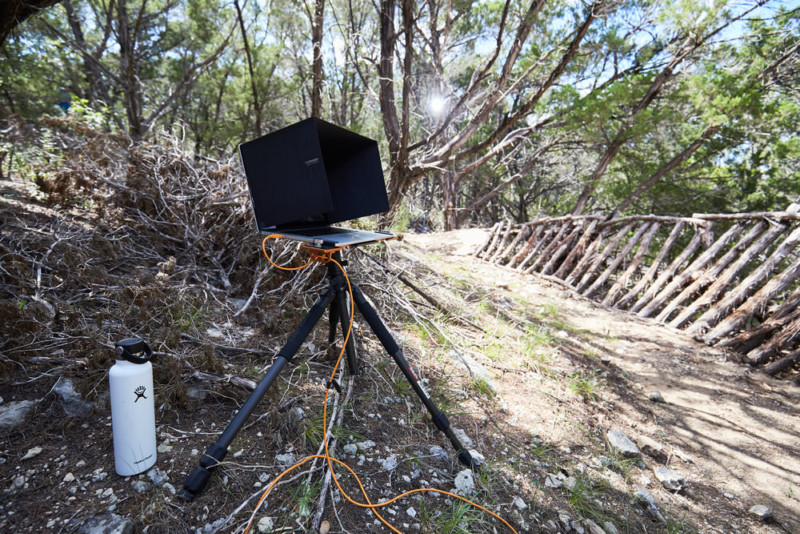
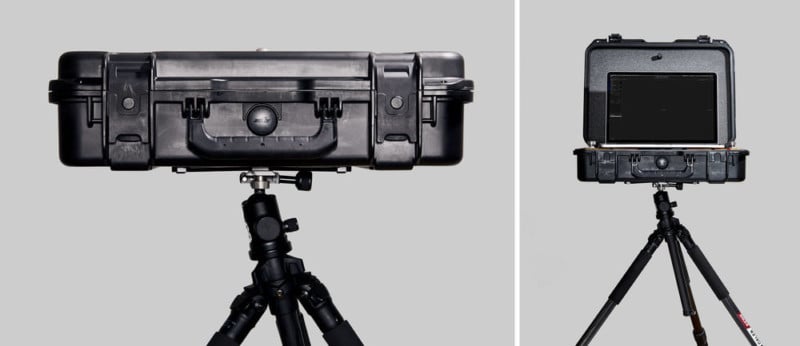
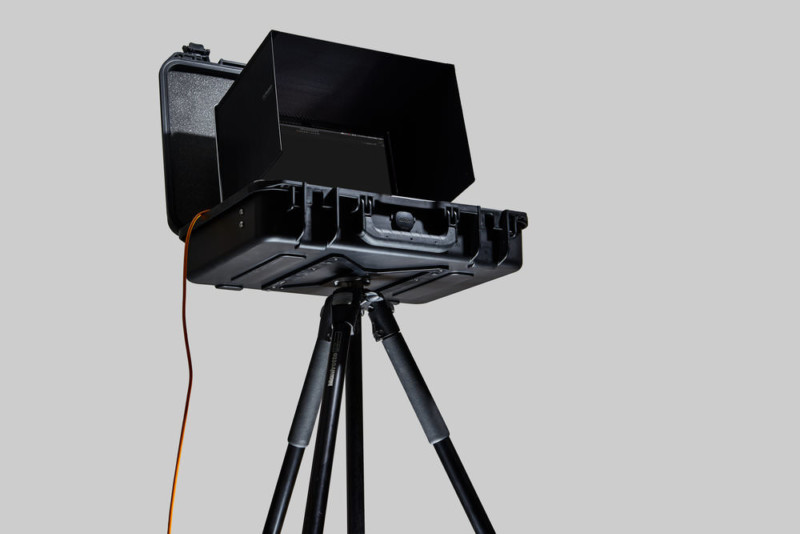
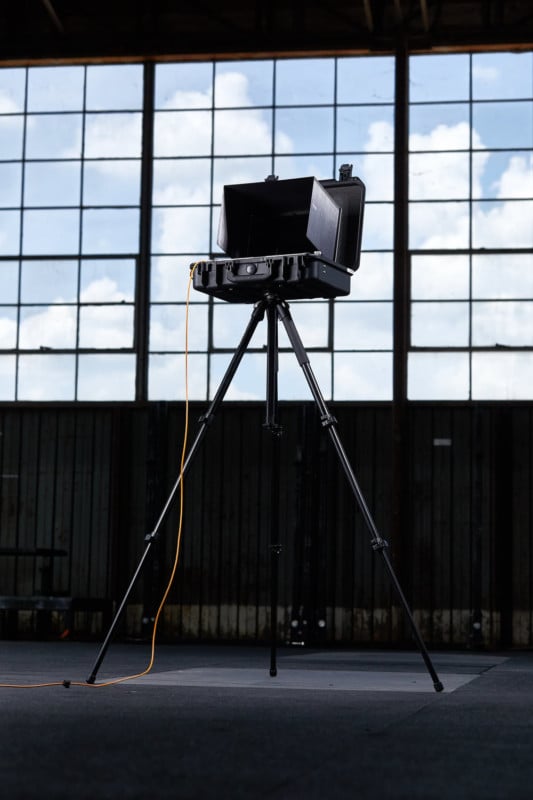
Conversely, If I’m doing a gear-heavy shoot where I can pull my car right up to the location, and involves hauling cases of lights, stands, light modifiers, grip equipment, etc, then I’ll bring the entire SKB case and mount it directly to a tripod or light stand.
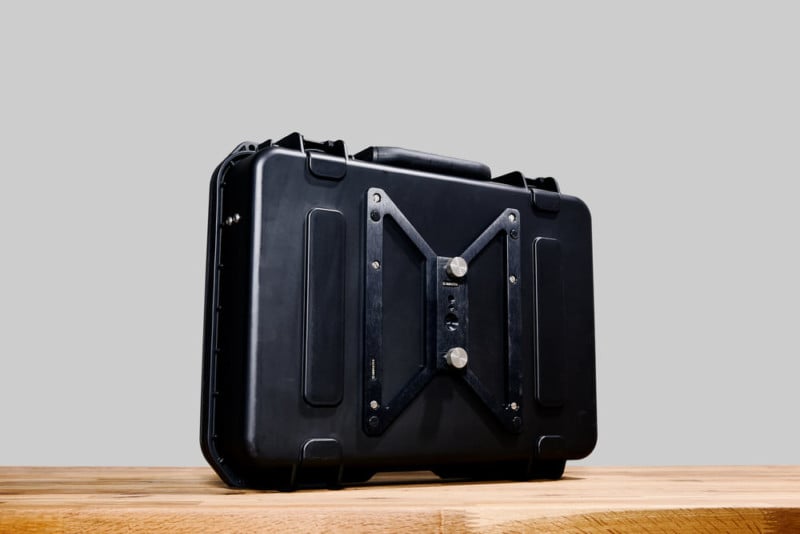
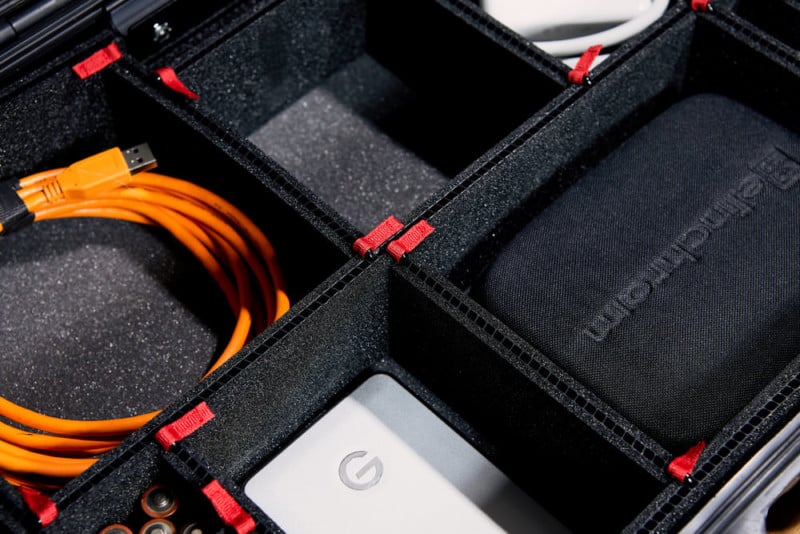
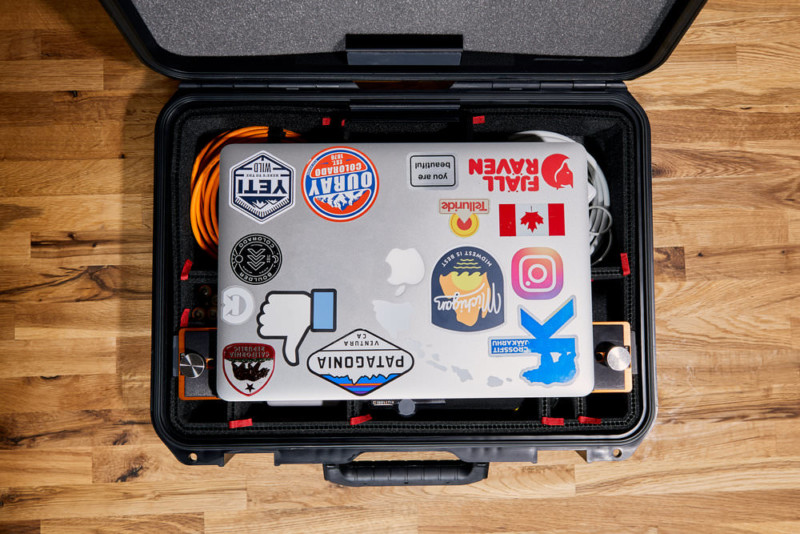
This package also comes with a uncut, customizable Trekpak insert system for the case. I laid out all the items I wanted to fit inside and cut and installed the dividers as needed.
Below, you’ll see a basic kit for when I’m shooting on location with lighting and I’m not worried about gear weight or size (and I haven’t even included apple boxes, sand bags, beauty dishes, or big softboxes). The items flashing in and out in the GIF below are what are required for tethering. It’s not a major additional gear commitment. And it’s all so easy, you don’t need an assistant to manage it (but an extra set of hands on set never hurts).
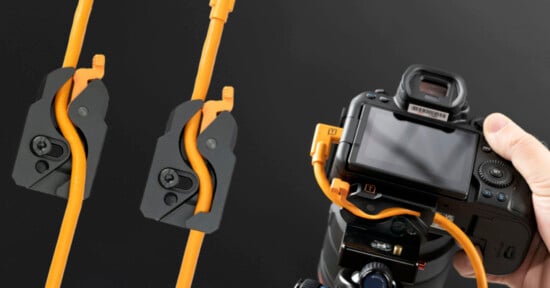
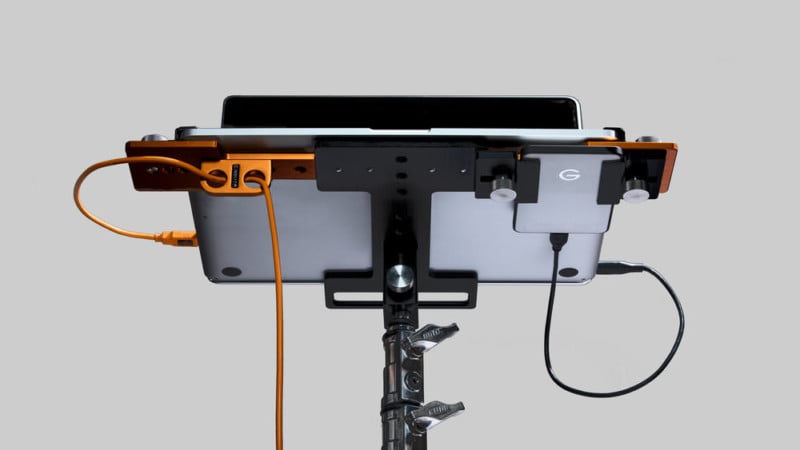
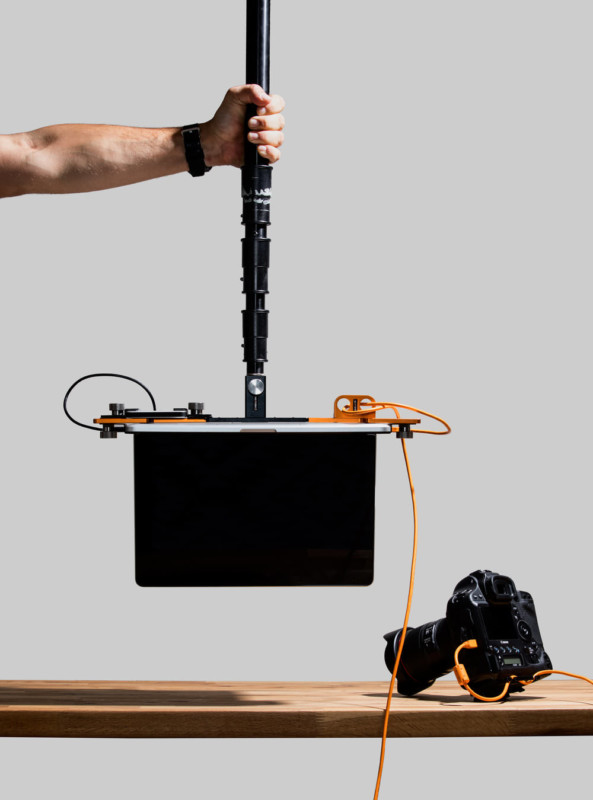
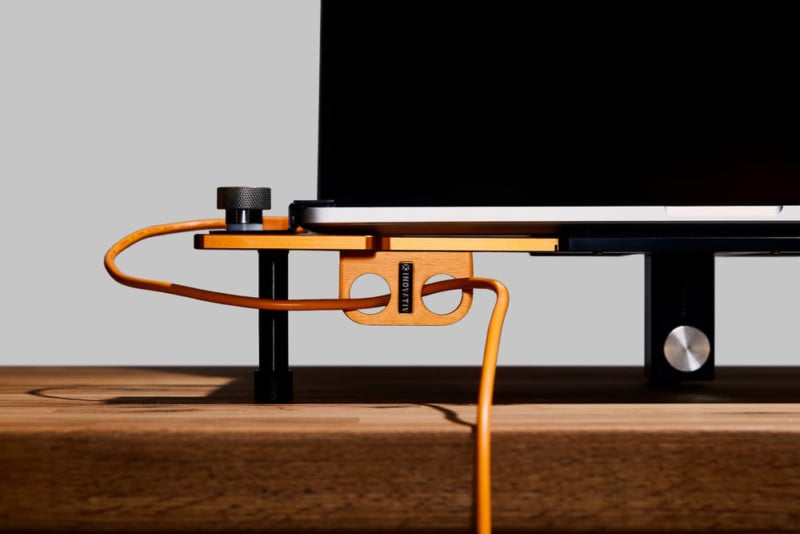
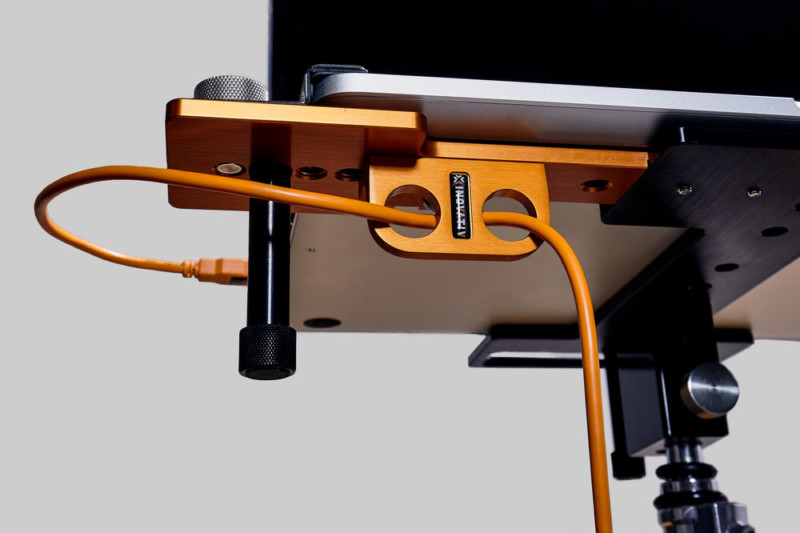
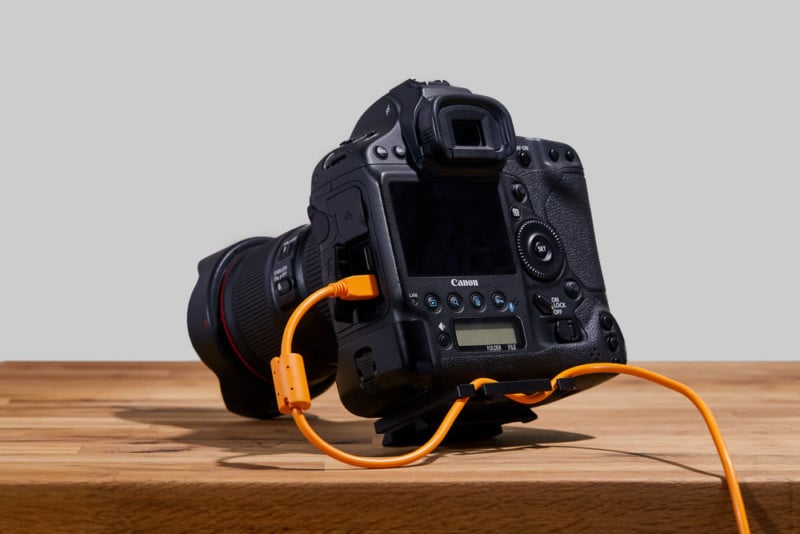
Cord jerk stopping system. A thing to be very conscious of when tethering is that you have a 15′ cord connecting two expensive pieces of equipment (laptop and camera). Not only do you not want to damage either of them, having the cord get unplugged while shooting can be a pain (especially if using Lightroom). There are two pieces of gear that I use that help with this. One is this DigiHanger, a simple bracket with two holes that the tether cable runs through and the friction keeps it in place, even if yanked on.
Then, on the camera side, there is a plate that keeps the cord from getting ripped out of the camera. Mine is the DigiCameraPlate, which works by weaving the cord through slots, and also has an Arca Swiss tripod mount on the bottom.
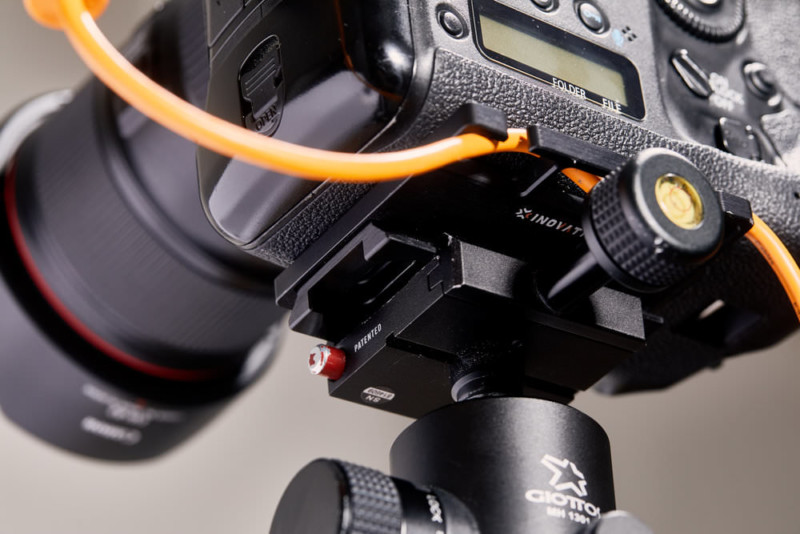
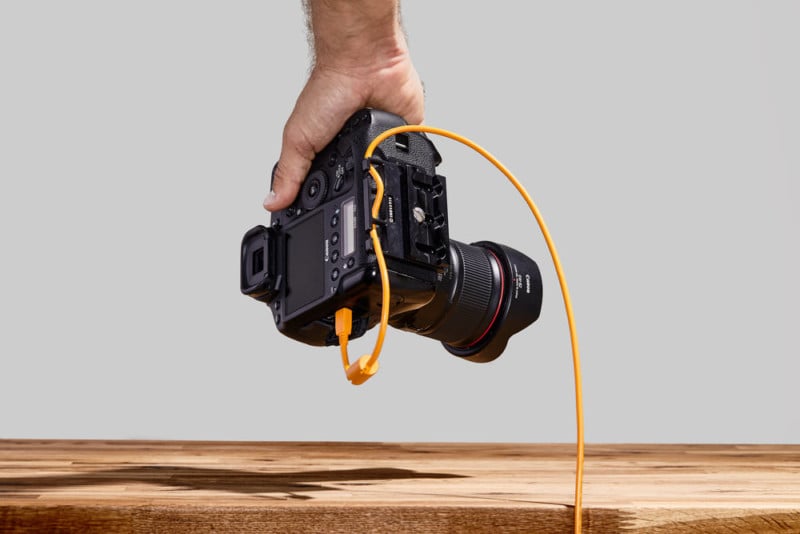
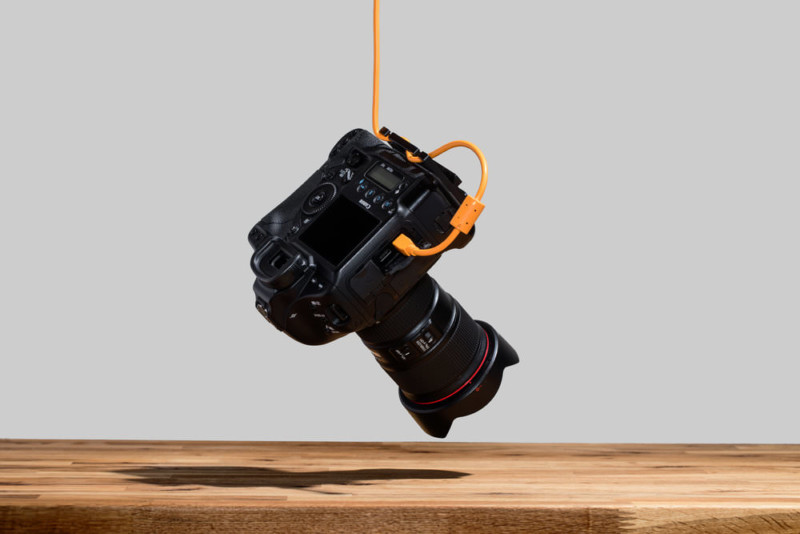
Not that I’d recommend hanging your camera this way, but the point stands — the cords are strong and it’s really not getting ripped out of the camera.
Laptop screen shade. This little DigiShade device is killer for keeping glare off the screen and adds virtually no weight or bulk. It folds up flat (and very thin and light) and is the same footprint as the laptop. 10/10 would recommend.
Full disclosureI reached out to Inovativ a while back and they were cool enough to provide me with hardware to test and fit into my workflow, but they haven’t paid for or sponsored this content.
The Software
There are two main software options for shooting tethered, and having one or the other is required: Capture One and Adobe Lightroom. Both will allow you to do automatic image processing (as covered earlier).
Lightroom
Adobe Lightroom is currently the most popular photo editing software (price: $9.99/mo), so it’s likely that you already have a copy. It’s pretty good for editing and file management, but I’ll tell you what it’s terrible at: shooting tethered. The functionality of it is so bad that I don’t understand why it’s even there at all. I’ve never once had a simple and frustration-free experience trying to tether to Lightroom, although I have been able to make it work after lots of fiddling and cursing. The main reasons you might want to use it are if already have it, and if you want to do your editing in Lightroom too, keeping the whole process within one software is easier—but you may hate shooting tethered because of it. The signal drops regularly and you have to reinitiate the tether session. You have to start a tethering session (File > Tethered Capture > Start Tethered Capture) each time and it becomes confusing because sometimes it just doesn’t recognize the camera. Fix this, Adobe, jeez.
Capture One
Capture One by Phase One is amazing (price: $299 to buy, $20/mo). The current version as of writing this is Capture One Pro 10, and from a tethering perspective, it works exactly how you want it to. You plug in the camera and that’s it, it just starts working.
If you unplug the cable, no sweat, just plug it back in and you’re back in action. Sometimes while shooting I want to switch my camera body. No problem, just plug in the other camera and you’re back in action. Additionally, Capture One offers much better fine tuned editing, especially in the color correction and toning department. It also has a luma curve, which Lightroom doesn’t have, which has become one of my favorite tools, along with better highlight, midtone, shadows color balance tools. All of this results in having to do less work in Photoshop, which saves time.
Another function of Capture One that I really love is the option of a session-based workflow rather than a catalog. This is pretty dry but really important, so I’ll make it fast. In Lightroom, you have a catalog that houses all the image folders. That catalog stores all the edits, ratings, and other post-processing data, but not the images themselves., which are stored wherever you put them on an external or internal hard drive). If this catalog file gets corrupted or lost, you lose all the editing information on every photo in your entire catalog. In Capture One, you have the option to do it this way too, but you also have the option to create a new session for each shoot—basically, a mini catalog for each shoot. It automatically creates capture, output, selects, and trash folders as well.

I love this because it keeps all of the information for an entire shoot in one neat, clean package on my hard drive. Because of this, it’s also much easier to move projects from my laptop to my main editing desktop station when I’m back from a shoot, or back from traveling. Even if I’m mid-edit on the laptop, I just close Capture One, plug the hard drive into another computer, reopen the session file (the file ending in .cosessiondb in the screenshot above) and I’m back in action.
There is one thing about Capture One that I don’t love, and it’s significant enough to mention here: the photos don’t write to the camera’s internal memory card, they write directly to the computer. This means that the photos will not show up on the camera’s LCD screen. For those of us who have been chimping for years, it’s a hard habit to break, but it might actually be a blessing. Having to look at the computer screen means I can focus on working with my subject and having a good connection with them. I reached out to Phase One (the company that makes Capture One) about this, and they said the reason it works this way is that they want photos to appear on the computer as fast as possible (and it is very fast). To have images appear both on the camera and laptop (like it does when using Lightroom), the image has to be written to the card, then transferred to the computer. Adding this step increased the lag between pressing the shutter and seeing the photo on the computer pretty significantly. So, keep that in mind, and don’t be surprised by this if you choose Capture One.
What are the downsides of shooting tethered?
Everything is a trade off. The benefits of shooting tethered are (hopefully) pretty clear. However, there are some downsides that are worth addressing:
- Not seeing images on the camera LCD (as covered directly above). Lightroom will show images on both the computer and camera LCD, but Capture One won’t (although Capture One transfers images faster because of this feature). Overall, I don’t feel hindered by this personally.
- More time consuming. No matter how you slice it, it’s more work to set up a laptop than it is to not. If you move locations or move around to different shooting positions that the 15′ tether cord doesn’t reach, you have to move the laptop with you. An assistant can be helpful for this, but it’s doable alone. IMO, it’s time well spent, but it’s a factor to think about.
- Not suitable for every situation. It should be obvious, but setting up a laptop isn’t always going to be desirable, possible, or necessary. A music festival is not a good place to shoot tethered. Or on a kayak. Or in the pouring rain. Or at a wedding. Or Hiking Mt. Everest. Or sitting around the campfire with your friends. Use judgment and think about the goal of the shoot (pristine, perfect image quality, versus casual, unplanned lifestyle shots that don’t need surgical precision).
- Cost. Money spent on one thing usually means less money for other purchases. However, to get started with shooting tethered, it doesn’t have to be a huge investment. If you already have Lightroom and a laptop, you just need a long tether cord and you can jump in.
- Losing connection with the subject. Because looking at the camera’s LCD can be done fairly quickly mid-shoot, one could argue that having to look over at the laptop causes more of a loss of connection with the subject. I feel this is an opportunity to break the habit of chimping. Instead, spend time getting the lighting and scene right, then focus solely on working with the subject and not looking at the photos constantly. After 10 or 20 frames, pause and quickly review them, and make changes as needed, show the subject what you’ve been capturing so they can make corrections.
Summary
Tethered shooting adds a small amount of effort during the shoot to provide a much higher quality final image. You’ll have to spend less time in Photoshop fixing mistakes that could have been fixed on the shoot.
This was a long and pretty dense post, so thanks for sticking with it, and I hope it helped give you a better understanding of what it means to shoot tethered and what is required to get started.
About the author: Caleb Kerr is a lifestyle, athletic, and commercial photographer based in Austin, Texas. The opinions expressed in this article are solely those of the author. Follow his work on Instagram, or view his portfolio on his website. This post was also published here.