Rolleidoscop: The First Camera Rollei Made and the Stereoscopic Process
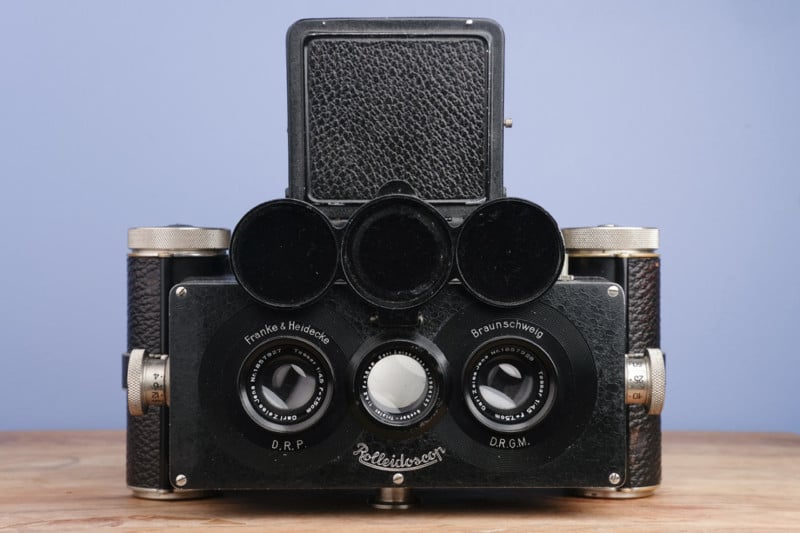
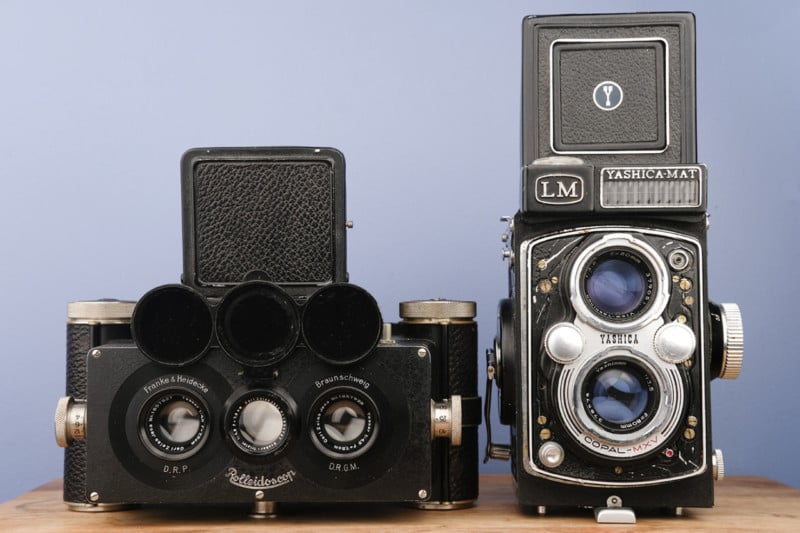
The Rolleidoscop was made from 1926 to 1939 in Germany alongside the Heidoscop, the same camera but with a sheet film or glass plate back. It was actually the very first camera that renowned manufacturer Rollei made.
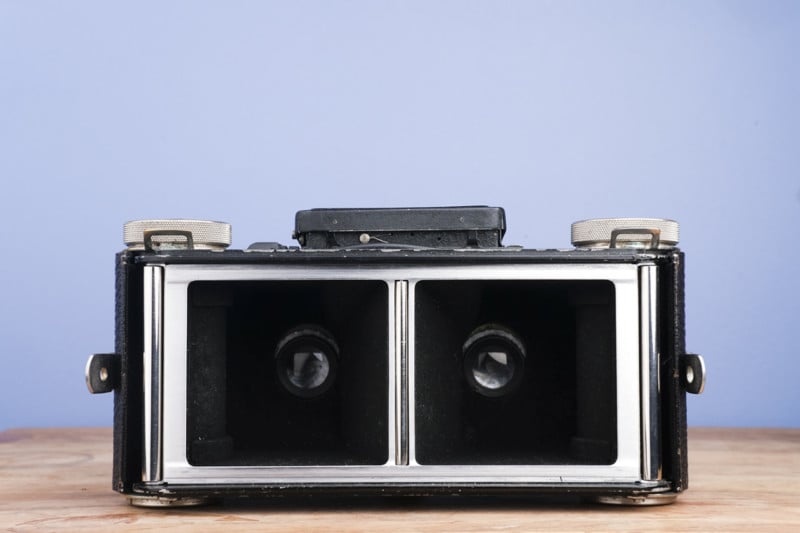
The Rolleidoscop is extremely solid and well made, as is typical of German cameras. It takes two photos on 120 film, roughly 6cm x 6.5cm each. The format is known as 6x13cm, perhaps the most common format for this era of stereo camera.
Despite the large format, over twice that of a 6×6 medium format, the Rolleidoscop is surprisingly compact. This is partly due to the waist level finder and the relatively small aperture of the lenses(more on that later), and partially the result of a simple and well devised layout that minimizes the space surrounding the format dimensions.
The back of the camera is virtually entirely taken up by the exposure space. Thin and precisely milled metal covered in leatherette also makes for a surprisingly light camera; my Yashica-mat 6×6 TLR is definitively heftier(and in very poor – but functional – condition). I feel I need to emphasize that the Rollei’s image area is over double the Yashica’s.
The shooting experience is in ways similar to that of a TLR. The waist level finder and the dual leaf shutters combine to make for a very discrete shooting experience. This camera is not at all out of place shooting street photography, although when people do notice the camera it draws a lot of interest due to looking like a very strange device indeed.
The camera feels very nice in hand; two-handed shooting is a must however, as the camera is wider than most and the focus dial is on the opposite side from the shutter button. The entire front can slide upwards roughly a centimeter to give the camera a rise movement that many large format cameras have. This can be used to keep lines straight on tall buildings, and although I rarely use this I find it an interesting and thoughtful addition.
The taking lenses are 75mm f4.5 Zeiss Tessars, and the viewing lens in the middle is an f4.2 triplet. This can make the viewfinder dim and difficult to use in situations with limited light. The taking lenses are very sharp and offer a “normal” angle of view. The quality is especially apparent using slide film in a back-lit stereo viewer, an incredibly vivid experience.
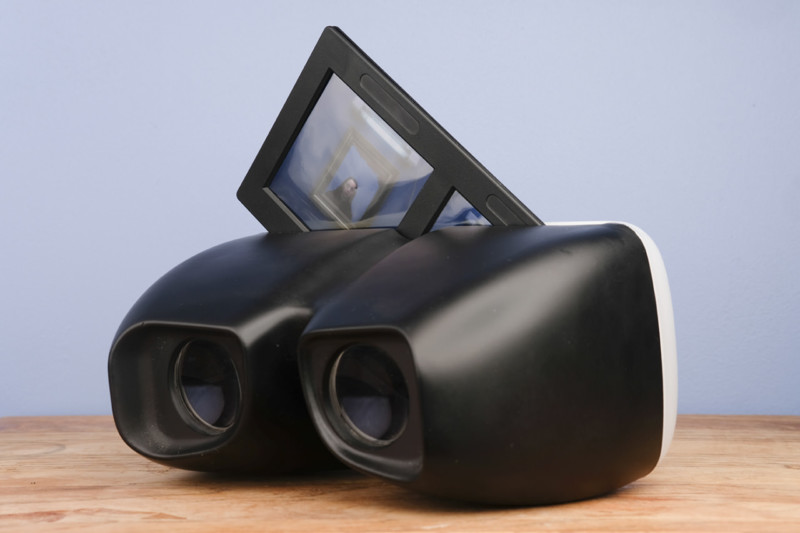
I’ve shot color negative and B&W negative film as well, scanned and viewed using the cross eye method on a screen. This technique in no way compares to the magnified view straight off the film that a stereoviewer with slides provides. Another option is to scan and print out stereo cards and use them with an old style Holmes Viewer. I’ve yet to try this method but the experience should fall in between the aforementioned options.
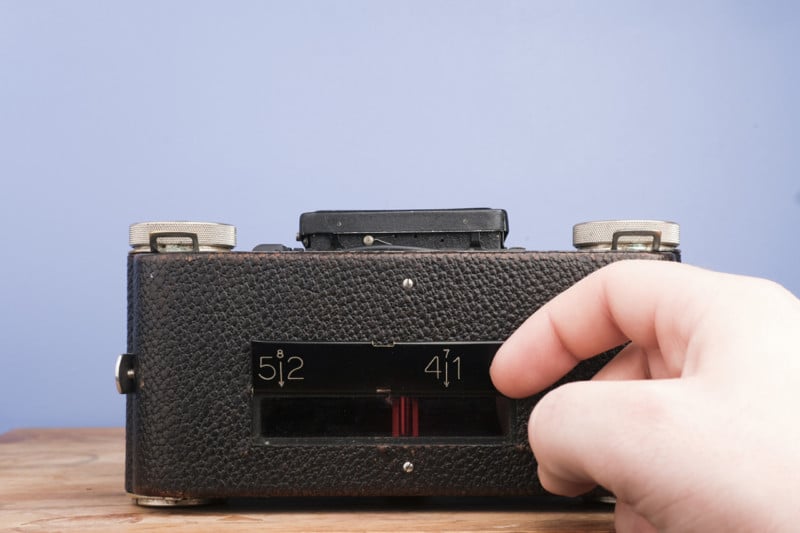
The process of taking a photo involves a couple of steps more than even the mostly mechanical film cameras from the 1960′s. There is a dial to select shutter speed (1 to 1/300sec) on the left side, an identical dial on the right to focus, and a small thumb wheel on the top to the right the controls aperture (f/4.5 to f/25). The shutter must be cocked via a lever to the left of the aperture, and the film wound by dial to the back left. A small flap on the back reveals a red tinted window with two groups of numbers etched inside the flap showing proper alignment for each stereo pair.
You get 5 stereo photos per roll, and you can squeak a frame on to the end of the roll resulting in a regular old photo. The 120 film has numbered arrow indicators on the outside paper that are to be lined up corresponding the same number on the back flap. This sounds complicated but is much simpler visually to understand and not a problem in the field.
I do end up looking for shade and hunched over the camera every time I need to advance the film, as lifting the flap on a sunny day results in light leaks. The shutter button doesn’t get locked out after an exposure, so if you forget to advance in between shots you can get some crazy 3D double exposures.
A lesser known trait of all stereo cameras is that they like to be shot at small apertures. Stereo photographs need a large depth of field to be successful, likely for two related reasons. When we experience the perception of depth, our natural reaction is to look around the scene for objects at different distances. We want to fully experience the phenomenon. If a photo is taken wide open, there is a shallow depth-of-field; only objects from one depth are in focus. This invariably ruins the experience, as there is a diminished perception of three dimensions.
The photo can be an amazing image, but it would look just as amazing if it were a two-dimensional print. The second and lesser reason is that when looking through a stereo-viewer the image is magnified very large, encouraging the person to look around throughout the photo. If most of the image is out of focus bokeh, it doesn’t seem so all-encompassing.
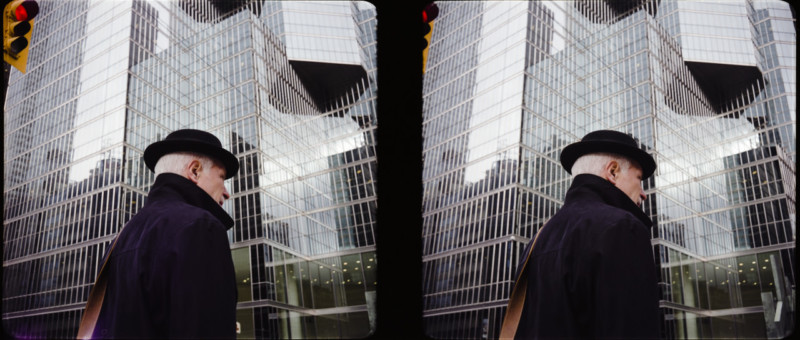
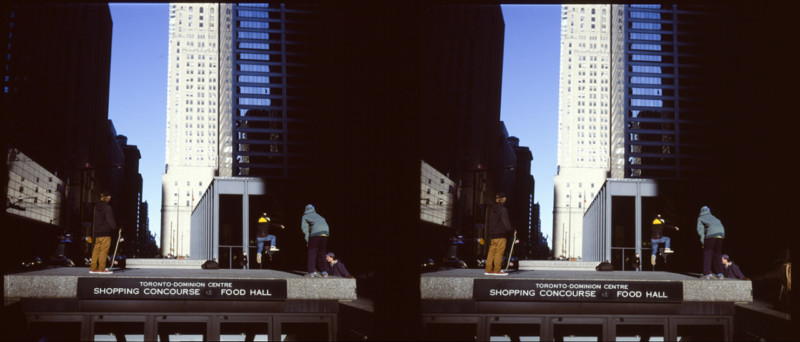
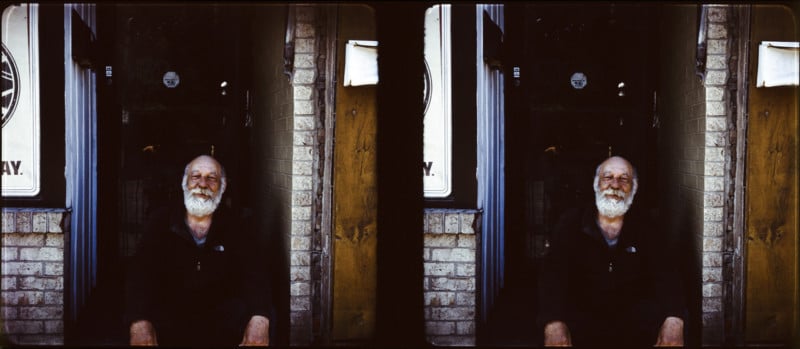
Note: To free-view the following images in stereo, you can focus on the photo and then cross your eyes until the two frames overlap. This does not work for everyone, but with practice I can do it readily.
Conversely, images that would look bad or muddled as a regular photograph can work as a stereograph. A large part of photographic composition involves placing objects in the frame so they overlap in harmonious fashion; light on dark, dark on light, complex objects against simple, avoiding overlapping objects of similar colours.
Due to the perception of depth in a stereograph, these faux pas aren’t nearly as tragic. Shooting someone in all black against a black background rarely works with photography; the person’s clothes blend with the background and the subject doesn’t stand out. In a stereo photo, they get separated from the background because they were and appear 10 feet in front of it.
One of my passions in photography is in finding opportunities in the seemingly limited technology and processes of the past. In this respect the 6×13 stereo camera is a gold mine. Half of the “rules” are completely different, the photographic ‘opposite day’.
The camera therefore has a thirst to be stopped down, and as such you need a LOT of light for moving subjects. For street photography with the sun out and high, I try to shoot around 1/300sec at f/12.5 with ISO 100 film pushed a stop. If it’s cloudy the shutter speed usually goes down before the aperture; it’s that important for stereo photography. Shooting un-moving non-people you can just bring a tripod, but where’s the fun in that?!
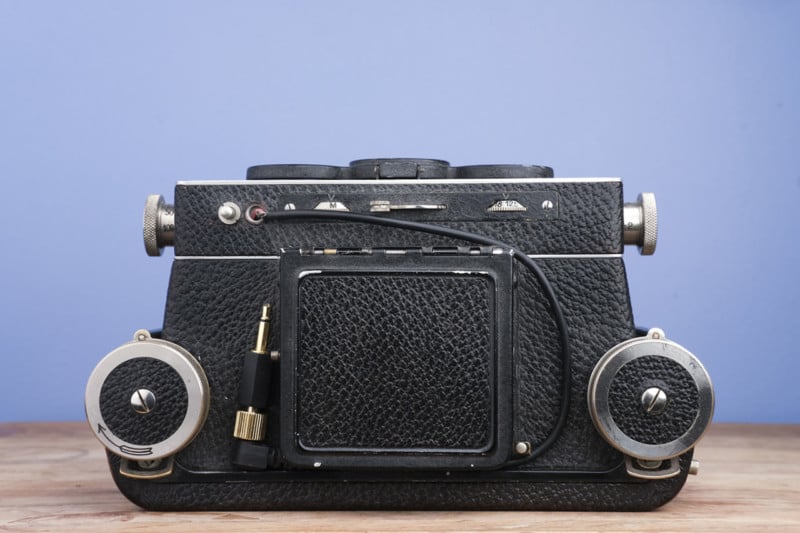
I recently got some studio lights and had some ideas for stereo portraiture and studio conceptual images, but unfortunately the Rolleidoscop didn’t come with a flash sync. That meant that I had to make one, which was surprisingly easy. Don’t worry, I didn’t make any modifications to the body itself!
I took the front plate off, glued a click sensor from an old computer mouse under the shutter lever inside, stripped one end of a PC sync cable and fed it down the shutter release cable hole. Then I saudered the cable ends to the click sensor contacts and voila! I plug the cable into any flash or PocketWizard-esqe remote, and it fires. I shoot at 1/50 usually to make sure the shutter is open for the flash. It works really well, if you have some decent strobes you can shoot at f/16 or higher which is ideal. Recommending shooing f/16 for portraits sounds ridiculous, but that’s part of the charm.

This is my favorite camera to use. It can be a bit finicky and needs very specific circumstances to shine, but under the right conditions the results are unparalleled. I often see 3D tech viewed as a gimmick, and it is often used as such.
Photographic style is often used as a tool to draw the viewer in to see what we have to say as photographers. Lighting, composition, angle and focus are all tools in grabbing the viewer’s attention, and stereoscopic images can serve the same purpose. Done right, it can be highly immersive and tends to invite a prolonged interaction with the subject matter.
Stereo photography hasn’t been popular for nearly a century now, with equipment being rare and difficult to use. For me, it’s well worth the effort.