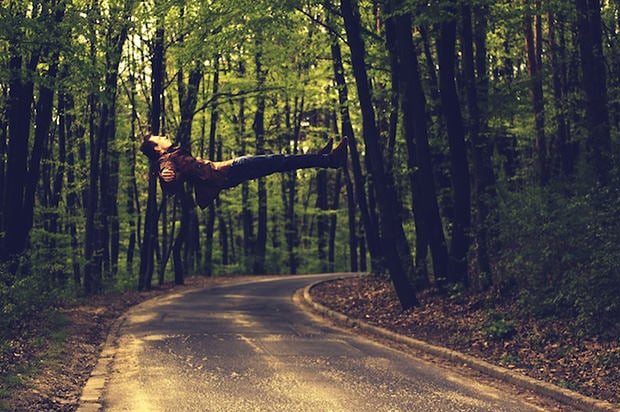
How to Shoot a Portrait of Yourself Levitating
As with most creatives, when I have a concept in mind it will distract and consume me until it becomes a reality. I wanted to create a conceptual self-portrait that was dreamlike, surreal, and relevant to an inner conflict in my life.
Gear used: Nikon D610, 50mm f/1.8, tripod, trigger and remote, ladder, string, and props.
Levitation photography involves taking two or more photos, one of the background and one with the subject(s) in the scene, usually posed on a chair/stool. All the shots must be taken in identically exposed, focused and framed fashion. For this reason, a tripod is essential to the success of a levitation portrait.
For my concept to work , I knew I needed to be as high off the ground as possible so I needed to choose a spot for my tripod that would give me plenty of space. I moved around my kitchen test shooting different compositions and chose a spot to set up in my hallway. Using manual focus, I chose a focal point near where I knew I wanted my face to be and set my exposure. I attached my wireless remote to my camera and tested my remote.
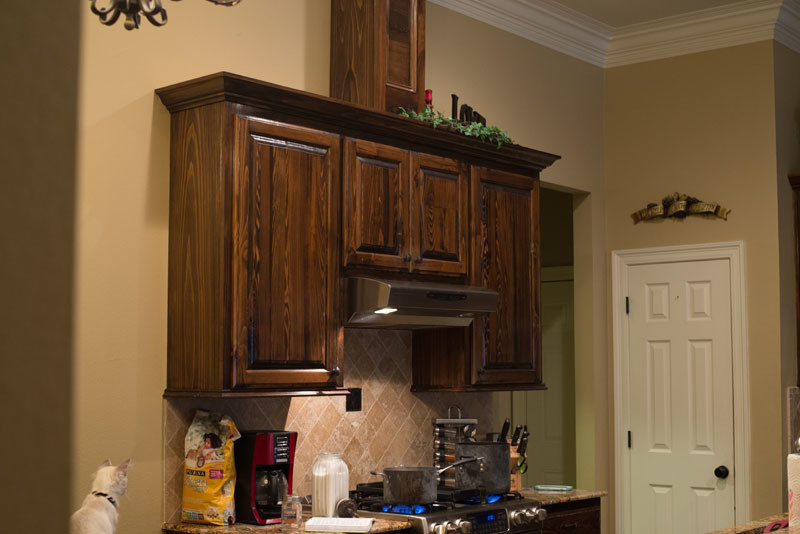
Once everything was ready, I turned the burners on and took several shots of my plain old kitchen. These would serve as my background in post.
I quickly noted the focal length of my 50mm lens wasn’t giving me as much space and “air” in the frame as I’d envisioned.
To fix that, I decided to experiment and break the “identical framing” rule. I used my tripod to slightly pan the camera left and right, and moved it up and down, taking shots of each section of the room. I was planning to “stitch” them together in post to expand my background to include the whole room.
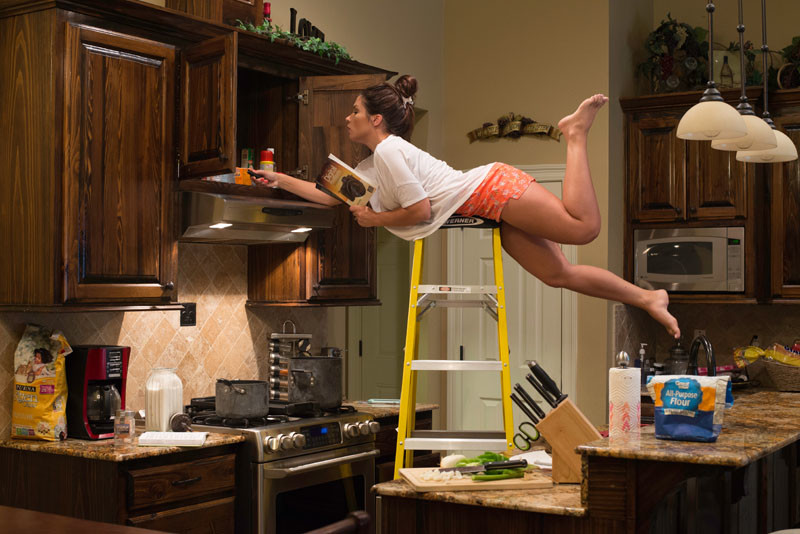
Next, I grabbed our ladder out of the garage and set it up. With my photography book and remote I climbed up and got into position. I felt the ladder wobbling and it occurred to me that this wasn’t my brightest idea. I imagined explaining to the emergency room triage, “Well, I was trying to levitate!” Ha!
I tried a few different poses and took as many shots as possible hoping to avoid having to climb up and down more than once. I got down to review my shots but I didn’t have “the one.” Determined, I climbed back up and tried again, adjusting my pose as best I could. This time I got one I was happy with!
Post Processing
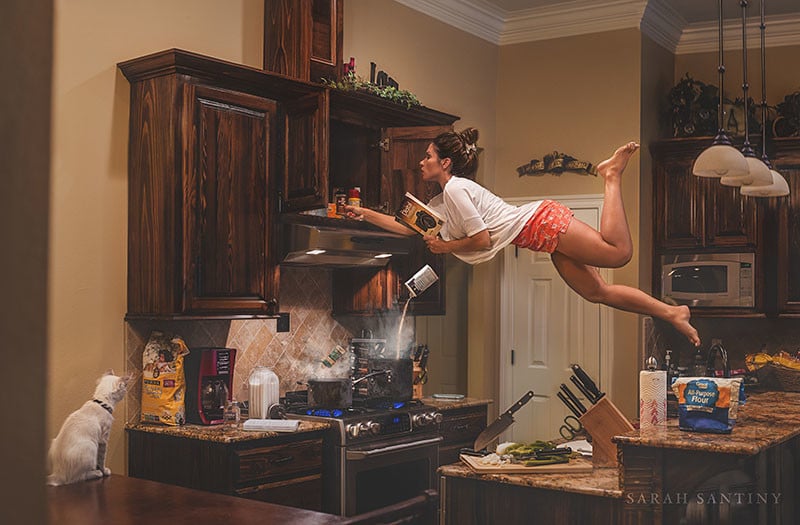
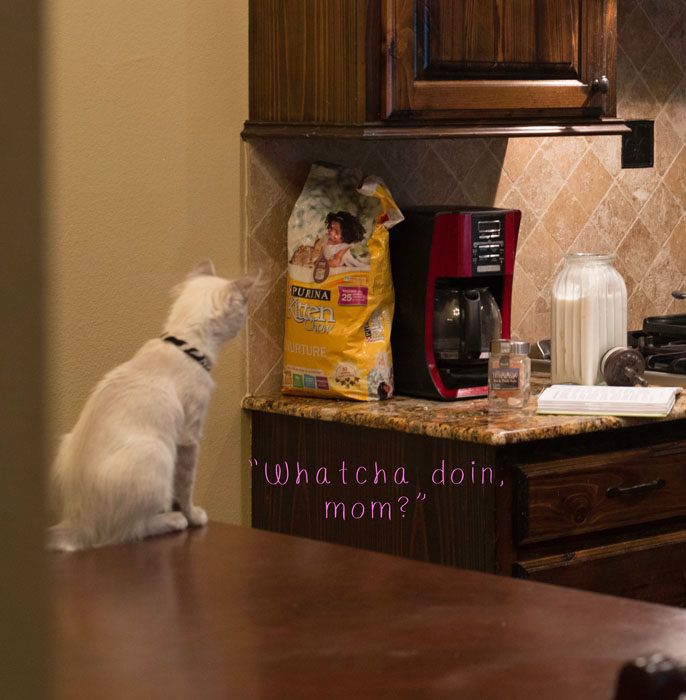
As I imported my images into Lightroom, I noticed my cat had come into a few shots to get a closer look. I knew she would add a special touch… I had to incorporate her!
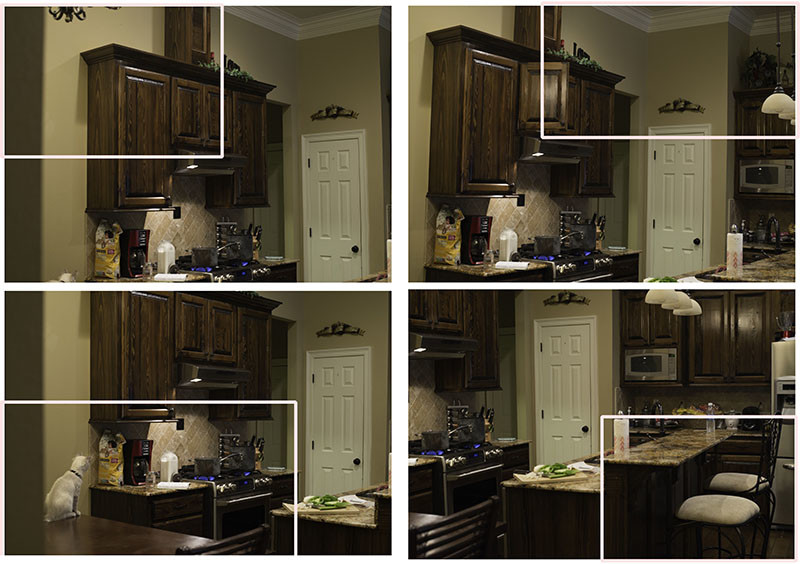
Keeping in mind I wanted to combine several images of my background to stitch together, I selected a photo of each part of the room.
In the images below, the rectangular sections of the surrounding images were composited together expand the scene:
I made basic adjustments in contrast, clarity, sharpened them, and matched tones, etc. I exported them into Photoshop to begin combining
them.
If I am combining images or expanding a background, I always increase my canvas size first to give myself space to work. That way I can use the move tool and drag all my images into one document without too much crowding. Not all of them lined up as seamlessly as I’d hoped but lots of tedious masking and cloning techniques did the trick.
Once the background was to my liking, I opened the image I chose of myself “flying” on the ladder. I made all the same adjustments and I used for my background images.
To bring it all together in Photoshop, I dragged the “flying” image onto the background image. I selected the background layer and put it on top and added an inverted (black) layer mask. Using a white brush, I painted the background back in underneath my body, completely removing the ladder and being careful not to paint off any of the subject matter. Now we are getting there!

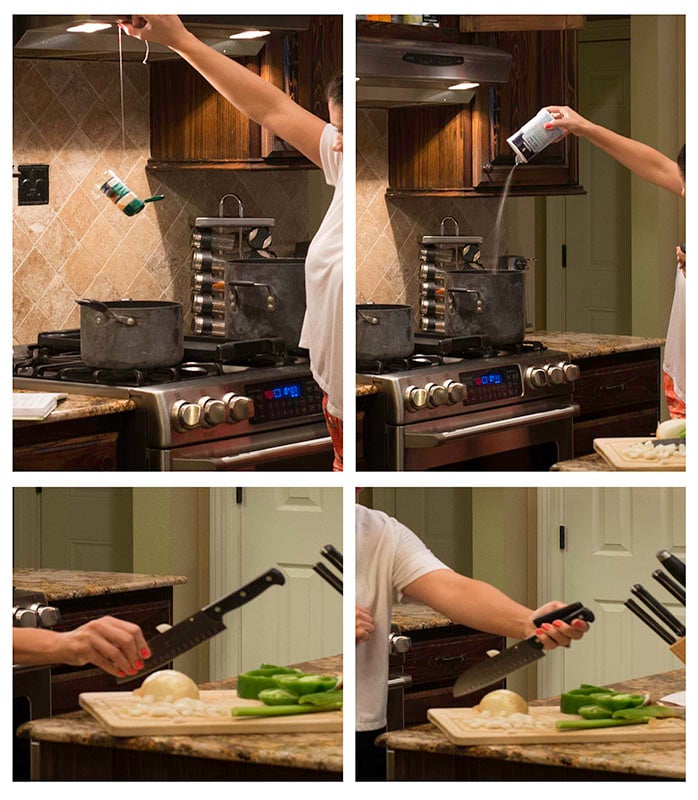
I noticed my remote was visible in my right hand. I decided the quickest fix would be to climb back up and take a shot of my hand holding something relevant. I used the same masking technique to paint the new image of my hand over the original.
I didn’t plan on incorporating any of the floating elements but I felt it was lacking the hectic multitasking and chaos I wanted to portray. I grabbed some seasonings and tied some string around them, leaving enough length to dangle. I used the remote to shoot a few shots holding them over the pots on the stove. For the knife, I took one shot holding it by the handle and one holding it by the blade. I imported these into Lightroom and gave them the same adjustments before pulling them into Photoshop. I masked out the string and combined the knife images making everything appear to float.
For the steam, I found a free smoke brush. After the composites were all complete, I made some final adjustments and voila! I named this “Multitasking.”
About the author: Sarah Santiny is a child and family fine art photographer and creative composite artist based in Baton Rouge, Louisiana. You can find more of her work on her website and on Facebook.