How I Photographed a Model with Fire and Water
I firmly believe creative work is the most important element to maintaining a strong work ethic and absolute focus. I make an effort to book at least one personal project a month, sometimes it involves a mood that is completely outside of my comfort zone, which often leads to finding new lighting, composition and techniques.
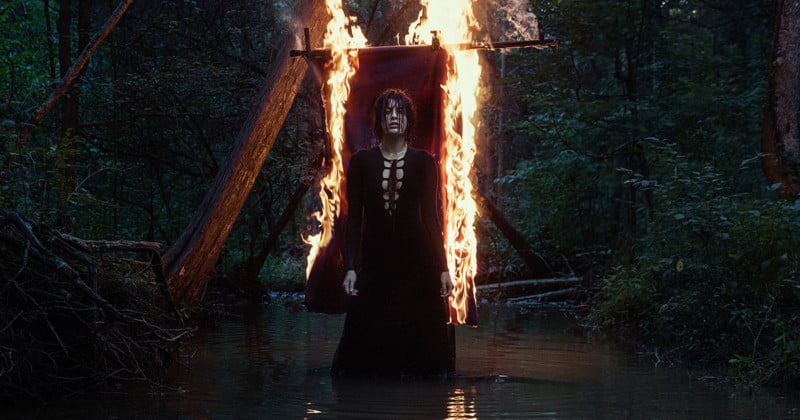
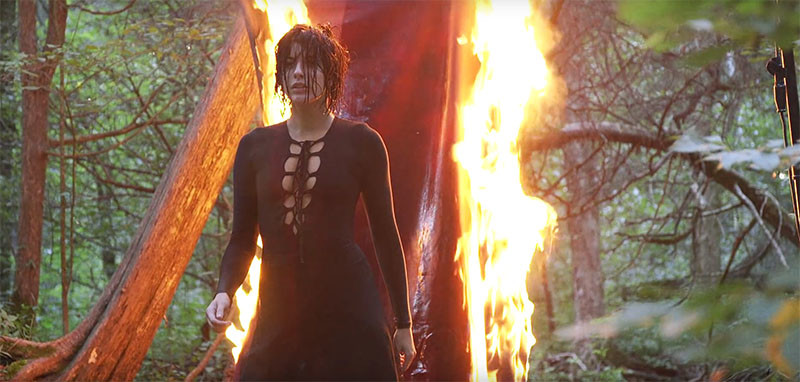
The photograph was initially sparked by the film “The Witch,” which, let’s be honest, isn’t a winner. However, the cinematography and mood was attractive; dark, mysterious and had a silent aesthetic that held the weight of the poorly written script. It provided the inspiration we needed for the look of the model and the final color palette. Blending both fire and water was the foremost foundation to the photograph. I wanted to work with “real-life” fire — nothing composited in post or masked-in from stock imagery, just straight out of camera.
I recently had a 3×4 custom canvas backdrop created for one particular shoot, it contained deep shades of matte red and black. It was unique and unique enough that I would never use it for any other project; the perfect victim. I envisioned a large creek or river with depth and good lines, with a canvas completely engulfed in flames. Fortunately, I’m based in Kentucky, which lends a plethora of water, forest and rock. Of course, large fires are widely acceptable in remote locations.
Logistics
The concept required the perfect location. We had to find private property, a location that was remote and a creek in which the owners would allow the concept. Through various referrals we were able to lock in a location. After quick chat, the property was secured and the owner was surprisingly thrilled, which calmed a lot of our nerves. With fire, there is a danger involved, which also required finding the right model, who would fit the mood and be a team player. We had to be prepared for any and all safety concerns which means a fire extinguisher, wet towels and an extremely watchful eye.
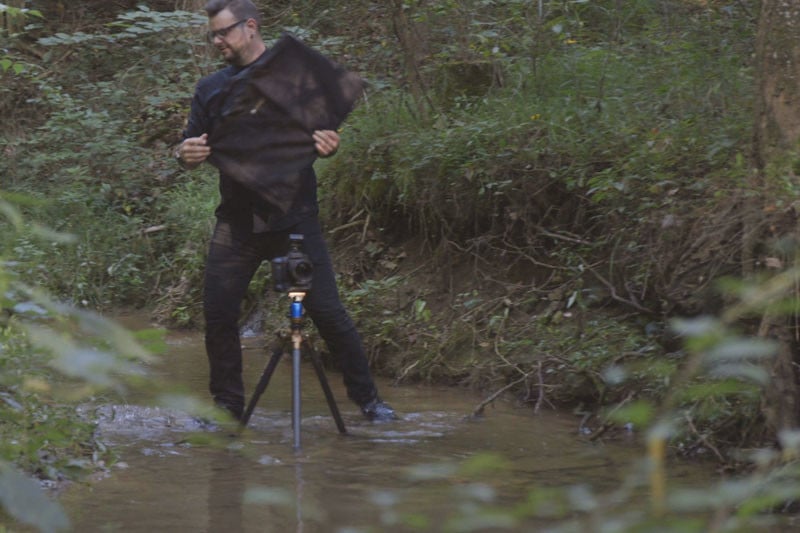
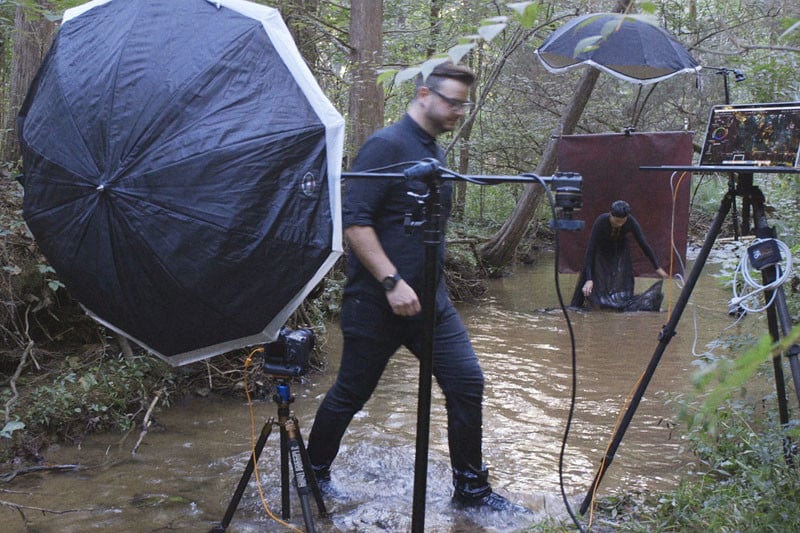
Un-loading a truck full of equipment was an adventure. The creek was located about a quarter-mile off the backyard of the property through some serious mud and brush. Carting C-stands, grip equipment, lighting, camera and tether gear forced our time on location. We only had a brief hour of perfect light and timing was an issue. I immediately jumped in to help the load move quickly.
The background was soaked in lighter fluid beforehand and all it needed was a spark and some additional coverage of flammable fluid. Once the background was lit, the actual shoot time to completion was condensed to only 5 minutes, which is all we needed for the perfect capture. A great image always comes down to solid pre-lighting and pre-staging, so when the time is right, the shot only requires a minimal amount of frames.
Lighting
Light is always a crucial aspect, especially when it comes to the unexpected, such as lighting a background on fire. I wanted to guarantee the model was well-lit, but still within the realism of natural light. The light had to be soft and subtle.
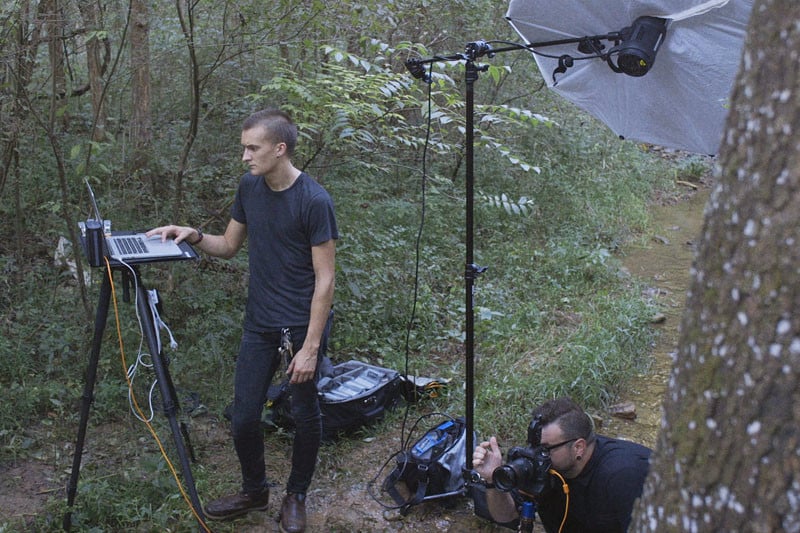
We started with the key light; a Profoto B2 Location Kit modified by a 60” Photek Softlighter. The key light was placed overhead, several feet in front of the subject and slightly camera right for a soft feather. We then filled the dark shadow density with a Profoto D1 500 modified by a 46” Photek Softlighter at the lowest power, pointed directly at the model.
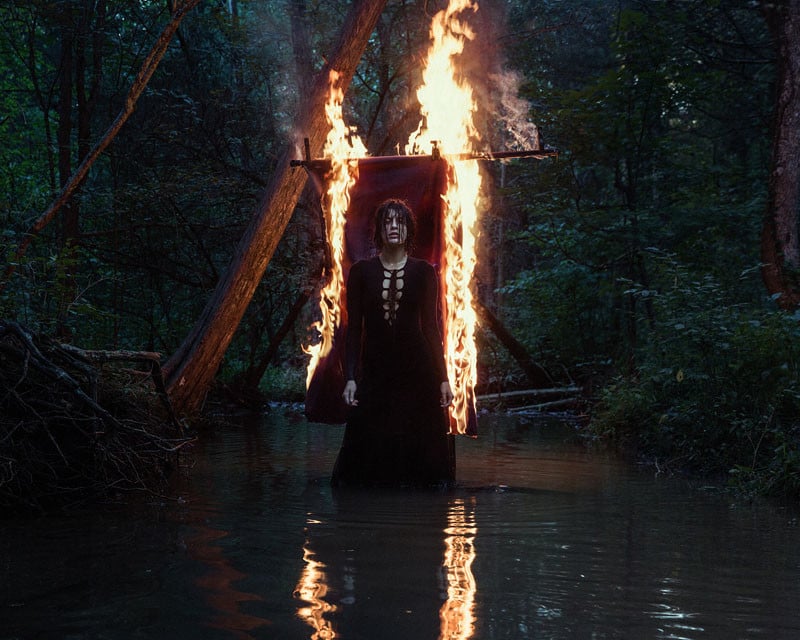
After a series of composition and lighting tests, we had our frame and light locked in. I had to compensate for the flames, so I pushed the shutter to it’s maximum sync speed and under exposed for the bright highlights. Once the background was ignited, there was no turning back. Fortunately, the flames provided a beautiful warm kick which contrasted off the cool tones of the artificial light. It was the perfect scenario for cinematic color.
Processing
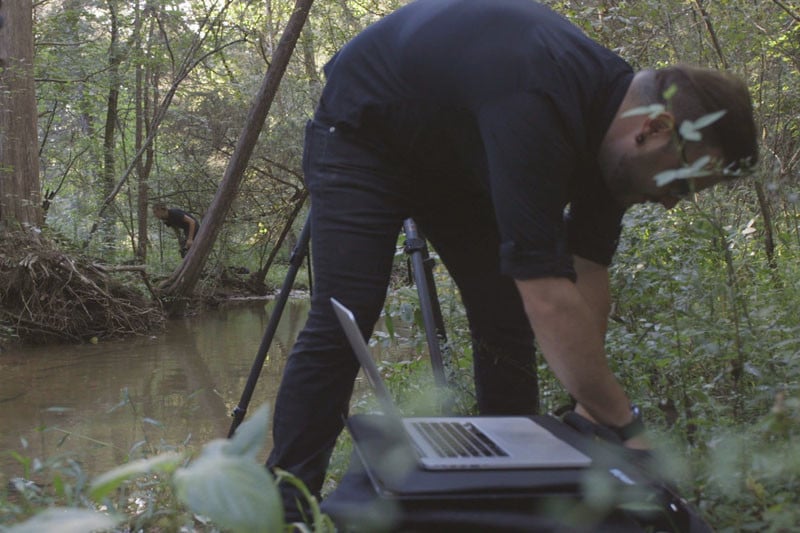
Shockingly, processing time was limited. Tethering was extremely important, it guaranteed we had the right exposure, lighting and provided the ability to apply a color grade on our images, live, using Capture One 9 through an Apple Macbook Pro. With our basic adjustments applied, all we needed to do was knock out was the light stand which made it into the frame.
After the shoot was complete we grabbed a few background plates, which made it easy to erase the light stand. Beyond the compositing, we made some very minimal exposure correction and creative color grading using a combination of Curves, Color Balance and Vibrance. The final output was sharpened and a layer of Silver Rich Film Grain was added through Capture One 9.
Despite the danger and logistical hurdles, we are all very proud of the final image. The concept allowed the entire team to work outside of complacency and opened the door to making a critical risk, which is exactly how my entire career has been built.
Here’s a behind-the-scenes video showing how the photo shoot was done:
And here’s the final photo that resulted:
The Tether Tools equipment used were the Tether Table Aero Master, Aero Propad, Strapmoore, Jerkstopper, Tetherpro USB 2.0 15’ Cable, and Securestrap.
Additional credits: Model was Alex Hepfinger (Heyman Talent Agency), cinematography by Blake McGrew, and photography assistant was Hunter Zieske