Why I Stopped Using the DNG File Format
A couple of years ago, when I switched careers and moved into photography full time, I did a lot of research on multiple aspects of running a photography business. One of those areas, digital asset management (DAM), deals with, well, managing your digital assets, your image files.
I discovered Adobe’s open standard Digital Negative Graphics (DNG) file format. There are a number of advantages to converting your proprietary raw files (CR2, NEF, etc.) to DNG files, including file size, embedded file verification, future compatibility, and speed.
If you’re using Bridge and Adobe Camera Raw (ACR), don’t forget: you meant to call your kids and ask them why Seinfeld has stopped recording on your DVR. But seriously, you should stop reading this now and migrate your entire workflow to Lightroom. Lightroom is basically Bridge and ACR puréed into one beautiful interface. But don’t convert your files to DNG just yet! Bookmark this article, come back to it in a year or so once you really understand how to use Lightroom, and I will finish telling you why I don’t use DNG files anymore. You need to update your workflow. That’s more important than this article. Catch up on the latest season of Seinfeld while you’re at it.
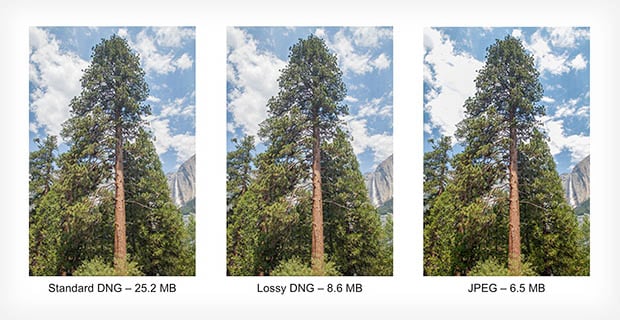
Having very limited financial resources, the main benefit for me — at that time — was the 15-20% reduction in file size over proprietary raw files. When you barely have enough money to buy bread, $120 for another external hard drive is a lot of dough. On a 2TB hard drive, that’s a gain of up to an additional 400GB of images, the equivalent of months’ worth of images for even someone who shoots as much as I do. So, to save disk space, I converted all my CR2 files to DNG files on import.
Two years later, however, I wish I hadn’t.
Processing Power
I am always striving to be better than my last shoot, to learn more, grow, and take my work to the next level. My experience has shown to me that the tools we use to get us there are important. Last year, I upgraded my motherboard and CPU (i7) and jumped to 32GB of RAM. My computer is fast because it is the most important tool in your workflow. More important even than your camera.
I think your choice of camera (brand or model) is one of the least relevant tools in making your work better. I’ve shot on a Canon 60D for many years because I haven’t, until recently, had the funds to upgrade to a better camera. I’ve shot using a Phase One digital back, a 5D Mark III, and other camera bodies. Under the same lighting conditions, most cameras produce relatively similar results to the naked eye. The real difference between various camera systems lies in the raw image files they produce, and what you can do with those files when processing them… on your computer.
The Canon vs Nikon debate for professional photographers is a ridiculous one. Both systems produce great images. Both manufacturers have produced camera models with serious flaws, focal issues, light-bleed issues, whatever. The real decision, I believe, that separates very good from great, is how photographers choose to process their images. For me, the real debate lies in using Lightroom vs Capture One.
Now, I loooooved Lightroom. My LR kung-fu is legit, son. I advocated and raved about it because I like to evangelize the tools that I use that make my work and life better. (Hell, that’s the whole reason behind this blog post.) I am a ninja-level Lightroom user. Loved. That. Sh*t.
But loving Lightroom is kind of like loving your first car. If you’ve been riding a pedal bike your whole life, getting your own car is like having a level of freedom and control you’ve never experienced. Until someone ruins that by giving you the keys to a DeLorean equipped with a flux capacitor. Suddenly, you realize you’ve been limited all this time to having to drive on roads.
Where we’re going, we don’t need Adobe Camera Raw.
All Raw Files Are Not Created Equal
About seven months ago, I downloaded the trial version of Capture One Pro. From the very first shoot I processed using Capture One, I was sold on its ability to make my work even better. As a raw processor, Lightroom can’t touch it. It can’t even. After a month of using CapOne, people had commented that my work had suddenly gotten so much better. Some asked what I was doing differently. Others assumed I drank magic juice and my work got better. Nothing had changed except that I had stopped using Lightroom and started using Capture One exclusively.
Initially, I thought the results weren’t going to be very noticeable to the naked eye, much like the difference in images produced by different camera sensors. And this is where great software vastly differs from basic human colour perception. Raw files contain a lot of data. Lots of colour data. Tonal data. And metadata.
What puts Lightroom and Capture One oceans apart is that Lightroom treats all raw files equally, setting the default camera profile to “Adobe Standard.” You have to go in manually change the camera profile to something like “Camera Portrait” or “Camera Landscape.” (You can set defaults based on camera serial number and build import presets, etc., but until you become a power user, most people don’t even realize that “Adobe Standard” is not a good baseline for any image.)
A great thing about Lightroom is that it is very easy to use. It has a shallow learning curve and keeps getting easier and easier to use for the average person. It’s still great for professionals, but Adobe’s business model with regard to Lightroom has switched from being great raw conversion software for professional photographers to great raw conversion software for everyone who owns a camera. Hobbyist photographers are subscribing to Adobe’s photography plan for $10/mo and producing better work. Which is great for them. And for Adobe.
Getting back to the metadata… what is critical to note about Capture One is that it doesn’t ignore the camera metadata. It doesn’t set all images to a default state. In fact, this is what I think is in Capture One’s secret sauce. Instead of assuming all raw files are the same, and even offering to convert your raw files to its own format on input, Capture One uses that data as the fundamental building block upon which the rest of its raw processing is built.
By having integrated countless camera brands, makes and models, Capture One knows how each one of those camera models is built and how each model’s specific sensor interpolates the light hitting its surface and how the camera stores that data in its raw file. Sony makes a majority of the world’s camera sensors (including all Nikon sensors), but the sensors in the Sony A7s and Nikon D810 are vastly different. As are the sensors in the Fuji X100T, the Phase One IQ3 backs, Mamiya Credo 60, Canon 60D, etc.
While the images these cameras produce under the same conditions may not be that noticeable to the human eye, they are incredibly different to a computer program that knows how to read and interpret that raw data. This is why I believe the computer is the defining tool in the photographic process. We can now take the captured data and do extraordinary things with it, but how extraordinary is, as I’ve stated, dependent on the tools we use.
If you take the same raw files (not DNG files!) and open them in both Lightroom and Capture One, side by side, without doing anything to the files, you will notice immediately — IMMEDIATELY — that Capture One does a much better job of accurately rendering the image. The colours are better. The exposure is better. Everything is just better.
Below are two versions of an image of my friend Kit that I took on Feb. 16, 2014.

The version on top was processed last year using Lightroom. The version on the bottom was processed last week using Capture One. (In fact, going back and processing this image for Kit is actually what prompted me to write this article.)
It’s very easy to see the difference. Compared to the Capture One image, the one processed using Lightroom looks flat and dull. And I tried my best to get it as close as possible to something Capture One can produce. It just can’t. (A side effect of becoming really good with Capture One is that I’ve gotten even better at using the tools in Lightroom if I happen to need to go back and get images from an older shoot.)
As I said, I evangelize the tools I believe in and I believe Capture One outshines Lightroom in every aspect of raw image processing, except one…
My Problem with DNG Files
Capture One does not like DNG files. Unless the camera supports DNG files natively (Leica, Pentax, Samsung, etc.), Capture One doesn’t really know what to do with a DNG file. It can still read the files and process the information, and you can still work with them, but don’t forget that DNG files store the native camera profile as “Adobe Standard.” Capture One doesn’t recognize Adobe Standard as a camera profile and it shouldn’t, because Adobe has never made a camera.
The DNG file format is, by design, meant to create a universal standard for raw image files, or digital negatives. When raw files from your camera are converted to DNG, they are converted to a universal standard through a process that Adobe has developed to best interpret the data in your CR2 (or NEF, etc.) files. The problem is, it just doesn’t do anywhere near as good a job as Capture One.
In converting my old files to DNG, I had no idea that I would one day be making my life more difficult. Since all of my images prior to December of last year are all converted to DNG files, I cannot just open them up in Capture One and pick up where I left off. Capture One has no idea which camera that image was taken with. It has no idea which camera profile to use.
You might think it’s as simple as changing the camera and lens profile in CapOne — and that is definitely the first thing to correct — but the raw data has been changed during the conversion process. Capture One sees the information differently than ACR, but Adobe has changed that data to something that works best with ACR (or its Lightroom interface). Adobe created an open format in DNG but it built that open format on its own standards, specifically “Adobe Standard.”
So, now I’m sitting on a mountain of DNG files that I wish had never been converted to DNG in the first place. I’m a much better photographer now that I was two or three years ago, but I still have some fantastic images that I would like to go back and re-edit. That’s something I’m in the process of doing now.
I am systematically going through my old shoots and creating Capture One sessions for those shoots and an overall Capture One catalog. Cataloguing, unfortunately, is the one area in which Capture One falls behind Lightroom — very, very far behind.
In the meantime, external hard drives are getting cheaper, I can afford to eat steaks every night, and I no longer convert my raw files away from their native format. When I get a 10-bay NAS and have a ton of room to spare, I might consider the future compatibility of DNG files something worth revisiting, but now I no better than to get rid of the native raw files in the process.
CR2 for liiiiife! Well, at least until someone hands me the keys to a system with native IIQ files. WINK!
About the author: Kevin Patrick Robbins is a commercial, editorial, and advertising photographer based in Hamilton, Ontario, Canada. You can find his work and connect with him through his website, blog, Twitter, Facebook, and Instagram. This article originally appeared here.