How to Create a Repeating Flash Effect with Light Painting

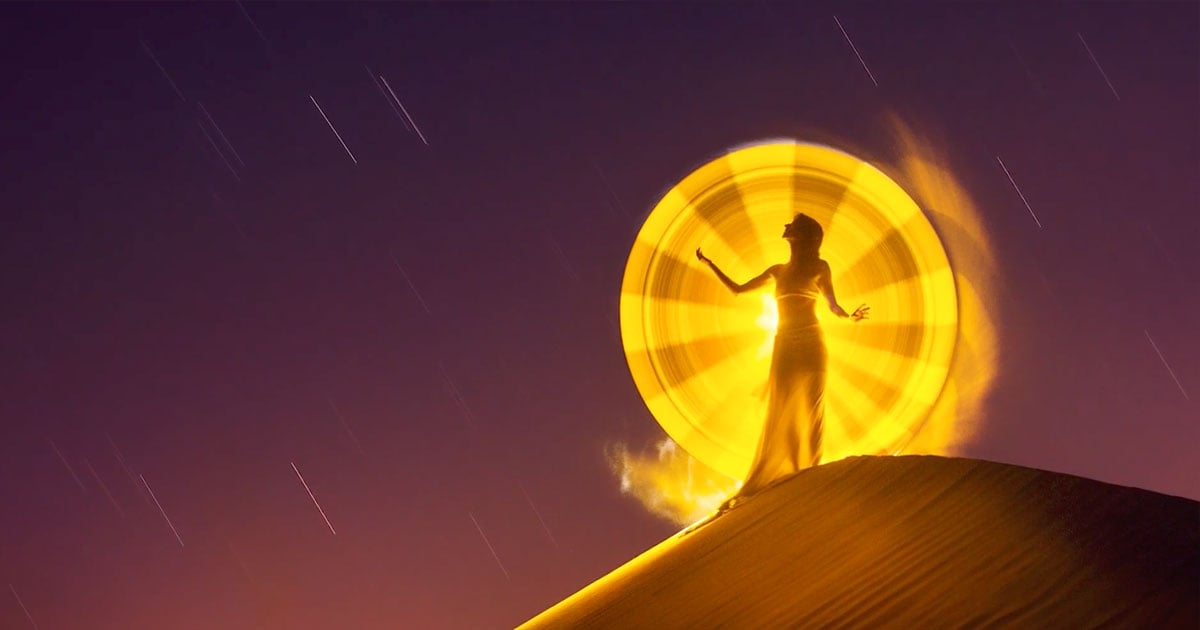
Certain higher end flashes have a strobe (AKA repeating flash) mode that can flash repeatedly, freezing a moving subject in various positions in a single exposure. This tutorial will teach you how to create a similar effect using light painting techniques, resulting in the above photo.
Items Needed
- Camera
- Tripod
- Remote control or “bulb” feature on your camera
- Black back drop
- Dark room
- Mobile light source (flashlight, LED, cell phone, glow sticks, sparklers, or any other light emitting object)
- Model or subject
1. Work in darkness
Ensure that the location in which you plan on shooting is quite dark with very little to no light “spillage” on your subject.
2. Pose your subject
With the lights on, first pose your subject with their hands in the air trying to keep them as comfortable as possible… Especially since they will be standing perfectly still for nearly 1 minute. (Time will range depending on how detailed you want your light painting to become)
3. Camera settings
Set your camera ISO and f/stop to allow for a 45-60 second exposure. Typical is around ISO 100 and f/16. Turn off any noise reduction features.
4. Start the exposure
With the remote or built in timer, actuate the bulb mode.
5. Paint the subject

We then used an iPhone flashlight app and ran the phone along the arms of the subject. Don’t light their face chest or legs, simply paint the arms. Keep in mind you will only want to light your subject by keeping the light source in front of the model/subject and yourself. Your back should be to the camera, and you should keep the light source moving — the longer the light is exposed in one spot, the brighter the light will become.
6. Change position and repeat
Once we had done one pass lighting the arms in the high position, we then dropped the models arms about 6 inches, being very careful to not move any other part of the body.
We then once again followed the same procedure of Step 5, being careful again to not light anything but the arms. Do this until the desired number of arms is reached.
7. Finish with the body
Lastly, we then lit the face and chest. Once that was done we simply closed the shutter of the camera, completing the photo.
8. Clean up the photo
In post processing, simply “clean up” any light spillage in the photograph.
This will take practice, patience, and a very, very still model/subject. I wish you the best of luck and don’t give up!
Image credit: Flashlight by sskennel