8 Tips for Making Better Environmental Portraits in Natural Light
Environmental portraits typically portray a person in their natural environment. Different from traditional portraits shot in a studio, locational portraits capture the character of the subject and give insight into their daily life making for a more personal image, generally telling some kind of story about who the subject is.
Close-up headshots aren’t really defined as ‘environmental portraits’. Nevertheless, if taken in a natural environment these can add another aspect in telling a story about your subject. There’s nothing quite as personal as gazing into a person’s eyes that is believed to be the gateway to one’s soul.
Here are 8 tips I’ve compiled from my own experience to help aspiring photographers shoot better natural portraits on location.
#1. Planning ahead
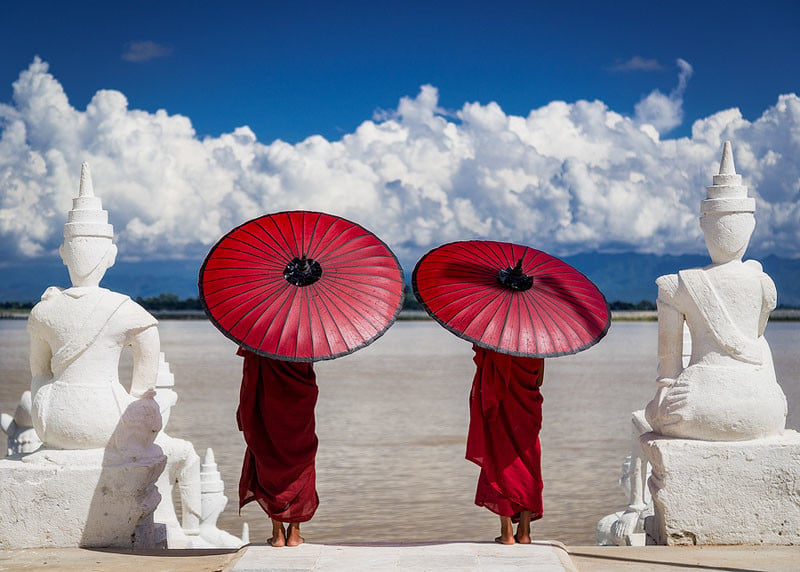
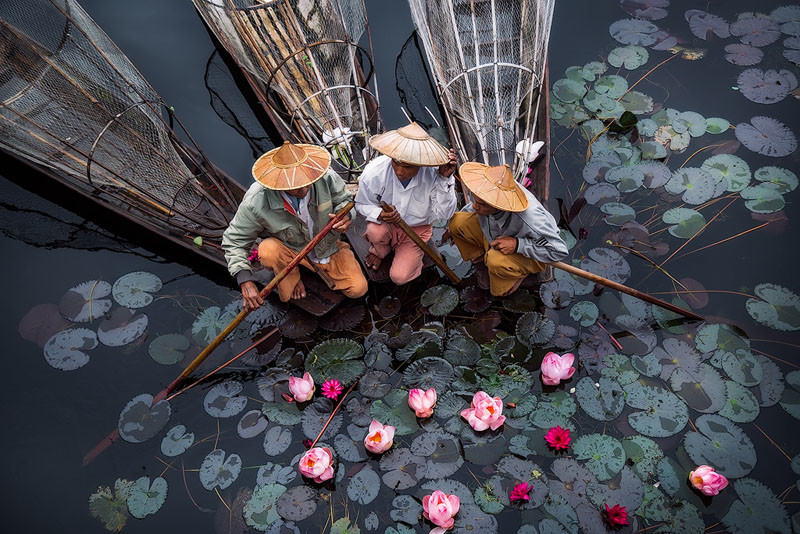
The first thing I do before every photo trip is decide what I want to see and the type of photos I intend on capturing. On a recent trip to Myanmar, I was inspired by the culture, so I wanted to capture pictures of local people and the culture, both staged naturally and candidly. I spent countless hours researching online to make sure it would be a successful trip.
Determine the style of the shoot, the purpose and the mood you plan on conveying. Do you need an assistant or fixer to help translate if working in a foreign country? Are you shooting indoors or outdoors? Do you need location permits or a model release if you plan on selling the images commercially? These are just a few questions to think about before picking up your camera.
#2. Location is everything
Finding the perfect location can be challenging, but is the key to capturing environmental portraits. It’s a good idea to scout the area in search for the right place to depict your subject. Persevere until you find the right location and it definitely result in stronger images.
Meet with your subject beforehand and get to know them. Perhaps they have a place where they feel relaxed. As an example, people often feel comfortable at their homes, which strengthen the chances of capturing natural facial expressions and body language. Although, some people may not feel comfortable inviting a stranger into their safe place so be respectful if you are invited into their home. Allowing your talent to choose the location can be extremely beneficial when working in a new or unfamiliar territory and can safe a lot of time looking for location yourself.
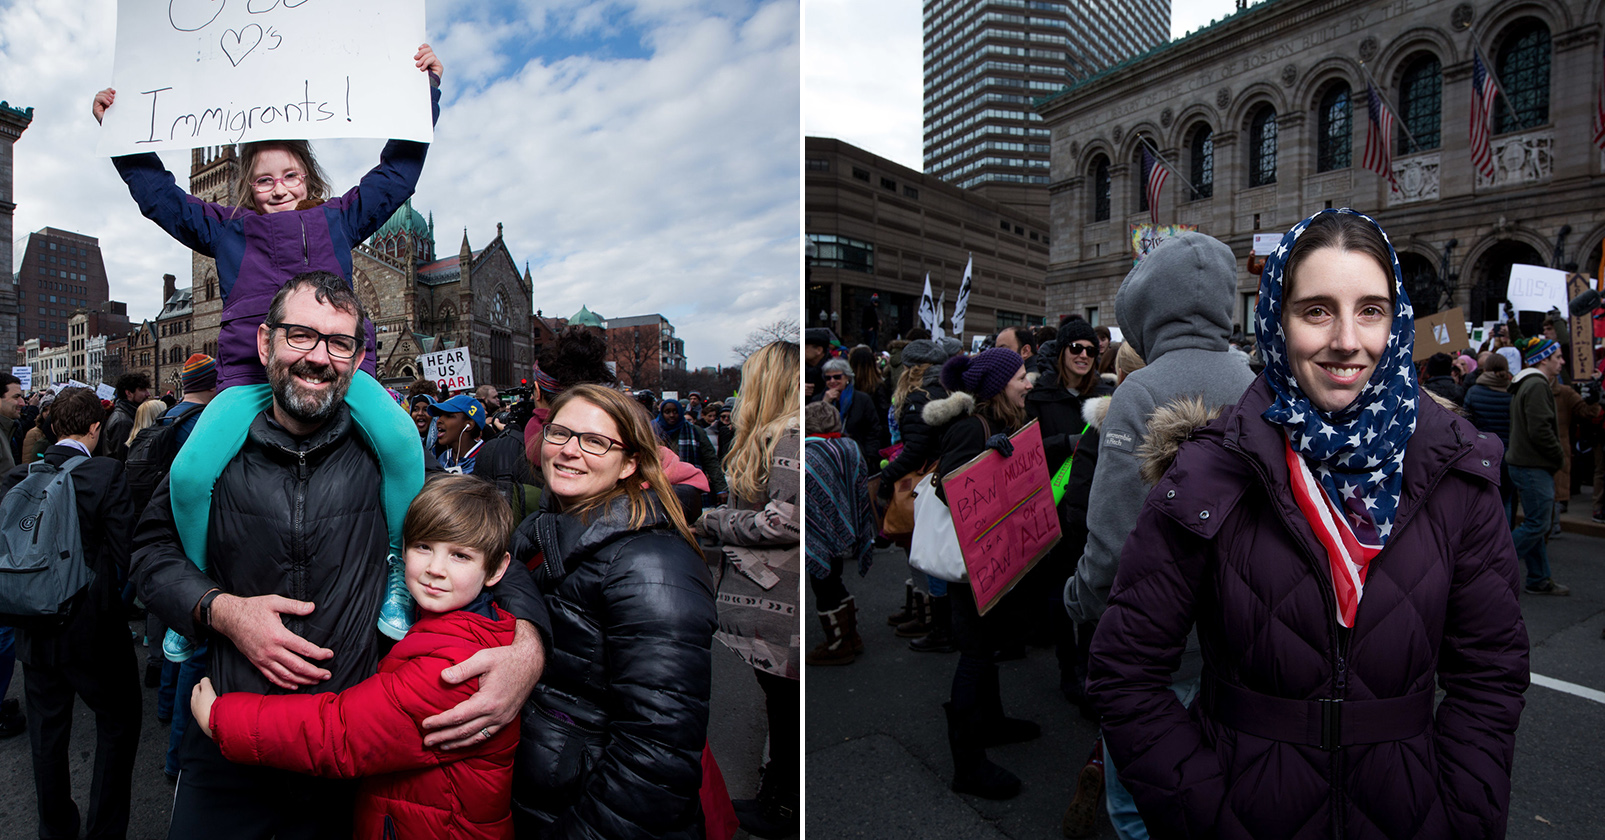
Background detail is imperative in adding a sense of place and defining the character of your subject. However, be mindful when composing your shots so that the background doesn’t detract the presence of your subject. The focus should be on your subject.
#3. Communication
An essential part of photographing people is communication and interpreting what you wish to achieve. If working in a foreign country you may not speak the language, this makes things trickier. The best way around this is to use a location fixer or someone local who speaks the native language who can translate. Fixers can also sort out shooting permits for special locations while liaising with local authorities to make things run smoothly during the shoot.
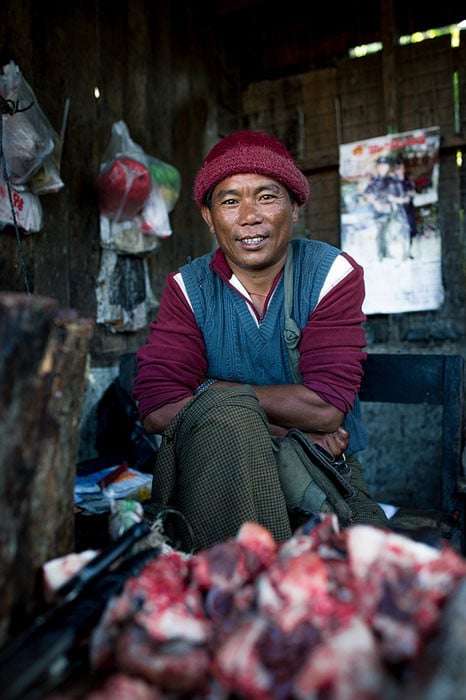
In some countries people enjoy being photographed. Myanmar is a great example of this. It is much easier to approach people if they are open to having their picture taken and an excellent opportunity to meet new people. By talking with people you’ll find the confidence to approach strangers and take their photos whether staged or impromptu. If there is a language barrier, simply point to your camera and smile. Most people already know what you want once they see the camera. However, if they refuse to have their picture taken, respect their wishes and move on. Always remember to smile and always say thank you. Be polite and project positivity when you work, people tend to take on your energy so be that radiating photographer everyone wants to know.
#4. Posing your subject
Posing your subject and capturing natural body language takes some work, but with good perception and practice this can be an enjoyable experience for both yourself and your model. It’s vital that they feel relaxed, as any strain will be evident in your pictures. Again, communication is an essential part of this process. Ask them how they feel and never push them to pose a certain way they aren’t confident or capable, this will result in tension resulting in unnatural body language.
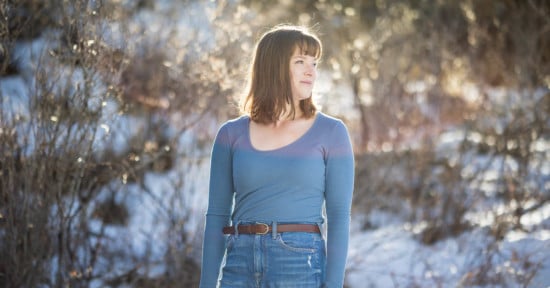
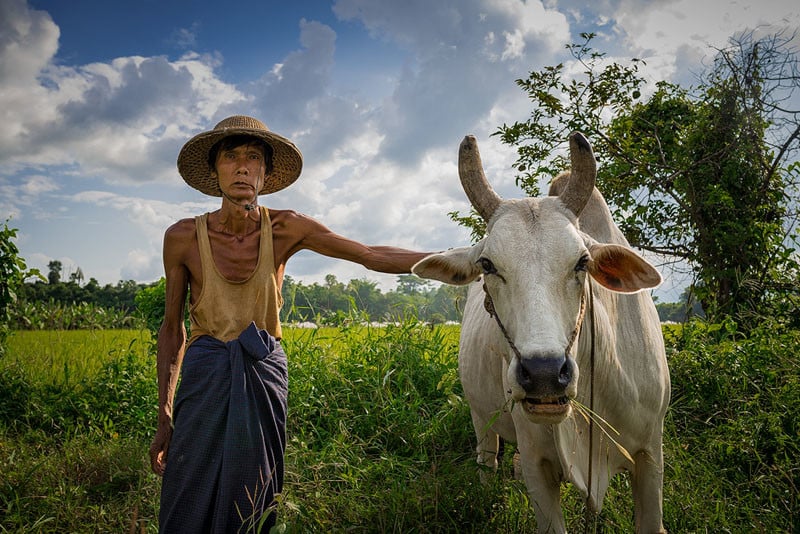
Most people feel at ease when sitting or having something to lean against (wall, doorframe for example), this is a good starting point. Have your subject sit in their environment, not necessarily looking at the camera. Ask for them to look off into the distance, or get them to focus on something. As an example, if you’re shooting someone in their workplace, they could continue with their daily routine while you shoot. Remember you are capturing their personality, so step back and observe how their actions before directing. If you are shooting candidly there is no need to pose. Anticipation is key, wait for the right moment (the decisive moment) to take your shot.
When shooting closer more intimate portraits it’s best to approach with humility, respect and a light footprint. This means working respectively with your subject and their environment. Never physically handle your subject, especially if you’re a male photographing a female. Politely explain/demonstrate the pose and then have your model re-position. It’s about gaining each other’s trust, which takes time but if approached appropriately it will dramatically improve your results.
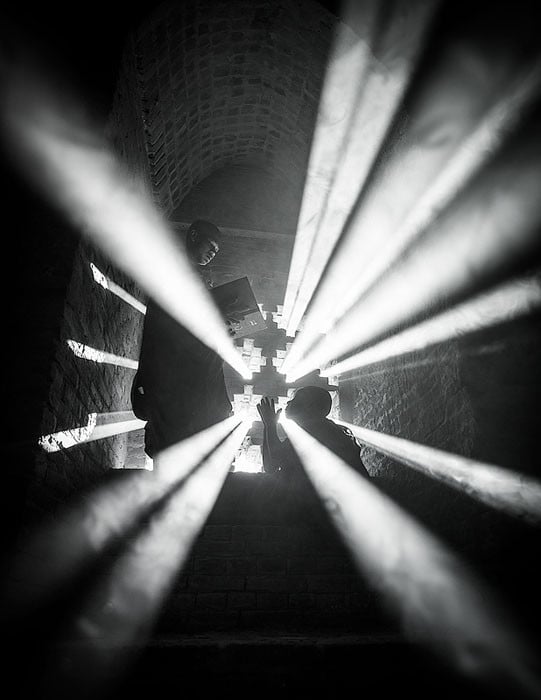
#5. Add drama to your pictures
Working under natural light is a great way to add drama to your pictures for moody portraits full of character. It’s also a fantastic way to better understand the importance of light and how to effectively use it. If you are new to photography, you don’t want to complicate matters by adding multiple speedlites. Instead go out with your camera and observe your environment, study the light and take notice of how different lighting changes the mood of the environment you are in.
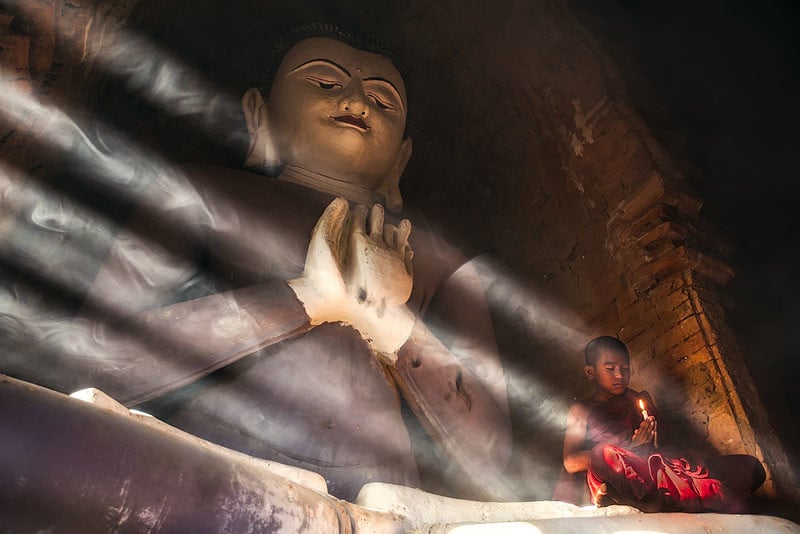
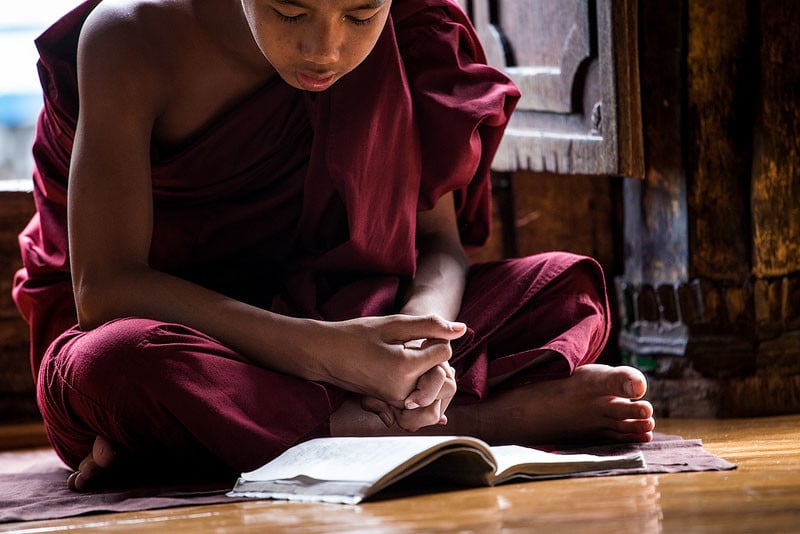
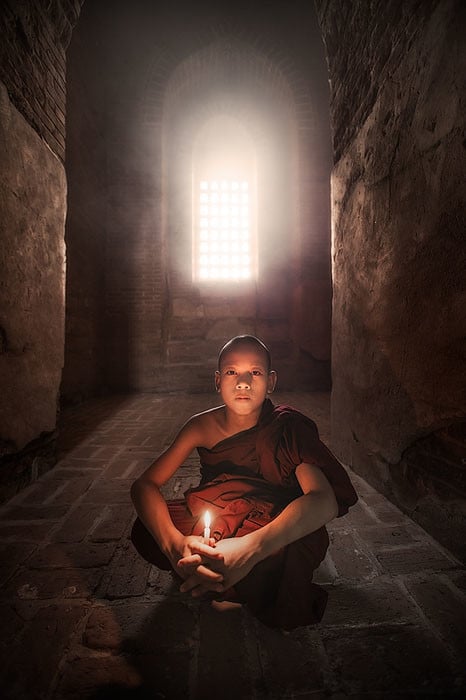
Photographing elderly people in low light is a fantastic way to exaggerate facial expressions, lines and wrinkles to make a dramatic portrait. One of my favourite approaches to low-light portraits is finding a dark space with areas of light highlighting parts of the scene. An example could be an open doorway into a dark room. Position your model in the light against the dark area. Notice how the light highlights your subject and the background is dark and free of distractions? Keep an eye on the light and try shooting from different angles, or reposition your model to stand half in the shadow and half in the light to create deep contrasts. This is the easiest way to manipulate natural light for a more dramatic feel. Experiment with natural light, you’ll be surprised how effective it is.
Another way to add/enhance the atmosphere of your portraits is by adding smoke. Your model could be smoking a cigarette and exhaling smoke into the air, or burn incense. Darker backgrounds work best for smoke, as smoke is typically light so a brighter background won’t have the same impact. Use a shallow depth of field to draw the focus on the smoke to create a subtle illusion of depth. Candlelight is another natural light source to create ambience, but be careful of fire and hot wax.
#6. Keep post processing in mind
Cameras have their limitations where they cannot capture the entire tonal range of some more challenging lighting situations. Shooting during the middle of the day when the light is harsh can cause an unflattering loss of shadow detail. If your subject is backlit, half in shade or wearing a hat you’ll notice this problem. Asking your subject to move, or waiting for the light to become favourable isn’t always an option, so it’s good practice to shoot with post-processing in mind.
By underexposing or overexposing elements in a scene allows the freedom of recovering lost details in your editing software by adjusting the shadow/fill depending on the situation. Exposing for someone’s face when the light is harsh may result in an extremely over-exposed sky. In this case it’s likely the highlights would be unrecoverable, so expose for the highlights and tweak the shadows in post. If this increases digital noise (grain) you can reduce this with some noise reduction in post.
#7. Don’t be afraid to increase ISO
A common photographic fear that I’ve noticed is photographers afraid to increase the ISO setting on their cameras. Most photographers advise to use the lowest ISO possible. There is good reason to shoot lower ISOs, as image quality is at its maximum compared to shooting with a higher ISO. However, camera technology has improved a lot since the first DSLR was released and most modern DSRL’s are capable of shooting higher ISOs (1600 – 3200 or greater.)
Increasing the ISO enables you to shoot at faster shutter speeds and smaller apertures, which can be extremely useful when shooting portraits in low light conditions without the need for a tripod or flash. High ISO combined with a fast prime lens opens up a whole new world of experimentation and this is often when the best light happens. If noise is evident than you may need to adjust your settings, but you can also remove digital noise in post-processing, so go explore and see what you find.
#8. Use model releases
Basically, a model release is a contract. It is a written and signed agreement between the photographer and the model. The purpose of obtaining a release is to protect the photographer from future liability if something were to happen and become a lawsuit, which can and does arise if someone files a legal claim against you, such as an invasion of privacy or defamation of character. Every photo you sell that features a recognisable person must feature a release unless it is being used for certain reportage/documentary purposes. The document imposes the terms and conditions that one party may use images taken of another party. In short it’s an essential part of being a portrait photographer when using images commercially.
There are a number of phone apps that allow you to electronically draft legally binding model releases in seconds. All you need is a smart phone or iPad and a good app. I have been using the app by 500px called ‘Releases’, which lets me save model and location information. Once you’ve filled in the blank fields all you need is your models signature, which he or she can sign with the ease of the touch screen using their finger and you can save it as a PDF to print, file or export elsewhere. Saves a lot of time doing paperwork!
P.S. If you enjoyed this post, check out my 10 tips for successful street photography.
Image creditsAll photographs by Drew Hopper and used with permission