A Teardown of Affordable Speedlights to See the Build Quality
Today’s flash market offers a wide variety of options for anyone looking to dip a toe in the off-camera flash pool. While there are plenty of things to consider while shopping for a speedlight, one factor that doesn’t always receive the most attention is build quality.
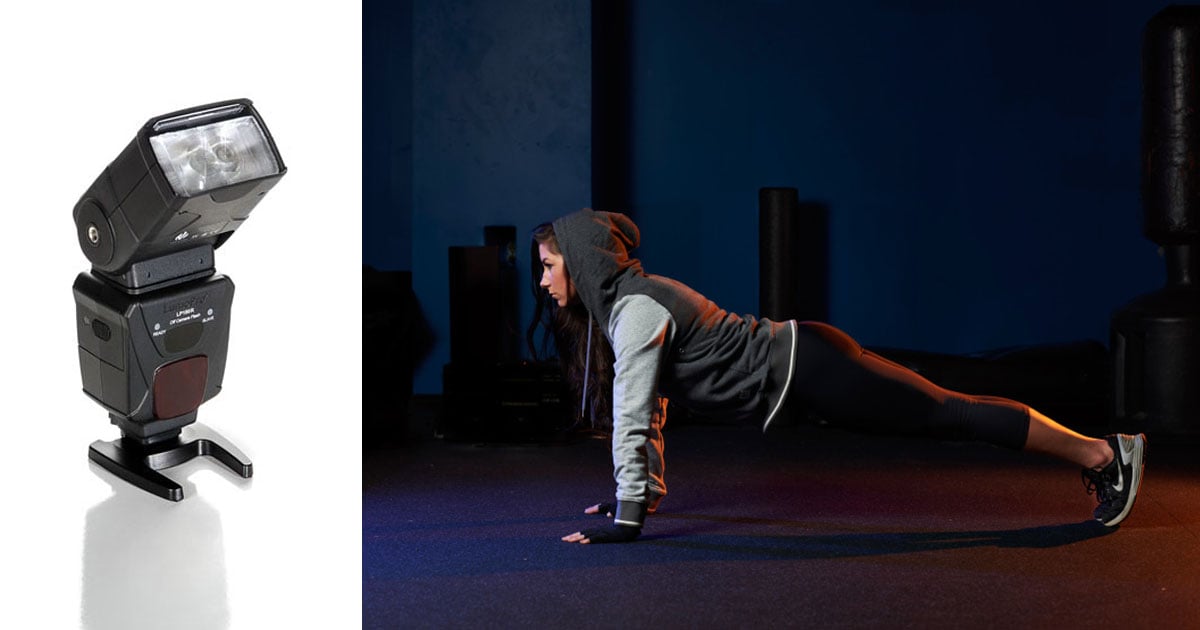
Recently, I had the opportunity to look inside some popular inexpensive flashes and compare them to the LumoPro LP180R. Although I’m slightly biased, we at LumoPro have always stood behind our build quality (2 year international warranty, anyone?), and I’ve often wondered how some of the other flashes really stack up against ours
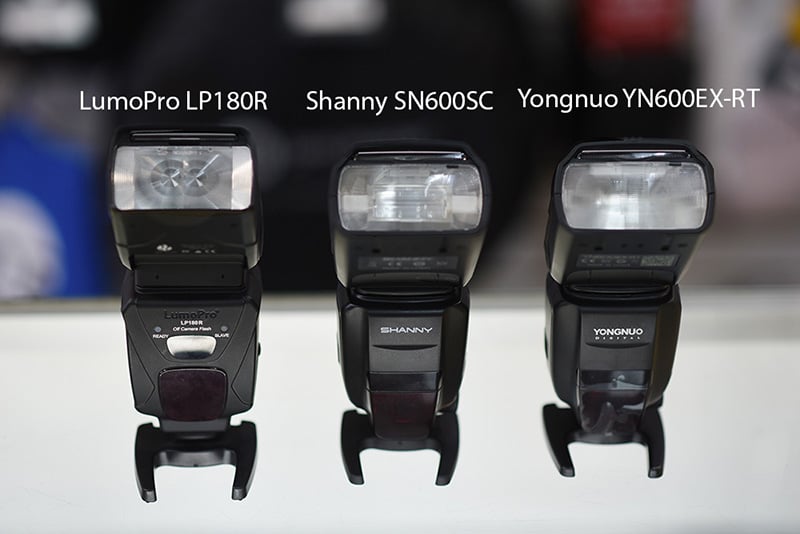
Does the internal build account for other brands’ lower price point? I decided to open up the Shanny SN600SC and the Yongnuo YN600EX-RT, two popular alternatives for photographers looking for a bargain, and share what I found.
Author’s note: Please, please, please do not try this at home (I’ve always wanted to say that!). The capacitors inside a speedlight store up enough charge to stop your heart. No joke. They can and will do bad things, if you don’t absolutelyknow what you are doing. So stop! Put that screwdriver down!
Flash Head Fastenings
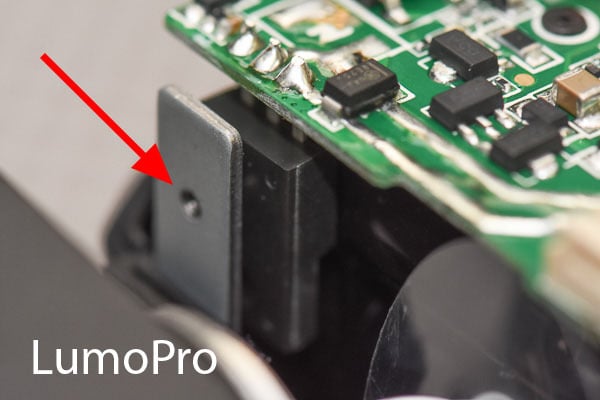
Before I could get inside, I had to remove the outer covers on both sides of the flash head to reveal the first set of screws holding the cases together. On the LP180R, you can see two small holes, in addition to the screws. These holes lead to the capacitor and allowed me to safely discharge it, using my fancy capacitor discharging tool. Again, you don’t have a fancy capacitor discharging tool, so don’t do this!
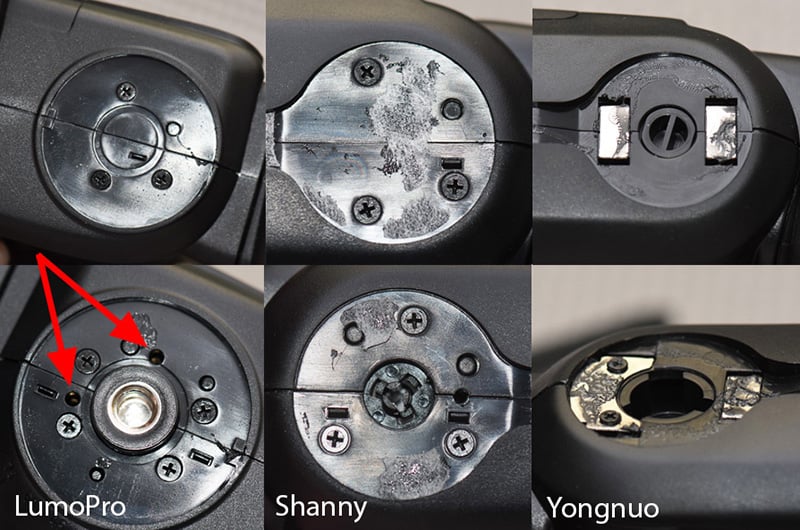
The Shanny and Yongnuo flashes, both seeming identical on the outside, are quite different under the hood. The Shanny is held together with three screws on each side of the flash head. The Yongnuo, by contrast is held together with two metal clips, which simply sit in the indentations on the plastic. There are two screws on the one side, but these screws are very small and very short and seem to only be holding the metal clips in place rather than holding the flash together.
Once I removed the screws (or clips) from the sides, all three flashes had two more screws to detach before I took a look inside the flash head.
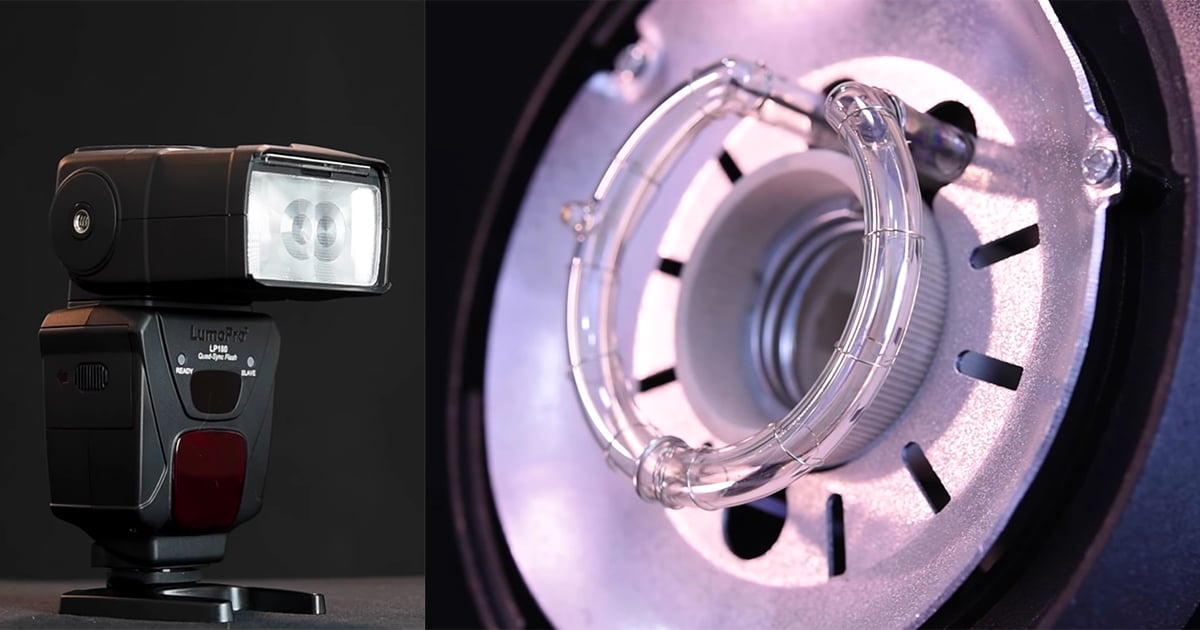
Flash Tube Digs
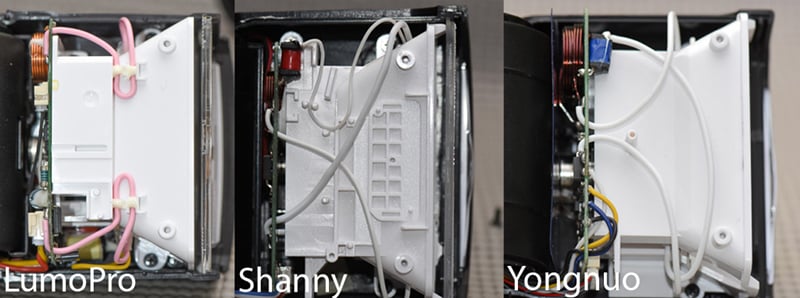
That big white thing you’re seeing is the housing for the flash tube (the bulb that makes your flash, flash). Inside the housing, the tube rides up and down a pair of rails driven by the zoom motor, which adjusts the spread of the flash’s beam. The wires you see (pink and yellow for the LP180R, and white for the other two) are the wires coming from the flash tube itself. These wires do the heavy lifting for the flash. Current is carried from the capacitor (remember that scary thing that could stop your heart?), through the wires, to the flash tube, and that flow of energy is released in the form of light (and heat!).
The point is, those three wires are working hard for your flash and handling a significant amount of voltage. However, since the flash tube also has to be free to move up and down as the zoom spread changes, those wires have to be securely connected to the flash’s circuit board.
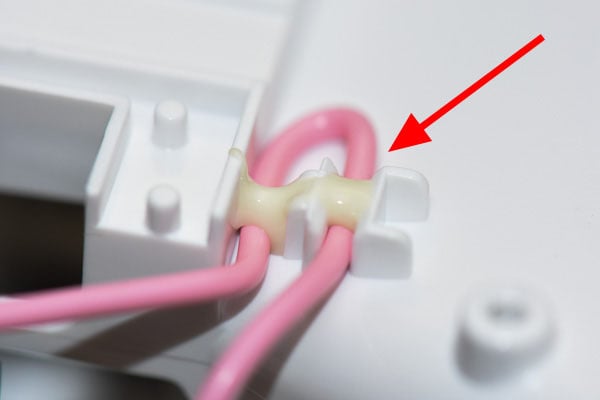
If you zoom in on the LP180R’s housing, you can see that the wires are held in place with silicone adhesive. It’s a simple solution, but one that ensures the only part of the wires moving are the parts attached to flash (which are fused into the flash tube itself), rather than the other end (which is connected to the circuit board), a potential weak point if flexed too often.
And take a look at the main wires coming from the capacitor, which are responsible for carrying about 330V. On the LumoPro, the wires are attached to the circuit board with a quick-disconnect plug. This secure, positive connection makes it much easier to disconnect the flash bulb assembly if replacing the bulb is necessary.
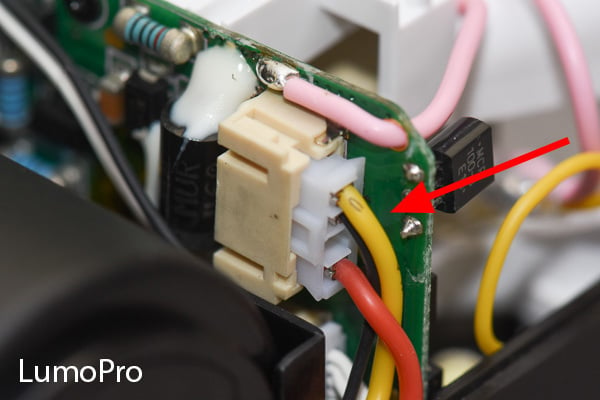
The Shanny and Yongnuo on the other hand have these wires connected to the circuit board with a simple solder joint. Which is sort of like plugging a lamp into your wall by cramming bare wires into the outlet; effective, but clearly not a long-term solution.

A third difference can be found in the trigger coil, another piece that handles the voltage flowing through the flash. You’ll notice that again, on the LP180R, there’s a healthy dose of silicone around the joint where the wire from the bulb is soldered to the coil. The silicone not only secures the joint, but insulates what would otherwise be a bare wire. Bare wires and connections, plus high voltage can cause arcing. Internal sparks would be bad news for any of the flash’s electrical components. On the Shanny and Yongnuo flashes, I didn’t find any sort of protection. Just a bare wire soldered onto the coil.
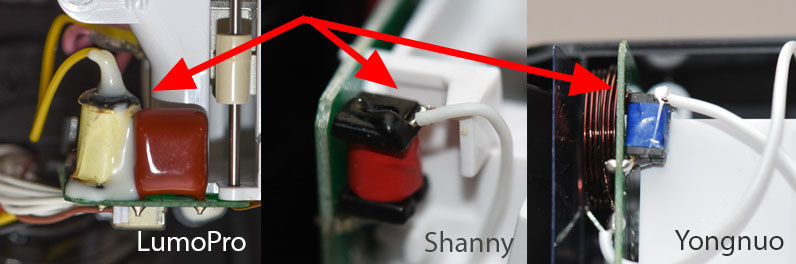
As a side note, that component next to the LumoPro’s trigger coil is another capacitor. This stores the charge that the trigger coil uses when firing the flash. The other two flashes do not seem to have this second capacitor. It may be that their triggering capacitor is hidden somewhere else I can’t see. I won’t make guesses as to why it’s not there (I’m not an electrical engineer), but I find it very unusual to not see one.
Body Work
Next I removed the shoe from the foot of the flash. Nothing too exciting here, as all three flashes are pretty similar.
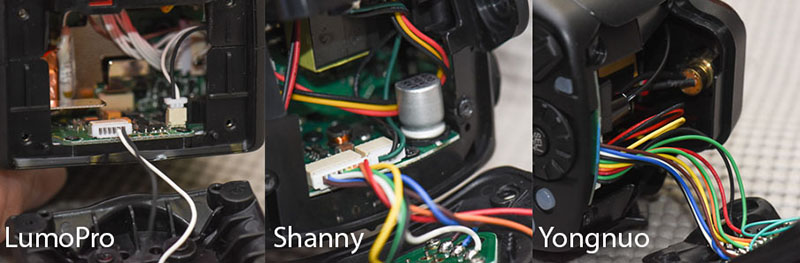
The LP80R does have fewer wires coming from the shoe. This is because the LumoPro flash has a single pin in the foot for firing, and the Shanny and Yongnuo flashes have multiple pins for TTL communication. The LP180R receives all that TTL information wirelessly via the built-in Phottix Odin transmitter, so only the single pin is needed.
After taking off the shoe, I removed the screws that hold the two halves of the body together. Again, I immediately noticed a difference between the three speedlights.
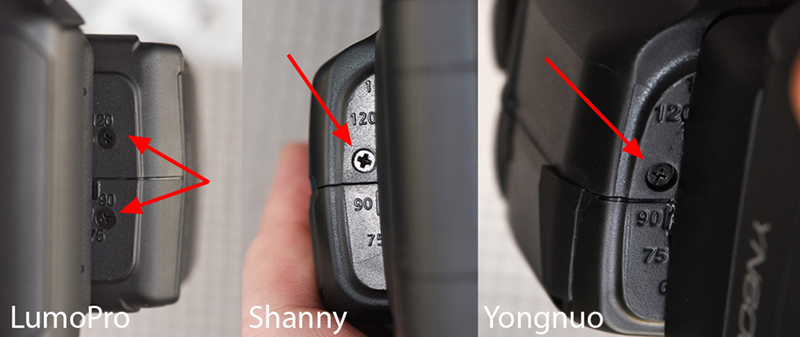
The Shanny and Yongnuo flashes are held together with just two screws on only one half of the body, while the LP180R has four screws, two on each half. Both the Shanny and Yongnuo’s screws are fastened into plastic. The LP180R’s, on the other hand are screwed into metal.
Getting to the Guts
To be honest, I was expecting both the Shanny and Yonguo to be as seemingly identical on the inside as they are on the outside. In reality, they have their own unique design of circuit boards and components. There aren’t moving parts inside the body like there are in the flash heads, but I found the same general differences in construction as I saw in the flash head.
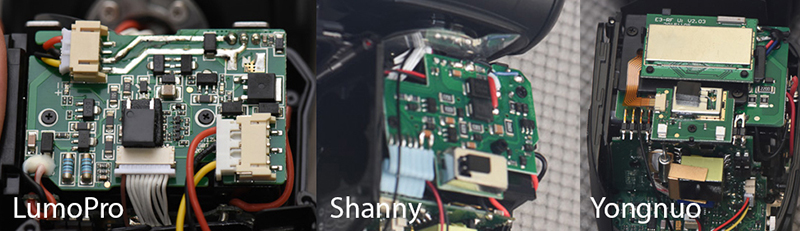
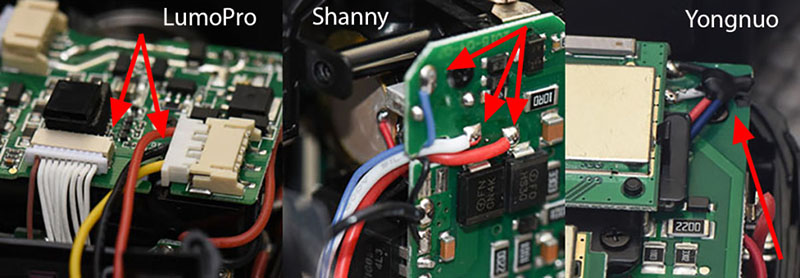
Zooming in closer, I found that the LP180R utilizes plenty of quick-disconnects to attach wires securely to the circuit boards. The Yongnuo has some insulation where the high voltage wires attach to the board, but the Shanny relies on only bare solder joints.
So What?
I wasn’t sure what I was going to find when I looked inside the less expensive flashes, but the differences were clear cut. The Yongnuo, the cheapest of the 3 flashes, was held together with glue, a couple of loose-fitting clips and not much else. While the Shanny had more screws than the Yongnuo, neither offered much on the inside in terms of protecting moving wires, securing vital, high voltage electrical components or insulating connections. The LP180R, the highest priced of the 3 flashes, had the most screws, the most metal parts and obvious thought concerning the security of internal moving parts.
As a photographer, the question you have to ask yourself is, do you feel lucky does any of this matter? For some, it might not. The construction of a Yongnuo flash might be sufficient and never give you any problems. Likewise, the better build quality of a LumoPro flash (or an OEM flash for that matter) does not guarantee that it can’t be damaged or succumb to wear and tear. We photographers are a rough lot and take our equipment into some nasty conditions. The bottom line is speedlights are complex and delicate electronic devices that can fail regardless of the build quality.
However, what you can see when comparing these three flashes should also raise questions about what you can’t see. If a manufacturer is willing to cut corners by not gluing down a wire that should be glued down, where else are they cutting corners? What other decisions have they made to keep their costs low? The cheaper option may be “good enough,” and I believe having options is in general, a great thing. But to assume there aren’t differences and compromises would be a mistake.
While I am obviously biased (though I purchased my LP180’s long before I worked for the company), there are clear differences in how these flashes are put together. What makes the best purchasing decision for you is a choice only you can make, but an informed choice is always preferable than one based solely on price.
About the author: Mike Bock is the Product Specialist at LumoPro, a brand of quality lighting and support equipment made by photographers, for photographers. You can say hello to Mike and LumoPro on Facebook, Instagram, and Twitter. This article was also published here.