6 Black and White Photography Tips for Monochrome Enthusiasts
Thanks to digital technology, monochrome photography is easier today than ever before. Check out these six black and white photography tips for getting great results.
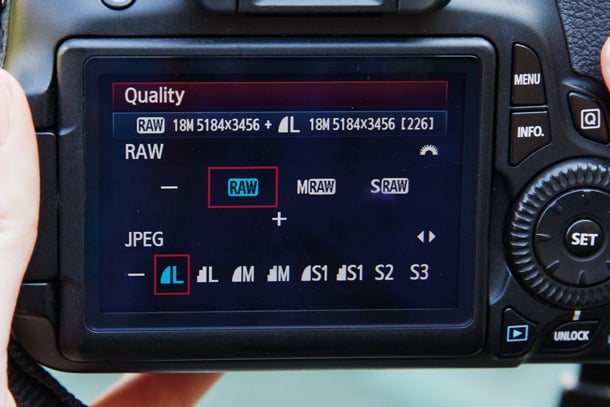
1. Shoot RAW + JPEG
The best monochrome conversions are made by editing raw files which have the full colour information, but if you shoot raw and JPEG files simultaneously and set the camera to its monochrome Picture Style/Picture Control/Film Simulation mode you get an indication of how the image will look in black and white.
As many photographers struggle to visualise a scene in black and white, these monochrome modes are an invaluable tool that will help with composition and scene assessment.
Many cameras are also capable of producing decent in-camera monochrome images these days and it’s worth experimenting with image parameters (usually contrast, sharpness, filter effects and toning) to find a look that you like.
Because compact system cameras and compact cameras show the scene seen by the sensor with camera settings applied, users of these cameras are able to preview the monochrome image in the electronic viewfinder or on rear screen before taking the shot.
DSLR users can also do this if they activate their camera’s live view system, but the usually slower responses mean that many will find it preferable or check the image on the screen post-capture.
2. Look for Contrast, Shape and Texture
The complimentary and opposing colours that bring a colour image to life are all reduced to black and white or shades of grey in a monochrome image and you have to look for tonal contrast to make a shot stand out.
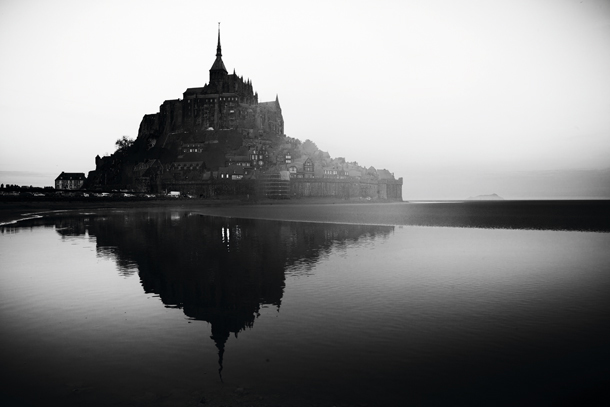
In colour photography, for example, your eye would immediately be drawn to a red object on a green background, but in monochrome photography these two areas are likely to have the same brightness, so the image looks flat and dull straight from the camera.
Fortunately, it’s possible to work adjust the brightness of these two colours separately to introduce some contrast. However, a good starting point is to look for scenes with tonal contrast.
There are always exceptions, but as a general rule look for scenes that contain some strong blacks and whites.
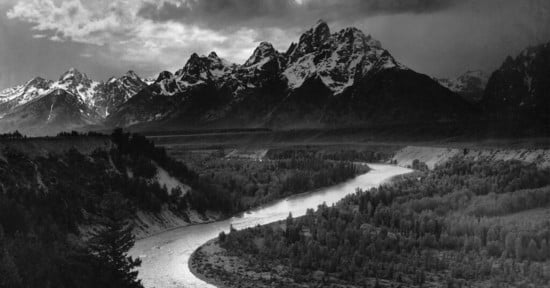
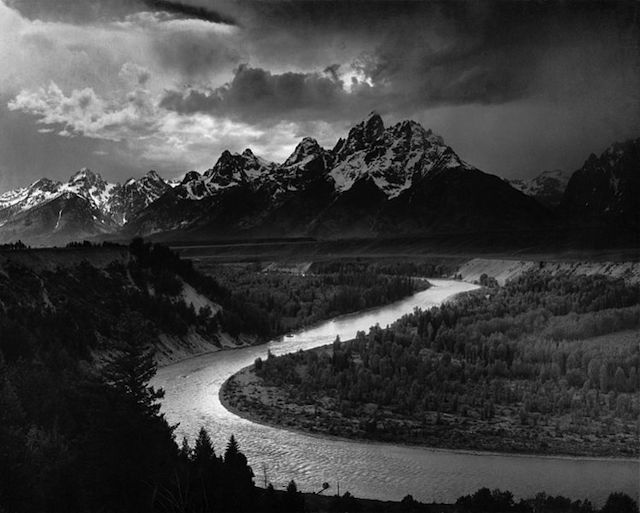
This can be achieved by the light or by the brightness (or tone) of the objects in the scene as well as the exposure settings that you use. The brightness of the bark of a silver birch tree for example, could inject some contrast (and interest) in to a woodland scene.
Setting the exposure for these brighter areas also makes the shadows darker, so the highlights stand out even more. Look for shapes, patterns and textures in a scene and move around to find the best composition.
3. Try Long Exposure
Long exposure shots can work really well in monochrome photography, especially where there’s moving water or clouds.
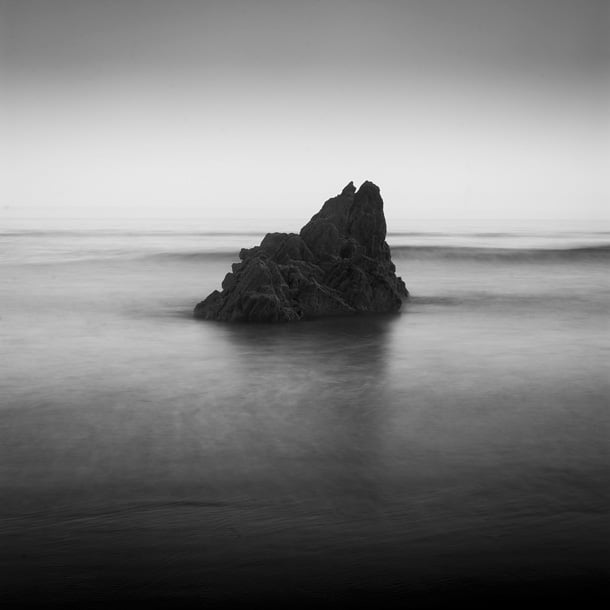
During the exposure the highlights of the water, for example, are recorded across a wider area than they would with a short exposure and this can help enhance tonal contrast.
The blurring of the movement also adds textural contrast with any solid objects in the frame. If necessary, use a neutral density filter such as Lee Filters’ Big Stopper or Little Stopper to reduce exposure and extend shutter speed (by 10 and 4 stops respectively).
Naturally, when exposures extend beyond about 1/60 sec a tripod is required to keep the camera still and avoid blurring. It’s also advisable to use a remote release and mirror lock-up to minimise vibration and produce super-sharp images.
4. Use Filters
Graduated neutral density (AKA ND grad) and polarizing filters are just as useful in monochrome photography as they are in colour. In fact, because they manipulate image contrast they are arguably more useful.
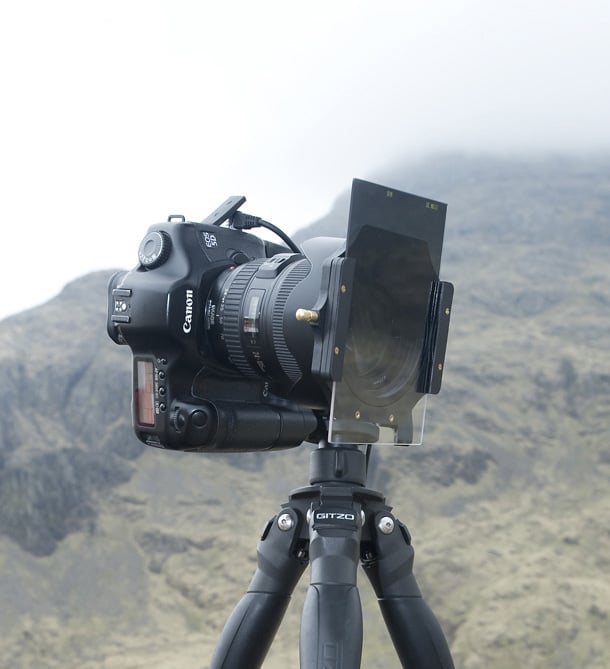
An ND grad is helpful when you want to retain detail in a bright sky while a polarizing filter can be used to reduce reflections and boost contrast. Alternatively, consider taking two or more shots with different exposures to create a high dynamic range (HDR) composite.
Don’t be afraid to use a ND grad with a standard neural density filter if the sky is brighter than the foreground in a long exposure shot.
Coloured filters, which are an essential tool for monochrome film photographers, can also be useful for manipulating contrast in digital images.
They work by darkening objects of their opposite colour while lightening objects of their own. An orange filter, for example, will darken the blue of the sky while a green one will lighten foliage.
5. Take Control
Although coloured filters can still be used to manipulate contrast when shooting digital black and white images, it’s more common to save this work until the processing stage.
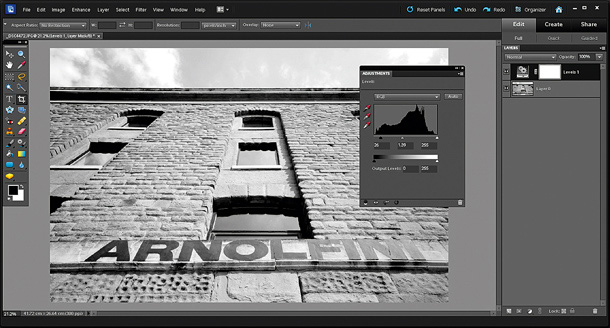
Until a few years ago Photoshop’s Channel Mixer was the preferred means of turning colour images monochrome, but now Adobe Camera Raw has more powerful tools (in the HSL/Grayscale tab) that allow you to adjust the brightness of eight individual colours that make up the image.
It’s possible to adjust one of these colours to make it anything from white to black with the sliding control.
However, it’s important to keep an eye on the whole image when adjusting a particular colour as subtle gradations can become unnatural looking.
And adjusting the brightness of a red or pink shirt with the red sliding control, for instance, will have an impact on the model’s skin, especially the lips.
The Levels and Curves controls can also be used to manipulate tonal range and contrast, but the HSL/Grayscale controls allow you to create separation between objects of the same brightness but with different colours.
6. Dodge and Burn
Dodging and burning is a technique that comes from the traditional darkroom and is usually used to burn in or darken highlights and hold back (brighten) shadows.

Photoshop’s Dodge and Burn tools allow a level of control that film photographers could only dream of because you can target the highlights, shadows or mid-tones with both.
This means that you can use the Burn tool to darken highlights when they are too bright, or the Dodge tool to brighten them to increase local contrast.
It’s a great way of giving a sense of greater sharpness and enhancing texture.
Plus, because you can set the opacity of the tools, you can build up their effect gradually so the impact is subtle and there are no hard edges.
About the author: Jeff Meyer is the editor of PhotoVenture, a photography blog for everything post-capture — improving photos, image management, sharing and more. This article originally appeared here.