Review: Alien Skin Software’s Exposure 5 is a Solid Film Emulation Program
Alien Skin Software’s Exposure 5 is a starting point for building stylish and creative photos that will impress even the harshest of critics. With hundreds of ideas to pick, layer and build upon there’s really no limit to what you can make. Opening an image for the first time in Exposure 5 may prove a little overwhelming with the vast array of filters there are to tinker with. Everything from a subtle film look still available at your local shop to the original daguerreotype feel. It is impressive to say the least.
The Exposure software is snappy. Part of me expected some delay in rendering the previews on the fly, but Exposure 5 did not lag enough to twist my knickers, even on my late 2009 iMac with a 2.8GHz i7 with a SSD and just 16GB of ram. Working on multiple images the scalable thumbnail previews come to life with a satisfying pace. Which is good because the whole point of a thumbnail previews is convenience and in this case, even on my old computer that element is not lost.
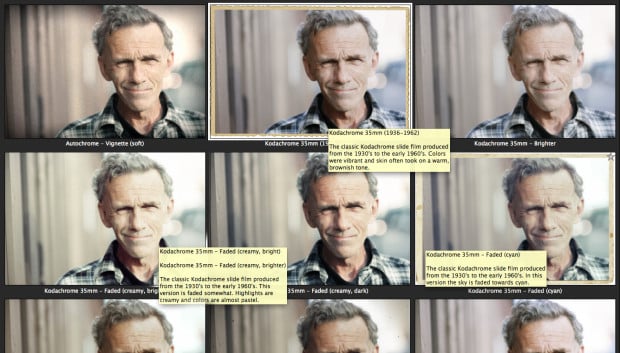
The tool tips for each style preset are a really nice touch and the film fans out there, ever longing to once again sniff that sweet smell of a dark room, will love it. The newbies may even learn a thing or two and that is never a bad thing.
Alien Skin did a great job keeping Exposure 5 ridiculously simple. Really, you can pick it up and just begin making brilliant and exciting adjustments to your photos within seconds of finishing the install, as I did.
However, I was anxious to get up to speed and it was at this point where I thought it best to watch some of the handy tutorial videos that Alien Skin provide for all of their software. The short 4-5 minute How-To’s quickly had me well versed and before I knew it, I felt like an expert.
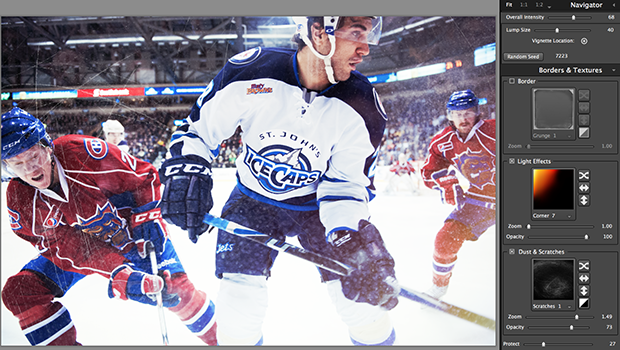
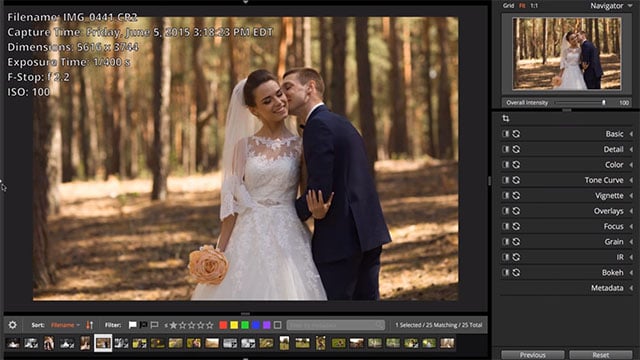
Rendering styles to the large preview in Exposure 5 is relatively quick . Even modifying the presets via the right hand side adjustments pane — offering an almost infinite number of variables — had and almost instant refresh on the larger preview image, down sampling the quality just a tad as you shift the slider left or right, kicking it back to the high res when you let go.
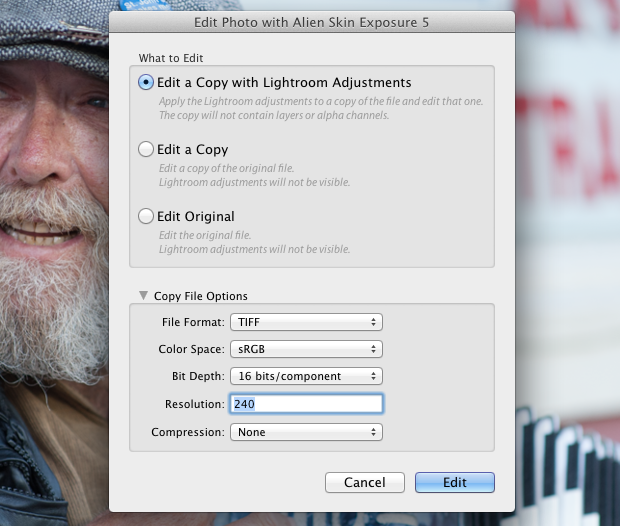
Click the blue “Apply” button to save and the big window disappears. A new box greets you advising of the render status while Exposure 5 fully exports the adjustments you’ve just made back to Lightroom.
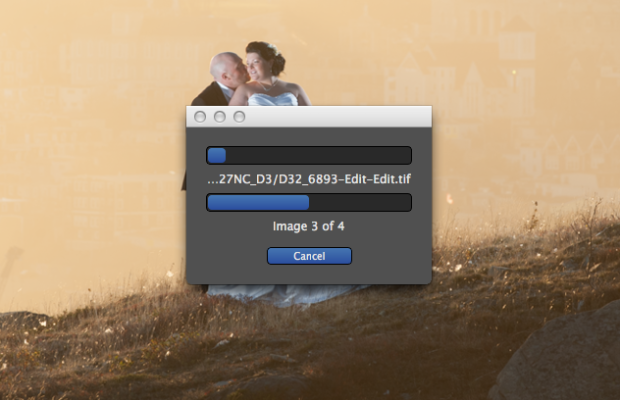
It is quick process, 20 seconds or so for these four files, but if you’re running through a full collection of photos you may want to go make a sandwich. The only thing missing here is a time estimation. Heck, it doesn’t even need to be an overly accurate time estimation. Any countdown telling me if I’ve got time to run for coffee or not, would be nice.
Jumping right in as I did, I learned the hard way what not to do. Finish all of your localized and even global edits before opening any files in Exposure 5. The issue you’ll run into, especially if you’re using borders or heavy overlays, is that the trickery applied by Exposure 5 will no longer look the way it should. Example: you’ve applied an old school white border and now you have the file back in Lightroom but oops, you forgot to tweak the white balance before you applied the white border. If you change it now, your white border will no longer be white, will it.
Even quicker local edits, such as removing an errant tree branch could prove to be twice as bothersome should you now have to erase that object as you dance around film grain and scratches.
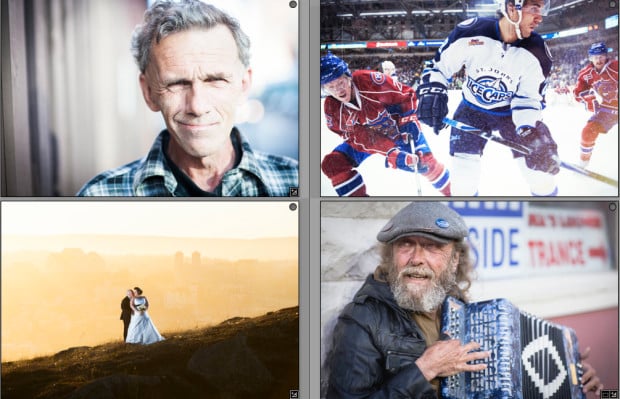
I wanted to pick some different photos for you to get a good idea of how this software could apply to just about anything. Abiding by the motto that “Less Is More”, I did not want to go wild applying every possible option available.
With hundreds of preset styles to choose from Exposure 5 does quite well, even for something as completely random and unlikely has a hockey photo. The obvious usages for this software are portrait and wedding/fashion photography but it’s always nice to explore other avenues.
A little bit of experimentation never hurt anyone. And so, here are some before and after photos.

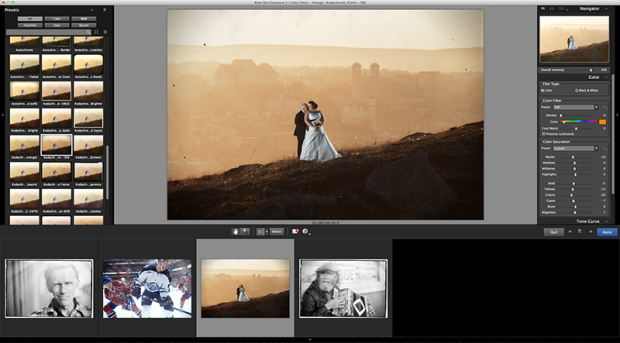
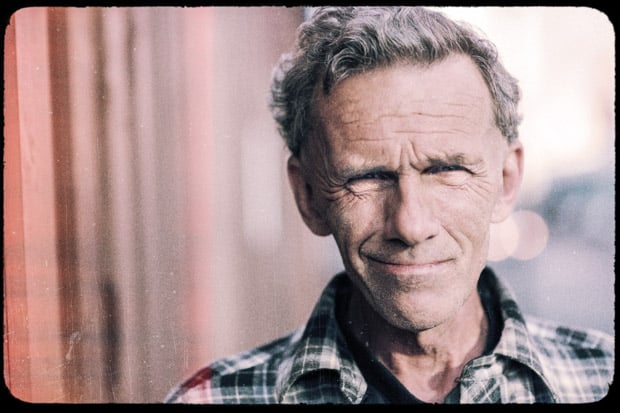
Before: Straight out of camera with a gentle adjustment to curves and subtle dodge/burn around the face.

After: Applied a kodachrome preset switched to black and white, adding a border (grunge 10) and a light leak from the top.

Before: Straight out of camera.

After: Added a film preset just to boost color and also a Dust & Scratches overlay, Scratches 1. Also kicked in a light leak from the bottom right corner. It’s a little hard to see in the small image size but the scratches actually worked quite well here, adding a little bit of context to the “behind the glass” action of the photo.

Before: Straight out of camera.
After: I’m OK with the original actually, but for the sake of the review I began with a Color Film preset, Kodak Ultra Color 100UC and slowly built on top of it. Adding a Kodachrome border and a side light leak (side 6). Then I came back to Lightroom and did a slight brush over the eyes to bring back the subtle catch lights lost when I applied the Kodachrome filter.
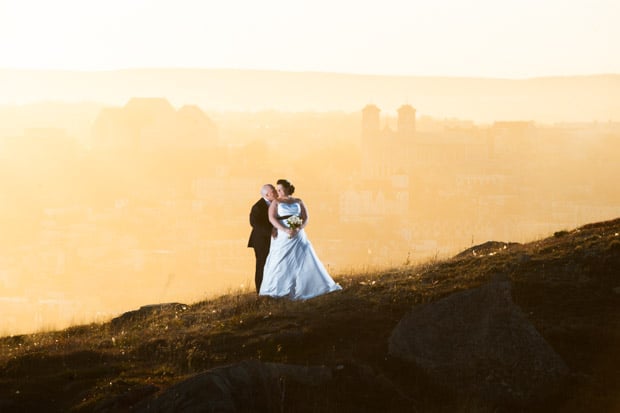
Before: Straight out of camera.
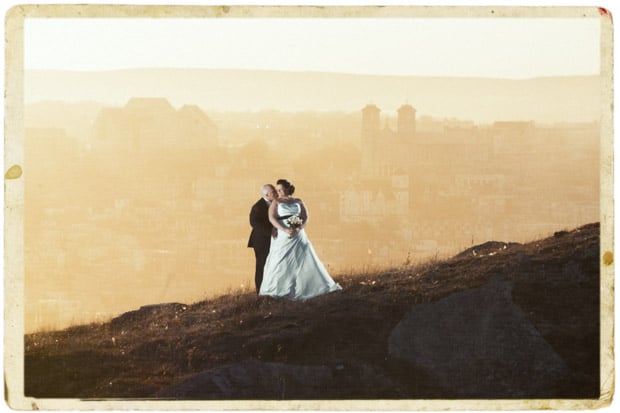
After: I applied Kodachrome 35mm – Faded (cyan) which included a border (print 3) and I felt it looked pretty good without any other adjustments.
Conclusion
Costing $199 or $99 for the upgrade, Exposure 5 is worth every penny. For some it will be software that becomes a staple of their post processing, loving every second and every available preset. For others the usage may be sparingly. Sprinkling a dash of Exposure’s salt and pepper on their photos, adding just a little bit of zest once in a blue moon.
To state the obvious, Exposure 5’s presets are style, and style is subjective. As a professional, clients always want variation and a break from the norm. Exposure 5 makes it impossibly simple to include a few offbeat selections in the mix for final delivery. And for the sake of a couple hundred dollars, the ease and speed at which I can go vintage with a wedding photo is unmatched. It’s not something I’ll do every time but when I do, they’ll stand out and have even greater impact.
Part of me, the part of me that loved shooting film, is shouting at me and throwing stones. Blasphemy it says. The unfortunate side of things is that film is dying.
Sort of.
Film, it could argued, is as popular as it’s ever been, but also it’s as expensive as it’s ever been. Unless you live in a major city, developing costs alone (shipping + processing) could turn you away. Depending on the cost of whatever flavor of film you use, a single roll or box could run anywhere from $5 to $40 or more.
Honestly. I kick out tens of thousands of wedding photos every summer. Even if I give just 200 of those the Exposure treatment, which thanks to Exposure’s speedy nature costs me no real measurable down time, I’ll effectively be paying less than one dollar per photo in just one year. You can’t beat that when it comes to offering clients something a little different to pick from. And when it comes to reproducing the look and feel of yester-years film, even for your hobby photography, Exposure 5 is top notch.
Alien Skin’s Exposure 5 software? Worth. Every. Penny.