How to Create Surreal Long Exposure Facebook Album Photos
Editor’s note: This tutorial was inspired by Phillip Maisel‘s “A More Open Place” project, which we featured here last week.

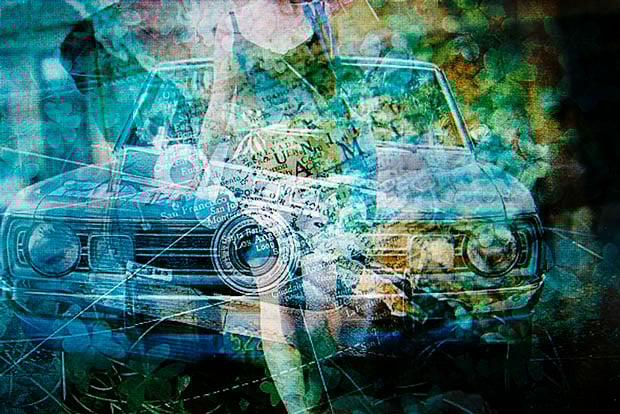
I saw an article on Gizmodo the other day that was just a photo of an album over a long exposure, I’m not sure what process the creator went through but I’ve emulated it here.
- A camera (Needs to have control on exposures)
- A computer
- A tripod or something you can set up to keep the camera still
- A bunch of photos
Step 1: Monitor Controls
The first frames I took were with the following settings:
Shutter speed: 30s
ISO: 100
F-stop: 32
The result was a completely white frame.
You’ll need to turn the lights off and lower your monitor brightness to about half, with the blue a few clicks below the red and green (this takes the colour cast out a bit).

Step 2: Tripod

Put your camera on the tripod and set it up nice and straight with the bottom edge of the monitor, so the frame on the camera and the edge of the monitor are parallel.
Now focus and frame your album, going full screen and using a slideshow would be clever but, as this is an experiment, I’ve used Facebook photos.
Step 4: Camera Settings
You’ll want to have a low ISO, a high aperture and a shutter speed between 30 and 6 seconds. Below six seconds would be possible if you’re using a program to flick through images automatically. I was using Facebook.
By the way, for those that don’t know, when viewing photos on Facebook you can hit the arrow keys to navigate them.
For Facebook or other Internet-based approaches, click through the album until you’ve got all you need and go backwards so the pictures are preloaded and you don’t end up with shadows of loading icons in the middle of your image.
Step 4: Click and Click

I clicked the shutter and started rythmically tapping the arrow key in as uniform a time as possible, at around a picture every half a second. If this is very hard find a drummer.
Step 5: Results (Oops)

My first set was ruined by the moire effect.
My monitor is 19″ and I put a full screen slideshow of phone photos on the go since they was in a folder called Android which was the first I came across.

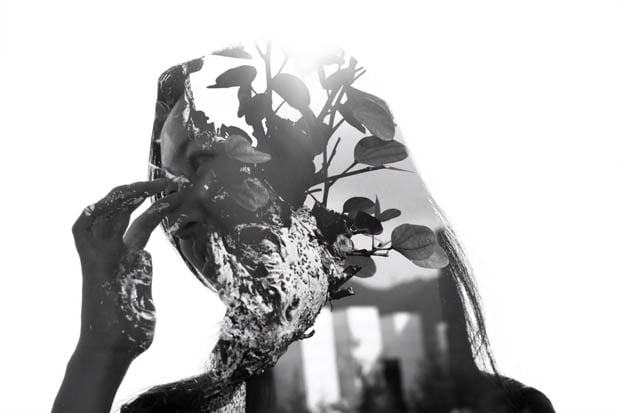
Step 6: Results (Yay)

The main thing about this is that a big screen is best, though resolution doesn’t need to be high.


About the author: Adam Kelly is a Northern Ireland-based maker, working PR for a club in Belfast and freelance photography. He enjoys working with computers, cameras, machinery and bikes. Check out his other projects on Instructables, where he’s known as killerjackalope.