What is Clamshell Lighting and How to Use It for Portrait Photos
If you shoot headshots and/or portraits, clamshell lighting is something you should definitely become familiar with. This versatile and easy-to-create lighting setup produces a very flattering look useful for a variety of portrait situations.
Table of Contents
What is Clamshell Lighting Used For?
Clamshell lighting can create a very flattering look by reducing the strength of shadows visible on the subject’s face. Here are some of the reasons that you might want to use clamshell lighting:
- Flattering Skin: Reduction of shadows to create a more pleasing skin texture by reducing the strength of lines and wrinkles on the face.
- Simple Setup: The most basic setup requires only one light and a reflector, making it quick and easy to set up in a short time.
- Portability: With modest equipment requirements, a clamshell lighting setup can be very portable.
- Avoids Glare/Reflections in Glasses: A clamshell lighting setup often produces little to no glare or reflections in eyeglasses (most of the time) and is easy to adjust if you do get reflections and/or glare by adjusting the height.
Basic Clamshell Setup
Clamshell lighting can be created using just one light and a reflector, making the setup simple and often portable as well. In Figure 1 I have a main light, in this case a beauty dish, directly in front of and above the subject. It is important to not have the main light too high above the subject, as it can make the eyes dark.
To achieve this light placement, I recommend using a boom or extension arm to place the light above and in line between the camera and the subject.
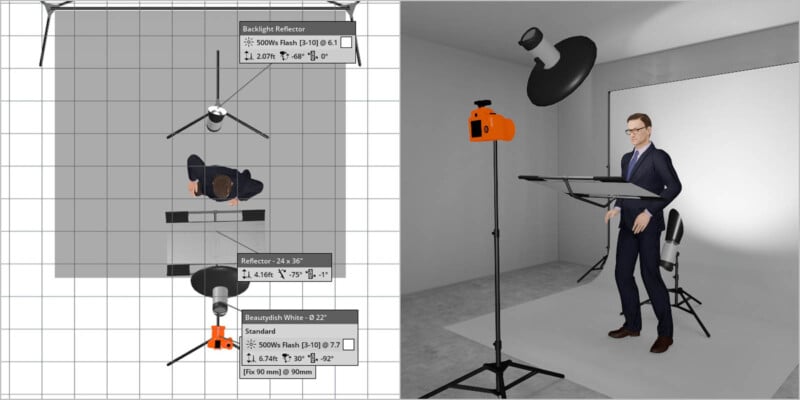
Note: The virtual setup did not offer a boom arm option that I could find, but there is an example that can be seen in Figure 3.
In addition to the main light, there is a reflector just out of view below the subject’s chest. It is angled slightly down as it gets closer to the subject to provide the best angle for “bouncing” the light from the main light into the face. This is what helps fill in shadows created by the main light. How close you have the reflector and the type of material (white, silver, etc) will affect how much of this fill you will get.
You can also see a second light in Figure 1 behind the subject. This light is being used to illuminate the white background in order to have a clean, white background. This background light is not in itself a part of clamshell lighting but if you do need to light your background for your shots, it means you still only need two lights in total to create clamshell lighting.
In Figure 2, we have a photo taken with the setup depicted in Figure 1. This image demonstrates how this simple setup creates a pleasing image. Joe isn’t a model, and this image was shot on location at the corporate offices where he works. However, I didn’t have to do anything here but adjust the image for color and contrast a little in Camera Raw before I made the final jpeg.
Clamshell lighting gives a nice look to his skin without the need to smooth it. This shot also demonstrates how this setup created zero glare/reflection in his glasses. While it doesn’t always eliminate glare and reflections, it is usually pretty easy to adjust the lights and/or angle of the subject’s head to greatly reduce them. Less time needing to retouch and edit is always a good thing.

Main Light Modifiers
Joe, in Figure 2, was shot with a 22” folding beauty dish with a sock diffuser. This worked fine as the main light for my setup for a while, but eventually I started using a 12×36” strip box for my main light when using clamshell lighting for headshots and here’s why.
Since I often shoot headshots on location at businesses, I occasionally ran into problems getting the main light high enough when shooting. Some spaces with lower ceilings could be an issue when photographing taller subjects, which I ran into more often than I would have expected.
Using a strip box set horizontally helped provide extra clearance for locations with low ceilings. It also turned out that I also preferred the quality of light that I was getting from my strip box. I went from needing to use it for some situations to it becoming a permanent part of my headshot clamshell lighting setup.
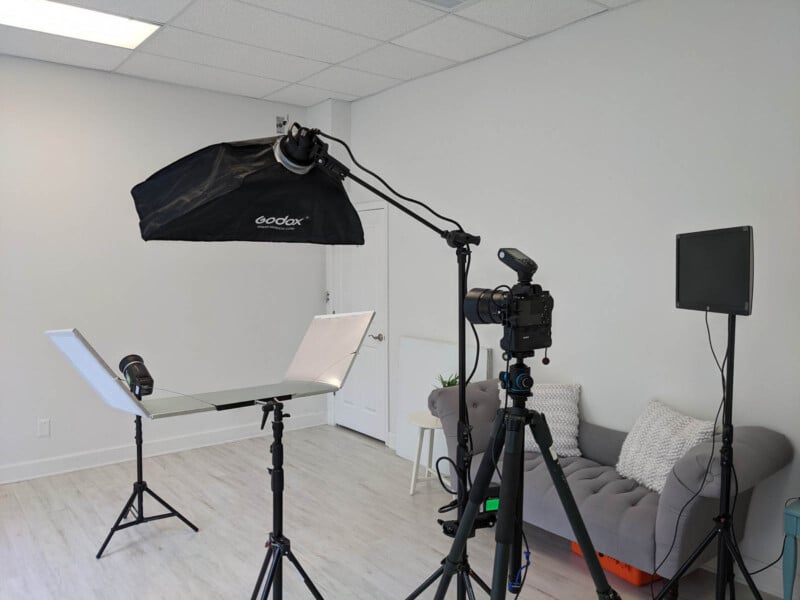
You can see the clamshell setup in Figure 3 that was my go-to for several years. You can see that the lighting gear needed is pretty compact, even when bringing a second light along for background lighting.
That said, you can use any shape modifier for your main light source that fits your needs. I would still recommend using a medium-sized modifier as larger ones can flatten the overall lighting too much by “wrapping around” the subject too far, but that’s entirely up to you and your desired results.
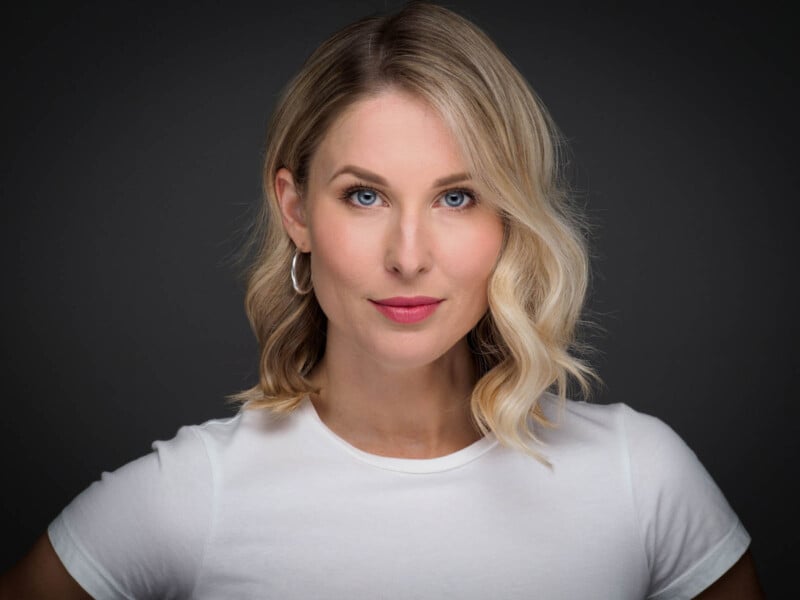
In Figures 1, 2, and 3 I’m using a light on the background. In the lead image to this article and in Figure 4 you can see how this setup works with just the main light and no background light. You can get the background a little lighter or darker by having the subject closer or farther from the background.

Reflector Options
Looking closely at the eyes in Figure 4 the catch lights show that I’m using my strip box here as a main light with its telltale shape reflection in the eye. You can also see more catchlights in the lower portion of the eye in Figure 4 than in Figure 2. This is because instead of using a flat reflector, the one I’m using has angled “wings” that provide a bit of extra side-lighting (visible in Figure 3) which further reduces shadows on the face and also makes the eyes nice and bright.
If you look at Figures 2 and 4, you can see how the neck and sides of the face are more evenly lit in Figure 4 thanks to the extra light being bounced from the “wings” of the reflector seen in Figure 3.
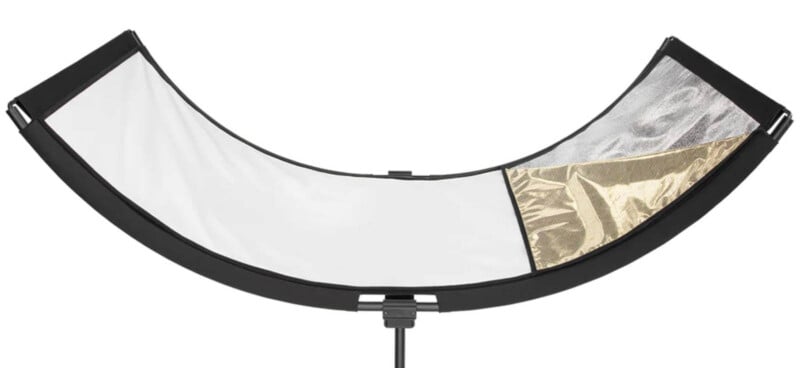
A similar look can be achieved using products like Westcott’s Eyelighter shown in Figure 5. The Eyelighter, and similar reflectors, are curved reflectors, designed for use in portraits and headshots as part of a clamshell lighting setup. These may also offer silver, white, or gold surfaces as options.
Clamshell Setup with Two Lights
While there is a pleasant simplicity to using a reflector for the lower portion of a clamshell lighting setup, there is no reason you can’t use a second light instead. In the diagram in Figure 6, I’ve replaced the reflector with a second strobe and strip box placed in front of, and below the field of view.
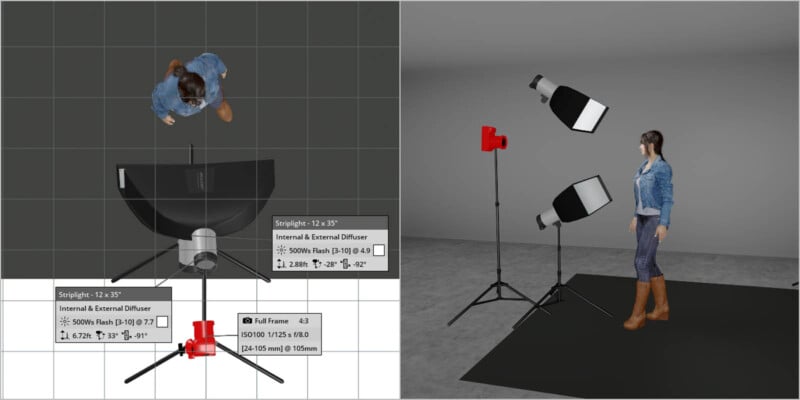
White this requires some extra kit in the form of the additional light, strip box, and light stand, it adds more control over how much light the model is receiving from the lower portion of the “clamshell”. In most cases, I’m happy with the results I get out of the one light plus reflector setup. However, for fashion, advertising, and other situations that may require precise control over the brightness of each light source, using a light instead of a reflector might be best.
The lower light, like the main, can be whatever best fits your needs, so it doesn’t necessarily need to be a strip box as shown in Figure 6. I feel it’s the most practical, though, as the space in front of the subject can quickly get crowded.
One thing I prefer about using a reflector is the option to have a curved or multi-panel surface that can wrap the light from below in a flattering way. Almost all softboxes are going to be flat which can’t produce the wrapping effect I like. I say “almost” because there is one option I’m aware of that can do this.
The Outlier
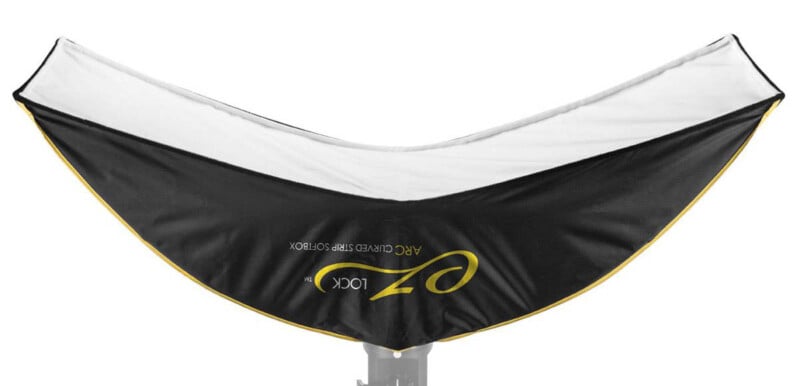
The Glow EZ Lock ARC Curved Strip Softbox is, as the name suggests, a strip-type softbox that is curved. As far as I know, this is the only strip box that is shaped in this way. As shown in Figure 7, the shape of the ARC lends itself very well to use as the lower portion of a clamshell setup.
I have actually owned one of these and used it for headshots and portraits for a time. While it did do the job, I preferred the simpler one-light, one-reflector setup. For those looking for the combination of shape and light control this offers in a clamshell setup, it might be worth looking into if it is available to fit lighting gear.
Note: I believe the ARC Curved Strip Softbox is only available in Bowens mount. It may be possible to change the speed ring to mount on other light systems.
Conclusion
While clamshell lighting is somewhat specific to portraits and headshots, it’s a very handy option to have in your lighting recipes. Since it can be done with only one light and a reflector, the cost in equipment is relatively low.
As the physical components are relatively small, the overall kit can be very portable, which is great for both studio and location situations. Also, the flattering nature of clamshell lighting can produce results that require less post-processing, which saves time in delivering images to clients. Figure 8 is one of those images that only required the removal of some stray hairs, but otherwise no other edits were needed.

In my own use, I’ve employed clamshell lighting for the 1,900 plus headshots I’ve done over the past decade. During that time, I’ve updated and refined the setup to fit my needs to the point where it reliably gives me the results I’m looking for, and the images require very little post. If you want repeatable and flattering results, clamshell lighting is definitely worth trying out.