How a Photographer Built the Ultimate DIY Digital Clock Inside a Flash Unit
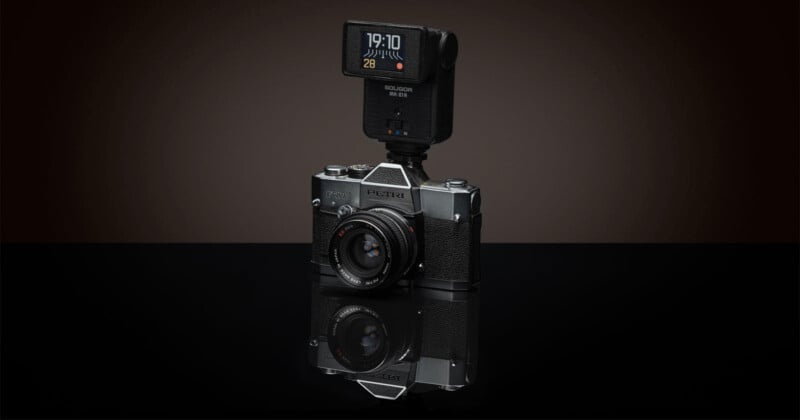
Finnish photographer Petri Damstén crafted a digital clock within a flash unit using a Raspberry Pi Pico, and it looks like a delightful accessory that many photographers would pay good money for.
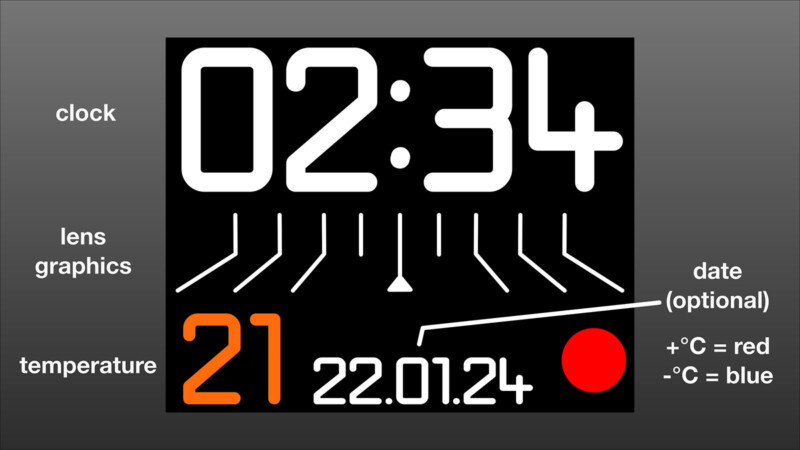
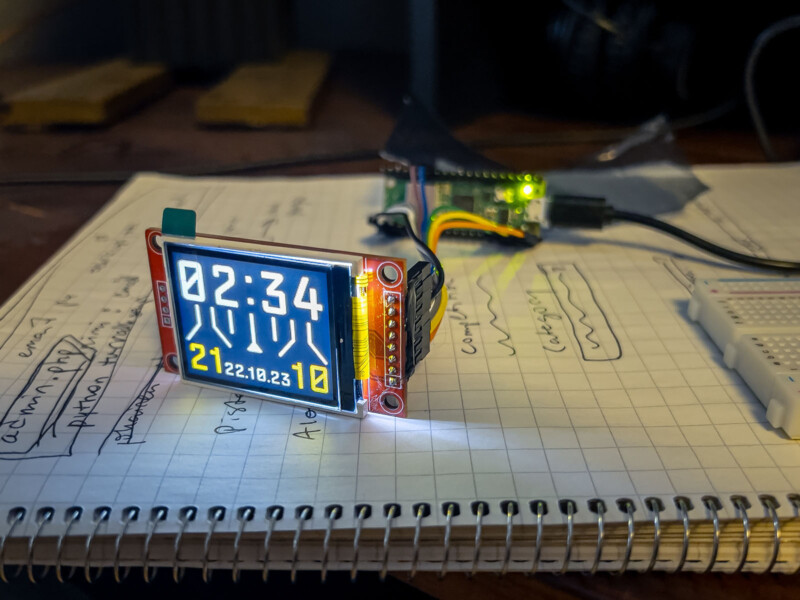
The digital display fits into where the diffuser panel once was. It mimics the simple aesthetics seen when on camera lenses to perfection. At the top, in large, easy-to-see numbers is the time. Below that a graphic reminiscence of depth of field markings seen on lenses. This part is just for aesthetics, but it’s a nice touch.
In the last row is further information, starting with the temperature at the far right. The simple number is meant to look like the focal length markings in orange also seen on lenses. To the right is a dot, which, when orange, indicates that the temperature displayed is above freezing (all in Celsius), or below freezing, if blue. In the middle of this row, users have the option of displaying the date.
“The idea of a camera-themed clock originated from my interest in photography. Another concept I had in mind was a Back to the Future DeLorean time machine-themed clock, but that might be a project for another day,” Damstén says in a blog post detailing the project
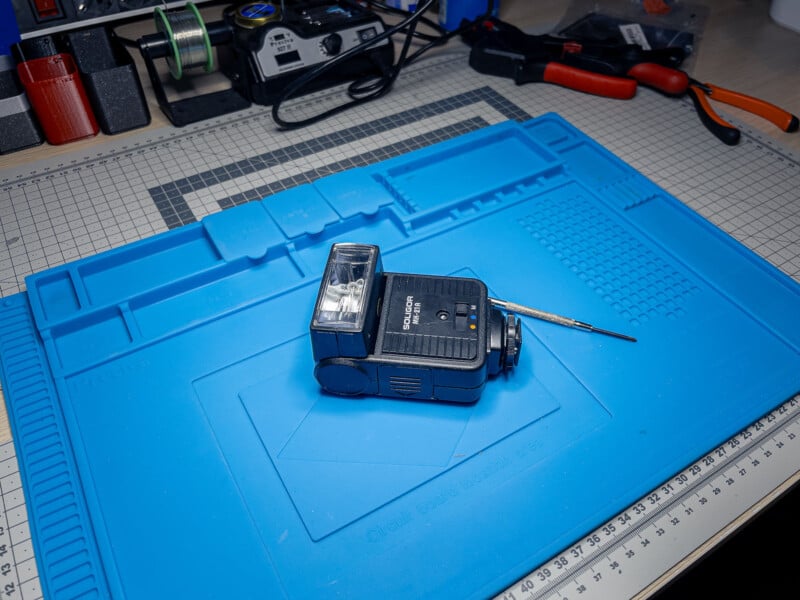
This DIY project looks incredibly impressive, but the process putting it all together is even more fascinating. Initially, Damstén thought of 3D printing a flash unit to house the clock display and electronics. But the photographer realized it was easy to find a used one for little money and determined it was worth it for the more authentic look. Damstén even tried to find a broken flash unit which would have avoided taking apart working gear, but wasn’t able to find one.
With the body ready to go, Damstén still had to figure out how to get the actual clock part working the way he wanted. Accuracy was of the utmost importance, and the photographer’s first go was off by a month.
“The absolute requirement for this clock was that the time is automatically set. You just plug it into the power source, and it shows the correct time,” Damstén said.
“I selected the Pico W with Wi-Fi since I was planning to use the internet for accurate time and temperature,” he later added.
Another key feature for Damstén was truly capturing the lens look.
“I wanted a font that resembles engravings in old lenses. I could not find one that I was happy with, so I decided to create my own font for this project (SVG, TTF on GitHub). The CircuitPython fonts are 1-bit fonts and appeared jagged, so I coded my own simple font system too,” Damstén says.
There were other obstacles, including a too-bright display and an overly blue palette, but Damstén was able to sort out the details with some coding behind the scenes.
“All in all, it was a nice little project,” Damstén says. “MicroPython is suitable for these types of projects, especially for beginners.”
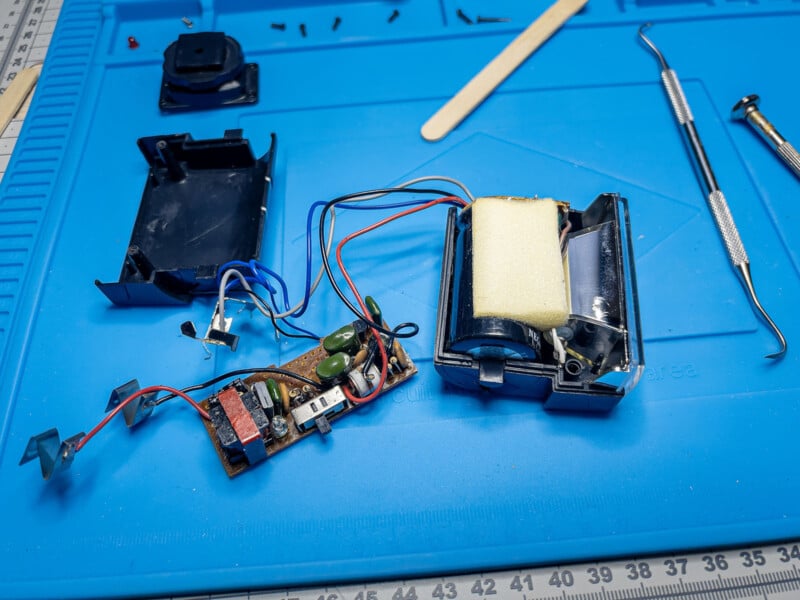
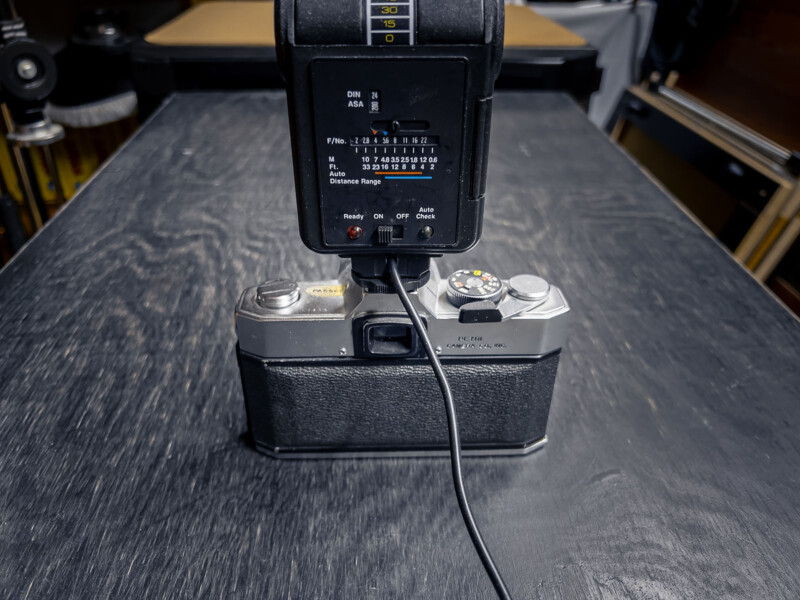
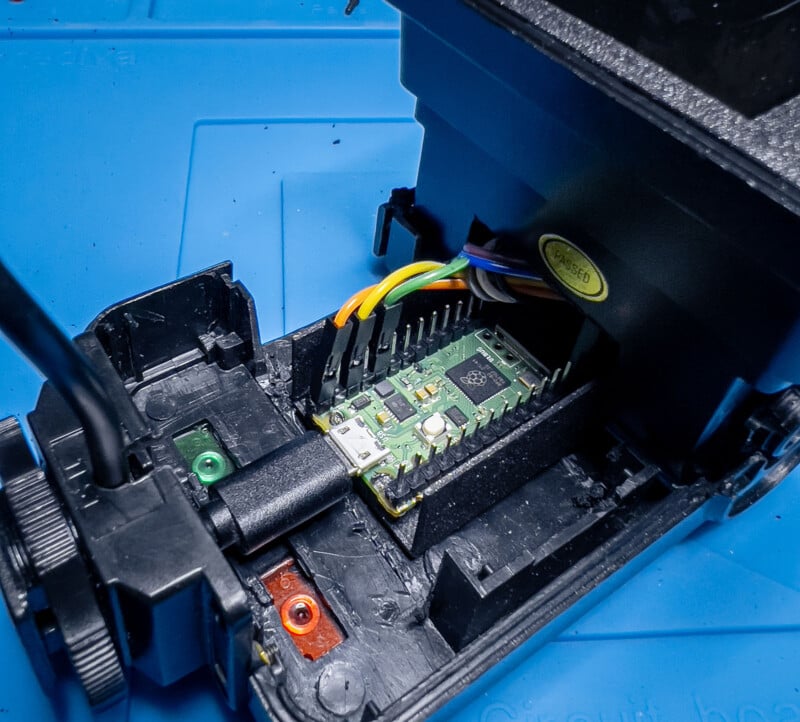
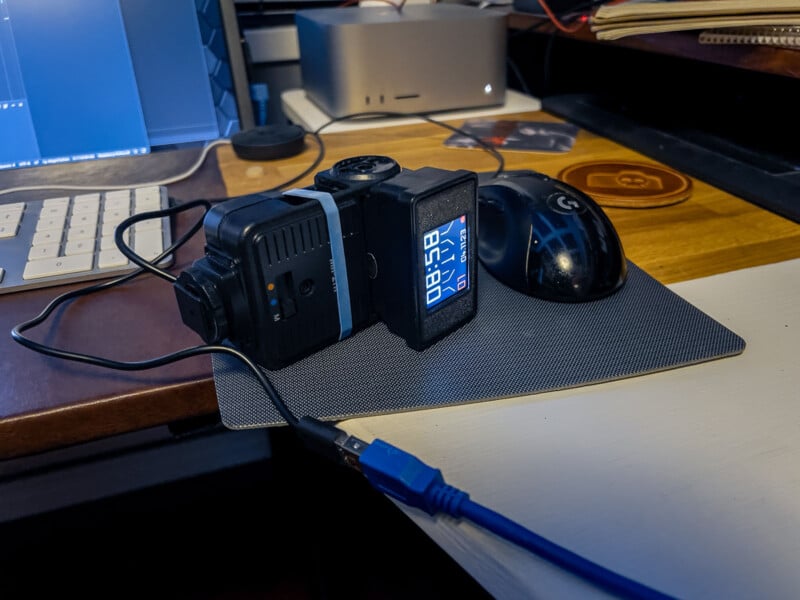
He removed the existing electronics and modified the battery compartment in the flash unit, but the display and Raspberry Pi Pico fit perfectly inside. A USB cable stretches out the back, which is nicely hidden in the final display mounted atop a camera. Even better? The camera holding up the tricked out flash clock: It’s called a Petri, the same as Damstén’s first name.
Image credits: Photographs by Petri Damstén