6 Tips for Pushing Your Drone to Go the Distance (and Make It Back Again)
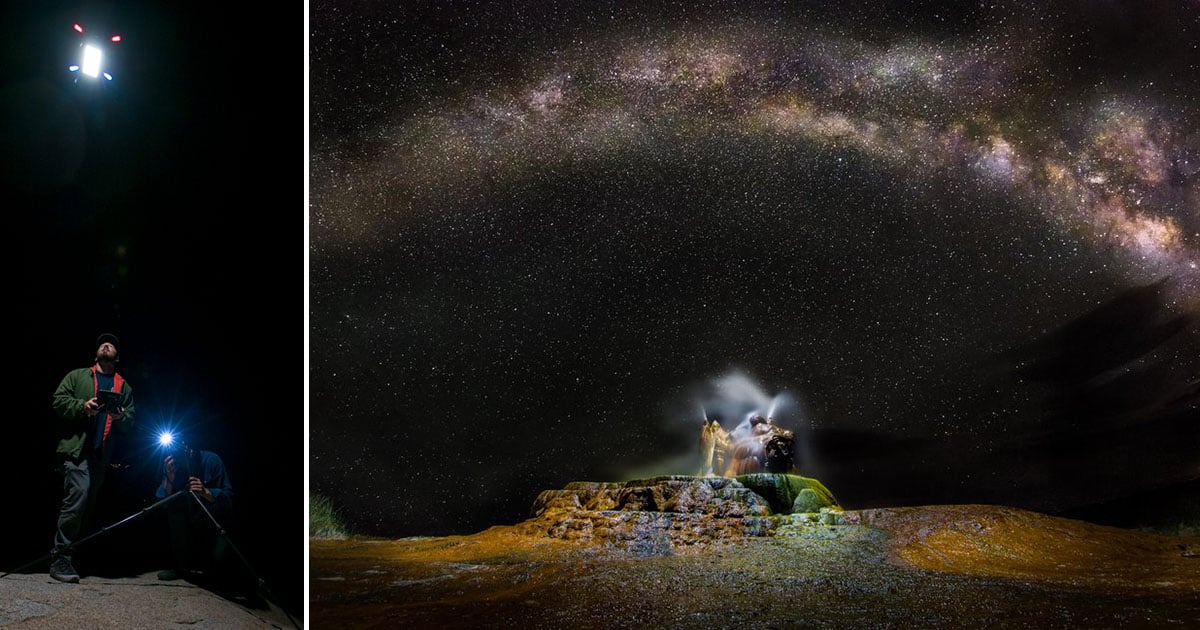
A few months ago I headed to Iceland to check out some of the beautiful scenery the country has to offer, which, as many of you who have visited or are following Icelandic photographers on social media will attest to, is a considerable amount.

Being presented with vast expanses of empty space is both daunting and fun. You can expend an entire drone battery (or five) exploring the terrain from above, looking for interesting formations or patterns, but often pushing your drone to distances that can be risky depending on weather conditions. Some of my flights there ended up being 12-15 km round trips just so that I could try to find some new or unique angles.
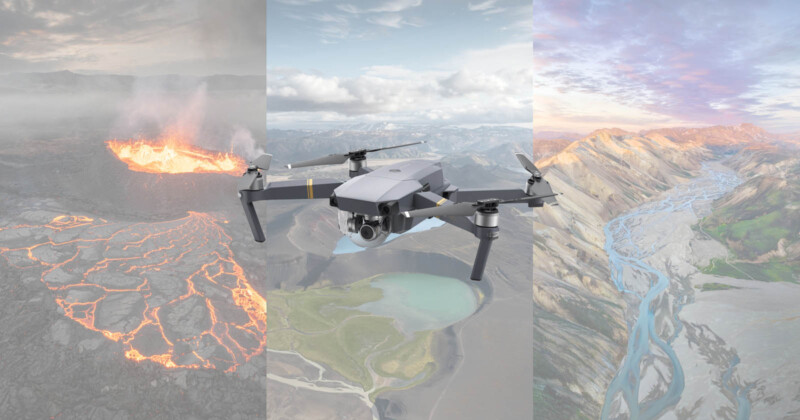
Fortunately, the release of DJI’s Occusync4 (O4) offers a strong transmission system with a range of up to 20km (12.9 miles) and safer flying with a smoother, more stable connection. While most users are just looking for a stable connection over short distances, the promise of better range and increased battery life means that there are situations where you can push your drone further.
In this article, we’ve looked at when you might want to do that, and if you do so, how to ensure you can get your drone (and all your beautiful photos and videos) back to you in one piece.

Tip 1: Do Your Research – Awareness is Everything
Google Maps is your best friend, not just to see what’s in the area but also to measure the distance from your current spot to where you want to go. If you’ve seen somewhere that you like, be sure to measure the direct distance on Google Maps as the crow flies – it can be the difference between even attempting the flight or finding a way to get to a closer take-off point to ensure you get the drone back.
It’s also worth noting that when DJI advertises a 20 km transmission signal for their drones, they’re a. talking about optimal conditions and b. mean that if you were to push that distance in a single direction, it would most definitely be a one-way trip (there are plenty of videos on YouTube that attest to this). For larger drones like the Mavic 3 series, a 5 – 8 km flight distance is doable with favorable conditions. For the Mini series, I’d exercise caution as return-to-home (RTH) speed is slower and the drone can struggle with higher wind speeds.

Tip 2: Check the Weather – Wind Speed & Direction in Particular
The number of people who don’t check wind speed and direction before they fly long distances blows me away – pun heavily intended. Weather apps like Windy, UAV Forecast, and Aura offer comprehensive information on wind speeds at different times of the day and, more importantly, at different altitudes. That’s because you should know that wind speeds at an altitude of say 500m are going to be wildly different to wind speeds experienced closer to the ground. Drones can expend a fair chunk of battery power climbing to altitude, and expend even more trying to remain stable at that height under windy conditions – add on the wind blowing in the opposite direction to RTH and you’re going to have a tougher time getting the drone back and will need to account for additional battery accordingly. If you’re flying out into the wind it can be the opposite situation, with it being a really slow slog to get your drone to your desired point, but favorable winds whizzing it back to you as they blow back towards you.
Ultimately you’ll need to decide when you take off, but having an awareness of conditions will aid you in the mental calculations for when you might need to turn back, lower the drone, or in some cases, not fly at all in favor of getting closer.

Tip 3: Drop Your Height for a Faster Return
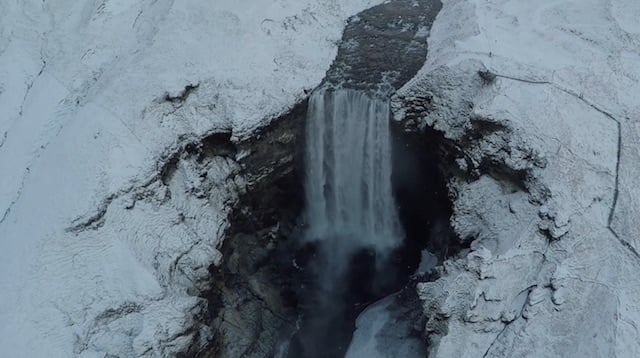
Another tip that some people don’t take full advantage of that relates to the previous tip. If the wind picks up you can usually get a faster return to home flight time by dropping your drone as low as you think is safe. In Iceland, where the closest thing to civilization in my vicinity was a small tree, I could drop the drone to around 10m to ensure it fought less against the wind on the way back. You’ll need to be aware of the terrain and any obstacles in your path – I’d advise going higher if you think there’s a potential risk of knocking out the power to part of a country by accidentally hitting power lines…
DJI drones also have an auto-landing protocol in place when the battery level dips too low. If you ever find yourself in this situation don’t panic. If you’re at a high enough altitude you’ll have some time to bring the drone back towards you and either get it back safely or find an area where you can pick it up once it has landed.

Tip 4: Manual Return to Home in Sports Mode
If you’re flying long distance and want to bring your drone back, don’t just hit the RTH button and relax and have a cup of tea. Depending on whether or not you’ve set a suitable auto RTH height, your drone could waste additional energy getting to the set altitude before it begins the journey back. Manual RTH gives you full control of everything – speed, direction, altitude – you can use the right mix of these to get your drone back to you more efficiently than the automatic setting would. Fly manually and fly conscientiously – you’ll get your drone back faster.

Tip 5: Pre-flight Checks to Avoid Issues
We all get excited when conditions are in our favor, sometimes to the point that we’re in a major rush to launch the drone and begin capturing some great stuff. Just before you take off, take a deep breath and relax – this will help you stay calm and focused before, during, and after your flight, ensuring that you don’t miss things like the all-important pre-flight checks. Before flying for long distances I actually conduct two checks – one with the drone switched off, and one with it switched on hovering above me.
For the first check, look for any visible damage – even with the DJI prop guards the props can become dented, bent, or scratched, and, while the drone might still be able to fly with no apparent problems, the flaws can result in additional energy being used to correct the deficiencies in aerodynamicity. Be sure to switch out any damaged or bent props that could result in battery life being consumed faster – especially if you’re planning on flying long distance.
The second check is also important but often neglected. Once the drone is in the air, the general tendency (for me anyway) is to just send it as fast as possible to get to the location in time. You might be in a hurry to capture sunrise or sunset, but take a few extra seconds to confirm that the drone is flying well. This includes looking for any warnings or notifications in the app, listening for any abnormal noises or sounds from the propellers, and checking visually if the drone is flying as it should be.

Tip 6: Use Your Best Batteries, Charge Them and Check Them
Unlike Paul Rudd or Cher, batteries don’t tend to age well and are affected by storage and usage conditions, usage frequency, and use habits. Extreme examples of battery aging include things like the corrosion of the collector, the decomposition of the electrolyte, structural disorder, and decomposition of the cathode, not to mention the formation of ‘dendrites’, tree-like structures that grow throughout the battery over time that can drastically reduce performance.
If you want to fly further, store your batteries properly, preferably in a non-humid, room-temperature environment. Use newer batteries where possible (check their charge cycles in the DJI app), and conduct a check of the cell voltages in the DJI Flight App to ensure that the cells are all showing green (4.35 V–3.62 V). DJI uses high-voltage batteries, so anything below that should result in a warning notification and require a switch to a new battery.
As a final word, flying long distance requires sound judgment of your own circumstances, ability, and weather conditions to ensure you can get the drone home safely. Please remember to abide by local laws, be aware of your environment and flight path (even in remote areas), and do your research and check into the state of the weather and your equipment. If you’re worried that you’re are risk of losing your drone, try to get closer, turn back early…or just don’t try flying in the first place. If something does go wrong, you could be left without your photos/video, and down an expensive drone.
Image creditsPhotographs by Blair Sugarman