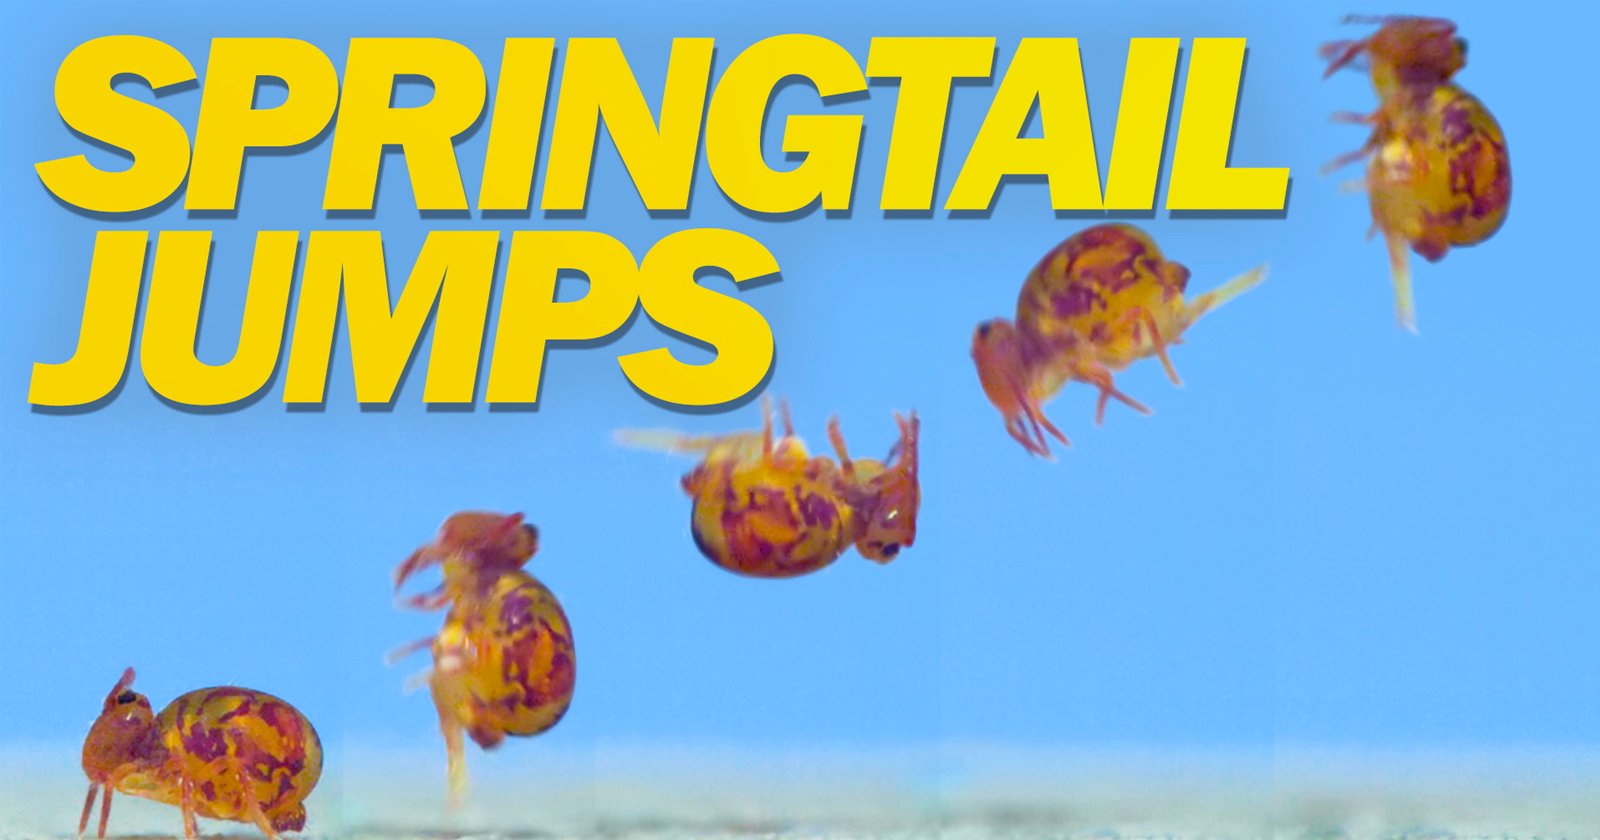
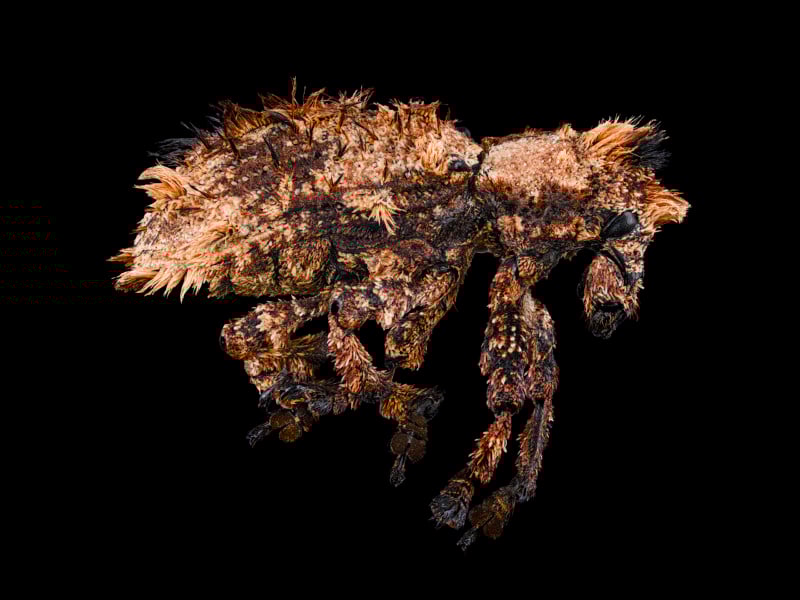
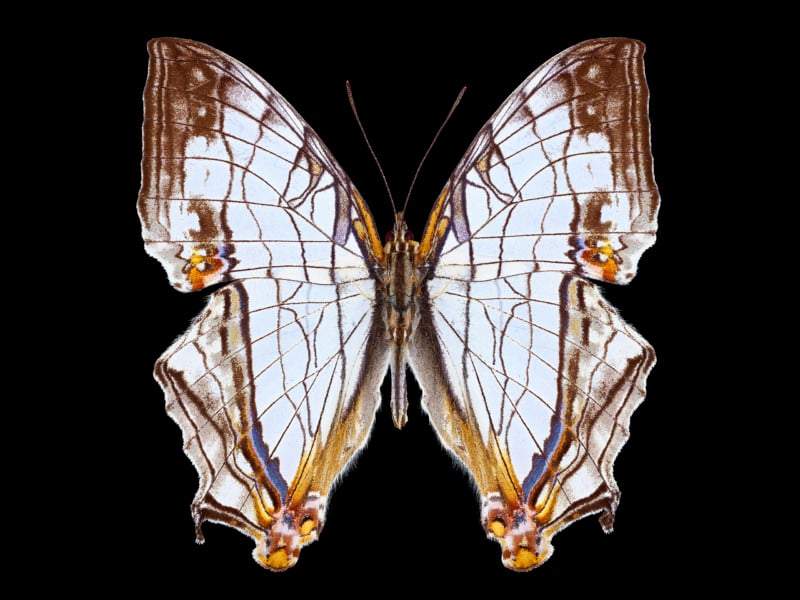
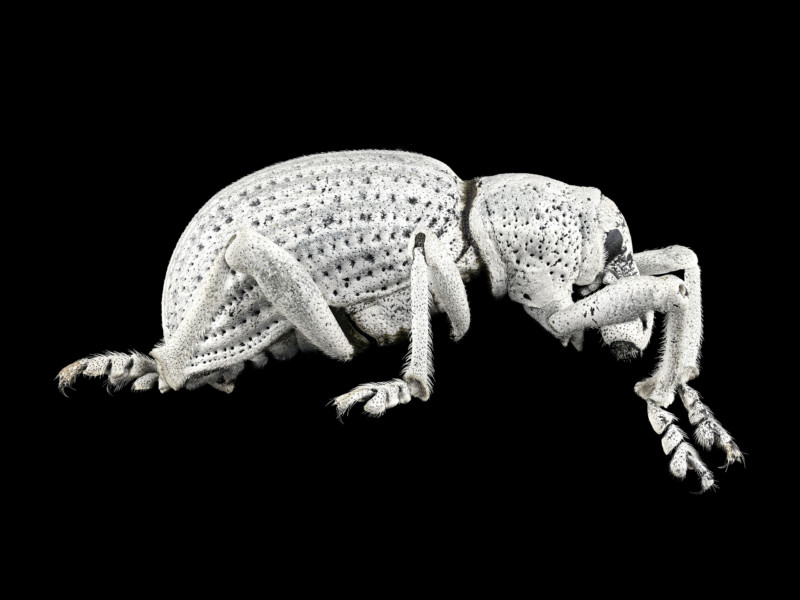
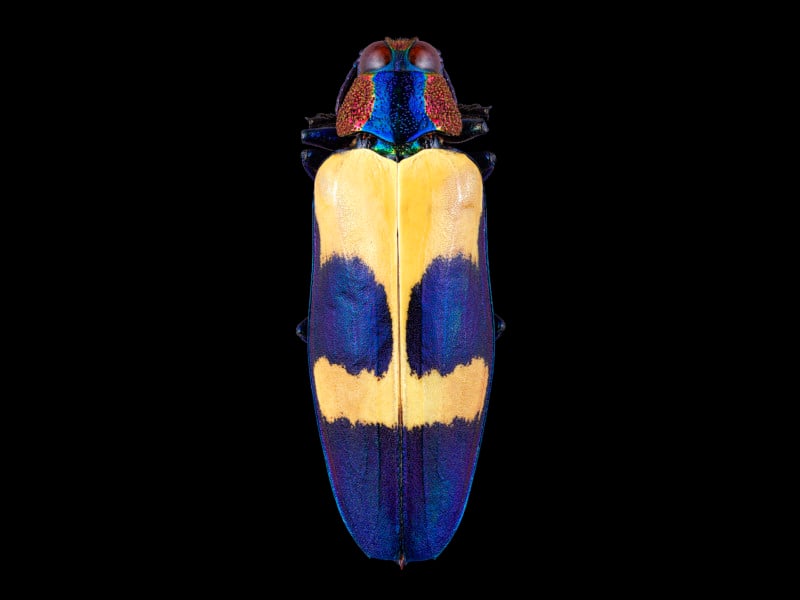
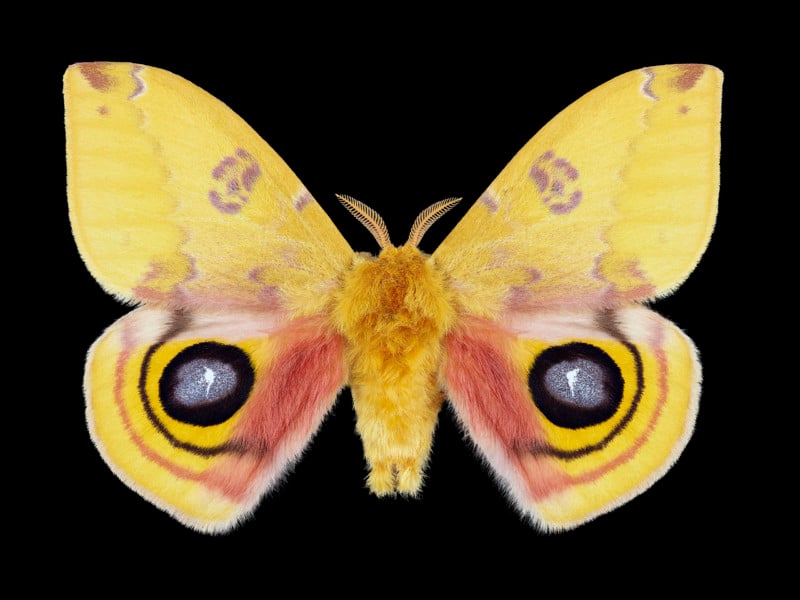
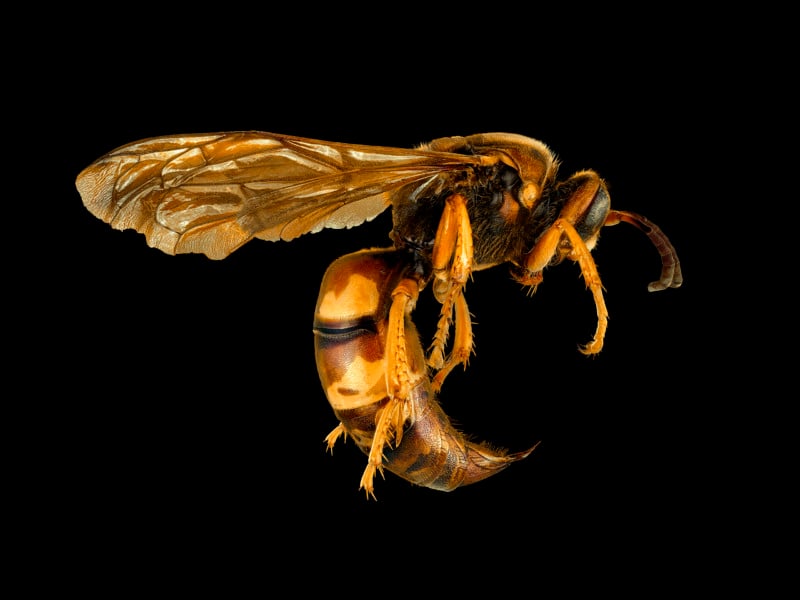
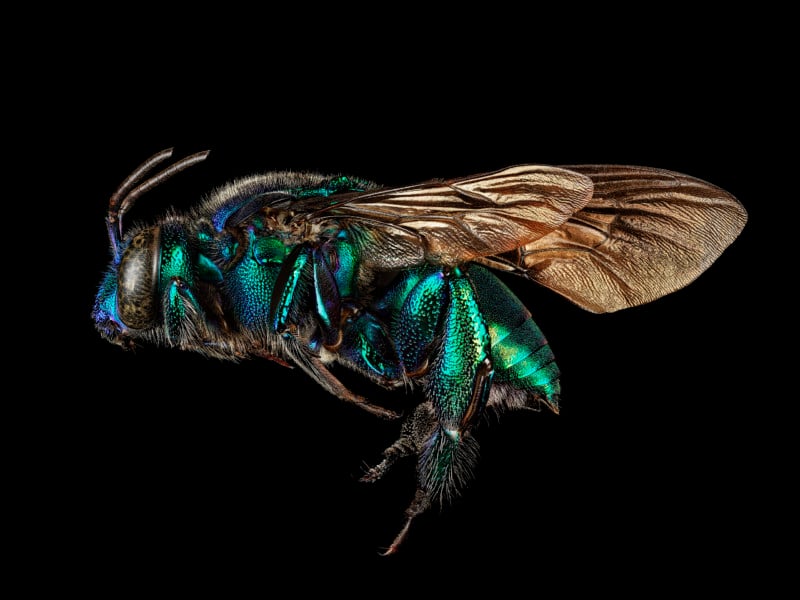
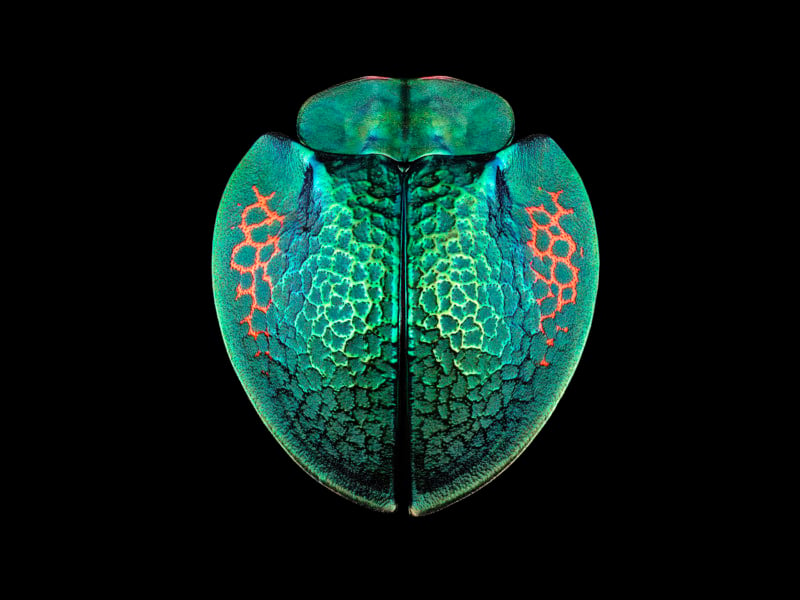
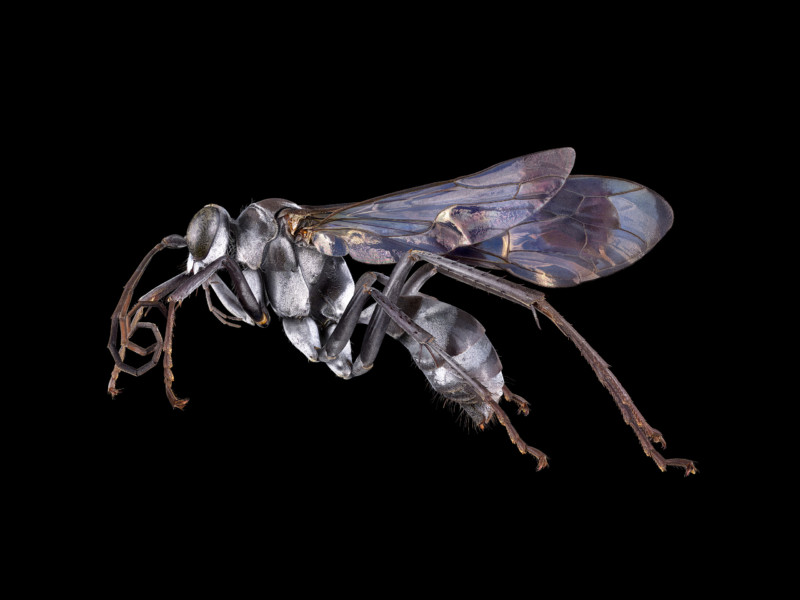
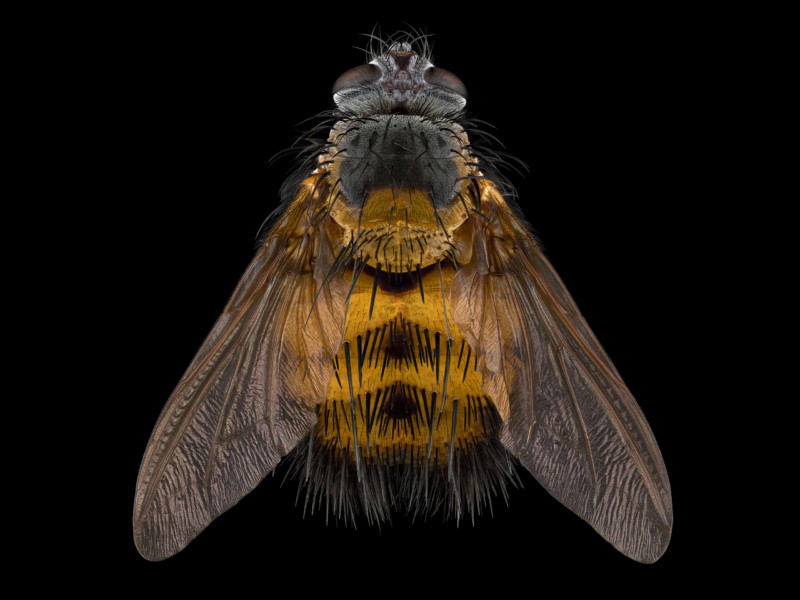
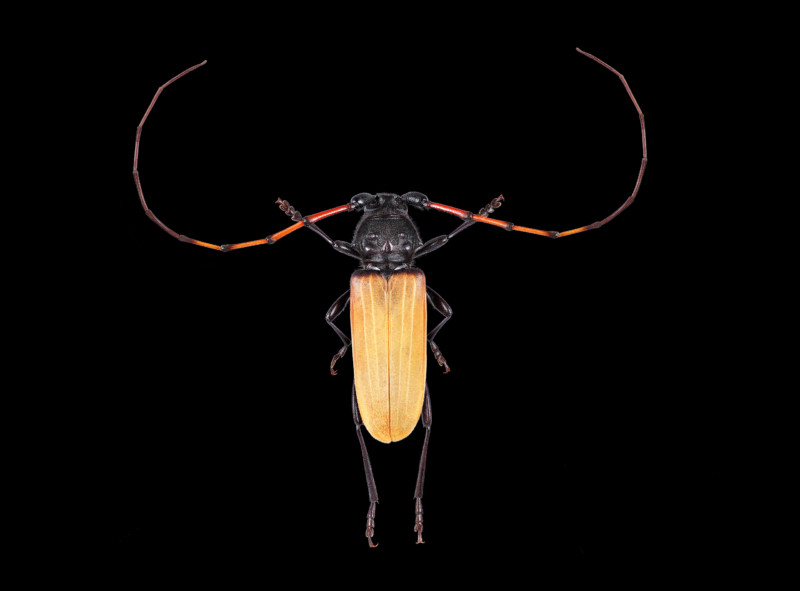
These Bug Macros Required 8,000 151MP Photos and 86 Hours of Editing
Growing up in a communist country, we had no access to or real knowledge of the outside world. With the information that we now take for granted tightly controlled, we were living in a bubble. When communism ended, my entire concept of what the planet and all living things were all about changed quickly and dramatically.
I became a sponge for every type of available data as most was all new to me, with particular emphasis on the natural world of insects. The variety of their patterns, textures, and colors captivated me. For hours at a time, I would watch as many TV nature programs as possible and started collecting numerous National Geographic magazines that had an emphasis on insects.
Throughout my life, I’ve had the great fortune to have traveled to over 80 countries, and throughout those trips, I was always on the lookout for the unique and endemic species of those locations. I wanted to see for myself the species that I studied and knew so well and experience their native environments. It is then no wonder that I had always envisioned doing a photography project where I would capture that diversity in as high a resolution as possible. I just never imagined it would take me over a year and 10 months to complete.
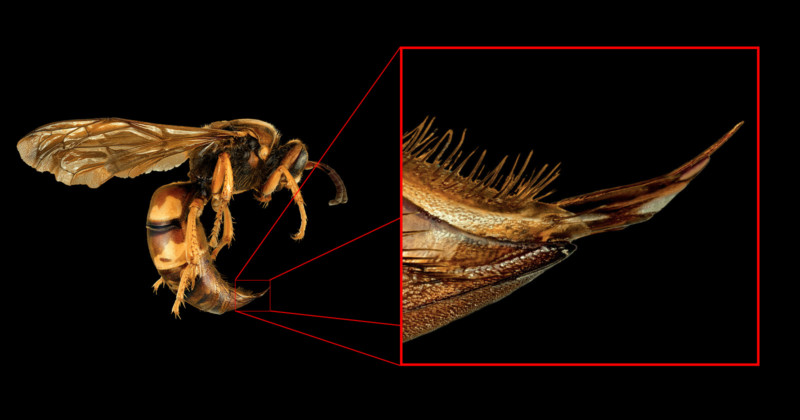
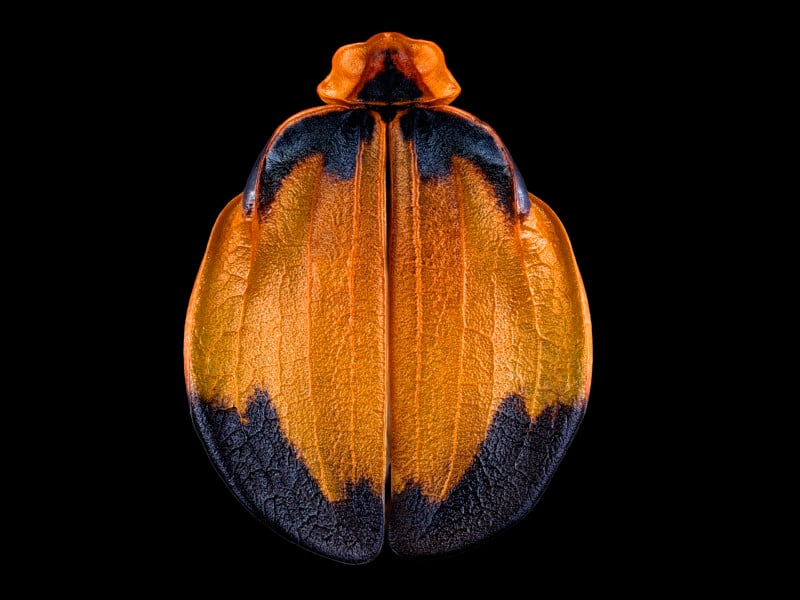
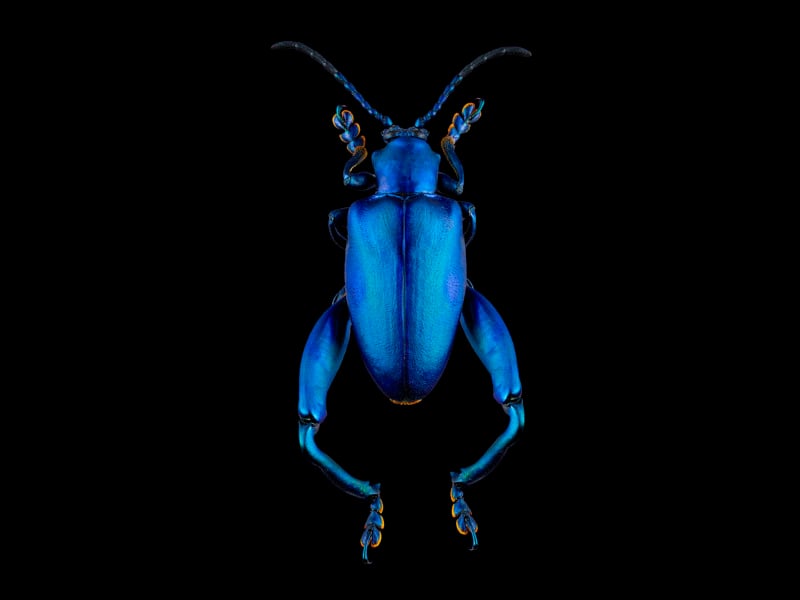
Editor’s note: The photos included in this story should be considered at best previews, as the full-resolution files are available on Duman’s website and allow for a fully dynamic viewing experience. Each finished photo is made up of 8,000 individual stacked frames taken with a 151-megapixel camera, which results in some of the most intricate detail of these specimens ever captured. It is highly recommended that readers enjoy the photos there.
Collecting the Specimens
The first order of business was to find the specimens. In order to be suitable for this project, they must have unique features, varying colors, and be in good condition. This sounds easier than one may think. To increase my chances, I partnered up with the entomology department at the University of California, Riverside as well as the Natural History Museum of San Diego. They were both generous enough to give me full access to their collections, and the University alone had 4.5 million specimens. As one of the largest faculty collections in the U.S., it took hours and multiple trips to have my first set of insects.
Photographing the Insects
With the samples chosen, my attention turned to how to actually shoot them. Researching online, everyone had their recommendations on the setup, lighting, composition, and gear. I was in a rather unique position because I was shooting on the world’s largest sensor and on a prototype medium format camera. There was no write-up on how to use this gear for this project because as I quickly found out, it had not really been done before. The gear I used was the Phase One IQ3 (101-megapixel back) and the IQ4 (151-megapixel back), ALPA 12PFS on a mechanical rail, and the Rodenstock f/5.6 105mm lens. The rail has a repeatable step of one micron (a human hair is 75 microns for reference). Multiple Broncolor Lights and softboxes were used to specifically highlight every section of each insect.
The Process To Make One Photo
Hours and hours of testing spanning over a few weeks led to more of what not to do, countless failed attempts, and many, many lessons learned. It quickly became apparent the magnitude of the project and how many independent factors had to be perfectly in sync for the mere slight chance that I would even get a single image. In the simplest way to express what it took to capture one image:
- Clean the specimen with surgical loupes and camel brush. Try to remove as much of the microscopic debris that is close to invisible to the human eye. The high resolution of the camera will pick up the tiniest of particles. Average time: 30-45mins
- Set up the lighting and composition to highlight unique features of specimen. Average time: 30mins
- Set up camera and rail and calculate 3 separate equations to find out the distance from the lens to the specimen, lens to the front of the sensor, and magnification factor. Average time: 45mins
- Depending on depth of specimen, calculate the numbers of focus stack. The incredibly shallow depth of field, as a result of the lens only being a few inches away from the specimens that were a few mm in size, meant that I needed to do very deep focus stacks. The larger the depth of the insect, the more stacks were needed. Automate the rail to shoot every 3 seconds and sync with the Broncolor Scorro pack and lights. Average time: 4 hours
- Once all images are taken, they have to be converted from the Phase One IIQ format to TIFF as the stacking software does not handle native Phase One files. Average time: 14 hours; Average number of images: 4,500; the most captured: 8,245
- Once I had all TIFF files, I could import them into the stacking software (Zerene) and start the process of flattening them. Custom code was written by the creator of Zerene to accommodate the large number of files. The flattening involved a 25 step process. Only when the software has produced one flat image, you can tell if there was any issue with what you shot (see below). If any issues, I had to start all over with the above steps. Average time: 12 hours
- At this point, the file is ready to be sent to the retoucher. All the microscopic debris that I was not able to clean during the prep stage had to be removed. Adjustments are needed to fix any tiny damage to wings, antennas, etc. Average time: 45 hours, with the longest taking 86 hours
What Could Go Wrong?
With regards to what could possibly go wrong, well it was a lot. Because of the long shooting duration, it massively increases the chance of complications that will render all the work you have done up to that point useless. Anything from the specimen slightly moving due to the pin not being properly secured to batteries dying before a stack was complete, to the flashes not firing happened to me.
Vibration was a huge issue and I had multiple shots ruined because the AC turned on and caused vibrations in the floor, my wife opened the garage door, an earthquake hit, and even just walking close by would show up as soft spots when you do all the steps and see the final file. This is not fixable in post-production and I had to restart in every case.
The rail, being a prototype at the time, had some issues skipping some stack steps and I had to consult with the ALPA team in Switzerland who were instrumental and incredibly helpful. They had to send me new gear and test it before resuming.
Running out of hard drive space was also a constant issue. The IIQ files are 195-megabytes each and with the deepest stack being just around 7,000 images, it was a massive scramble to stay ahead of the storage needs. G-Technology (now SanDisk Professional) were kind enough to provide me with a slew of fast, dependable, and high-capacity drives that allowed me to keep shooting.
Overall, I shot over 75 specimens successfully and probably 30 that failed, with only 24 fully processed in post and available for viewing on the site.
Designed for a Dynamic Viewing Experience
From the very outset, I knew that once I had the final files from the retoucher, they had to be seen in a more dynamic way than just exporting to jpeg and uploading to the site. I wanted the viewer to have the flexibility to zoom in and navigate on the full high-resolution TIFF file to truly see the incredible detail. Finding the software that allowed me to do that was incredibly challenging.
Months were spent investigating and researching and ultimately had to rely on a few contacts that helped custom build code for a software that did not quite do what I envisioned. Now, when someone visits ExoSkeleton, the controls at the bottom of the image will allow them to see every section of the specimens in the highest resolution and navigate around the entire frame.
An Incredibly Challenging Project
Without question, this was the most complex and time-consuming photography project I have ever done. There were many times when I wanted to quit because it felt like I was trying to achieve the impossible. It felt like I was hitting dead ends at every turn and when I would find a solution to one issue, it would uncover three more. However, I am glad I stuck through with it. I love the way the images came out and with the custom-built website for the project, I feel I was able to achieve a vision that I had been yearning to do for many years.
About the author: Andrei Duman is an award-winning commercial, conceptual, travel, and aerial photographer based in Los Angeles, California. His work is disciplined and driven by his passion to push boundaries with regards to what is possible with photography. His shoot concepts are usually complex with incredible attention to detail, all the while staying authentic to his ultimate vision. His photos are clean, technical, powerful, and evocative. They encourage the viewer to look beyond what is right in front of them to the scale and breadth of what surrounds us. More from Duman can be found on his Instagram.