Local Adjustments in Lightroom for Midtone Control
In most images, midtones carry much of the important information. This is not true for all images, but those are the exceptions. In this article, I will present an approach to control midtone information from color to tonal structure.

Start with Global Adjustments
This is true in Photoshop as well as in Lightroom that we start by making the global adjustments then move to control various parts of the image. Photoshop offers far more flexible and nuanced tools for all these adjustments, but Lightroom now has a few tools under its belt. Depending on the need, we can use the graduated filter, the radial filter, or the brush tool for local adjustments. I would like to focus specifically on the range tool that can be controlled by color or luminance when using any of the local adjustments.
Add a Radial Filter
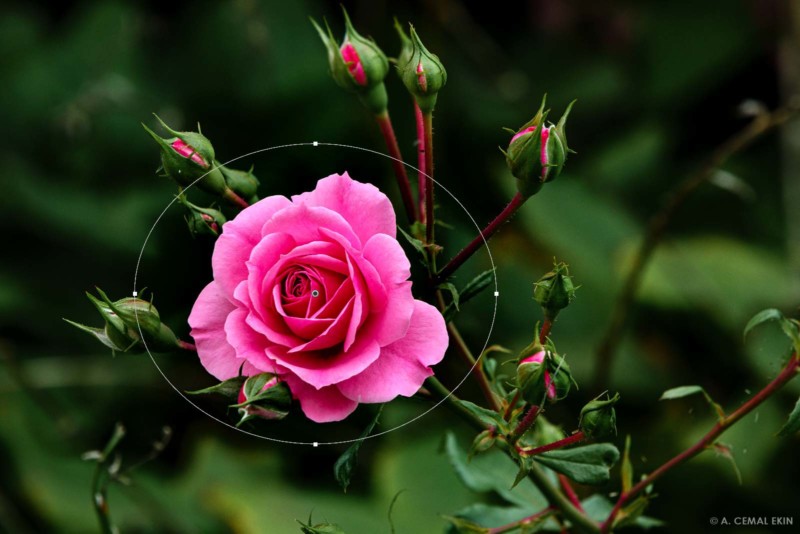
This tool allows us to draw an ellipse around the area we want to adjust or exclude from the adjustments. In other words, the adjustments can be applied to what is inside the selection ellipse or outside. In this article, I will use it to limit the adjustments to the inside area of the radial filter.
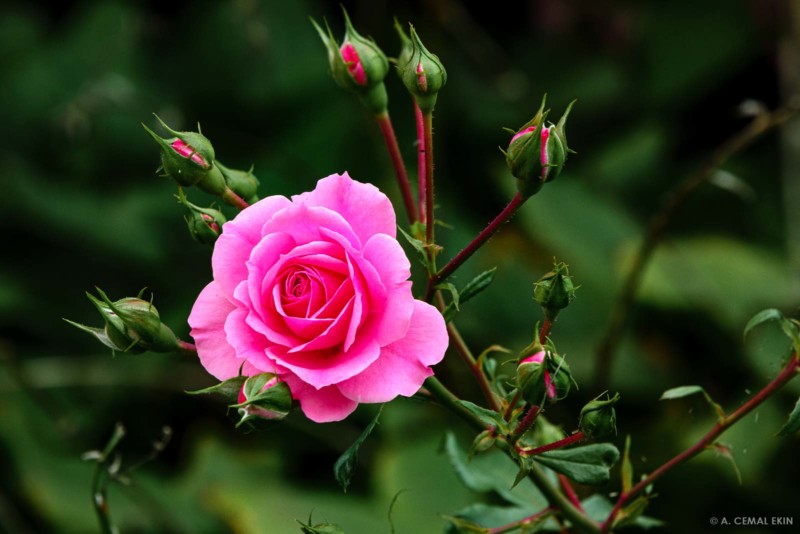
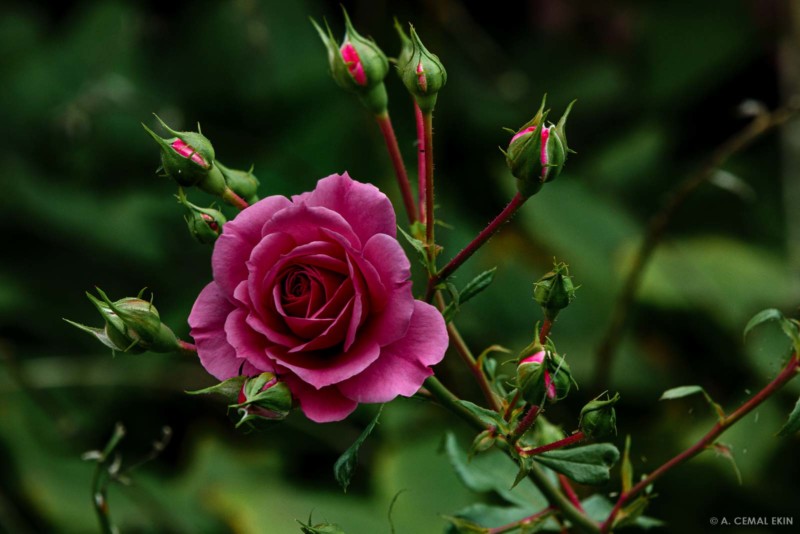
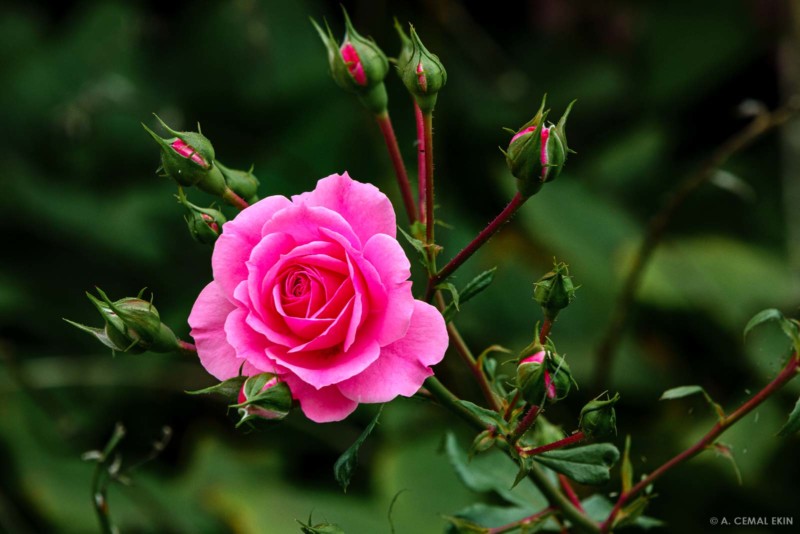
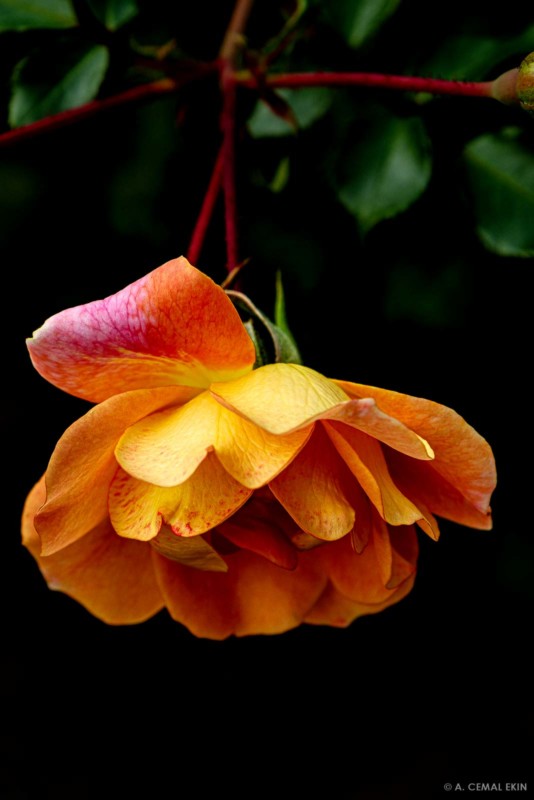
The rose in the image with only global adjustments has something akin to the magenta bloom that plagued the earlier digital cameras. With the global adjustments, I brought it to this point. If I lower the Exposure, Highlight, or Whites sliders the entire image will be affected. To limit the adjustments to where the rose is, I start by drawing a radial adjustment tool. The impacted area gradually tapers off from the center toward the edge of the filter area. That fade is controlled by the “Feather” slider of the tool.
Restrict with Luminance Range Mask
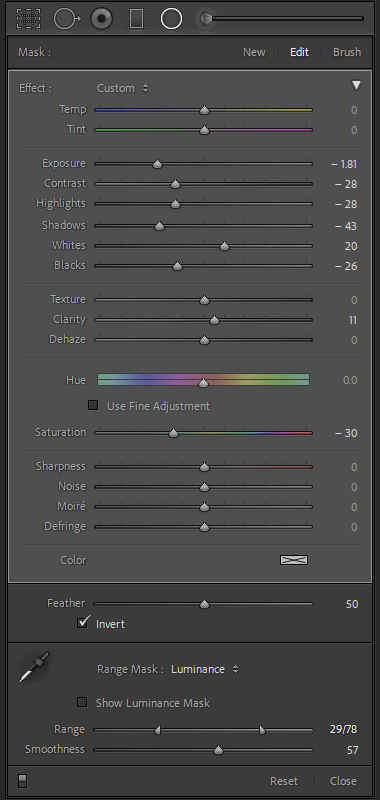
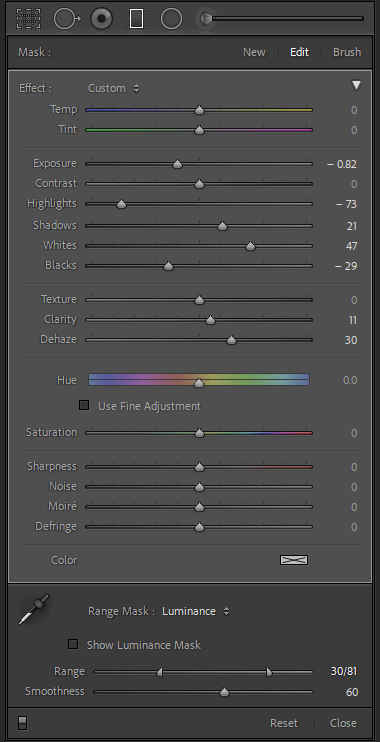
To restrict the adjustments to the midtones while leaving the highlights and deep shadows, I turned on the range mask by selecting the “Luminance” option. I will show how the other, color option works in a bit too.
Look for the luminance range with upper and lower ends movable. Currently, they are at 100 and 0. Dragging the upper edge towards the left protects the highlights above the selected point and, dragging the lower edge to the right protects the shadows and blacks below it. As we make various adjustments, both endpoints are still under our control, and we can even slide the range up and down by picking it from in between and sliding the scale.
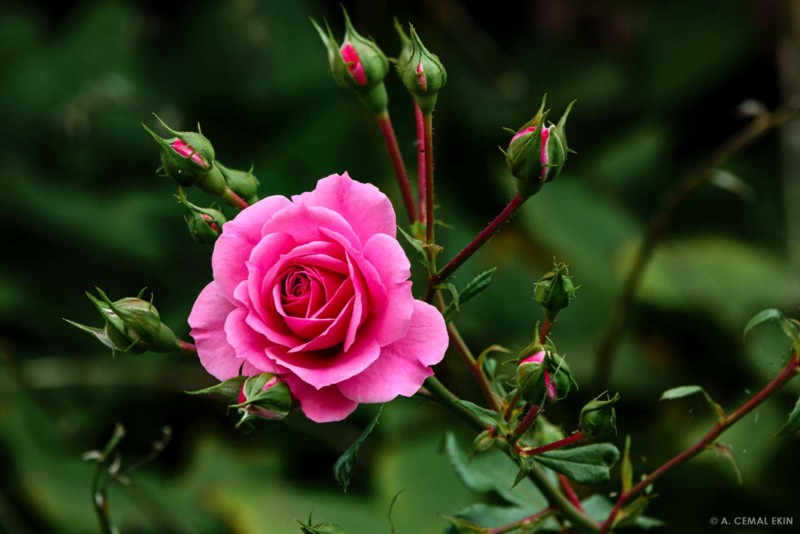
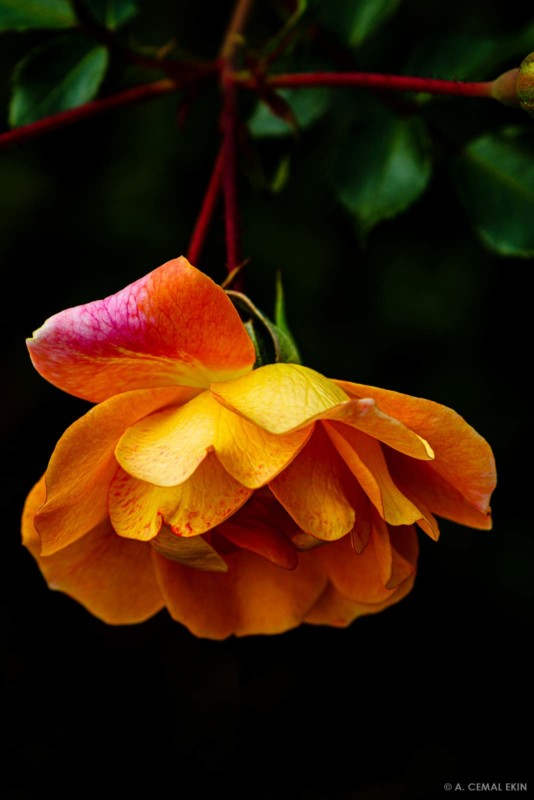
The adjustments to reduce the excessive glow and color are by using the necessary sliders on the radial filter tool. You can see all the adjustments on the image in the screen capture of the tool panel. Just to show the extent of the adjustments, I exported the image while the graduated filter was active, but the range mask was turned off. You can see the control luminance range mask applies to the adjustments to produce the desired results.
Restrict with Color Range Mask
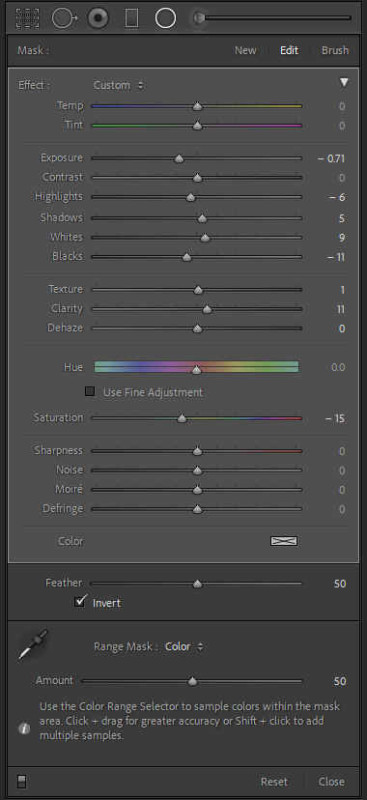
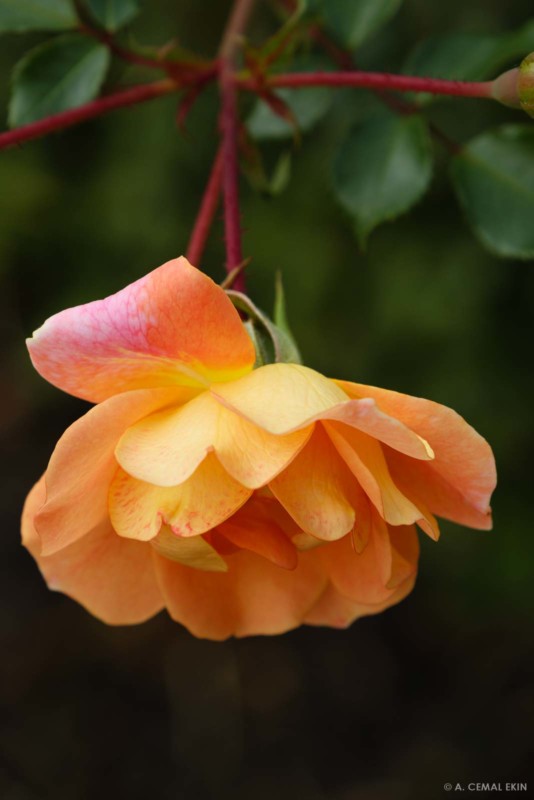
Although not specifically the midtones, the same tool can be used by applying a color range mask. Simply select “Color” from the range mask options, then select the range of colors to include by either drawing a rectangle with the eyedropper or by shift-clicking on various color areas.
For this article, I drew a rectangle to include a range of colors from highlights to shadows on the rose. After that, I applied the needed adjustments to tame the same issues as above. This time, I ended up using different sliders because the area of influence was controlled by the color range rather than the luminosity range. The result is similar but not identical to the first option. That is partly due to color-based selection rather than midtones.


How Far Can I Tweak the Global Adjustments?
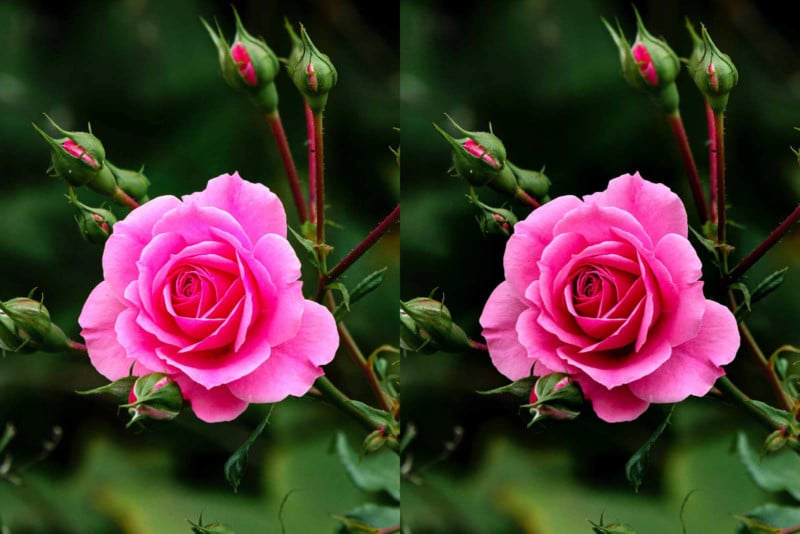
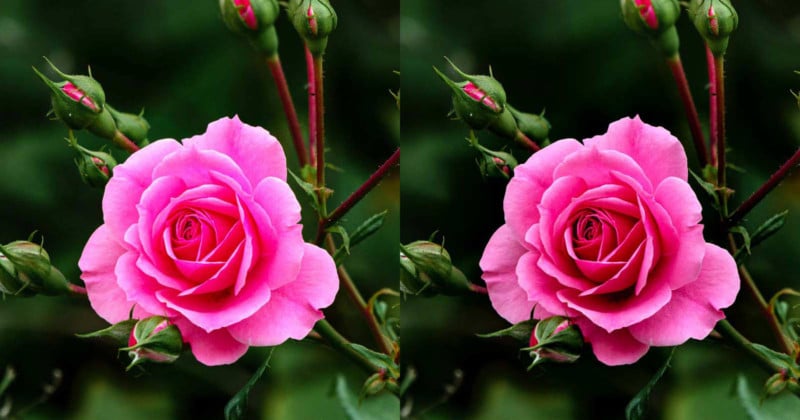
Many readers may think that much of this could be done using the adjustment sliders in the Basic panel in conjunction with the HSL panel. That is correct to some extent. But keep in mind that all other similar tones and colors will also be changed. I tried it and produced a result that is respectable, but I still favor what I obtained with the luminance mask adjustments, and I could refine that even further if I needed to. Here are the results of initial global adjustments, radial filter with luminance mask, radial filter with color mask, and the global adjustments tweaked.
In case you are wondering, the luminance range mask does not restrict the adjustments to the rose alone but spreads a little outside. Using the radial filter eraser tool, I erased the selected areas outside the flower while maintaining the same adjustments. I still prefer the unrestricted radial filter with a luminance range mask because it enhances the contrasts between the flower and its immediate surrounding area. But either option is available depending on the editing needs.
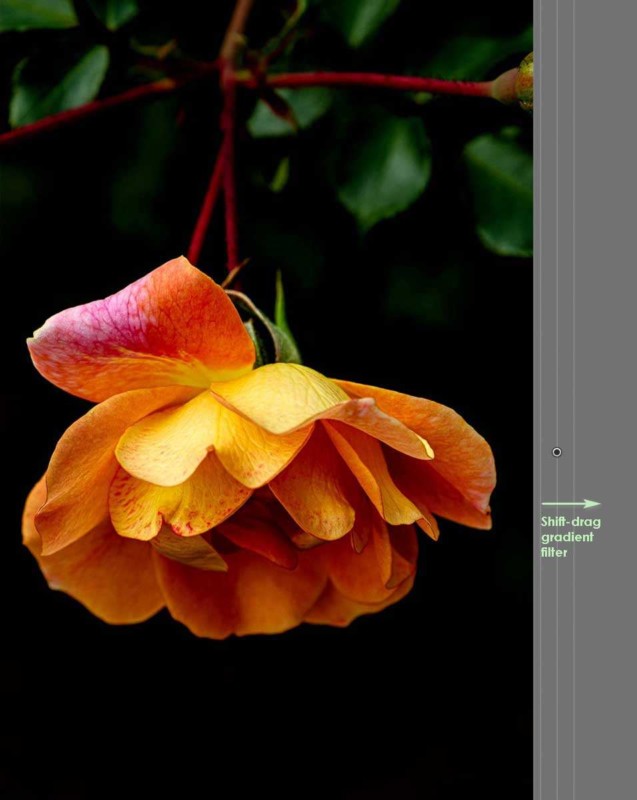
Can I Use a Graduated Filter? Sure!
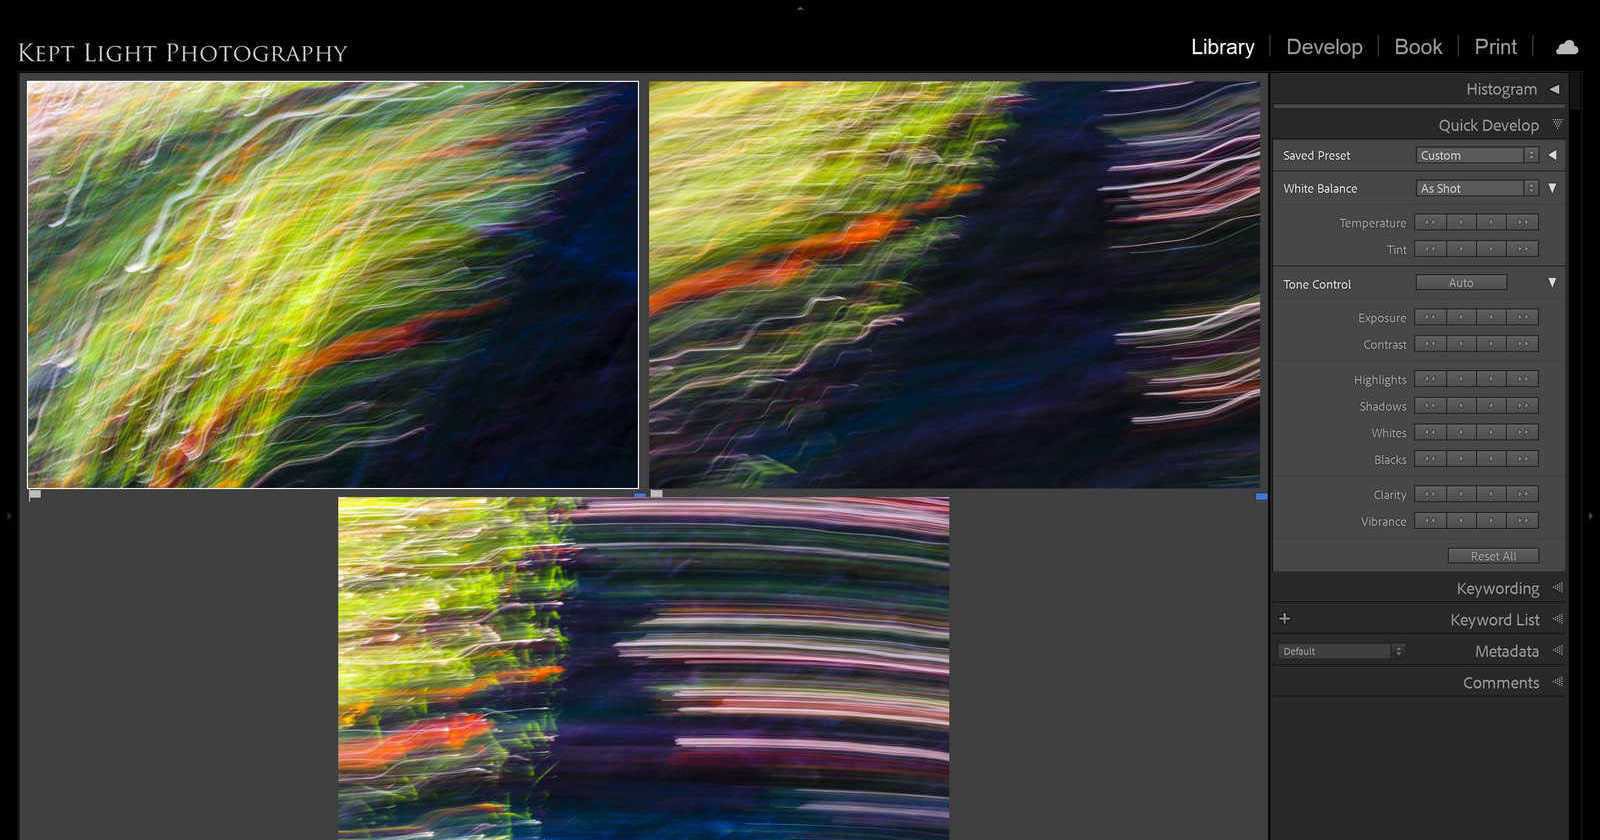
Depending on the image and the tonality of the areas you would like to adjust, you may be able to use a graduated filter drawn outside the image area. This needs to be drawn by holding the Shift key down and dragging the graduated filter tool away from the image starting just outside the image area. Look at the screen capture of the graduated filter, global adjustments, graduated filter with luminance mask, and another attempt to fine-tune the global adjustments for comparable results. You can see subtle differences.

Final Thoughts
When it comes to editing photographs in tools like Photoshop or Lightroom, there are several ways: The right way, the best way, and my way. I presented a tool, not a rule. Use it where it may make sense, use something else if that works better.
About the author: A. Cemal Ekin is a photographer based in Warwick, Rhode Island who has been shooting for roughly 60 years. The opinions expressed in this article are solely those of the author. Ekin retired as a professor of marketing emeritus from Providence College in 2012 after 36 years of service there. Visit his website here. This article was also published here.