Basic Advice About Photography for Beginning Photographers
This article is aimed at people who would like to advance their basic photography skills. I assume that you already make decent photos and are familiar with f-stops, ISO, shutter speeds, etc. But I’m hoping that this read will prove worth your time and lead to even greater photographic skills and enjoyment.
Suggested Basic Equipment
It’s likely that you already have this basic equipment. It doesn’t take much to make excellent photos and enjoy shooting them.
A camera with a zoom lens
This list is in order of image quality:
- An APS-C mirrorless or SLR camera
- A Micro Four Thirds camera
- A compact “one-inch” camera
- A compact 1/2.3 camera or a super-zoom
You may notice that I’ve omitted the high-end full frame and medium format cameras. That’s because you’ll rarely (or perhaps never) encounter a situation where their greater image quality is perceivably better than APS-C. If you already use a more advanced camera, that’s fine. But if not, one of the above will prove quite satisfactory.
Lenses
(This applies to interchangeable lens cameras. Your camera may have a fixed lens, preferably zoomable).
- A general-purpose zoom with “equivalent” field of view from 35 to 70mm or more. This may be the only lens you ever need. It’s what I use most of the time.
- A telephoto lens for wildlife. If you’re not interested in wildlife you can skip this.
I’ve omitted prime lenses. Many photo gurus demean zoom lenses and insist that primes are necessary. But my tests have demonstrated that most zoom lenses today are so good that you’re unlikely to perceive any difference in image quality between zooms and primes.
Prime lenses offer larger apertures. But large apertures often produce blurry photographs due to insufficient depth of field. I own quite a few prime lenses, but I’ve found that lenses 1. and 2. above meet my needs.
Yes, primes are usually sharper and faster than zooms, but my tests (described in this article) showed that it’s unlikely that you’ll perceive the difference in sharpness between an average lens and a great lens.
A computer or tablet with a photo editing program. I began editing with Photoshop. It’s very capable but complex and difficult to learn. Currently, I use ACDSee which is easy, fast, and inexpensive.
A flash. If it’s not already built into the camera.
Closeup aids. This can be a macro lens. But you can take great close-up photos with an inexpensive close-up diopter lens that attaches to your standard lens like a filter, or an extension tube that mounts between your lens and your camera body. I prefer the extension tube(s) which works with all of my lenses and is sharper with my longer lenses than the diopter lens.
A tripod. You can postpone this, perhaps forever depending on what you shoot.
(Probably) Not Needed
Very wide lenses (shorter than 28mm equivalent). It’s difficult to shoot good photos with very wide-angle lenses. Some of the disappointments include:
- People, animals, and objects may look distorted.
- Mountains and other scenery in landscapes looks too distant.
I was recently amused to watch a video on how to improve landscapes shot with very wide lenses. The author said that distant mountains were so small that his photos were boring. His video showed how to cut the mountains out, enlarge them, and paste them back into the image. But that problem only exists with very wide lenses.
Very fast lenses, like f/1.4. They are heavy, expensive, and their depth of field is too shallow for most subjects. They often cost more and weigh more than the camera they are mounted on.
Lens hoods. These are only capable of keeping the Sun off your lens over a very narrow range of Sun angles. That range is so narrow that I don’t bother with hoods. I have a box full that I never use.
General Subjects to Photograph
Many will view our photos on small screens, phones and tablets. With that in mind, I like to include shots of isolated subjects along with broader views. For example, I recently shot at the Filoli gardens in San Mateo, California. Filoli features acres of flowers, but I try to include closeups too. I think they work well on small screens.

Setting Up Your Camera and Shooting
Mode Dial
Most beginners set their camera mode to “auto”. I began with that, but my images improved greatly when I set the camera on “A” (aperture) and the aperture to f/11. The apertures selected by your camera’s “auto” mode tend to have too shallow a depth of field. f/11 is my “home aperture”. I often change it to suit the needs of the photo. More on this later.
ISO
Today’s digital cameras produce good image quality at higher ISO than film ever could. Your choice of ISO should consider the destination of your photos. If you only want to share them in small form, such as email or smaller, higher ISO may give you sharper results because it permits faster shutter speed. But if you make large prints or crop the photos when you edit them, then lower ISO will have less noise. Lower ISO may require a steadier camera which you can achieve with a tripod or just holding your camera on something like a fence.
Don’t forget that if you shoot the same photo 5 or 10 times, trying to “freeze” your hold for each shot, your chances of getting one very sharp shot are excellent.
I usually let the aperture and ISO dictate shutter speed. But I do pay attention to shutter speed when shooting action or using a telephoto lens, which is more sensitive to shake. I increase ISO if I want a faster shutter speed. The camera’s auto-exposure will automatically select a faster shutter.
You may already know the accepted rule that shutter speed should be at least 1 over focal length. For example, 1/100s is the minimum speed with a 100mm focal length. Many cameras have anti-shake which allows 2 to 4 stops slower speeds. Experiment to see what speeds you need with your longest zoom. But remember that your ability to hold your camera still for that instant will greatly vary from shot to shot.
Of course, shake isn’t the only consideration. Your subject may be moving. If it is, do you want to freeze it? Or do you want to capture some blur to convey motion?
Light
The most common lighting errors are shooting people with the light behind them, or on their faces in harsh sunlight. It’s best to avoid any sunlight on the face. If that’s not an option, then use flash in the “fill” mode to fill in shadows. For outdoor portraits, shade or overcast light is best. For indoor portraits, seek indirect lighting which comes from windows or lamps in front of, or beside the subject.
Always focus on the eyes. Sharp eyes are a must for portraits of people and animals.
Backgrounds can enhance the portrait if they are attractive and not distracting. But they often are distracting so many pros use large apertures to blur the background. But that often blurs noses and ears. I prefer to pose my subjects with a distant background. The photo below was taken at f/11 and the background was 100 feet behind her. That achieved a blurred background without resorting to large apertures, which have shallow depth of field.

Note that her ears are in focus. The largest aperture that will achieve this is about f/11. Anything larger will begin to blur the ears. Larger than f/5.6 blurs the nose too.
Take lots of photos
In this digital age, “film” is free. More shots will let you select for less shake, better expression, open eyes, etc. Many cameras have a burst mode and can shoot ten pics in a second or two. I don’t use that because I’ve found that the entire burst often has the same fault, such as closed eyes. So I manually separate my multiple shots by a few seconds or more.
Use flash
Flash can enhance many photos. Try closeups of flowers with and without flash. You’ll often like the flash assist.

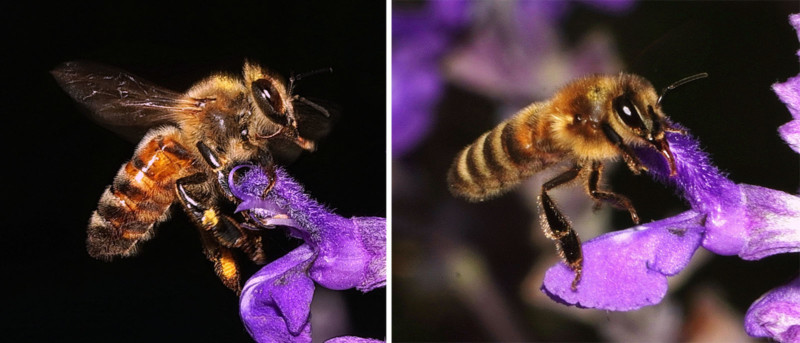
Flash illuminates the center of the flower and darkens the background.
Flash will also freeze action or your shake. Set your camera flash mode to “flash fill” in order to fill in shadows in sunlight.
The brightness of a flash diminishes with the distance squared. The maximum useful distance is about 5 feet with on-camera flash and about 15 feet with external flash. You can use this rapid fall-off of light with distance to create dramatic black backgrounds, such as this bee which was shot in daylight with flash.
Allow a few seconds between shots to give your flash time to re-charge.
A common difficulty when using flash is overexposure. Your camera’s exposure compensation adjustment may have no effect to fix this. That’s because when you activate flash, the camera sets a relatively slow shutter speed – such as 1/60s to ensure that the shutter will be open while the flash fires. So, you must reduce your aperture to f/16 or f/22 and/or set your ISO very low, like 100.
Another adjustment, usually buried in your camera’s menus, is called “Flash Compensation”. Setting that to negative can also mitigate overexposure. As a quick fix, I sometimes partially block the flash with my hand on the flash head.
More About Aperture
I set the aperture to suit the conditions and the subject. If the light is poor, I open the aperture to keep the shutter speed from going too low. Or even in good light, I may want to emphasize the subject with a shallower depth of field. But I rarely need to open my lens larger than f/4.
I also often choose very small apertures where depth of field is needed. This photo was shot at f/22 because of the subject’s depth of field.
Gurus advise against small apertures like f/22 because the resulting diffraction reduces sharpness. But diffraction is a very small effect and the tiny reduction in sharpness is far preferable to the huge reduction in sharpness due to insufficient depth of field. The examples above and below are sharp, even at f/22. You can also restore diffraction effects with a bit of sharpening while editing. I sharpen all my photos, except for certain portraits.
f/5.6 yielded adequate depth of field for this photo because the subjects of interest are at constant depth.
Capturing Action with Preset Focus
You may be frustrated by your camera missing focus on moving subjects such as children, pets, sports, etc. The autofocus may focus correctly, but on the wrong thing in the scene. An alternative to autofocus is to preset your focus. It’s instantaneous and foolproof.
Set your zoom lens at a wide-angle and f/16 aperture. Then set your camera to manual focus. In a confined area, where you don’t need infinity, focus on something about one-third of the way from nearest to farthest in that area.
Or, you can focus on the hyperfocal distance, which is sharp from half of that distance to infinity.
Here are some lens focal lengths and the hyperfocal distance for each at f/16:
24mm: 6 feet (1.8m)
28mm: 8 feet (2.4m)
35mm: 12 feet (3.7m)
50mm: 25 feet (7.6m)
This list is for APS-C or Micro Four Thirds cameras. Smaller sensors like “one-inch” and 1/2.3 have closer hyperfocal distances.
Think
Shooting is so easy that we forget to think. We may just aim and shoot. But we can do much better.
Look at the entire image and think:
- Is this the best zoom?
- Is my camera level?
- What depth of field do I want?
- Is the Sun striking the lens? If so, can I shade it with my hand, or by shifting my position?
- Is the shutter fast enough to avoid shake or freeze a moving subject?
- Are shadows harsh? Should I add flash fill?
Remember to freeze when you press the shutter. If you felt yourself shake as you pressed the shutter, just shoot again. Or just shoot again anyway. It’s free.
- Think.
- Adjust the camera if necessary.
- Compose.
- Shoot.
- Play back.
- Think
- Shoot again.
When you play back, examine the image with a critical eye. You’ll often see opportunities for improvement. Adjust, and shoot again.
If you’re concerned about shake or focus, magnify the playback and examine for sharpness. If you see blur due to shake, speed up the shutter if possible or use flash. If that’s not possible, just shoot many frames. Hopefully, some will be steady enough.
In playback, evaluate the exposure. Is it right for your goals? Don’t forget that your camera’s automatic exposure adjusts for medium. But medium is all wrong when shooting snow, a white dog, or a white bird. Medium will turn white to gray. The fix is to increase the exposure by one or two stops. But if you overdo this the highlights will lose detail. So watch for detail in the white areas.
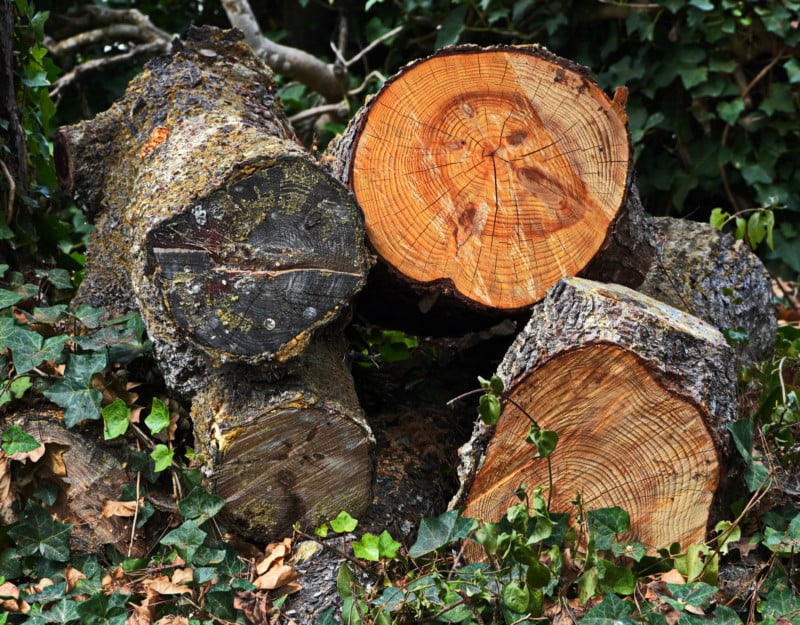
What about the shadows or dark areas? Can you see texture in the bark on that tree, or is it solid black? Perhaps you should increase the exposure.
There’s a lot to watch for and your job is to be aware of these factors. Playback is the wonderful feature of digital photography. Use it often.
With static subjects, shoot a few extra exposures after you get the settings just right. Then select the sharpest one while editing.
Manual Focus
Your camera’s autofocus will usually focus more precisely than you can manually. But things in the foreground, such as branches, will result in your camera focusing on the wrong thing. You repeat many shots and they are all wrong. It’s time to switch your camera to manual focus, just for that shot.
Wildlife Photography
Many of us enjoy photographing birds and other wildlife. To emphasize the creature, a telephoto lens is best. You can begin with the maximum zoom that your camera offers, then achieve further emphasis by cropping in edit. Eventually you’ll probably want a telephoto lens.
I’ve been shooting birds for decades and usually use an equivalent focal length of 500mm. Longer is sometimes nice. But the cost and weight rapidly escalate. A monopod or tripod is helpful to reduce shake and steady your view while composing although I also shoot hand-held. Wildlife photography is a pursuit where taking lots of exposures pays off.
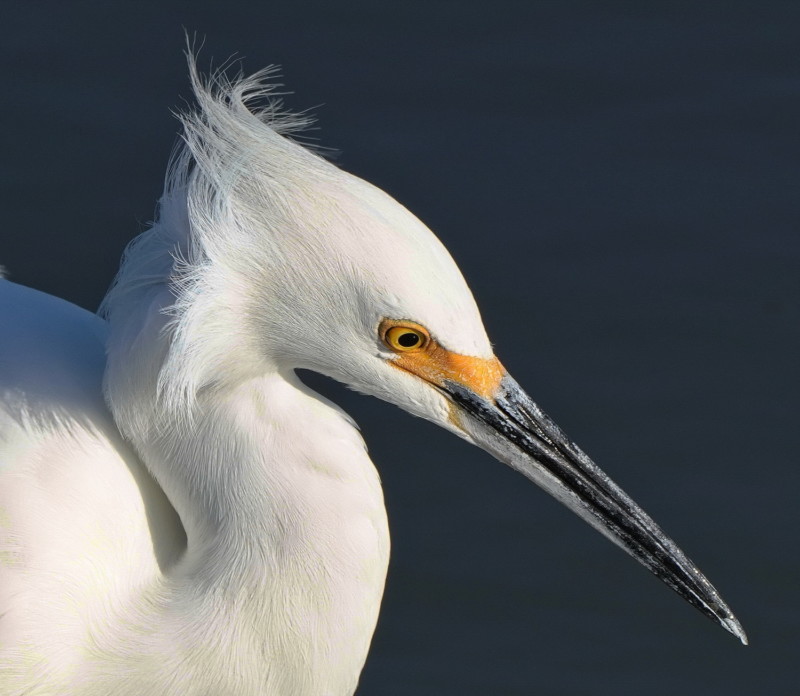
Shooting Birds In Flight (BIF) is a challenge pursued by many bird photographers. I do this only occasionally because birds flying above are backlighted and it’s difficult to capture detail. I prefer stationary birds and bird head portraits.
Because I mostly shoot at f11, I avoid the cost and weight of fast telephoto lenses. A Sony 400mm f2.8 lens costs $12,000 and weighs 6.4 pounds. My 70-350mm f6.3 Sony lens weighs 1.4 pounds and costs $900.
Digital Zoom
This is just cropping in the camera. The resolution of a 2x digital zoom is the same as if you cropped to half size then upsized 2x in edit. Digital zoom does this automatically. But I prefer to do this in editing.
Editing Your Photos
Editing is a lot of fun, and an opportunity to greatly improve your photos. Here is my typical edit:
- Rotate, if necessary, to level the photo.
- Crop to emphasize the best part and discard extraneous things.
- Adjust exposure and contrast.
- Downsize for sharing online.
- Sharpen. Even shots made with the best cameras and lenses can be sharpened. It only takes a few seconds.
This only takes a few minutes and really is fun.
More About Cropping
A 24-megapixel image is 6,000 pixels wide. For images shared online or via email, 1,200 or 1,500 pixels wide is sufficient to look great. But more pixels will produce a better large print. I often share my best pics down-sized to the above. However, I save the original for printing or future edits.
Cropping is a wonderful option in editing. Within that 6,000 pixel wide original frame are countless cropping opportunities.
Summary
Think, take lots of shots, play back, think some more, and repeat.
Have fun, don’t fret about the bad shots. You’ll learn more from them than from the good shots.
About the author: Alan Adler lives in Los Altos, California. He has been an avid photographer for 60 years. He is also a well-known inventor with about 40 patents. His best-known inventions are the Aerobie flying ring and the AeroPress coffee maker.
Image credits: Header stock photo licensed from Depositphotos